Willie

LCR Track car
Aug 6, 2004
8,939
1
Sunny Scotland
http://www.innovatemotorsports.com/...2&page=1&xid=7587e51dcaacca8c19d6691477e13399

This is the one I've been instructed to buy by my mapper.

Nial, as Allen said.
When getting a Custom Stage 2 map your getting as close to the limits of everything as possible. This will tell you instantly if fuel mix is drastically wrong instantly.
This allows you to do something about it before your engine goes KA BOOM!!!
I have been advised to get this and a boost gauge from day of map but have been a bit slack with this. There is still room in my set up for 'tweeking' and perhaps adding a few choice mods to further improve things. This will be getting close to blurring the lines between what's recommended and what's possible. Then it will be a case of a electronic boost controller with various boost settings depending on the situation ;)

Away to do the timing belt and sump this weekend if the wither alright, another BIG set in my on car learning
 

Willie

LCR Track car
Aug 6, 2004
8,939
1
Sunny Scotland
So with a very nice ambient temperature of 15.5 degrees today and finally getting all my other jobs done, I got onto working on the car.

I went into Halfords for some inspection gloves and came out with a MK4 Golf Haynes, gloves and some swarfega, lol.

So when looking at the timing belt section of this it was, well to be honest, it was utter shite!!

As I had a list of things that needed done and I didn't feel confident about the timing belt today I chose another job.

So the sump and oil pump it was.

I have already removed and refitted a sump on this car due to a ham fisted idiot in a garage[:@]
So fully aware of what I needed to do I cracked on with this.
The car has been sitting not running for about 1 1/2 months so was pretty sure the oil was ALL in the sump. Usually I would warm up the oil to allow it to flow better and evacuate the engine and sump easier. As the sump was coming off there was no need for this.

The sump plug was pulled, oil drained out and filter pulled, drained and both replaced to save getting dripped on. The turbo return pipe was removed too and all bled of oil.

So the sump to crank bolts were backed off and the gear box to sump bolts were removed. The sump was freed off and dropped.

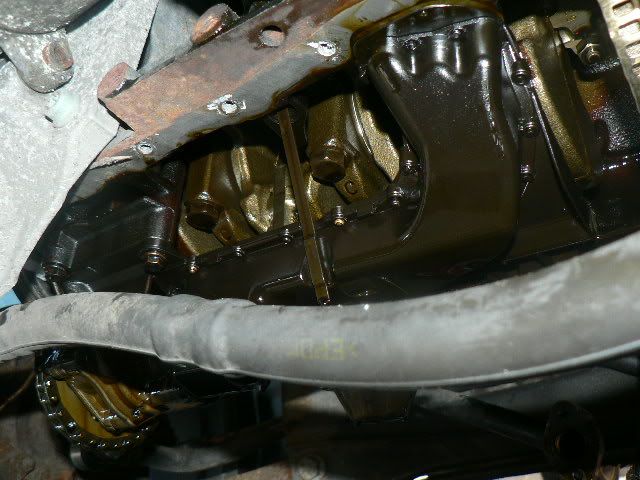
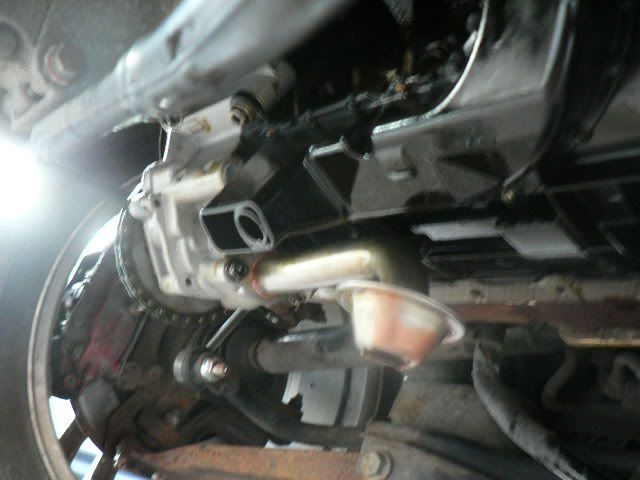
P1070009.jpg


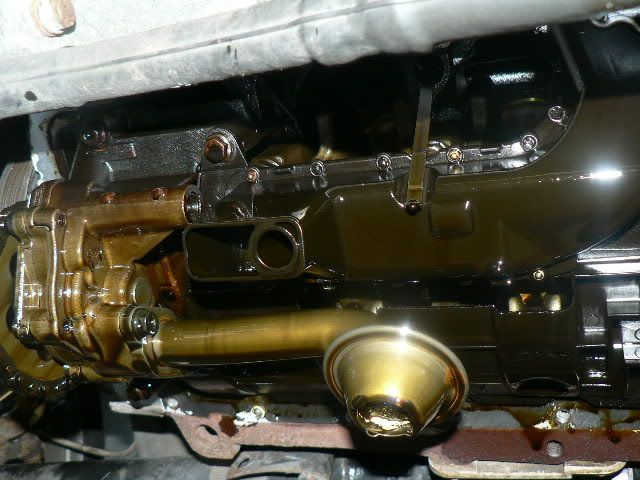
P1070010.jpg


For all those who haven't seen the inside of the sump.

The last time I had the sump off I had a replacement oil pump, when trying to remove this last time I run out of bottle and left it. This time I was going to change it out so with all the tooling ready I braced this with a suitable tool and backed off the torx screw holding on the chain/sprocket.


I had bought a GSF oil pump a few years ago. I had never looked at this since my initial bottled attempt. On trying to fit it this time the torx screw holding on the sprocket was damaged and couldn't be taken off. Not to worry though, the chain was slipped over this and the pump bolted up in place. After finding out more about GSF parts I won't be using any of them again, but this should see me alright for a while.

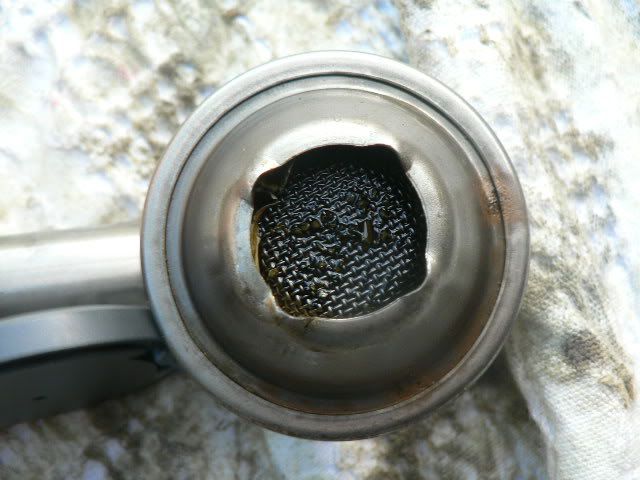
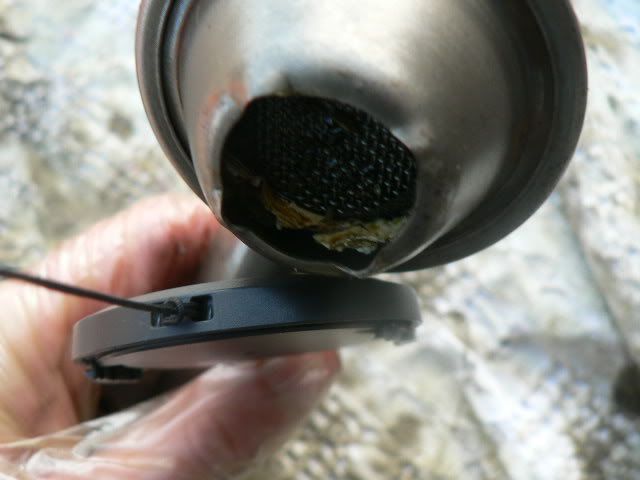
All you guys I have advised to remove your oil pick up pipe and clean/replace this check out my one.

P1070014.jpg


P1070015.jpg


As my philosophy is warts and all you will be able to suss out what the above shows about my sump fitting last time:whistle: perhaps a bit too much silicone sealant. TBH I did as it said 2-3mm bead of sealant, but this is too much.

I hadn't forseen this but was always going to fit a new pick up as last time I just cleaned out the OEM one with the wife's nail polish remover :cartman:


New pump, sprocket and pick up.

P1070022.jpg


I had new pick up seal, sump bolts, oil return line gasket and level sensor seal bought from Seremotors prior to doing this job. Also the baffled sump bought from Danny on here, cheers Dan :)

So the sump is on, sealed (with less sealant this time, lol) and torqued in place.
As with last time, when refitting the sump the two bolts between the fly wheel and sump were a total pig to fit lying on your back. Thankfully this time I borrowed a high lift trolley jack from Dav on here, top man, cheers.
Still twice I dropped bolts into the bell housing and had to remove the sump again.
Top tip.
When fitting the sump, push it fully home, fit one or two bolts to hold this in place then do the ones beside the flywheel. If you do it this way, when as it will happen, you drop the bolts into the bell housing you have less bolts to remove to fish out these ;)

So as it sits just now the level sensor needs to go on and the new filter fitted then fill it with oil.

I'm using this time, as advised by local motorsport guys.

http://www.millersoils.net/1_Millers_frame_MOTORSPORT.htm

This will be better for the extreme oil temperatures I've been seeing whilst on the track, but this time I'll be fitting a 13 row oil cooler too.

So tomorrows operations will be finish off the baffled sump operations, bleed the brakes and maybe tackle the timing belt or VVT sensor gasket change out.
 

Willie

LCR Track car
Aug 6, 2004
8,939
1
Sunny Scotland
AH ****!!!! In a James May style

As above, **** **** **** and double **** :censored:

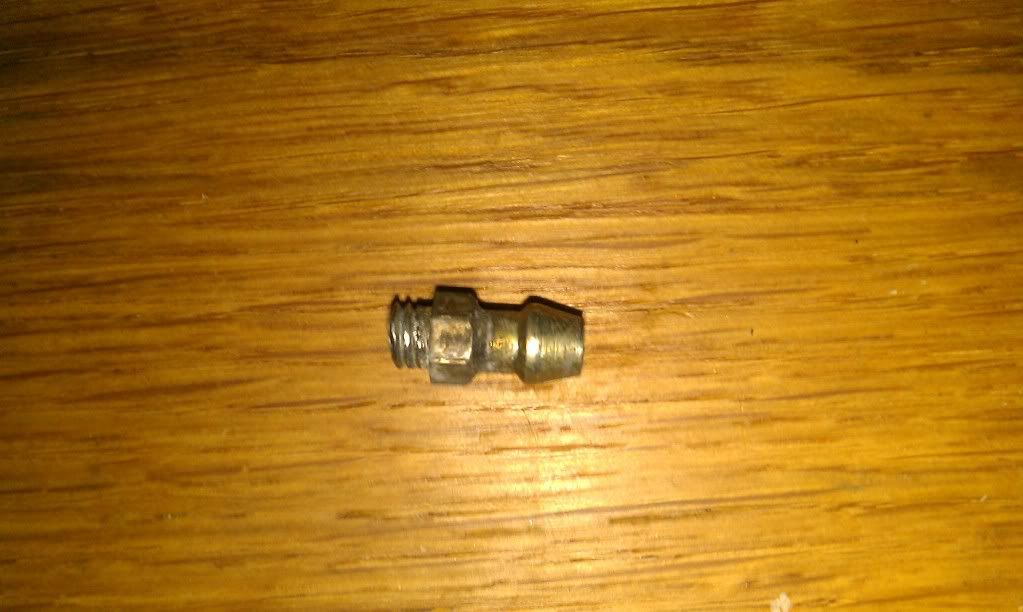
IMAG0181.jpg


IMAG0180.jpg


Can you tell what it is yet??

Yup MS bleed nipple [:@]:cry:

God dam it!!!

Yup I broke it off.
As a great man once said if its not ****ed don't **** with it, very true.

Anyway.

Got the sump dressed, filter changed, sump plug in and filled it with oil.
As its 10w-60 oil I'm using its very obvious from pouring it the difference between this and 5w-30. This stuff is like syrup. I'll have to be super aware of not booting it till the oil is nice and toasty. I have been anyway, that's why I'm still on my OEM turbo and engine bits.

Next up was a quick check of the cahonies, nope, still not big enough to tackle the timing belt yet, lol.

So other jobs that needed to be done were to change out the turbo to boost pip OEM elbow and bleed brakes.

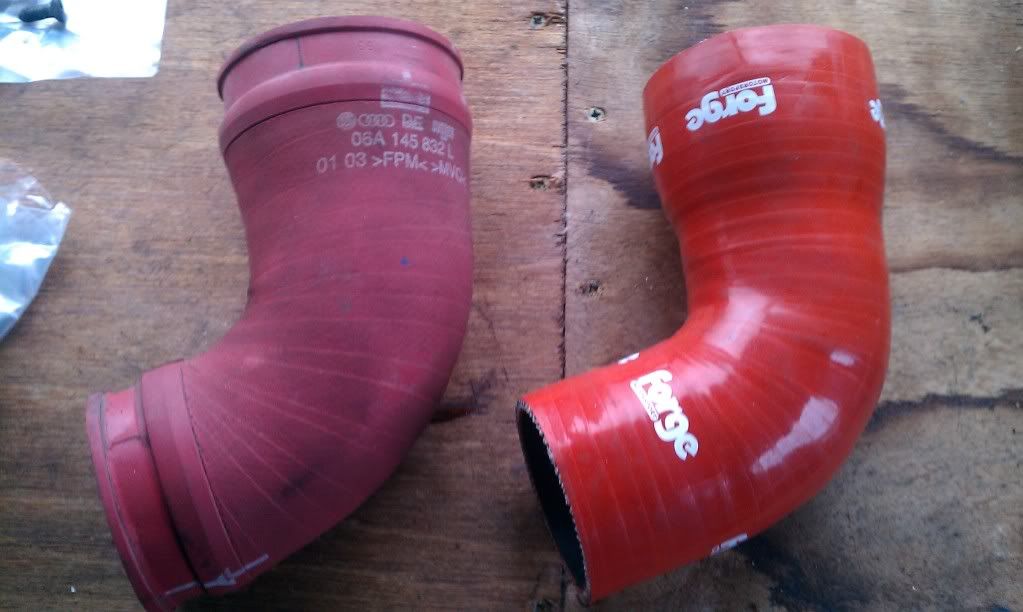
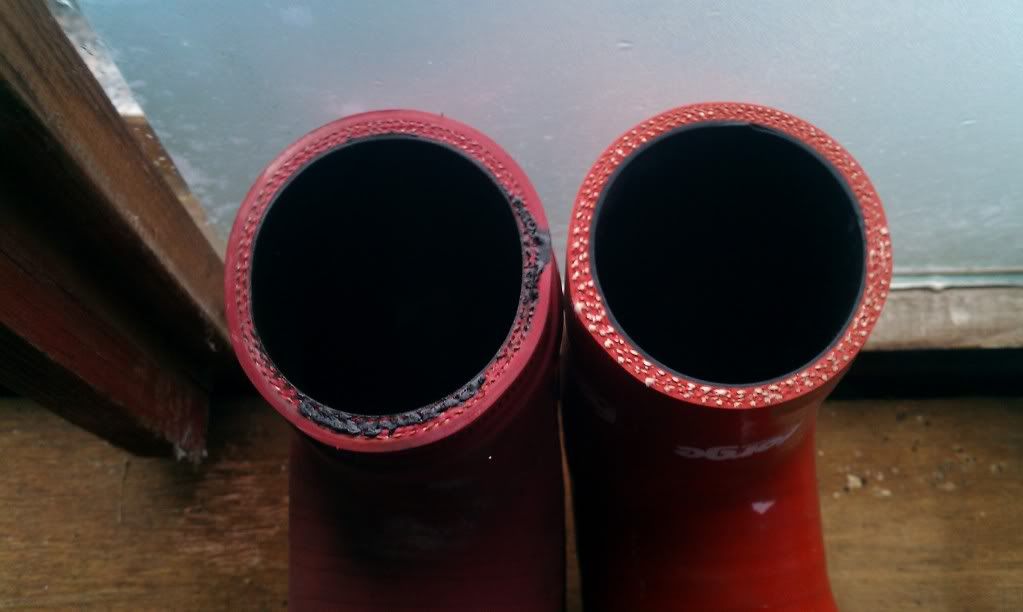
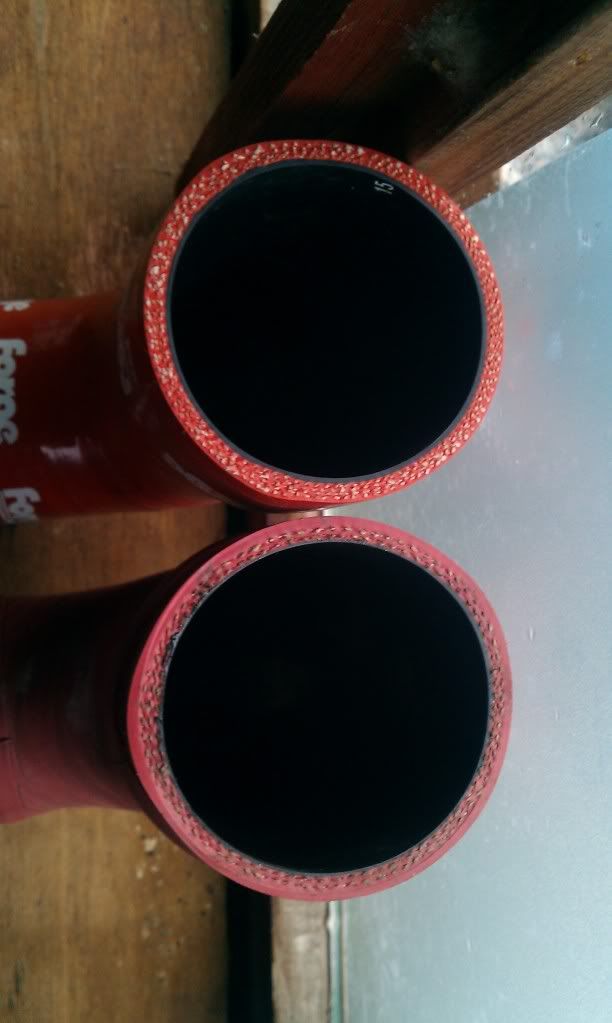
I've had the Forge replacement hose for a few years and yet again not found the time to fit this. We have been told that the OEM one cracks and splits etc etc.

Propaganda?

You decide

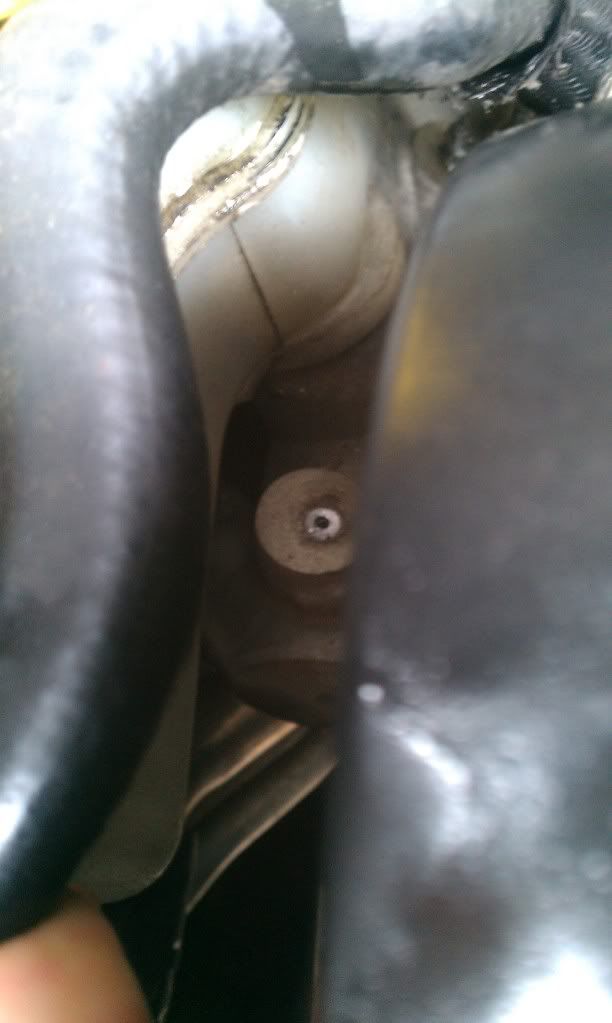
IMAG0172.jpg


IMAG0170.jpg


IMAG0171.jpg


So this was changed out without any issue.

This also cleared space to get into the brake fluid reservoir to allow the brakes to be bled through after the refit.
I've used the Gunsons Eazibleed a few times and always found it to be top notch. As long as you ready the instructions and follow these the jobs a good un.
So all nipples bled with no issues, clutch done, no issues. Then thought to be sure efficient I'll do the MS, what a ****!!
Should have left it well alone.
Anyway, you've seen the pictures. The bind in the threads was obviously more than the material strength of the nipple. there was no side load applied as I was using a socket. I'm 99% sure this didn't move but will monitor it when the cars up and running.
So boys and girls, if you've used the Gunsons thing and not run dry of brake fluid, don't feck with the MS nipples ;)

With Easibleed removed I pumped the pedal to get the pistons into place, got nice hard pedal too, so all looking good. I removed some fluid from the reservoir to sort the level out and put the lid back on.
Next up is to take a look at the VT sensor seal. This requires the cam cover to be removed so will see if the Haynes can redeem itself.
 

dav

SEAT owner no more...
Feb 2, 2006
1,077
2
Kincardineshire, scotland
what like a job is it for the master cylinder swap?

would an easy out do the job for removing the left over part? or is it proper seized? thats if and only if you can get a nipple seperate?
 

Willie

LCR Track car
Aug 6, 2004
8,939
1
Sunny Scotland
what like a job is it for the master cylinder swap?

would an easy out do the job for removing the left over part? or is it proper seized? thats if and only if you can get a nipple seperate?

It's in a very difficult place to work in.
If I 100% have to get this out I would try and easy out first in place.
There's a lot in the way of the MS, might even have to drop the engine a bit to get it out :cry:

Hopefully it'll be alright for the noo
 

Willie

LCR Track car
Aug 6, 2004
8,939
1
Sunny Scotland
Next job of the day was to try and gain access to the middle air vents.
As I've said I have a 3 pod gauge carrier for in here.
After reading guides and having a fiddle I gave up due to lack of stereo keys.
Getting these on Tuesday, if not sooner.

The other job to be done was the VVT sensor, but due to lack of the specific paste I couldn't progress with this either.
Getting this Tuesday, if not sooner.

Due to higher power and more forces going into the engine and fueling I want to start monitoring things more closely.
I had been advised to be doing this already :whistle:

So spoke to my mapper who has advised the best set ups to go for.

AFR gauge

http://shop.grahamgoode.com/innovate-gauge-kit-inc-lc-1-inn3795-60880-p.asp

Oil pressure and oil temperature gauge

http://www.spa-uk.co.uk/design/productdetails/?objid=130

Boost gauge to 30 PSI ;)

http://performanceparts.com/part.php?partID=14060

Hoping to order these on Monday.
 

Willie

LCR Track car
Aug 6, 2004
8,939
1
Sunny Scotland
My ms needs changing I'm getting hissing from the brake peddle , is itva do able job on your own
Dan, this sounds more like the pedal master cylinder. Take a look closely at the base of the pedal when pushing it down, you might notice some fluid/air around where it goes through the floor.
 

Phillc

Love is....Yellow
Apr 23, 2007
4,170
20
Pershore, worcestershire
Willie,

I did my water pump and timing belt a couple of weeks ago, It is fairly easy to do but putting the belt on without any of the timing marks moving is a PITA, most time is taken stripping the engine and bay down to get access, let me know if you want a talk through guide and i will email you one. I have also replaced my brake servo which Dan mentioned this is a major big time PITA, you need to move the engine forward to get it out, you also need to remove the master cylinder which is a walk in the park, undo the sensor wire, and the pipes going in, (i soaked them in WD40 for a while) then undo the two bolts holding it on to the servo and bobs your uncle.

(You should have got the gauge today i posted it on friday first class)
 
Last edited:

Willie

LCR Track car
Aug 6, 2004
8,939
1
Sunny Scotland
Willie,

I did my water pump and timing belt a couple of weeks ago, It is fairly easy to do but putting the belt on without any of the timing marks moving is a PITA, most time is taken stripping the engine and bay down to get access, let me know if you want a talk through guide and i will email you one. I have also replaced my brake servo which Dan mentioned this is a major big time PITA, you need to move the engine forward to get it out, you also need to remove the master cylinder which is a walk in the park, undo the sensor wire, and the pipes going in, (i soaked them in WD40 for a while) then undo the two bolts holding it on to the servo and bobs your uncle.

(You should have got the gauge today i posted it on friday first class)
Cheers Phill, pod arrived today, much appreciated.
Looks perfect for my needs.

I will do the timing belt soon and still need to do the VVT sensor first so most of the timing belt stuff will be removed anyway.
Got the VT engine mounts to do too so will all tie in nicely.
 

Willie

LCR Track car
Aug 6, 2004
8,939
1
Sunny Scotland
I'm loving how much is happening now Willie! Definitely rattling through these jobs!

I wish I had the same motivation. Hopefully it will come back after I get this one problem sorted.
I don't want to end up with the usual midnight motors modding the night before my first track day or the SCN Scotland national day.
Get you motor sorted out min, its going to be a beast when its done.

You'll get to hand everyone their asses on a plate.
 

csd_19

Full Member
May 11, 2005
2,279
28
Angus / Edinburgh
Next job of the day was to try and gain access to the middle air vents.
As I've said I have a 3 pod gauge carrier for in here.
After reading guides and having a fiddle I gave up due to lack of stereo keys.
Getting these on Tuesday, if not sooner.

Wish I'd seen this earlier, I've got a set kicking around in the car, AND I was over in the Bridge of Doom earlier, would've been a quick wee hoon out your way ;)

Loving the gauges, especially the combo oil pressure/temp one, very sweet.

Wee tip for you, order a 501-fitment red LED type bulb for the Autometer boost gauge, the little bulb johnnies in the box make the light pretty weak at night and IIRC rather pink :)

like these
 

Willie

LCR Track car
Aug 6, 2004
8,939
1
Sunny Scotland
Wish I'd seen this earlier, I've got a set kicking around in the car, AND I was over in the Bridge of Doom earlier, would've been a quick wee hoon out your way ;)

Loving the gauges, especially the combo oil pressure/temp one, very sweet.

Wee tip for you, order a 501-fitment red LED type bulb for the Autometer boost gauge, the little bulb johnnies in the box make the light pretty weak at night and IIRC rather pink :)

like these
Cheers Craig,

I did read about the lighting being a bit pish, will this LED just slot in place and sort it out?
 
Lecatona HPFP (High-pressure Fuel Pump Upgrades)