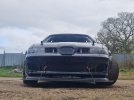
Going to build a race 1m

Manic172

https://m.facebook.com/ManicMotorsport1
Dec 4, 2018
1,351
1,411
Hemel hempstead
www.seatcupra.net
Just a little bit of fiddling. So I thought I would put the rods together. I got 20mm wrist pins riffle drilled. Supplied by PRE
20240210_182158.jpg
and ACL race bearings
20240210_181412.jpg
The rods are lovely and and well made.
20240210_181234.jpg
20240210_181230.jpg
again as every thing... clean clean clean. Then tiny bit of engine oils like the bearings in to position. Making sure the oil way lines uo for the riffle drilling so the small end is lubricated
20240210_181255.jpg
the end caps are matched to each rod and orientation so done mix them up
20240210_181239.jpg

Just to finish off I used ARP2000 bolts to hold caps on
20240210_181825.jpg
20240210_181830.jpg
All done... might get round to fitting pistons today and then checking the oil clearance on the crank ... but might have to go shopping ......
 

Manic172

https://m.facebook.com/ManicMotorsport1
Dec 4, 2018
1,351
1,411
Hemel hempstead
www.seatcupra.net
Some thing I was looking for was an uprated style dog bone mount.... and looky what I found on ebay.
20240221_233142.jpg
20240221_233137.jpg
20240221_233149.jpg
20240221_233159.jpg
20240221_233203.jpg

034 motorsport mount. Very small Bush one end and then rose jointed the other. Saves wasting power to twist the engine. It the goes to the wheels.. not sure how much these normally are. I can't see ant marks or dents ... and it's shiney...
 

Manic172

https://m.facebook.com/ManicMotorsport1
Dec 4, 2018
1,351
1,411
Hemel hempstead
www.seatcupra.net
Was messing about the other day, just lined up the new front seal housing. So see how the new shines bits looked. But touched the seal. But the rubber didn't move back. It just stayed with the dent in it
20240411_200722.jpg

So knocked the seal out the housing.. ordered couple new ones. But of a better quality and higher quality. Using the size details
20240411_200901.jpg

Ordered the new ones .
20240411_200907.jpg
Slightly thicker. Seal rings on it also a tension spring that will help to stop any oil weeping out.
20240411_200931.jpg

Will take it to work tomorrow and use the press to just slide it in..
Any.one ever had problems with these leaking befor. I was thinking of making these uprated versions and selling them if needed
 
Last edited:
  • Like
Reactions: VT86

Manic172

https://m.facebook.com/ManicMotorsport1
Dec 4, 2018
1,351
1,411
Hemel hempstead
www.seatcupra.net
Had to buy a cheap crank pully bolt. Then grind the flange off
20240424_172446.jpg
next to the new arp bolt.
20240424_172427.jpg

This is so when I put the pulley on to the crank I can have access to the holes
20240424_172702.jpg

So when it's bolted to the crank I can drill in to the crank. And then push 2 tool steel pin threw the pulley in to the crank. . Basicly to help stop the pulley from shearing the keyway and spinning on the crank .... then that would be the end of every thing hahahah.
Every little helps
 

Manic172

https://m.facebook.com/ManicMotorsport1
Dec 4, 2018
1,351
1,411
Hemel hempstead
www.seatcupra.net
Gonna do this over a few posts to make it easy. Had to grind the flats down a bit more to clear the pin holes
IMG-20240505-WA0018.jpeg
with some measuring and calculations I figured out how far to drill in to the crank, so the pins sit below the surface so get the drill bit and I marked it with some masking tape for the depth. Then drill
IMG-20240505-WA0020.jpeg

Then use what is called a reamer it's a drill type bit that makes the hole perfectly round and precisely the right size... but using a hand drill it's not ideal.
IMG-20240505-WA0022.jpeg


To help the fit I put the pins in the freezer. This will cam them shrink by a couple of thou, this will make them slide in easier
IMG-20240505-WA0024.jpeg

Then with a bit of pinloc like threadloc but designed for locking pins in position. I lined them up and tapped them in
20240505_205434.jpg

Then using a small punch tapped them to the bottom of the hole
20240505_205509.jpg
the pins have to be below the surface so that they don't sit against the crank bolt when fitted
20240505_174548.jpg

Just wound it in finger tight to hold it all together when building it .
 
  • Like
Reactions: tracktoy

Manic172

https://m.facebook.com/ManicMotorsport1
Dec 4, 2018
1,351
1,411
Hemel hempstead
www.seatcupra.net
Piston time. I forgot to do picturs. But I used a piston ring squeeze tool. Like sleave that squashes the rings in. With some lubrication I knocked the piston in to position. In the bore.
IMG-20240505-WA0027.jpeg

Then turn the engine over. And pulled the big end on to the crank.. I wrote a "how to" previously about how to measure the oil clearance on the shells. So won't go over that all again and bore you all.
So all check and OK. Checked each one in turn and then fitted the caps and torqued up.
20240505_194050.jpg
 
  • Like
Reactions: tracktoy

Manic172

https://m.facebook.com/ManicMotorsport1
Dec 4, 2018
1,351
1,411
Hemel hempstead
www.seatcupra.net
Next up was is oil pump. This is a pro-race engineering high flow pump. Cleaned all the surfaces. Fitted new chain and tensioner. And torqued the fixings
20240505_194324.jpg

After the problems with the crank seal , so a new up rated one fitted. Again cleaned all the surfaces. Using lock tight flange seal lined up and fitted. I bought some stainless m7 bolts and washers for a lot of this build..
20240505_200252.jpg

I went digging in the parts bin and found the LPS manule tensioner. And using the stainless m7 bolts.
20240505_204157.jpg

Also fitted brand new idle pulley too.
When fitting the oil pump I fitted the oil drain housing too. Cleaned it in side and out and cleaned all the sealing surfaces
 
  • Like
Reactions: tracktoy

Manic172

https://m.facebook.com/ManicMotorsport1
Dec 4, 2018
1,351
1,411
Hemel hempstead
www.seatcupra.net
Done a little more this evening. Had to take the engine off the stand to get to the rear main seal.
20240506_185311.jpg
cleaned the area and again washed down with brake cleaner. Using locktite 515 flange sealant.
Checked the new seal for any damage etc all OK. Sprayed it with some grease to help the seal slide over the crank
20240506_185322.jpg

Slide it over and bolt it down and the torque
20240506_191750.jpg

Also spun in the ARP flywheel bolts just to keep them safe .
 

Manic172

https://m.facebook.com/ManicMotorsport1
Dec 4, 2018
1,351
1,411
Hemel hempstead
www.seatcupra.net
Next up is a very very simple job... but as normal it's never simple and never easy.... it's only fitting a sump... just a sump... but. And as always there is a but.
So I turned the engine upside down on the stand and lowered the sump down. And it didn't sit all the way flush. So with some engineering paste I marked some of the areas I thought could be causing the issue.
20240506_194400.jpg

Lowered down the sump. Wiggled it a bit and lifted it up.
20240506_194349.jpg

And this is where the pump is rubbing on the baffle plate.
I have a standard pump laying about . So holding it next to the high flow pump you can see the difference
20240506_194440.jpg

You can see the extra moulding on the high flow pump where the purple ink is.
So the tried them in to the sump and
20240506_194510.jpg


the standard pump sits right down clears the baffle plates

20240506_194603.jpg
the high flow pump sits proud of the sump. As the sump and pump have the same mounting surface it's holding the sump off the block... . Bit of modification and it will be on...
 
Last edited:
  • Like
Reactions: tracktoy

MATT RILEY

Oil burner
May 9, 2004
422
82
When you said engineering paste did you really mean tomato sauce?

Loving the progress, Keep it going! 💪
 

Manic172

https://m.facebook.com/ManicMotorsport1
Dec 4, 2018
1,351
1,411
Hemel hempstead
www.seatcupra.net
Right due to work, time , money, and waiting for bits not a lot has happened. So again just fiddling. I thought I would out the sum on. So had to order 20 m7 x20 bolts... ooh sounds easy... in the end got them from spaldingfastners.co.uk from Lincoln. So stainless bolts and washers. Some loctite 710 flange sealer bolted down and torqued .. and forgot to take any pictures 🤫
 

Manic172

https://m.facebook.com/ManicMotorsport1
Dec 4, 2018
1,351
1,411
Hemel hempstead
www.seatcupra.net
On to some thing productive.. head studs.
I ran a m10 x1.25 down each thread to clear them out then washed with brake cleaner and blew then out to clean properly. The kit contains
20240616_115508.jpg
20240616_115524.jpg

Special lubrication stuff
20240616_115518.jpg
the special nuts.
20240616_115521.jpg

And the study (had already fitted some then remembered you lot
I clean the studs with brake cleaner then
20240616_115605.jpg

Using some of the special arp lubrication stuff wind the stud in to the head hand tight
20240616_115546.jpg
the top end has an alien key drive in the top and the bottom
20240616_115539.jpg

Has a slight swelling to stop it from being screwed in to far .
20240616_115735.jpg

Just to be consistent. Even tho it says hand tight. I done all the studs to 10nm. That in this case is bugger all. But I done it to make sure they are all seated equally
On to the nuts
20240616_120433.jpg
strange looking things these . M10 threads with a spline drive
20240616_120439.jpg

The box states no tool in kit..... so had a rummage threw I remembered I bought a load of stuff from a bloke in a van selling "us pro " stuff.
20240616_120452.jpg
purfect fit
20240616_120448.jpg
20240616_120505.jpg

M10 does the job.. I uploaded a pic incase any one want to buy these. I got 3/8 allenkey, spline and torxs, short and long versions of each for £60 the lot .
Hope this build isn't going on to long. If any one wants any information or how I done stuff just ask I am more than please to share. Also please go to our Facebook site and give us alike. 👍
 
Last edited:

Manic172

https://m.facebook.com/ManicMotorsport1
Dec 4, 2018
1,351
1,411
Hemel hempstead
www.seatcupra.net
Been ages since I got to the workshop. Got some bits from thaiwrong horse. Got mirror , door handles and black locks, and the rear door quarter windows with seals.
So started building uo the doors. Fitting locks and handles .
Fitted the polycarbonate windows. I for got to take photos of how I bolted them in. It was getting late.
20240817_234514.jpg
but the semi end result isn't to shabby. But still a long way to go
 
Lecatona HPFP (High-pressure Fuel Pump Upgrades)