For those that need the files hire it is from the Spanish forum together with some G translate info.
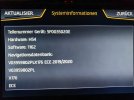
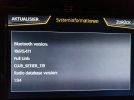
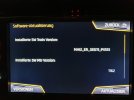
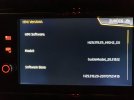
My unis is 5QA035858 HW24 SW245, the update to 346 went well with no problems at all.
330
https://drive.google.com/open?id=1wvEmQkI1eyyWFSxrwje9kap7tSOmXdaf
346
https://drive.google.com/open?id=1n08Fdw3C53futzb3b8sv5dOEwn2wIYv7
Mib2 - 6.5 "screen
Version of the update: 0330 (Beta) Install this and then 0346. The 0330 is a Beta and has known bugs (Do not be afraid if you see strange things) are solved by updating to 0346.
Equipment compatible with these updates:
MIB 2GEN 6.5 "HW: 024 FW: 0245
Unzip the file. The final structure should be as follows:
Folder: powerc
Folder: mainplus
Folder: main
Folder: DUW014
Folder: DUW013
Folder: DUE410
Folder: DUE409
Folder: DUE406
Folder: DUE405
Folder: cpuplus
Folder: cpu
Folder: bluetooth
File: metainfo2.txt
Copying the folders and the file to an 8 GB Class 10 SD card (If you use a slow card, the update can be eternalized, with the Class 10 it takes about 40 minutes)
Update version: 0346 (Latest version compatible with the device) (Pre-install 0330)
Equipment compatible with these updates:
MIB 2GEN 6.5 "HW: 024 FW: 0245 and logically HW: 024 FW: 0330 (If any)
Unzip the file. The final structure should be as follows:
Folder: powerc
Folder: mainplus
Folder: main
Folder: DUW070
Folder: DUW069
Folder: DUW013
Folder: DUW014
Folder: DUE410
Folder: DUE409
Folder: DUE406
Folder: DUE405
Folder: cpuplus
Folder: cpu
Folder: bluetooth
File: metainfo2.txt
MIB2 6.5 "update method
CHECKED AND SOLVED TO ERRORS PRESENTED
As explained above, to update the MIB2 from 0245 to 0346, it must be updated before 0330.
Therefore, first perform the 0330 following all the steps described below and then the 0346 and again the same steps and avoid unpleasant surprises.
1) Use a minimum SD 8GB and can be Class 10 (It is much faster)
2) Format the SD card in FAT32
3) Copy the data to the SD card (All folders and the TXT file must remain in the root of the card)
4) Insert the SD card into the SD1 Housing of the glove compartment.
5) Put the car contact (Do not start the engine under any circumstances or turn off the Infotainment)
6) Press the Infotainment Menu button and press and hold until the
service menu exits.
7) Select SW Update and click on Update.
8) Wait for the system to give us an Update Done message and confirm.
9) We connect the diagnostic device (Vagcom,
OBDeleven, etc.) and do a Scan.
10) We erase all faults.
IMPORTANT
1) Güncellemeler, SD kart Sınıf 10 ise, her biri yaklaşık 30 dakika sürer, eski kartlarda çok daha uzun sürer.
2) Bir USB'den yükseltmeyi deneyebilirsiniz, ancak her zaman işe yaramaz, USB çoğu durumda marka, çip vb. ile biraz çelişir. Güncelleme yapmazsanız hiçbir şey olmaz, size okuyamadığını söyleyecektir. veri.
3) Bir SD ile güncelleme yapmaya çalışırken, yanlış yaptığınız bir şey olan veri hatası alırsanız. Kartı yeniden biçimlendirin veya kartları değiştirin.
Güncelleme sırasında:
1) Kontağı araçtan çıkarmayın veya Bilgi ve Eğlence Sistemini kapatmayın.
2) Güncelleme sırasında motoru çalıştırmayın. (Başlamadan önce başlatabilirsiniz, ancak zaten güncellenmeye başladıysa başlatmayın)
3) Hiçbir koşulda otomobil tüketicileri kullanmamalısınız (Isıtma, klima, OBDII, Bluetooth bağlantıları vb.). GEREKSİZ RİSKLERDEN KAÇININ. Güncellemeler ciddi bir şey, arabada dolaşmayın, hava soğuksa ısınırsınız ya da başka bir zaman ararsınız.
Bu yönergeleri izleyemiyorsanız, güncelleme yapmamanız daha iyidir.
4) Pil gücünün düşük kalması riskini almak istemediğinizi düşünüyorsanız, işleme başlamadan önce bir pil şarj cihazı bağlayın ve bitene kadar açık tutun.
Normalde güncellemelerden sonra SVM (Yazılım Sürüm Yöneticisi) doğrulanmalıdır.
Sistem bir hata verecektir: 1555 - Kalıcı ve silinmemiş Yazılım Sürümü Yönetimini Kontrol Edin.
Bunu çözmek için şu adımları izleyin:
5F'ye giriyoruz
Uyarlamalar
Kurulum değişikliğinin onayı
Bize gösterdiği değeri kopyalıyoruz (XXXX)
XOR'a sahip bir hesap makinesi kullanıyoruz (örneğin Bitsel hesap makinesi)
Onaltılık olarak sahip olduğumuz değeri koyarız.
XOR veriyoruz.
Bu C9D2 değerlerini koyuyoruz ve hesaplamak için = sembolünü veriyoruz.
Bize koyduğunuz değeri, Montaj değişikliğinin Onayı'na koyduk ve kabul ediyoruz.
Kabul ettikten sonra, başlangıçta sahip olduğumuz değere göre değerin değişmediğini göreceğiz. BU NORMAL.
VagCom ile yapacaksanız ortada bir boşluk bırakın. (XX XX) tekrar yerleştirerek.
Tamamlandığında, Taramayı yeniden yapın ve hatayı kalıcı olarak silin.


 .
.