i love those rear lights thinkning about getting a set any pics in the dark or dusk with lights on?

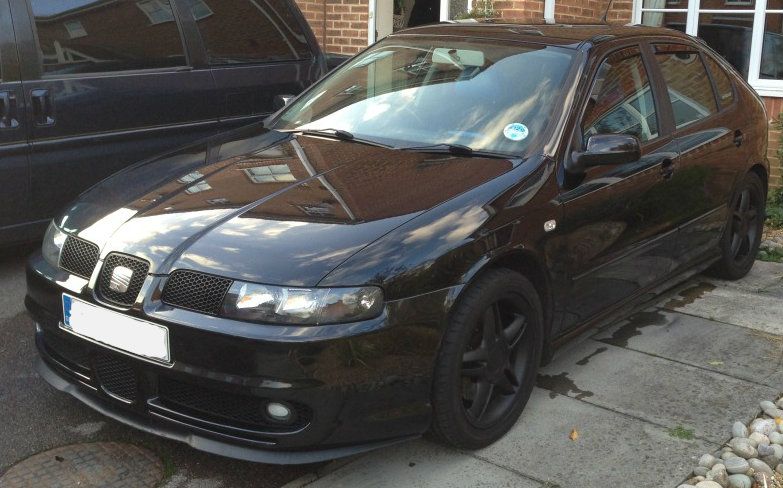
Cupra - Black n Blue
- Thread starter Dozer360
- Start date
You are using an out of date browser. It may not display this or other websites correctly.
You should upgrade or use an alternative browser.
You should upgrade or use an alternative browser.
Amcm
Guest
were did you run the power cable for the sud& i cant find anywhere to run it from the battery into the car??
i love those rear lights thinkning about getting a set any pics in the dark or dusk with lights on?
not yet, ill get some tonight when it gets dark if you like
were did you run the power cable for the sud& i cant find anywhere to run it from the battery into the car??
from the battery....
tucks in the side of the plastic box with the existing loom
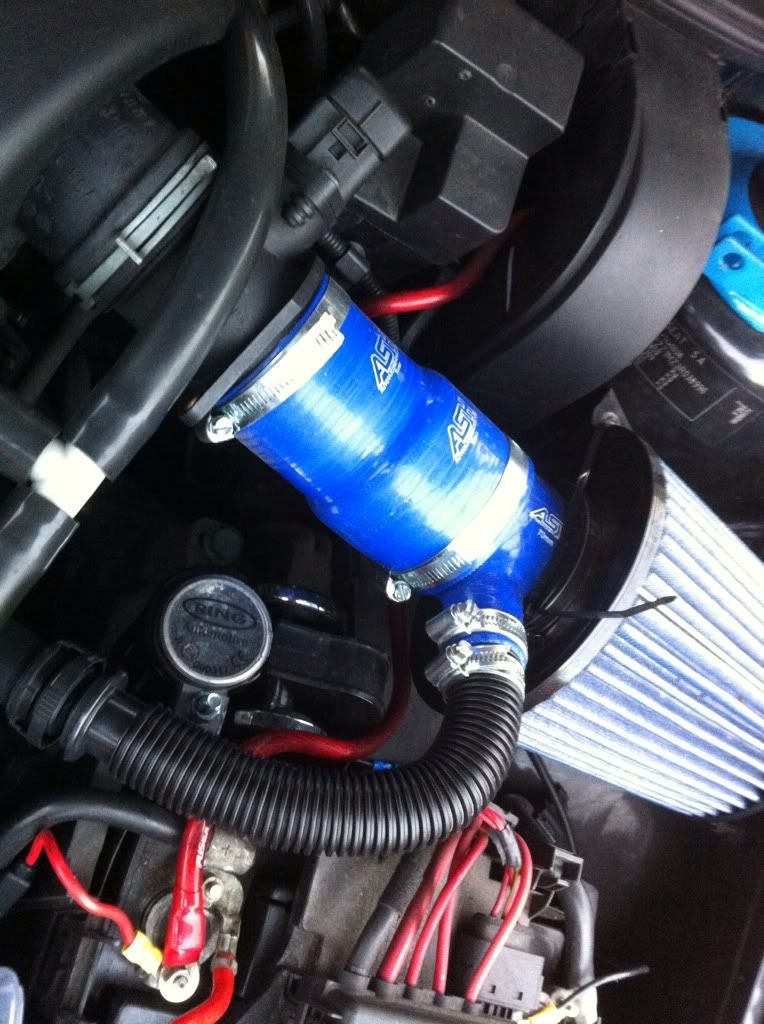
then its fed round the back of the pollen filter (no pix as im not going through that agro again lol)
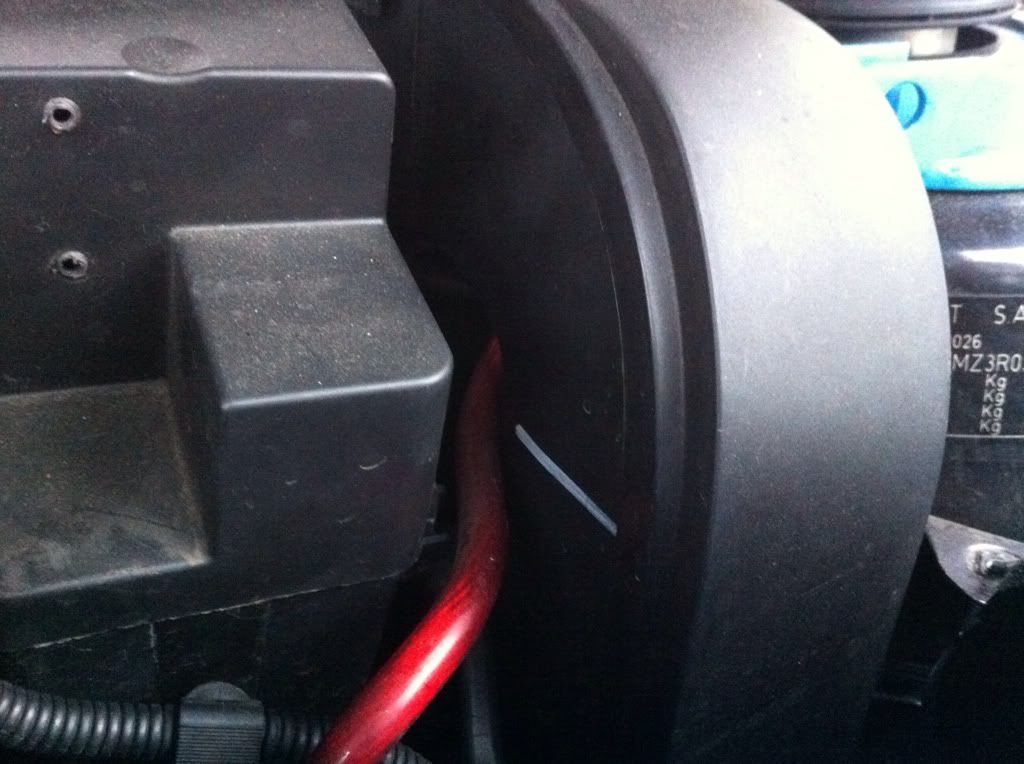
then comes out behind the glovebox through an existing grommet (red ring), the red cable is hidden behind the taped up loom (white arrow)

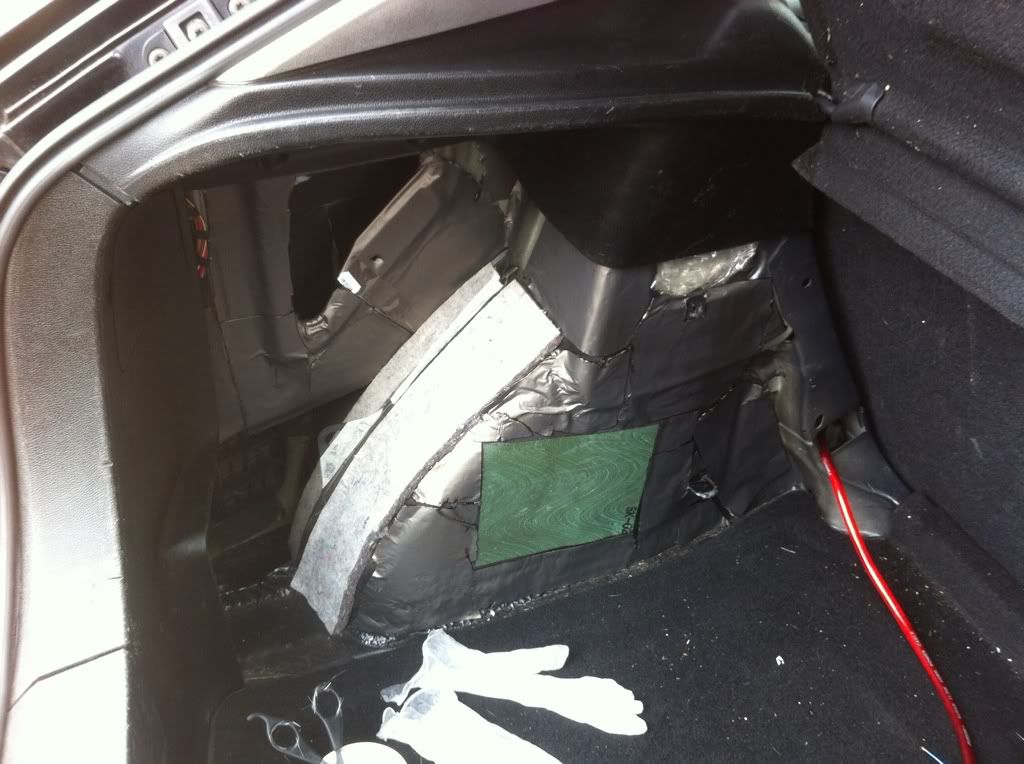
then it is just tucked under the plastic trim on the door seals, then when it gets under the back seat i poked it through the metal frame so as to not get in the way of the seat hinge
not yet, ill get some tonight when it gets dark if you like
that would be handy if you could fella as think that would make my mind up for me
i love those rear lights thinkning about getting a set any pics in the dark or dusk with lights on?
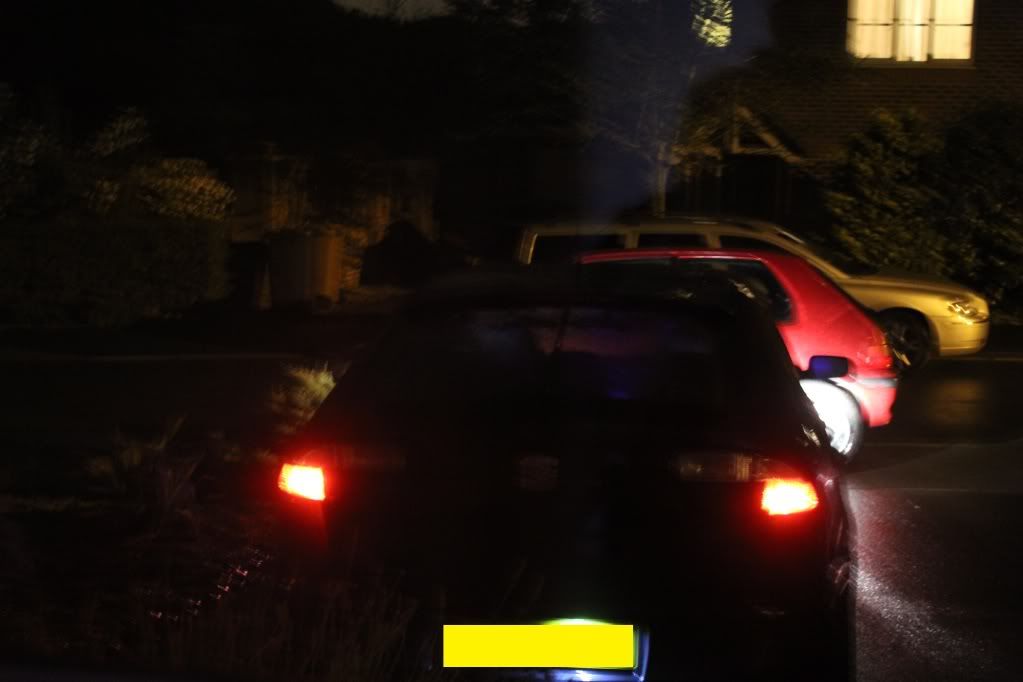
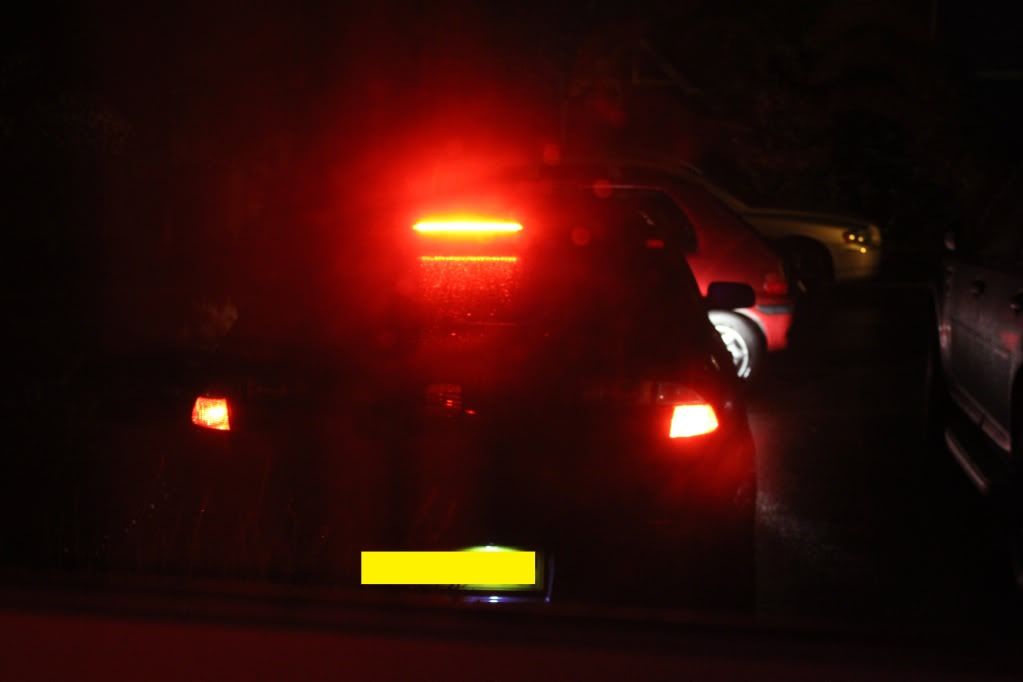
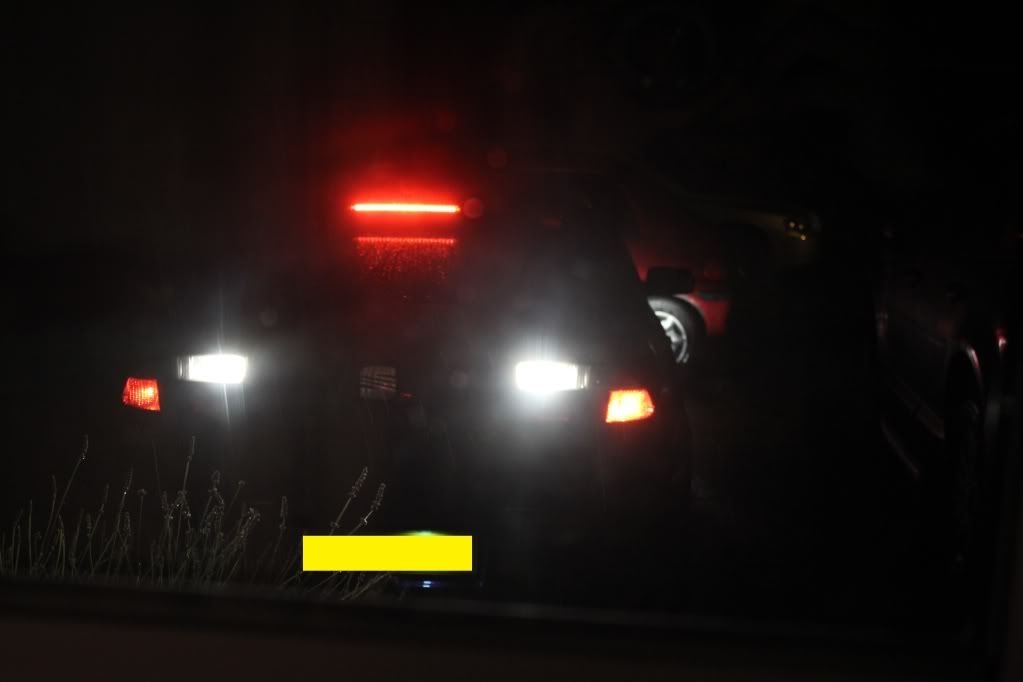
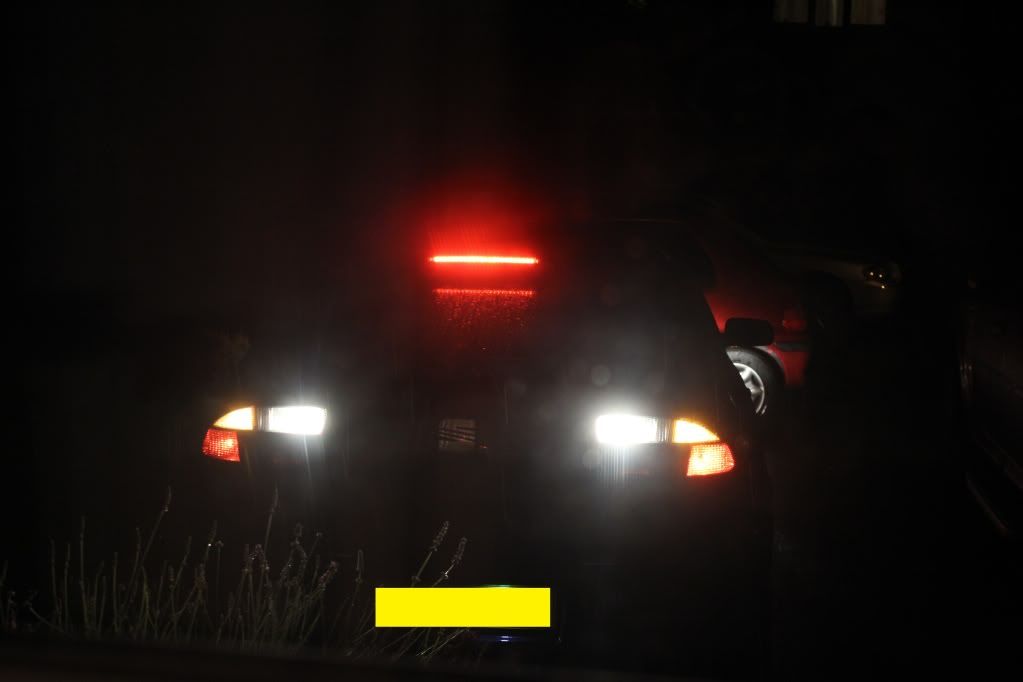
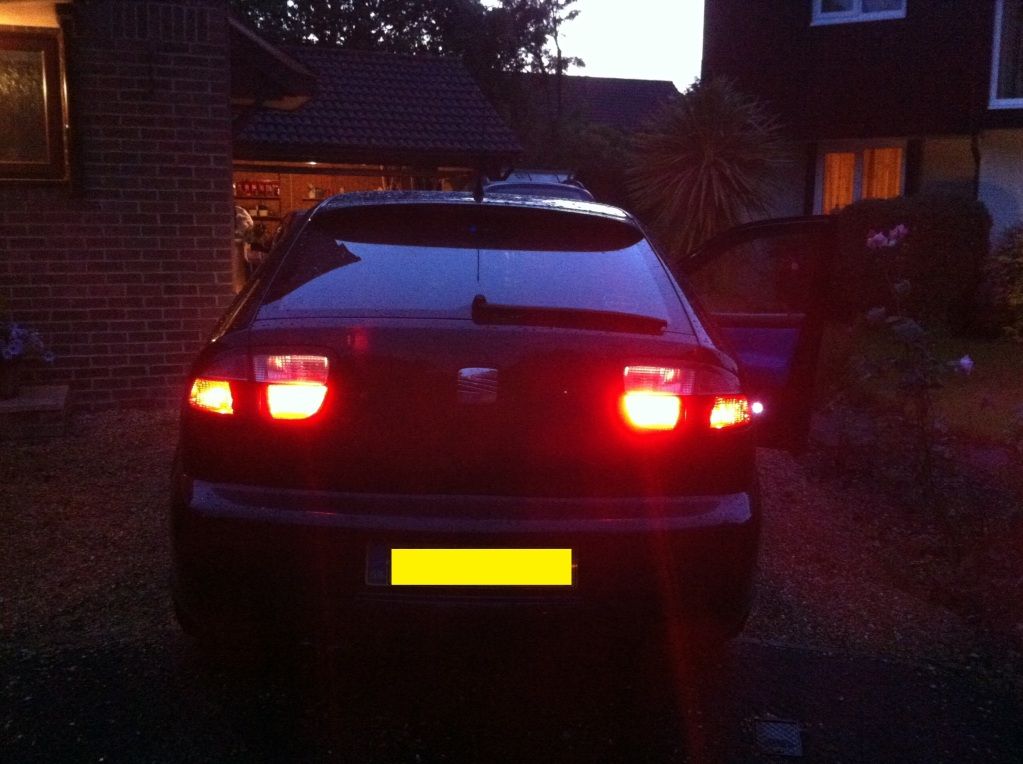
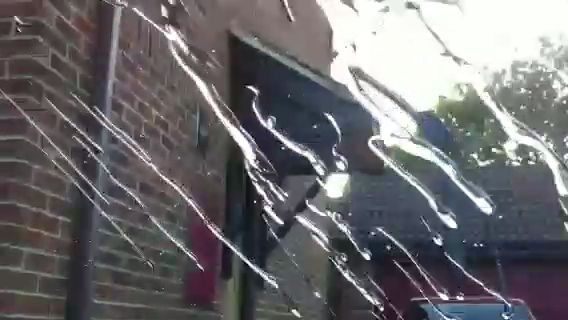
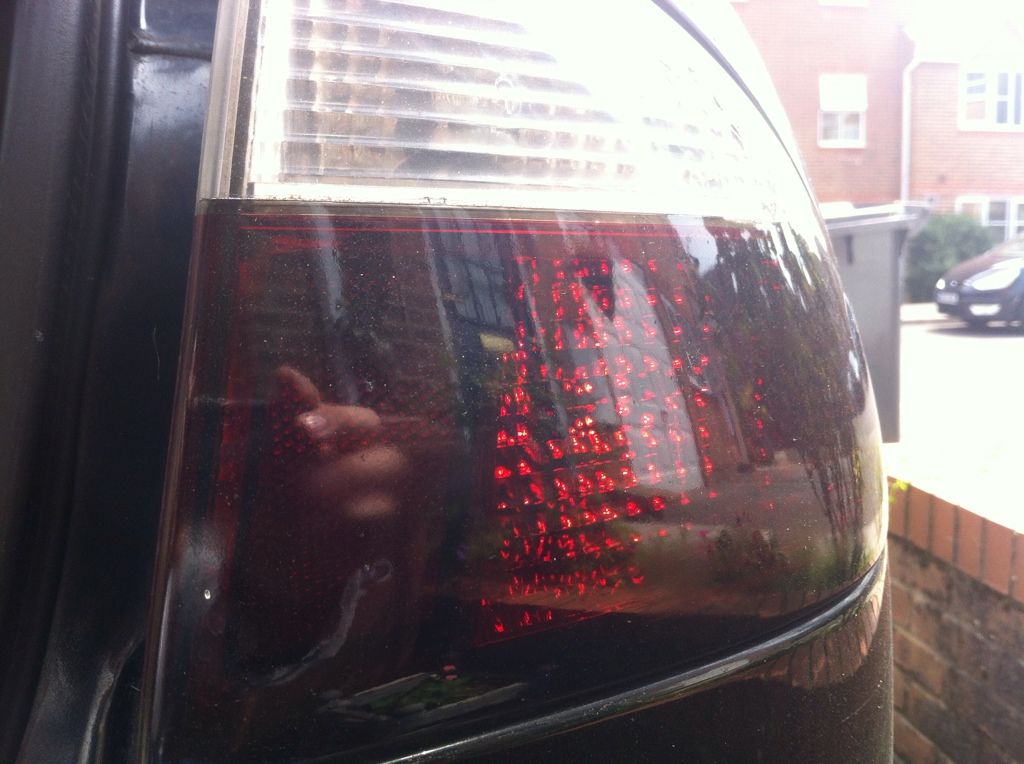
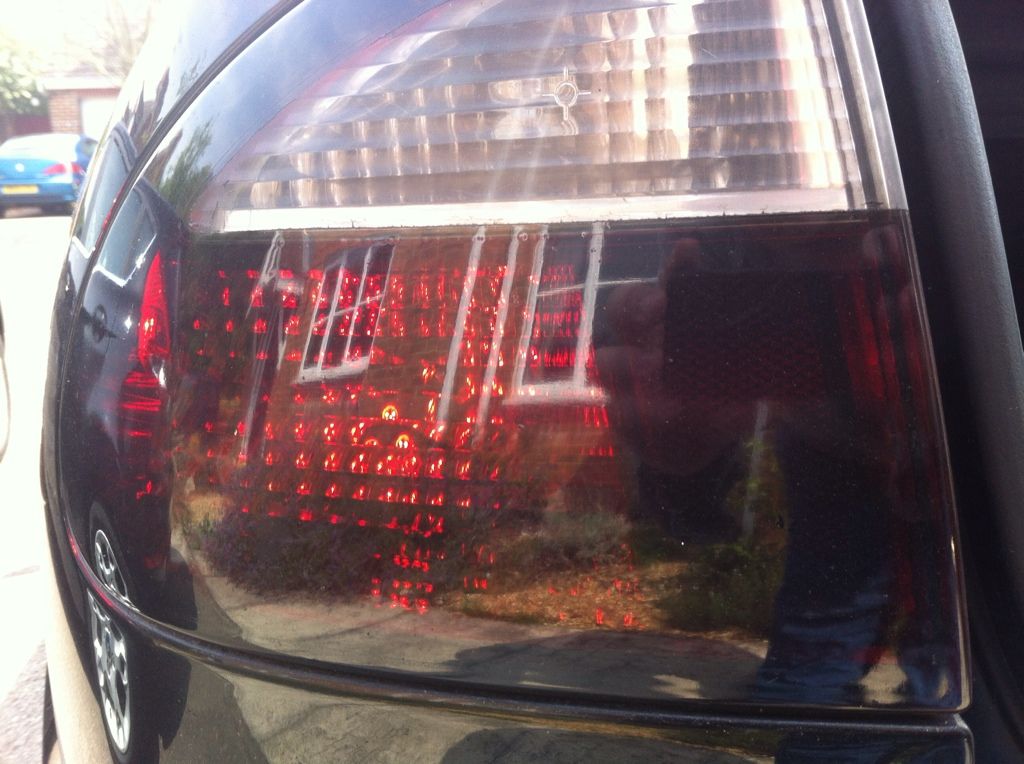
excuses out the way first, im half asleep, its raining, the pictures were taken from inside my house, and i noticed the near side brake light and number plate bulb have gone so that is why its not as bright as the drivers side, other than that enjoy:
side lights
brake lights
reverse lights
hazards
Well there a lot. Tighter than I thought they would be which is good think I might have to do this, thanx for the pictures bud cars looking good btw
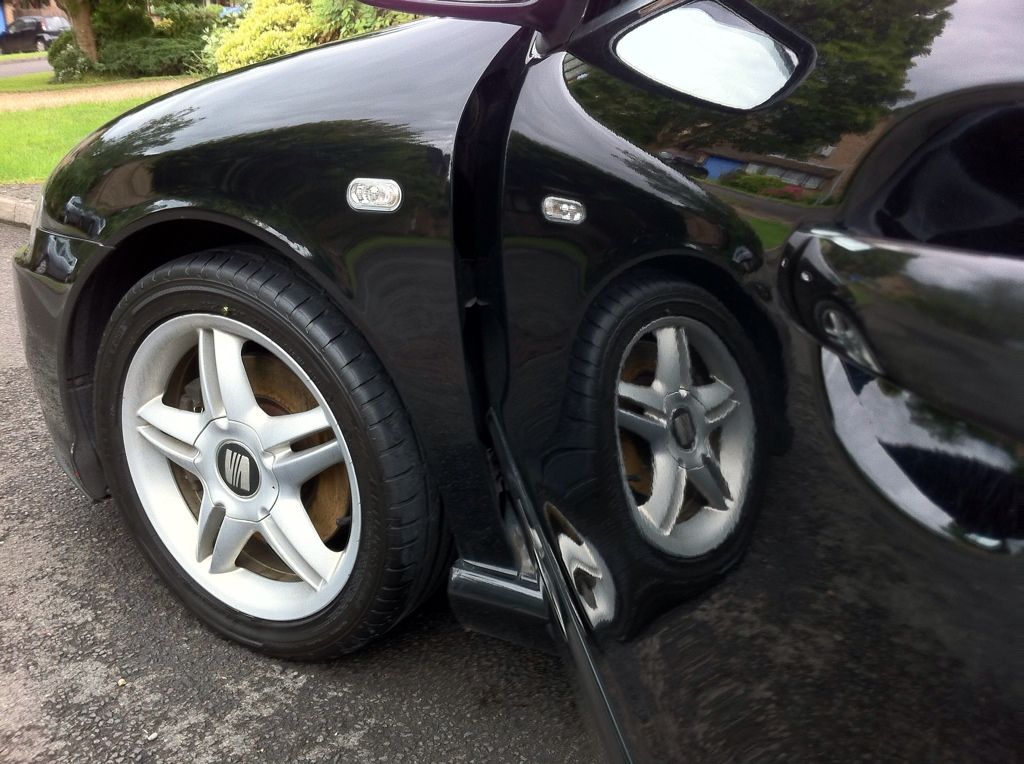
todays progress:
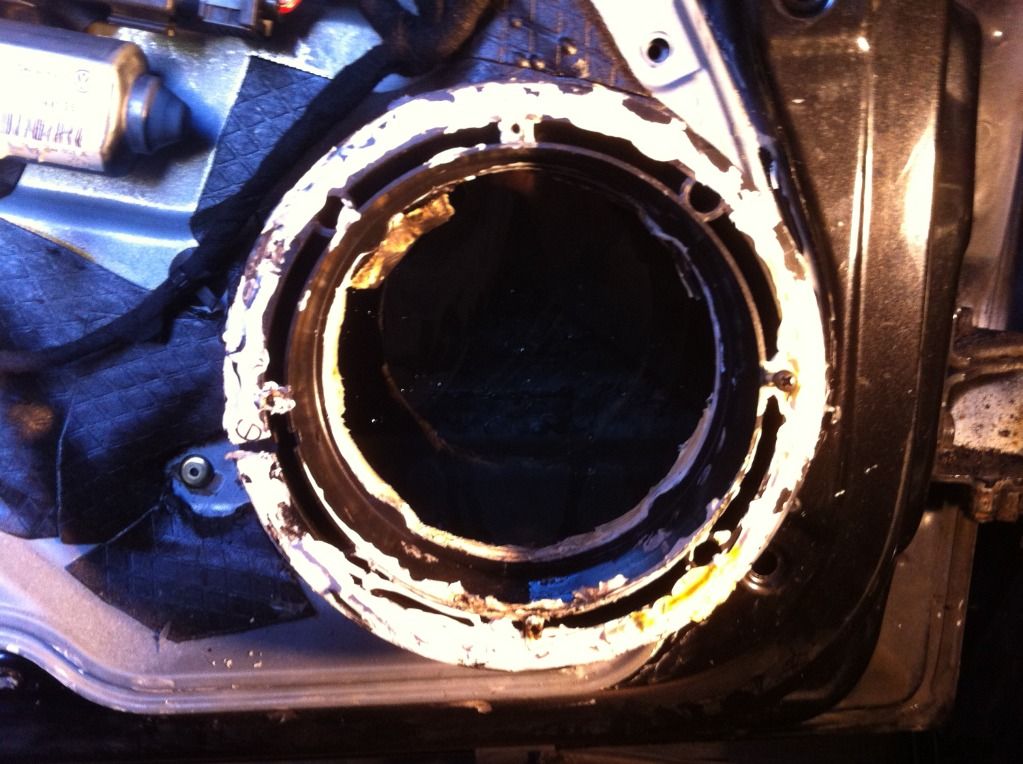
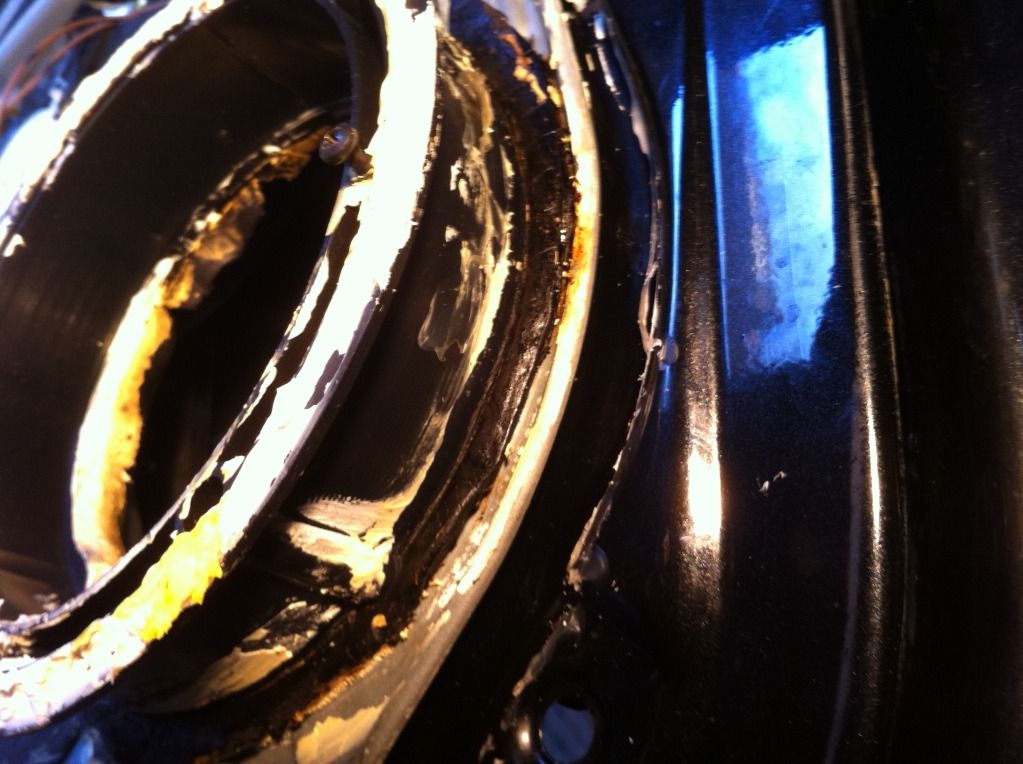
as it stopped raining for 30 minutes today i thought i would attempt the leaky door fix now my stuff has arrived from ebay, i thought it would only be a 30 minute job but i took the door card off and was greated by this monstrosity
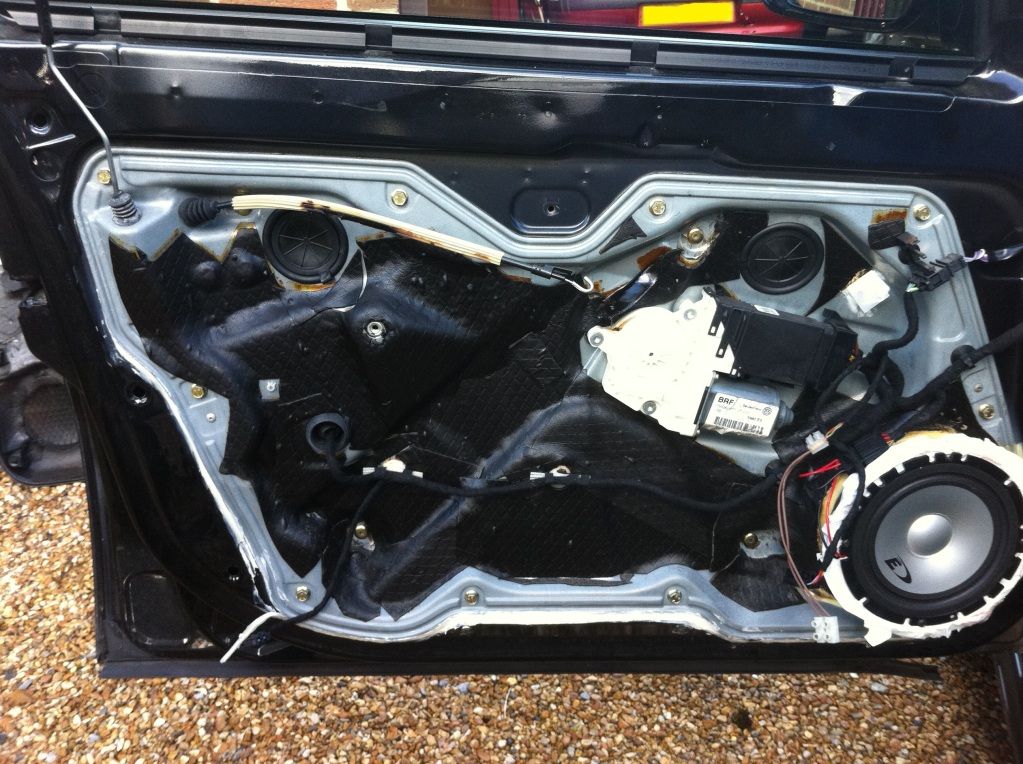
im sure its not standard to have that much soundproofing, its all inside the doors as well, the panel was also bodged back in place with what i can only think of as pollyfiller covered with silicon sealant
i found out that the speaker is an aftermarket alpine one that has been stuck on a plastic bag, then stuck on a adapter then stuck on the soundproofing then screwed in to the existing speaker holes
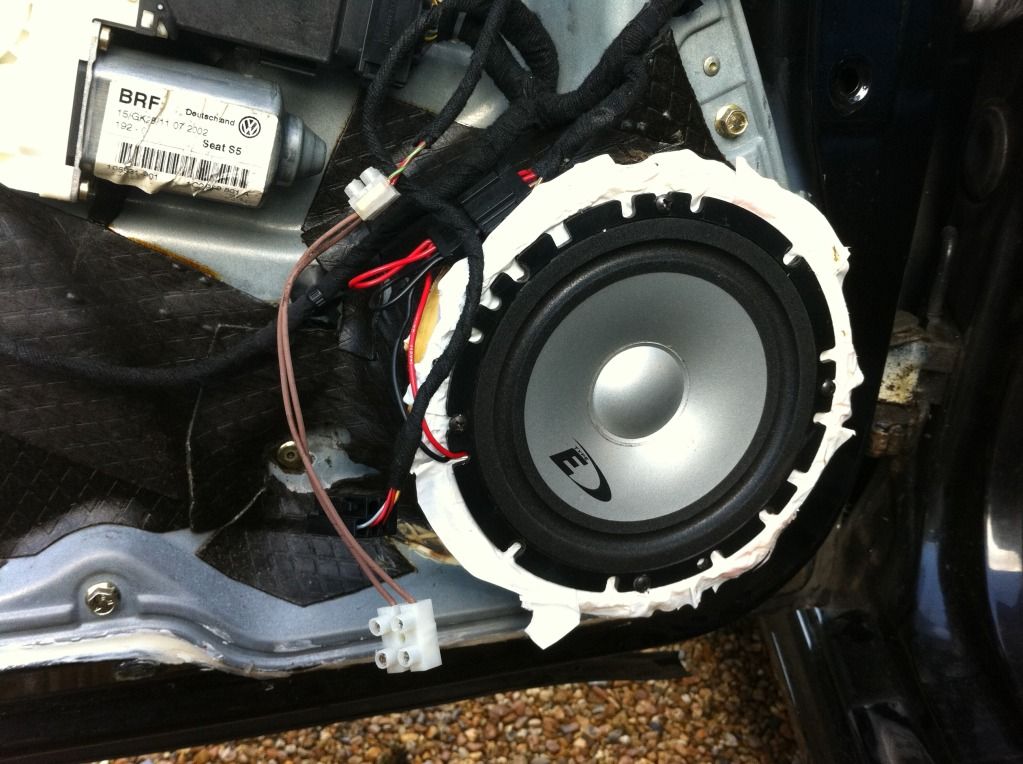

even the tweeter is bodged, im sure its not supposed to look like that, and the cables are all bodged as well
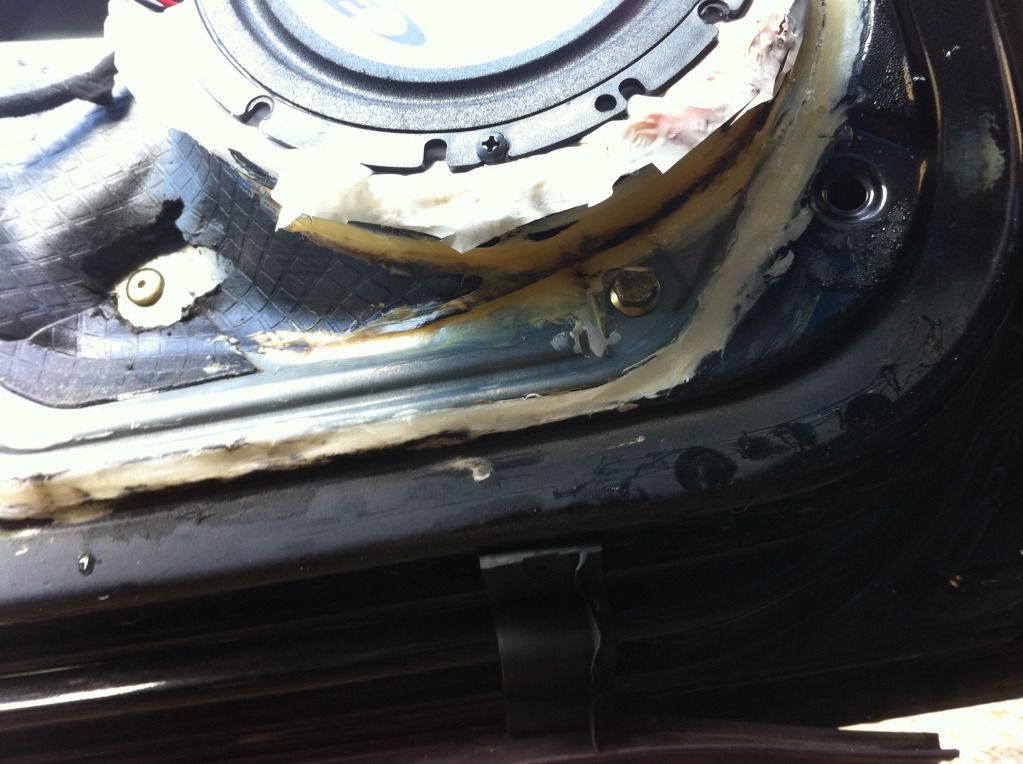
i have removed as much of the bloody pollyfiller and sealant as i could get at and have replaced it with butyl sealant strip, then i removed the speaker adapter and cleaned all the crap off that and removed some of the soundproofing it was sitting on and stuck it back on with butyl strip and screws.
i think the water was getting in through the soundproofing the speaker adapter was sitting on as half way through cleaning the crap off it started raining again (so it was a mad dash to get the gf's parents garage clear to get the car in there) and all around the bottom of the adapter was wet.
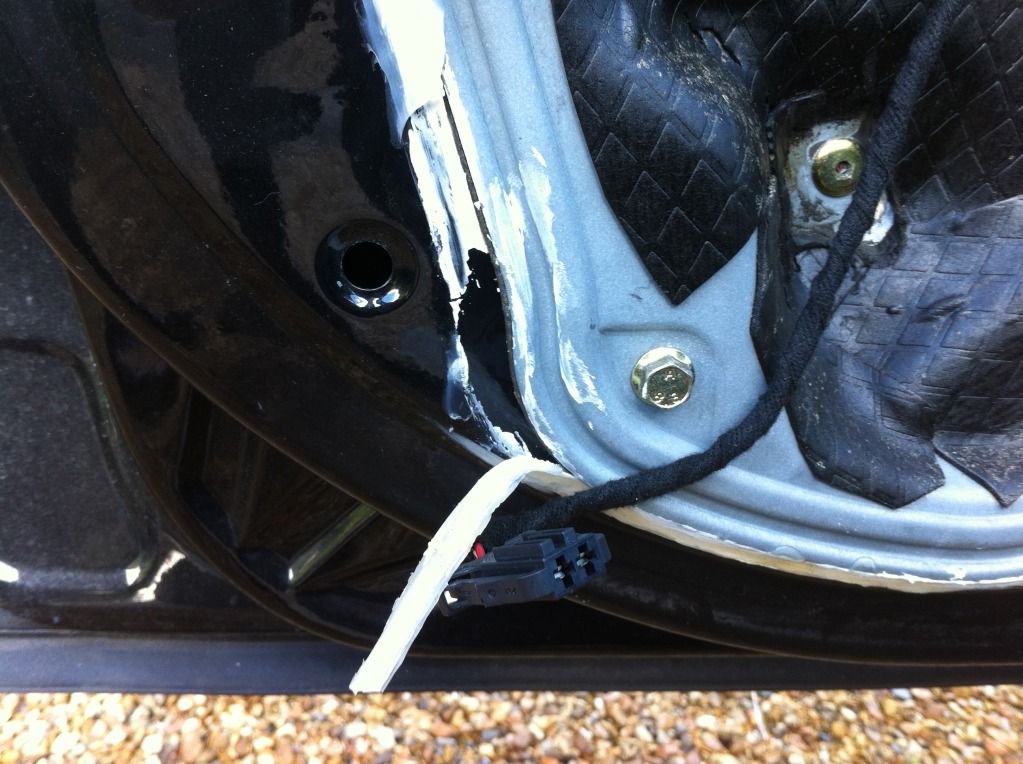
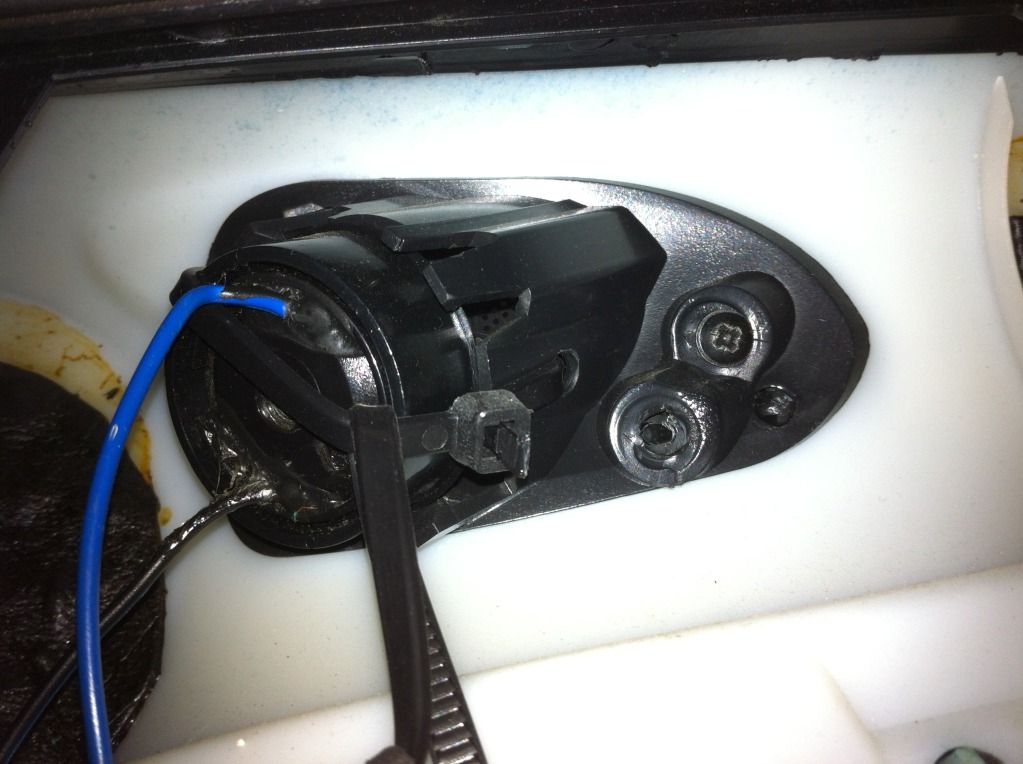
at the moment its all put pack together hopefully properly, but i have masking taped up the window tonight so it has a chance to seal properly, i will take it of tomorrow and it will hopefully be nice and dry on my door seal and carpet after tomorrows almost certain rain.
as it stopped raining for 30 minutes today i thought i would attempt the leaky door fix now my stuff has arrived from ebay, i thought it would only be a 30 minute job but i took the door card off and was greated by this monstrosity
im sure its not standard to have that much soundproofing, its all inside the doors as well, the panel was also bodged back in place with what i can only think of as pollyfiller covered with silicon sealant
i found out that the speaker is an aftermarket alpine one that has been stuck on a plastic bag, then stuck on a adapter then stuck on the soundproofing then screwed in to the existing speaker holes
even the tweeter is bodged, im sure its not supposed to look like that, and the cables are all bodged as well
i have removed as much of the bloody pollyfiller and sealant as i could get at and have replaced it with butyl sealant strip, then i removed the speaker adapter and cleaned all the crap off that and removed some of the soundproofing it was sitting on and stuck it back on with butyl strip and screws.
i think the water was getting in through the soundproofing the speaker adapter was sitting on as half way through cleaning the crap off it started raining again (so it was a mad dash to get the gf's parents garage clear to get the car in there) and all around the bottom of the adapter was wet.
at the moment its all put pack together hopefully properly, but i have masking taped up the window tonight so it has a chance to seal properly, i will take it of tomorrow and it will hopefully be nice and dry on my door seal and carpet after tomorrows almost certain rain.
Gave the car a once over with the snow foam, then washed and waxed it
Then went to halfords to get some rainX but the turtle wax stuff was £2 cheaper so I got that instead
And a quick vid of the magic working
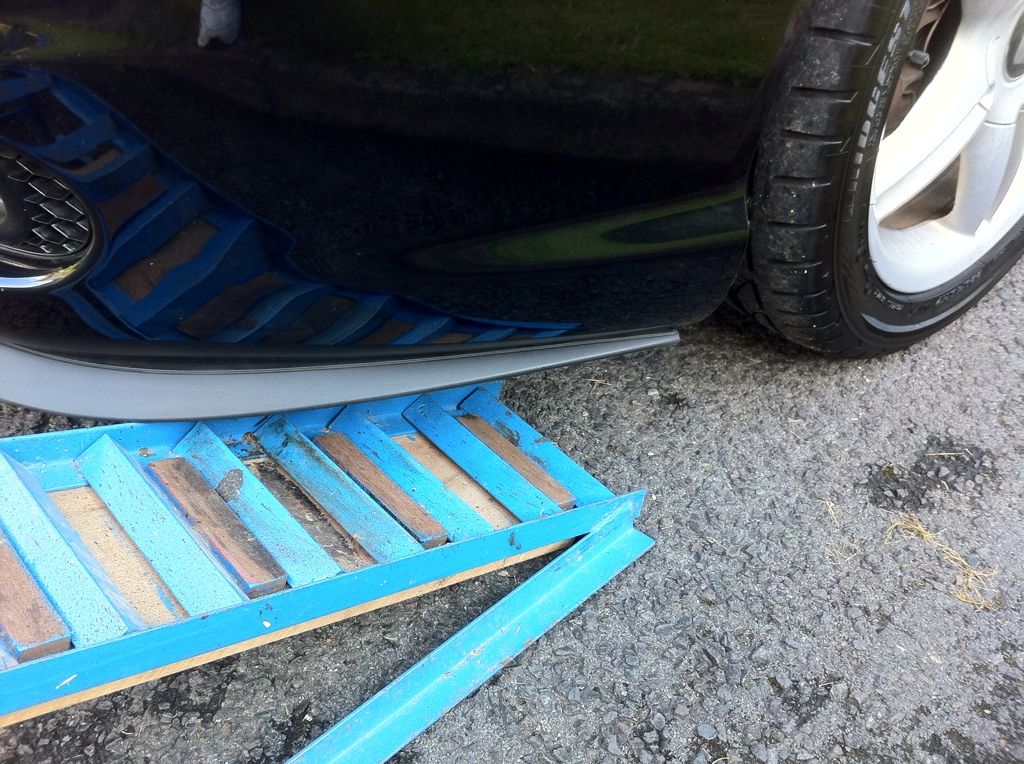
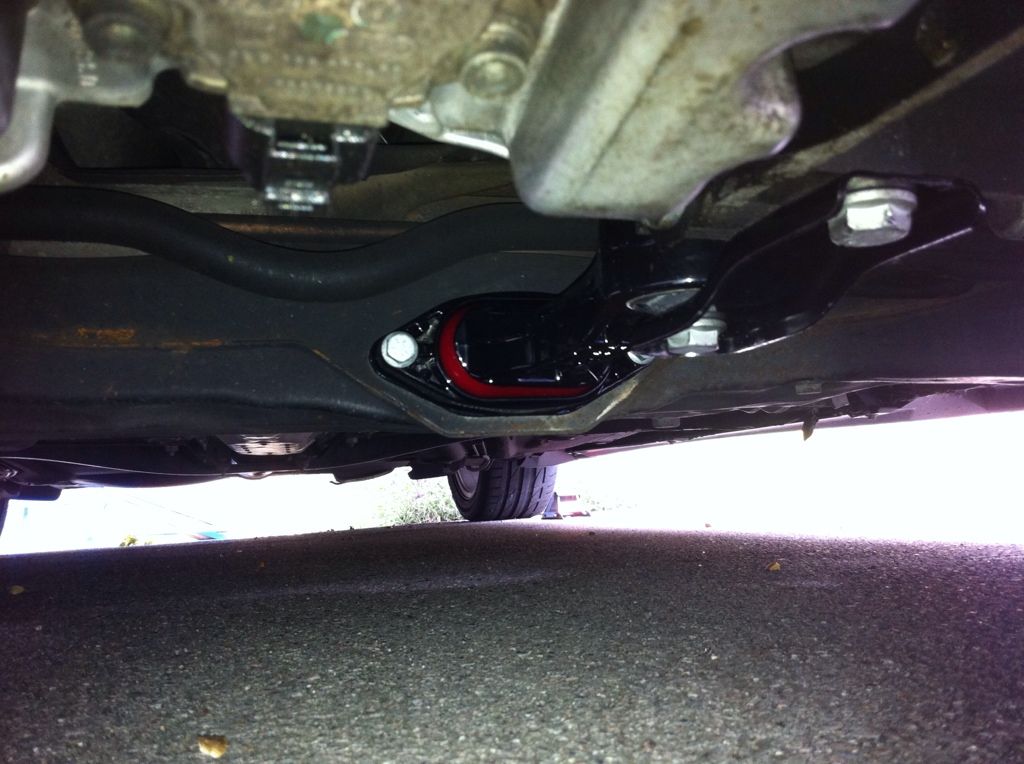
Then I went to try out my car ramps and find out what is making the knocking noise but no luck
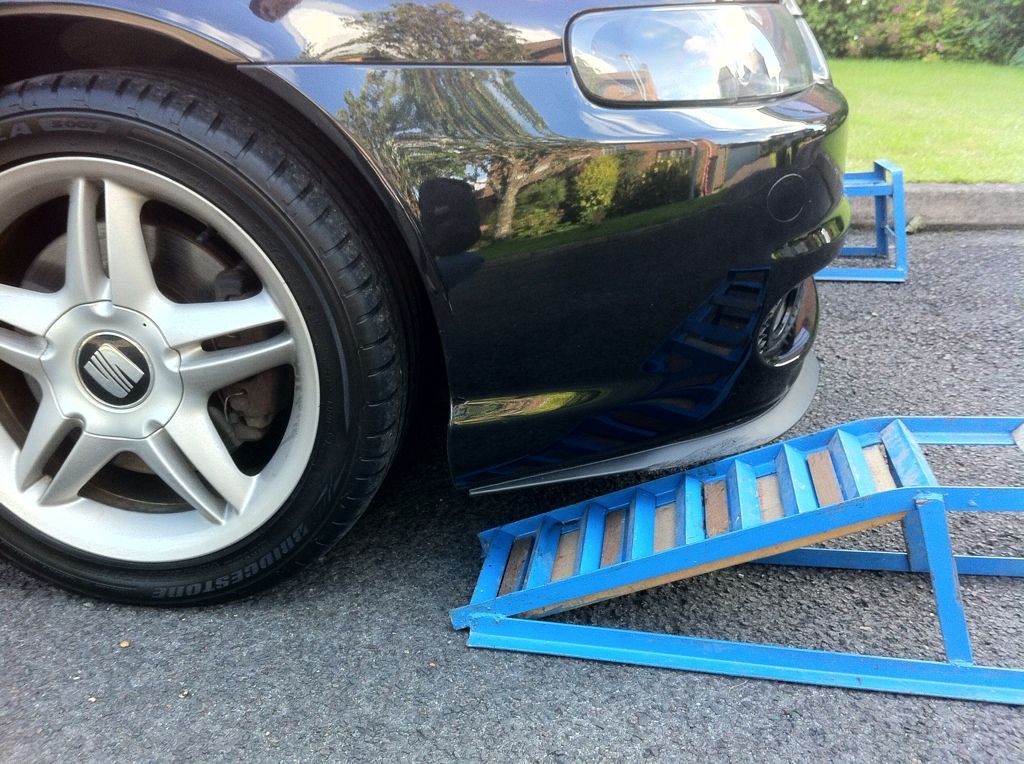
No chance without taking the bumper off
Then went to halfords to get some rainX but the turtle wax stuff was £2 cheaper so I got that instead
And a quick vid of the magic working
Then I went to try out my car ramps and find out what is making the knocking noise but no luck
No chance without taking the bumper off
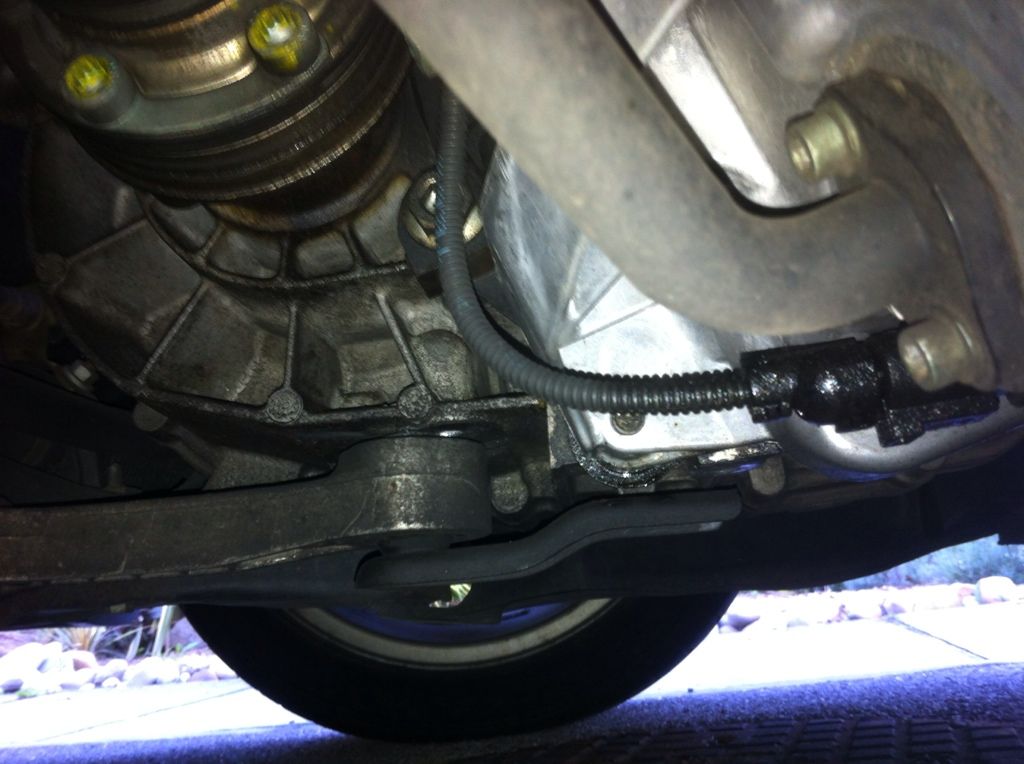
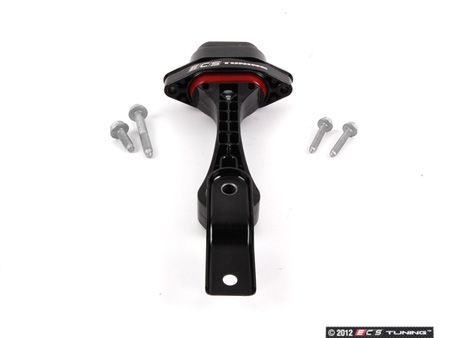
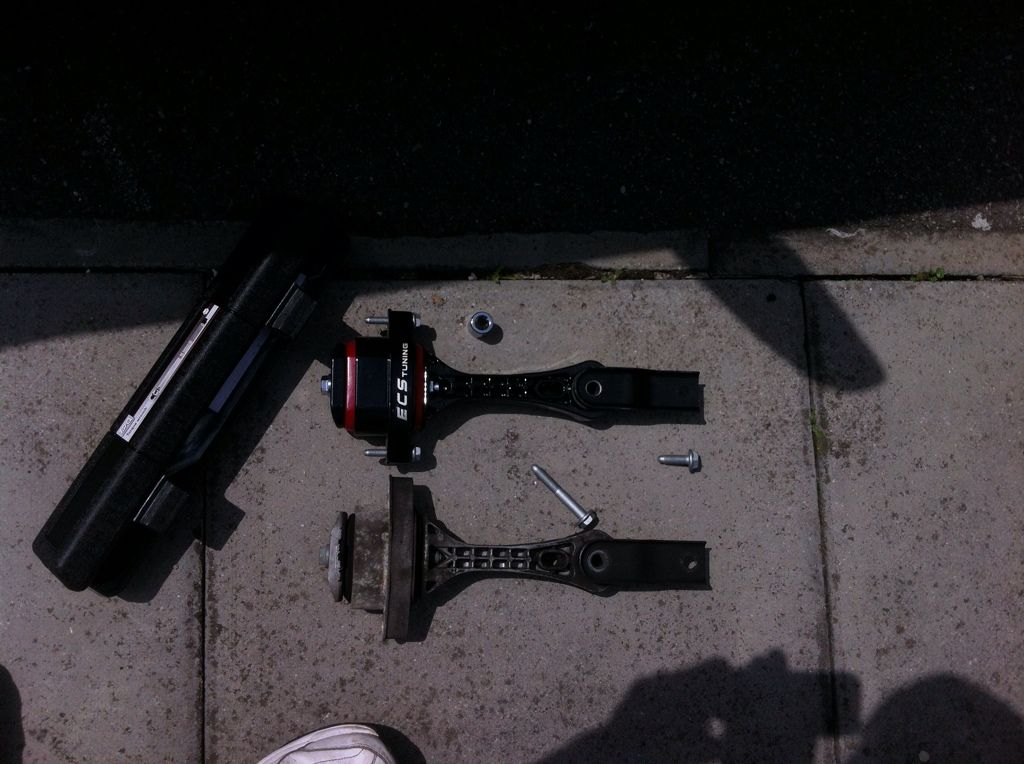
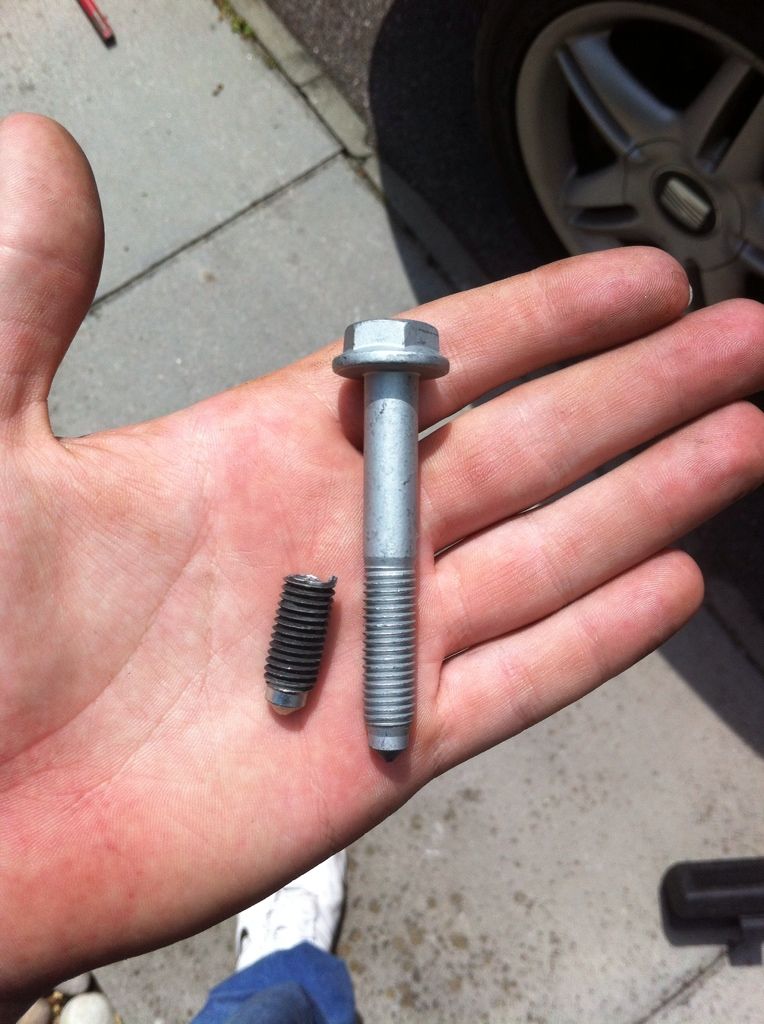
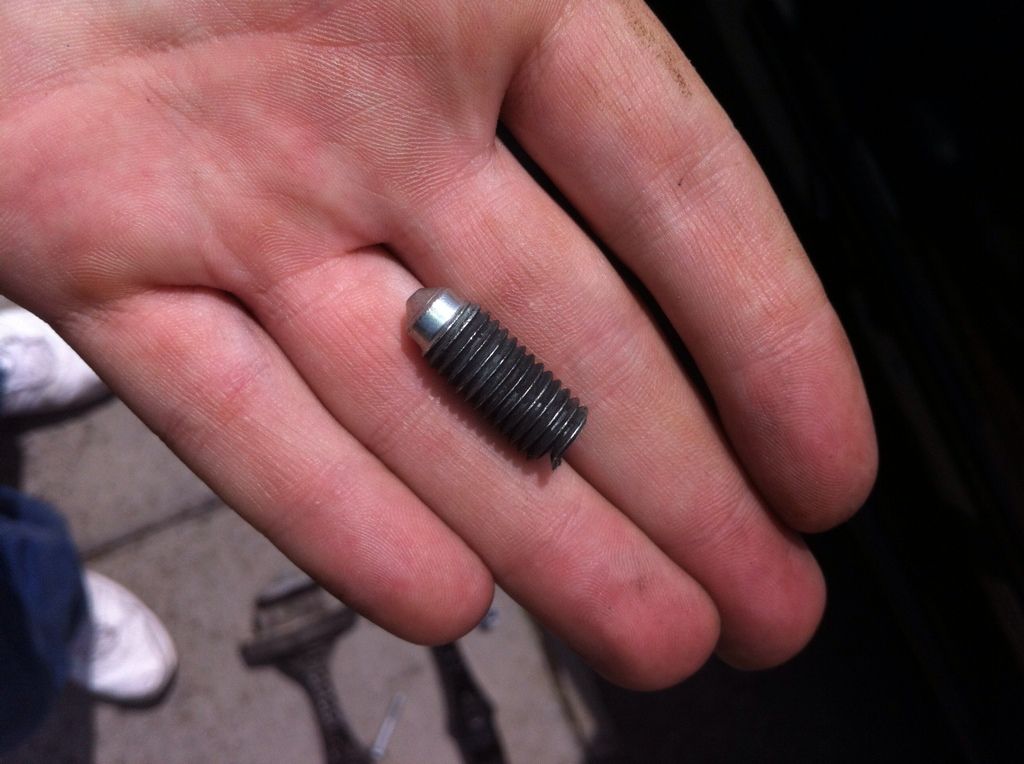
not today but last Thursday i managed to rip a bolt out of the pendulum mount (dogbone to some) load of hassle, ordered a whole new ECS Ultimate Dogbone Mount Kit from psi tuning yesterday and it arrived this morning. After a whole lot of hassle trying to get a sheared bolt out the new one is all fitted and torqued up correctly and you can feel the difference straight away
full thread here
full thread here
there must have only been one bolt in for a while because about 3 weeks ago i noticed there was a strange knocking noise some times when i put the power on, that's why i bought the ramps to have a look, and i think the dodgy roads round here caused the second bolt to shear off leaving the engine just hanging on the to other mounts and the exhaust/ turbo pipe.
got these
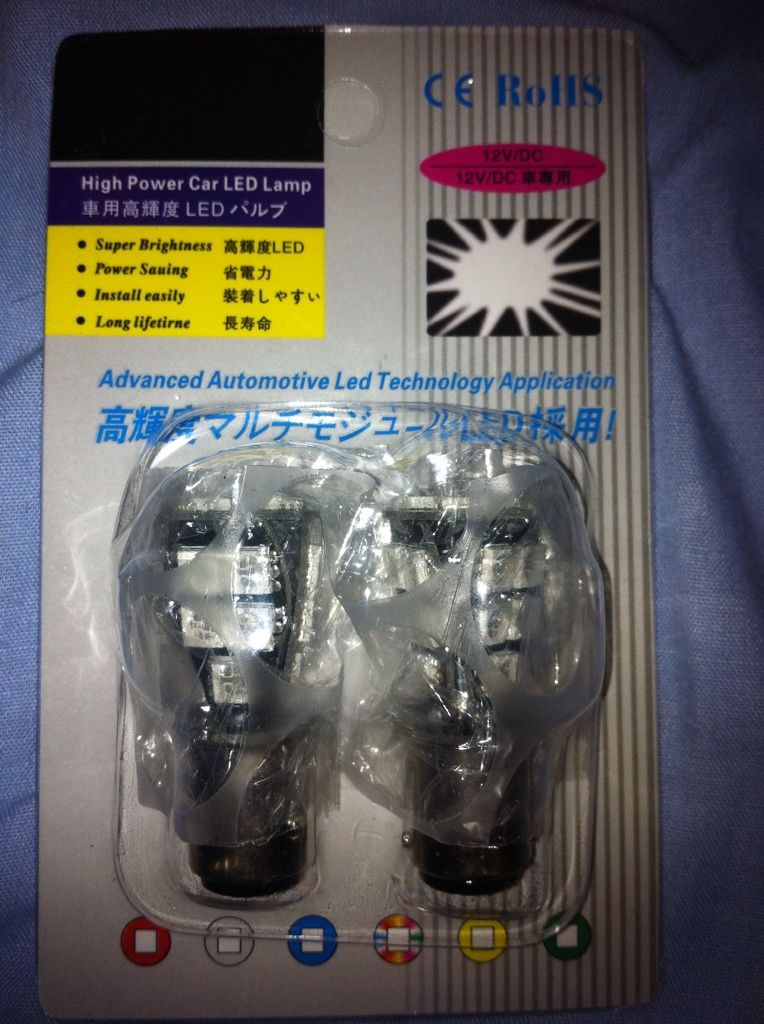
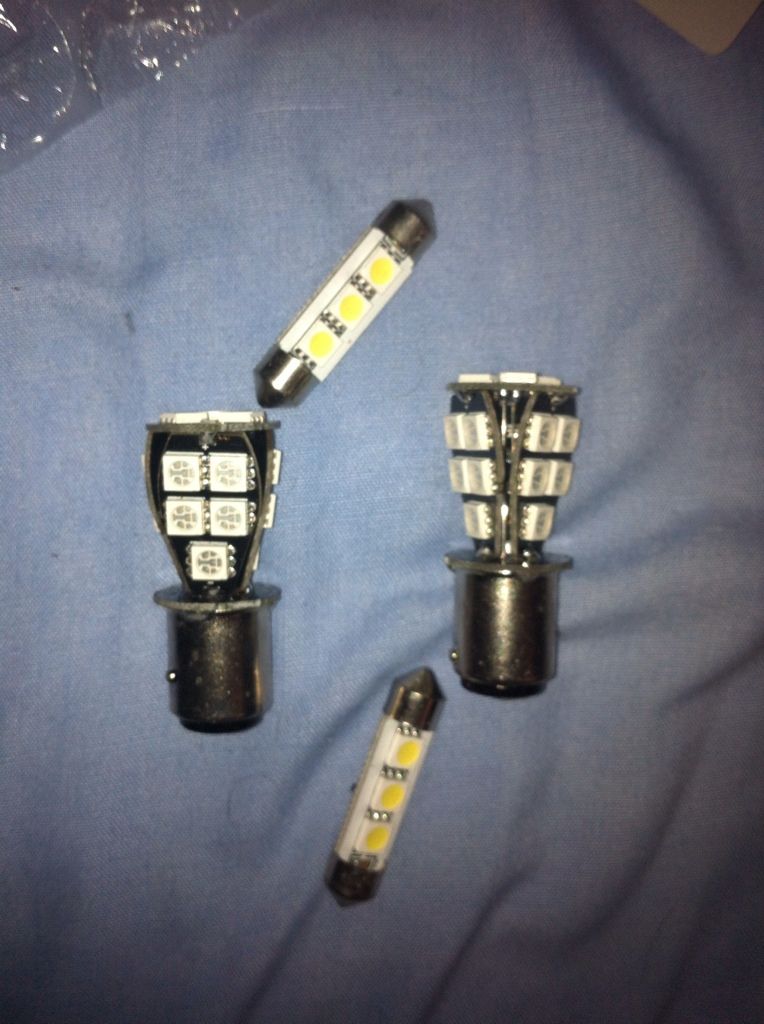
and fitted them, this was in bright daylight though
but the number plate leds seem to get very very hot so i dont think i will be keeping them i for long
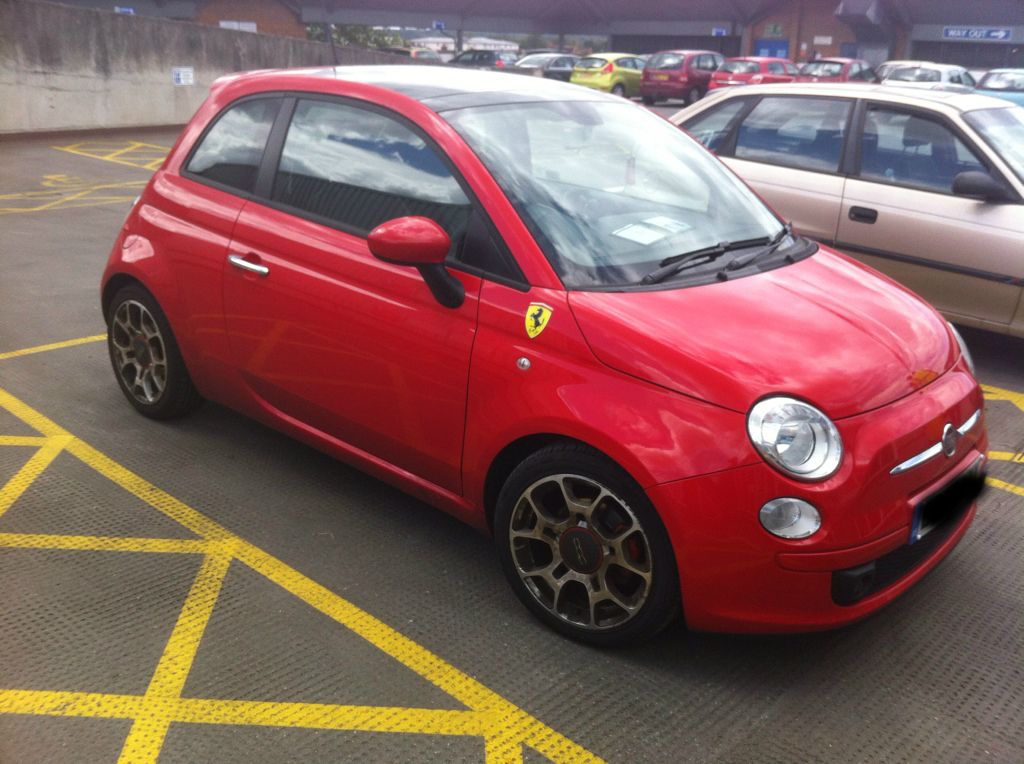
and today i spotted the very rare Ferrari 500


and fitted them, this was in bright daylight though
but the number plate leds seem to get very very hot so i dont think i will be keeping them i for long
and today i spotted the very rare Ferrari 500
Have you got any photos of them leds at night mate, been interested in them for a while but wondering what they are like?? Loving the F500, looks like a proper toy car lol
Have you got any photos of them leds at night mate, been interested in them for a while but wondering what they are like?? Loving the F500, looks like a proper toy car lol
not as yet, i have been having trouble with the number plate bulbs flashing and making the top stop light come on half brightness all the time.
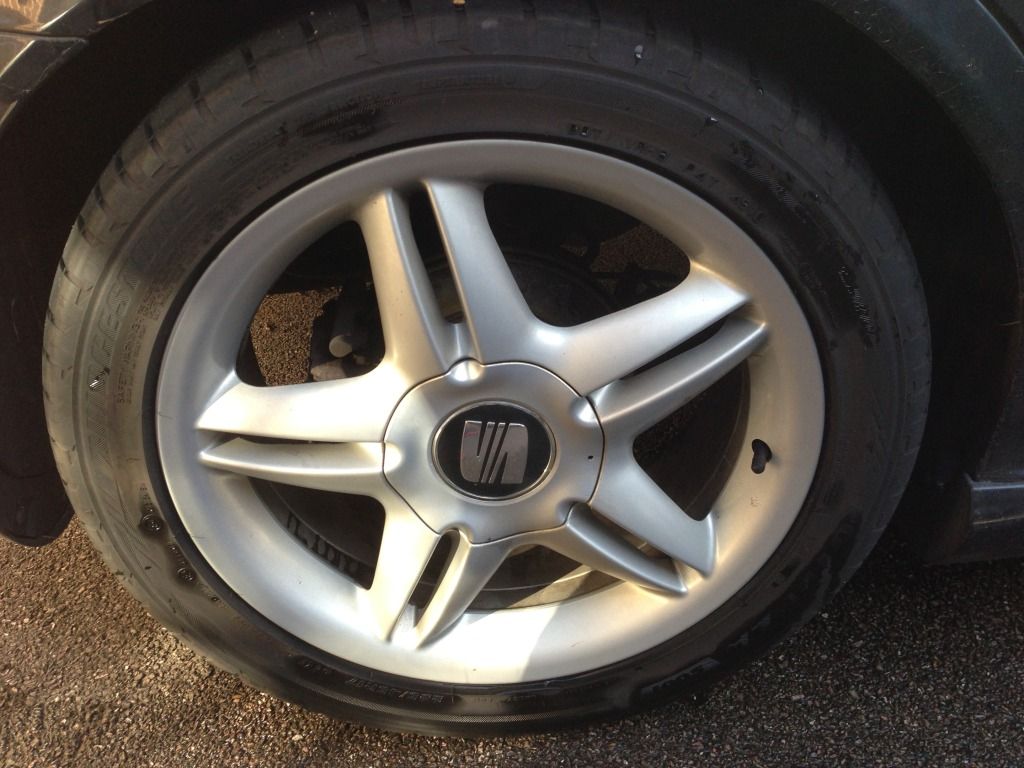
bit of an update
plasti dip arrived

So i thought id giv it a go on the wheels.
my plan is to do a test coat to see how it holds up and im thinking of doing my whole car mat black.
As this is just a test & i am very lazy i have left the wheels on the car, and im spraying outside in the cold and wind so already i know it wont be done to a perfect standard, but like i said its just a test.
first i cleaned them
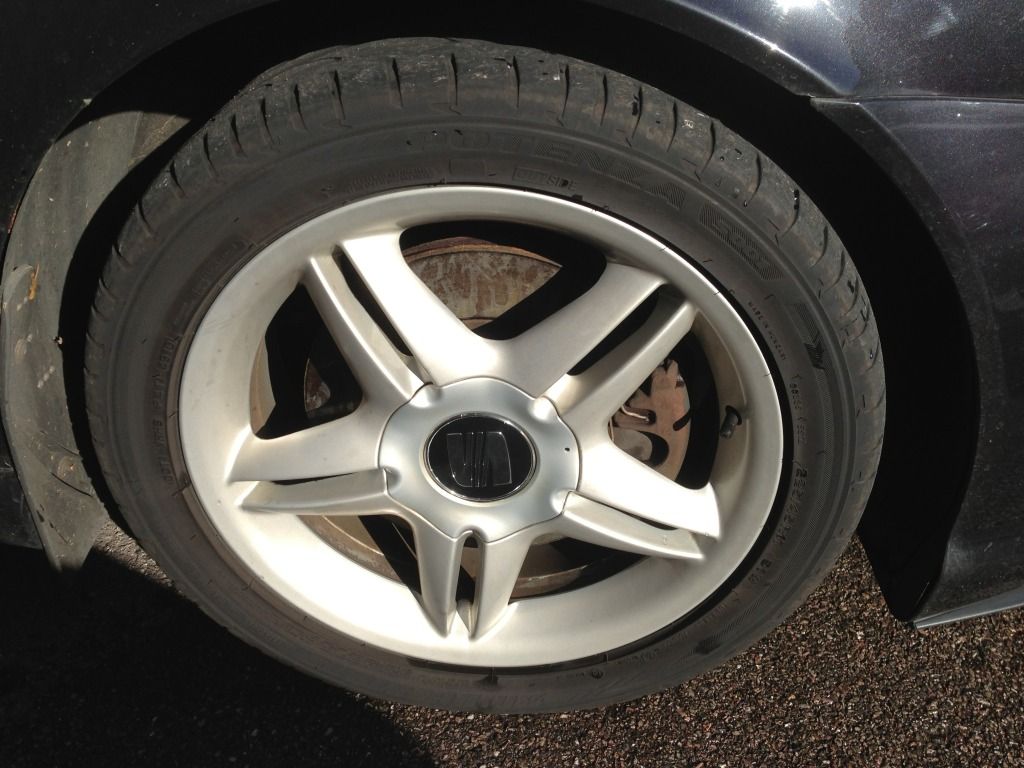
then applied a light first coat
then did the first wheel heavy and fast to see how it would come out
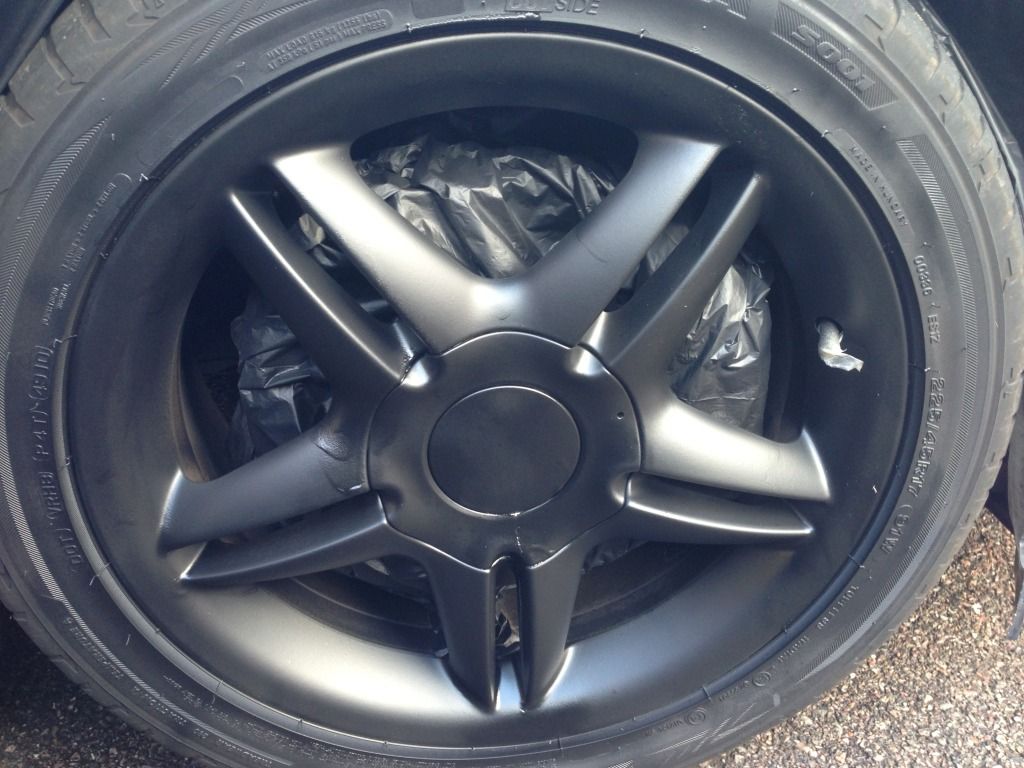
but did the other 3 properly and slowly built up the layers
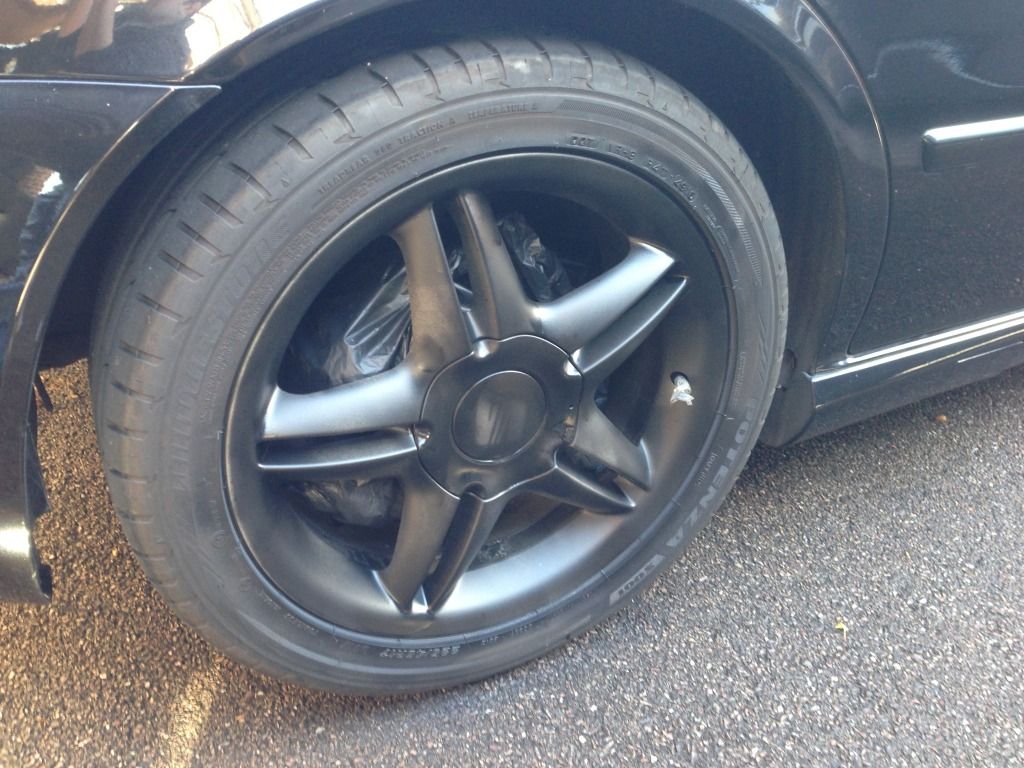
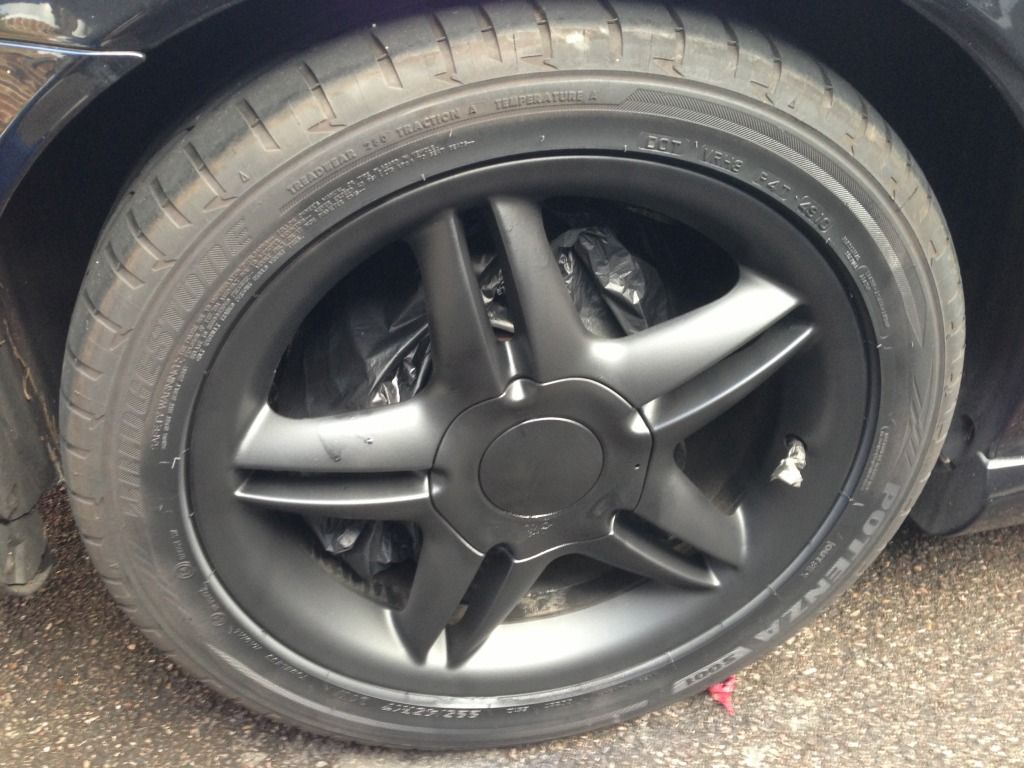
then some water from the cleaning started to drip from the bolt cover & S badge and wreck the dip
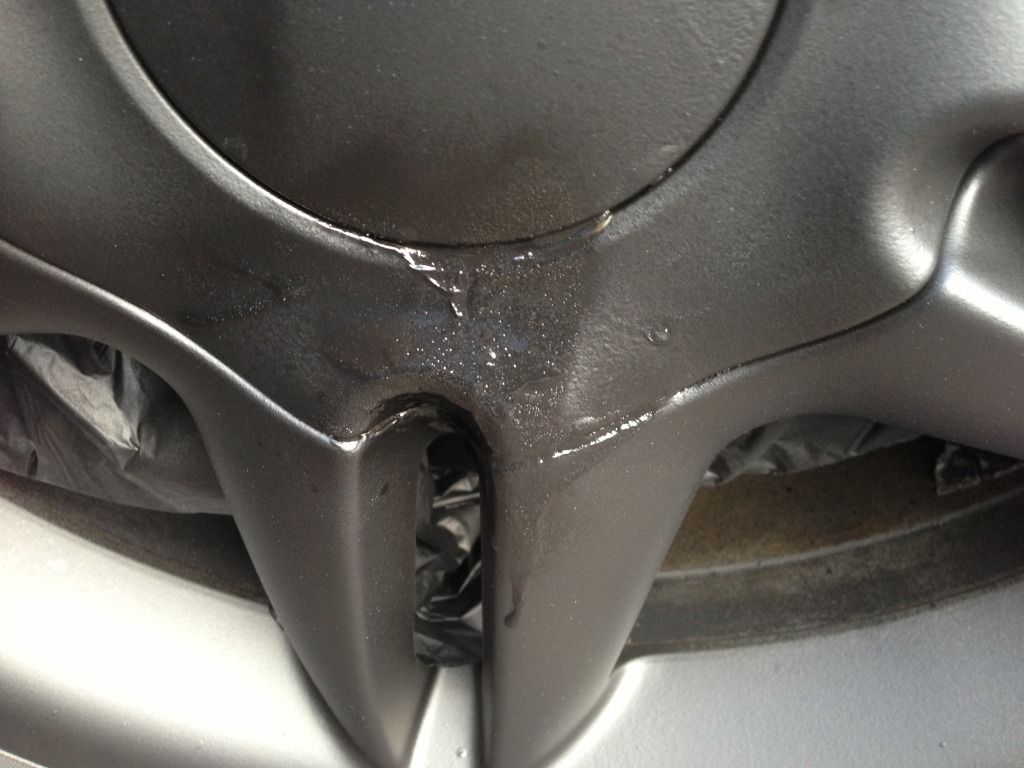
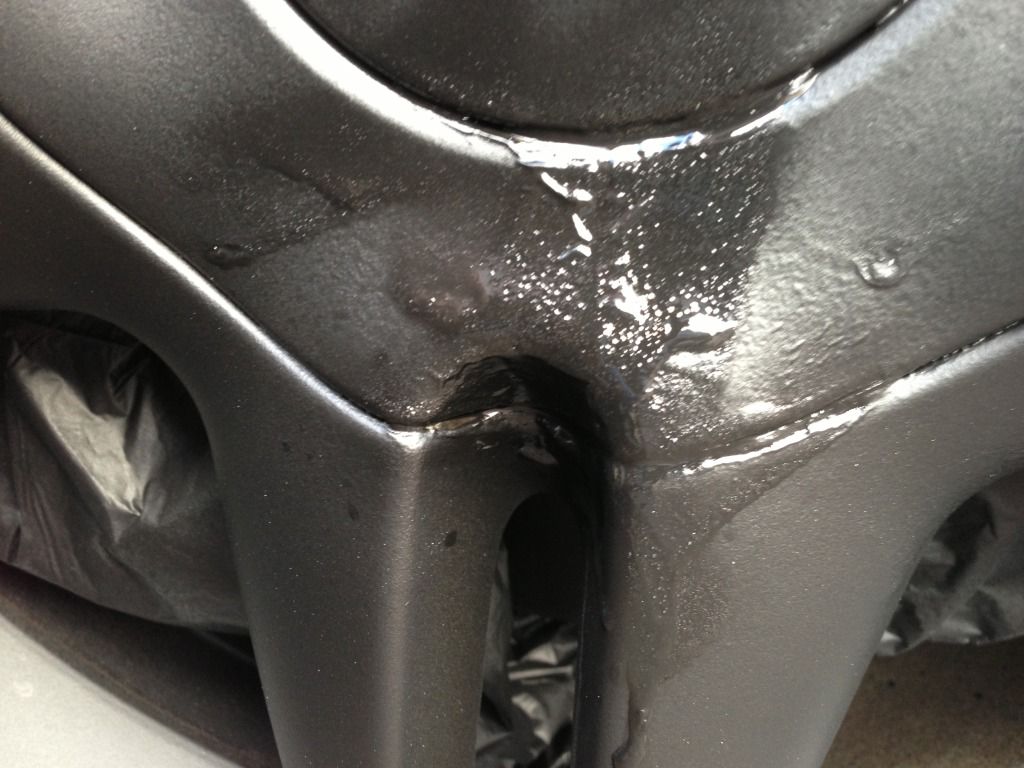
but after i pulled the dip off the center of the osf i re did it and touched up all the others
then moved the car back and touched up all of the bits i couldn't see properly
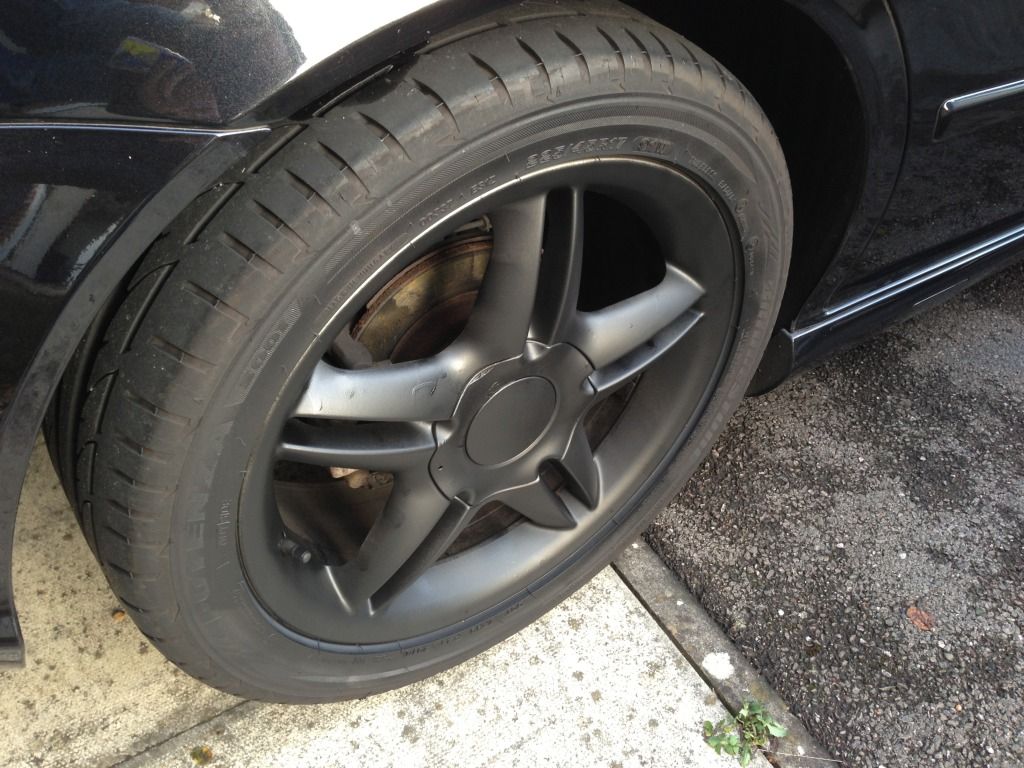
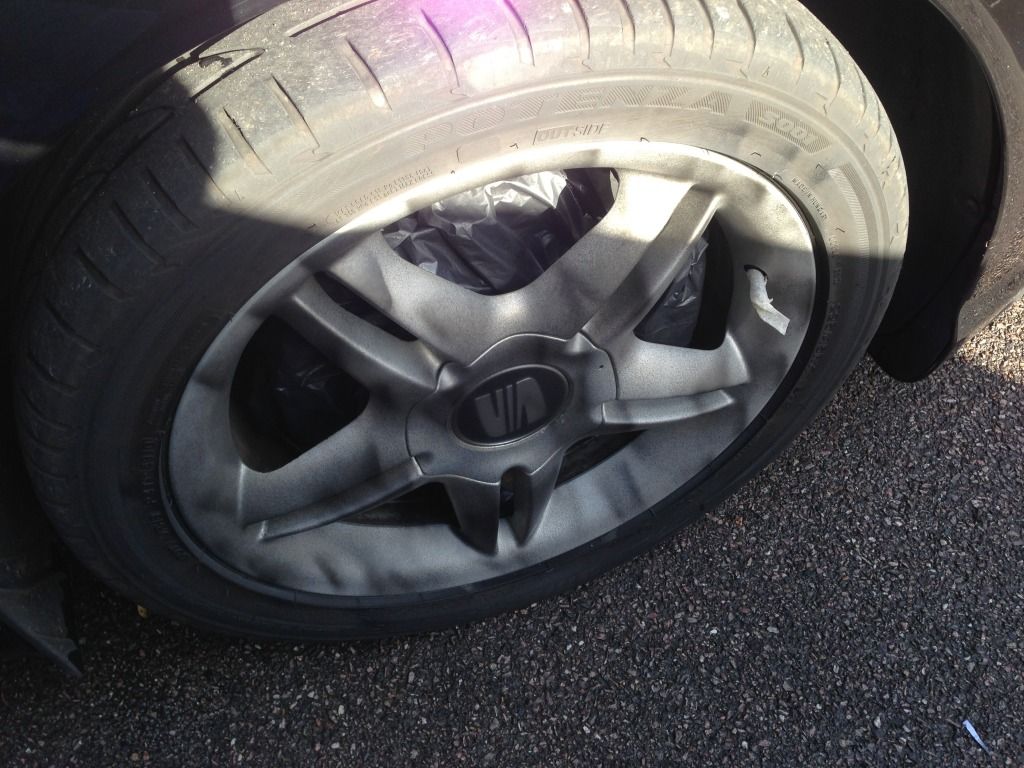
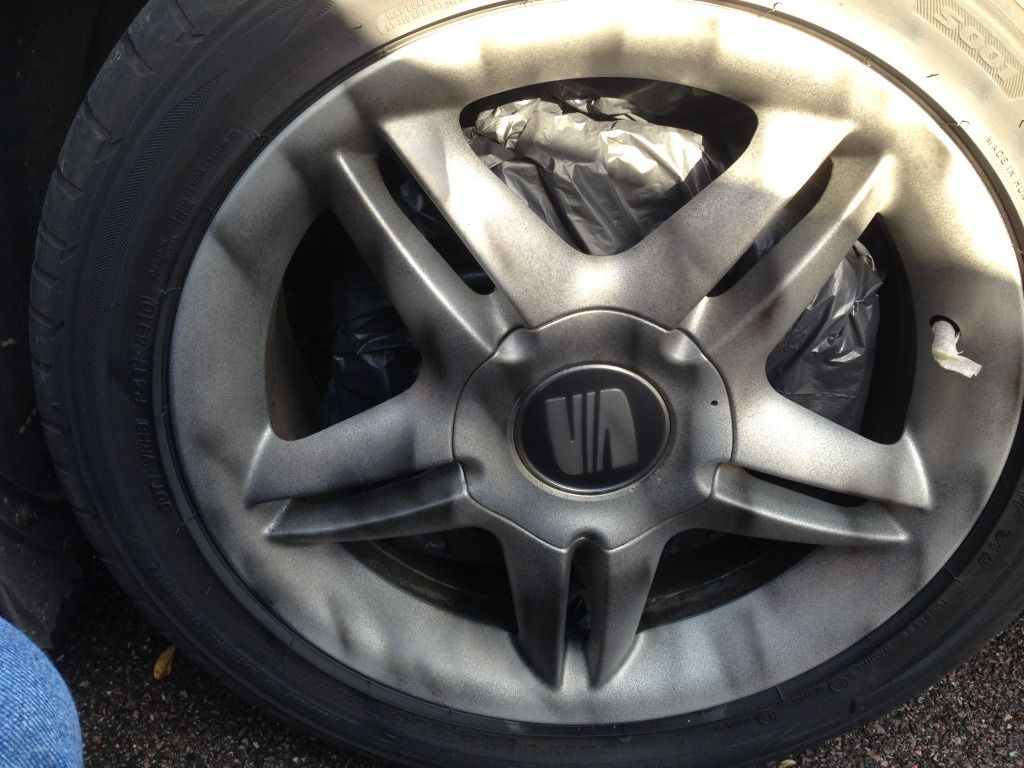
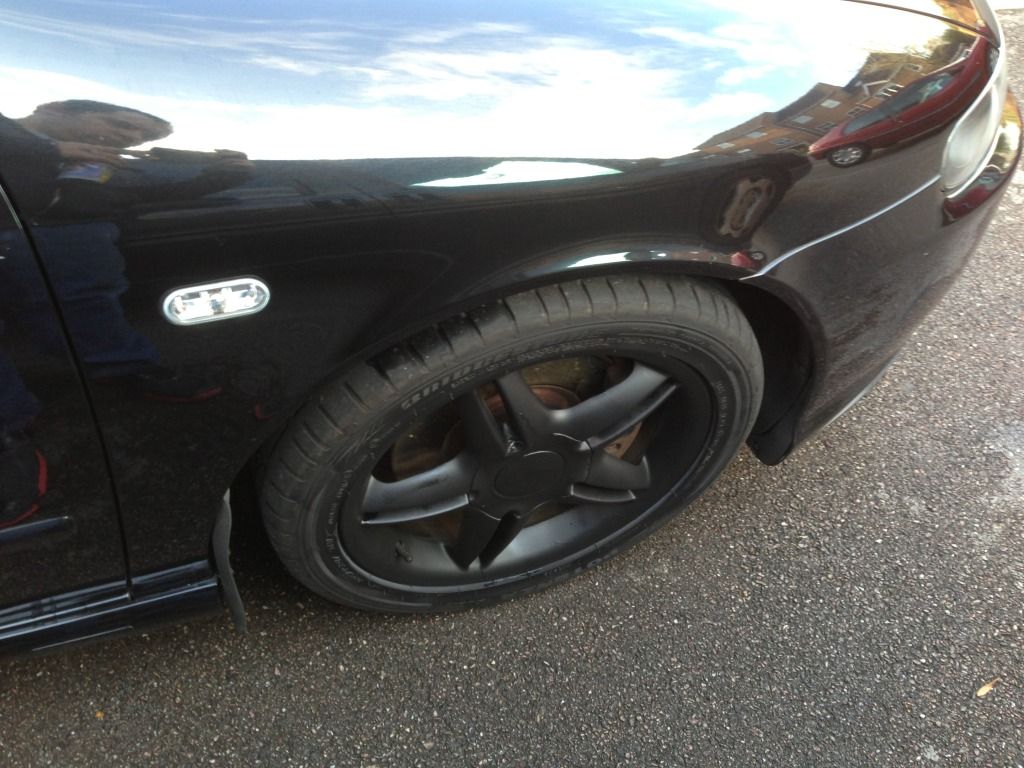
stealth mode
it looks better on the car than in the photos, all thats left to do now is peel the dip from the tyres and maby remove the dip from the S badge in the middle.
*** i know it is not done properly or to any sort of special finish.
This is a test to see if it is worth doing it properly & might convince me to dip the whole car.
Most people use 3-4 cans to do all 4 wheels i used 1.5 so i know its going to be a light/ easy to remove coat and i still have 4.5 cans left for doing it better next time if i like it & it holds up well. ***
plasti dip arrived
So i thought id giv it a go on the wheels.
my plan is to do a test coat to see how it holds up and im thinking of doing my whole car mat black.
As this is just a test & i am very lazy i have left the wheels on the car, and im spraying outside in the cold and wind so already i know it wont be done to a perfect standard, but like i said its just a test.
first i cleaned them
then applied a light first coat
then did the first wheel heavy and fast to see how it would come out
but did the other 3 properly and slowly built up the layers
then some water from the cleaning started to drip from the bolt cover & S badge and wreck the dip
but after i pulled the dip off the center of the osf i re did it and touched up all the others
then moved the car back and touched up all of the bits i couldn't see properly
stealth mode
it looks better on the car than in the photos, all thats left to do now is peel the dip from the tyres and maby remove the dip from the S badge in the middle.
*** i know it is not done properly or to any sort of special finish.
This is a test to see if it is worth doing it properly & might convince me to dip the whole car.
Most people use 3-4 cans to do all 4 wheels i used 1.5 so i know its going to be a light/ easy to remove coat and i still have 4.5 cans left for doing it better next time if i like it & it holds up well. ***
where did you get the dip?
direct from plastidip.co.uk £9 a can (cos i got 6) in stead of £16+ from ebay
Similar threads
- Replies
- 173
- Views
- 10K
