-
Welcome to our new sponsor Lecatona, a brand dedicated to enhancing performance for VAG group sports cars, including SEAT, Audi, Volkswagen and Škoda. Specializing in High Pressure Fuel Pump (HPFP) upgrades.
-
The forums will be offline for maintenance on Friday 15th November at 10pm for up to an hour. Thank you for your patience.
Audi S3 GT3582R stroker Build (previously GT3071r)
- Thread starter tufftybloke
- Start date
You are using an out of date browser. It may not display this or other websites correctly.
You should upgrade or use an alternative browser.
You should upgrade or use an alternative browser.
Just dropped the head off to Cotswold Engine Reconditioners and Bob (Flappers dad, nice bloke) gave it a once over and suggested that its usually only the exhaust guides that need changing as these wear the most (there was a lot of movement when he tried one of my new supertech exhaust valves in each guide) and the inlets were fine (checked those too). He checked the head for signs of warping and found nothing so no skim needed....
All good news, just the exhaust guides need to be replaced and the machining of the tensioner pulley mount to be done... should be able to pick it up at the beginning of next week...
Moral of this story is that exhaust valve guides take a hammering and this head did have some mileage on it (over 100k but don't know the exact figure) so if you are looking at getting a large port head for your own big turbo conversion then its worth getting these things done...
Should be in the region of £80 + vat to get this work done...
<tuffty/>
mush
Guest
ive recently spoken to jp from jnl racing (highest bhp 1.8t in uk, kerminator) and he suggests the same advice as above. its the guides that take a killing and if going for serious power then then its these that need the attention. keep it up dude!!
Ok... I have the head back now and I will look fit the valves and springs at some point over the next week....
What I am going to do though is finally fit my stereo gear as I want it in for Audi's in the Park....
I have the door panel off yesterday to size up the front speaker fitting and I think I have a bit of work there so I will start with the sub for now.
Here is a pic of the kit thats going in...

Will take pics etc and post up the results..
<tuffty/>
What I am going to do though is finally fit my stereo gear as I want it in for Audi's in the Park....
I have the door panel off yesterday to size up the front speaker fitting and I think I have a bit of work there so I will start with the sub for now.
Here is a pic of the kit thats going in...

Will take pics etc and post up the results..
<tuffty/>
Using the comprehensive instructions supply with the Andy Mac Stealth Sub I started taking the interior apart ready to fit the sub and the rest of the kit...
Took the front kick panel off from the passenger footwell followed by the sill trim (just the interior one). Then carefully removed the rear side panel... the instructions are clear but you still have to be wary of what you are doing to prevent damaging the panel and its fixings.
There is a big lump of polystyrene behind the rear panel which will be removed so I can get the amp in there..

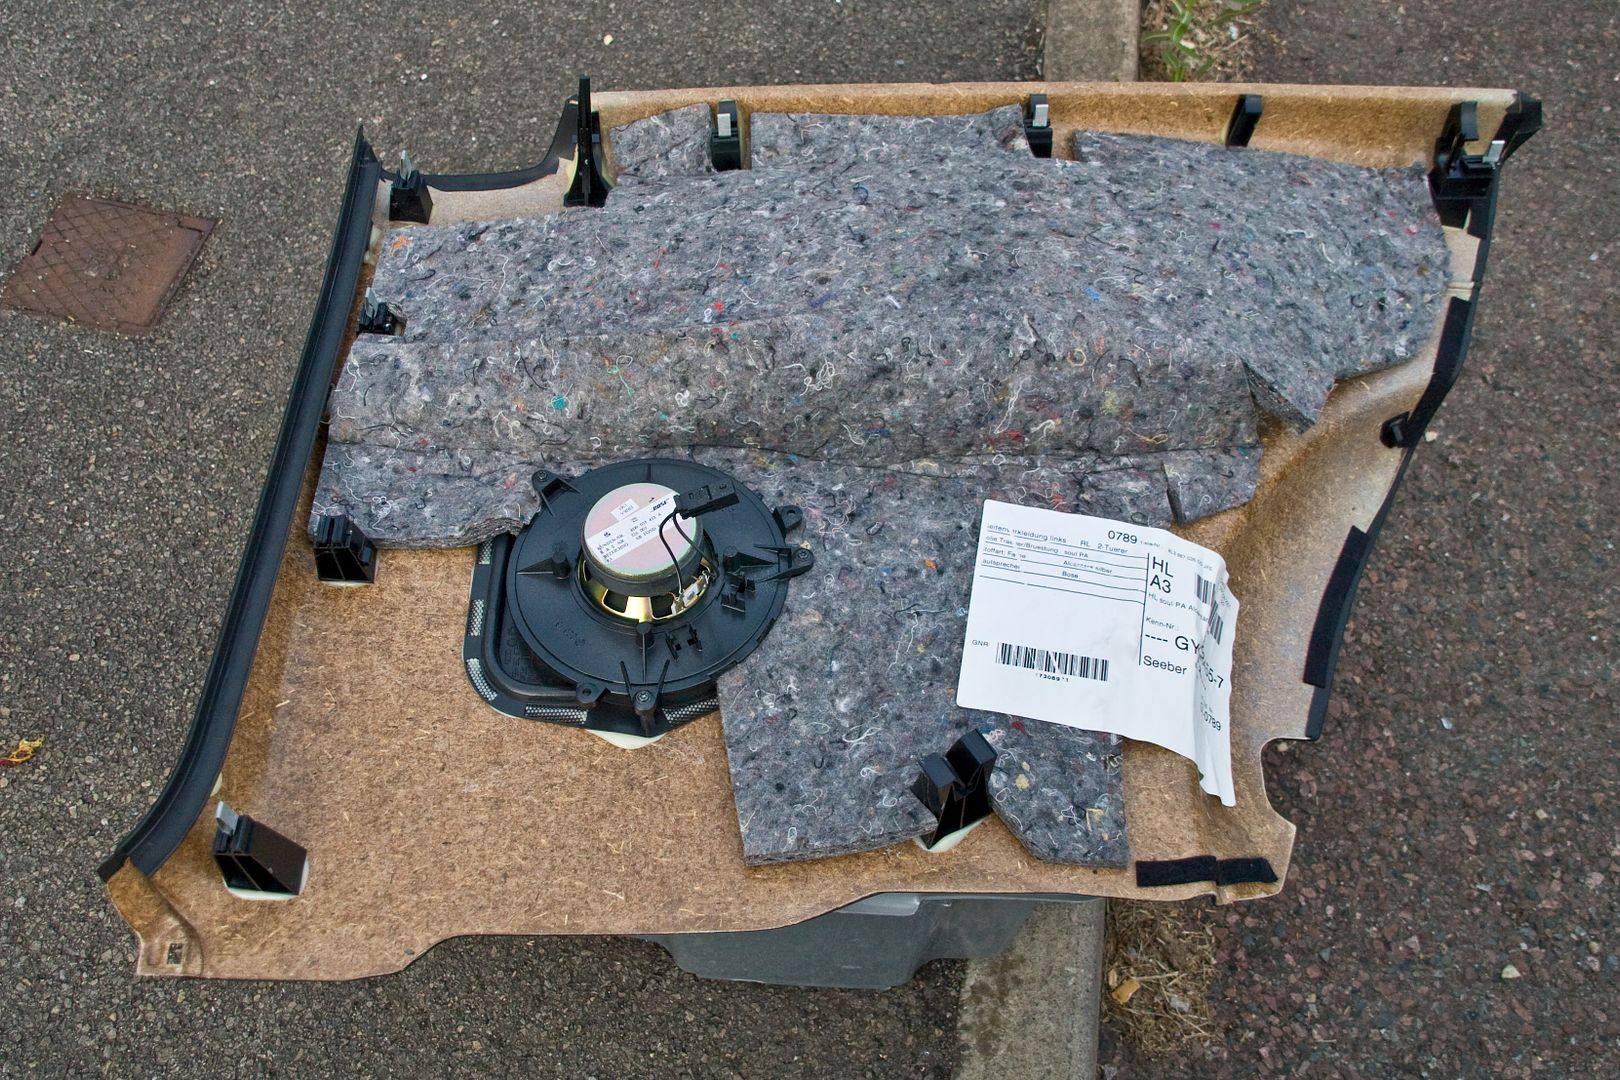
You can see in the pic below the some what pitiful 'Bose' rear speaker fitted to the rear panel (I have a full Bose system)...
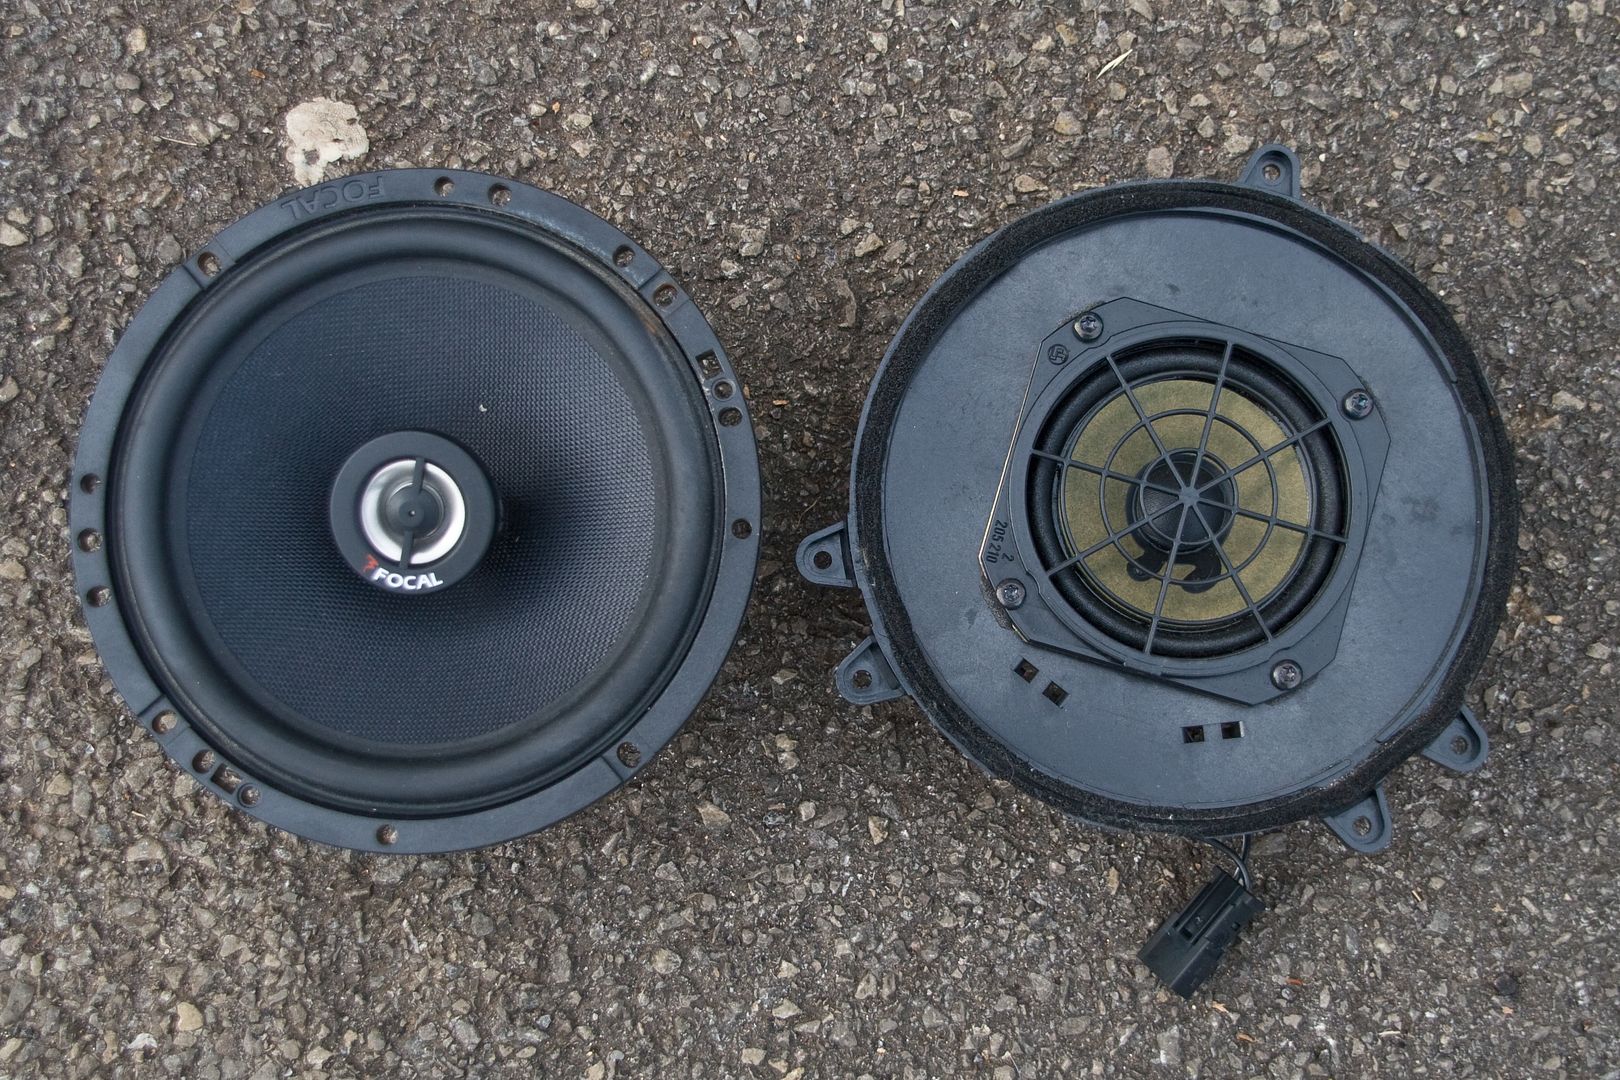
...and here removed in comparison to the Focal I am replacing it with...
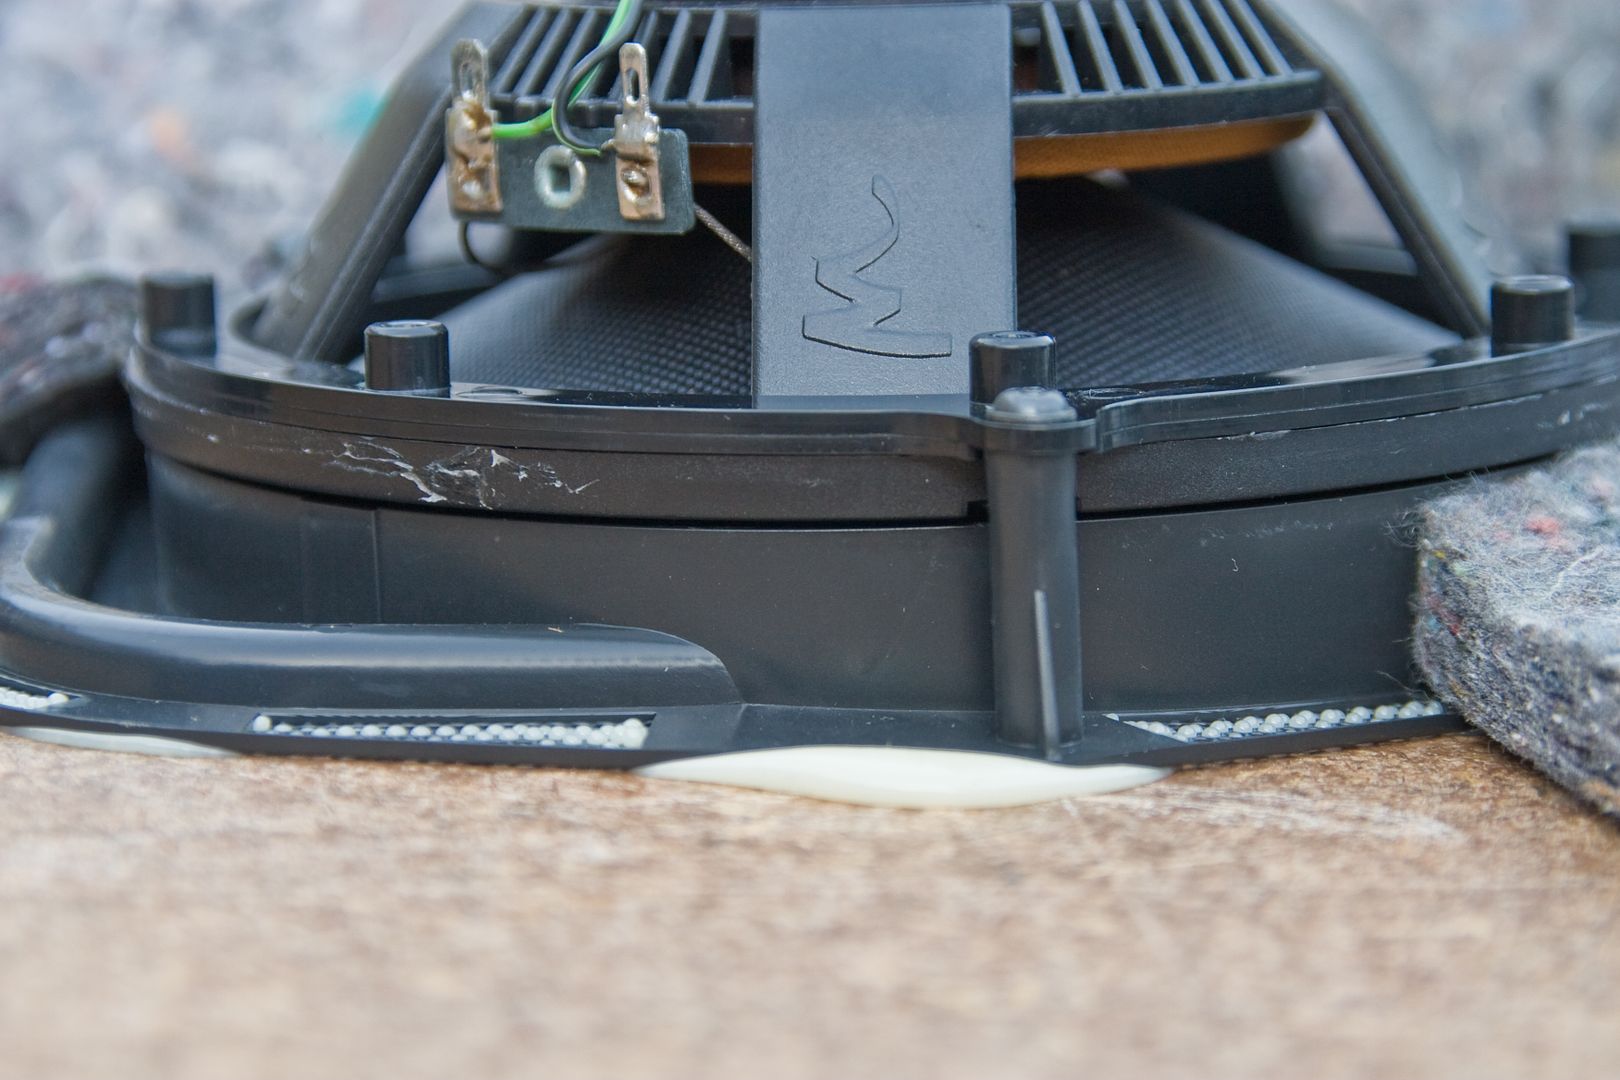
...although that too is not without its problems... fitted to the Autoleads adaptor its seems there is a little bit of a gap, I will sort this later with some trimming of the posts and sealant...
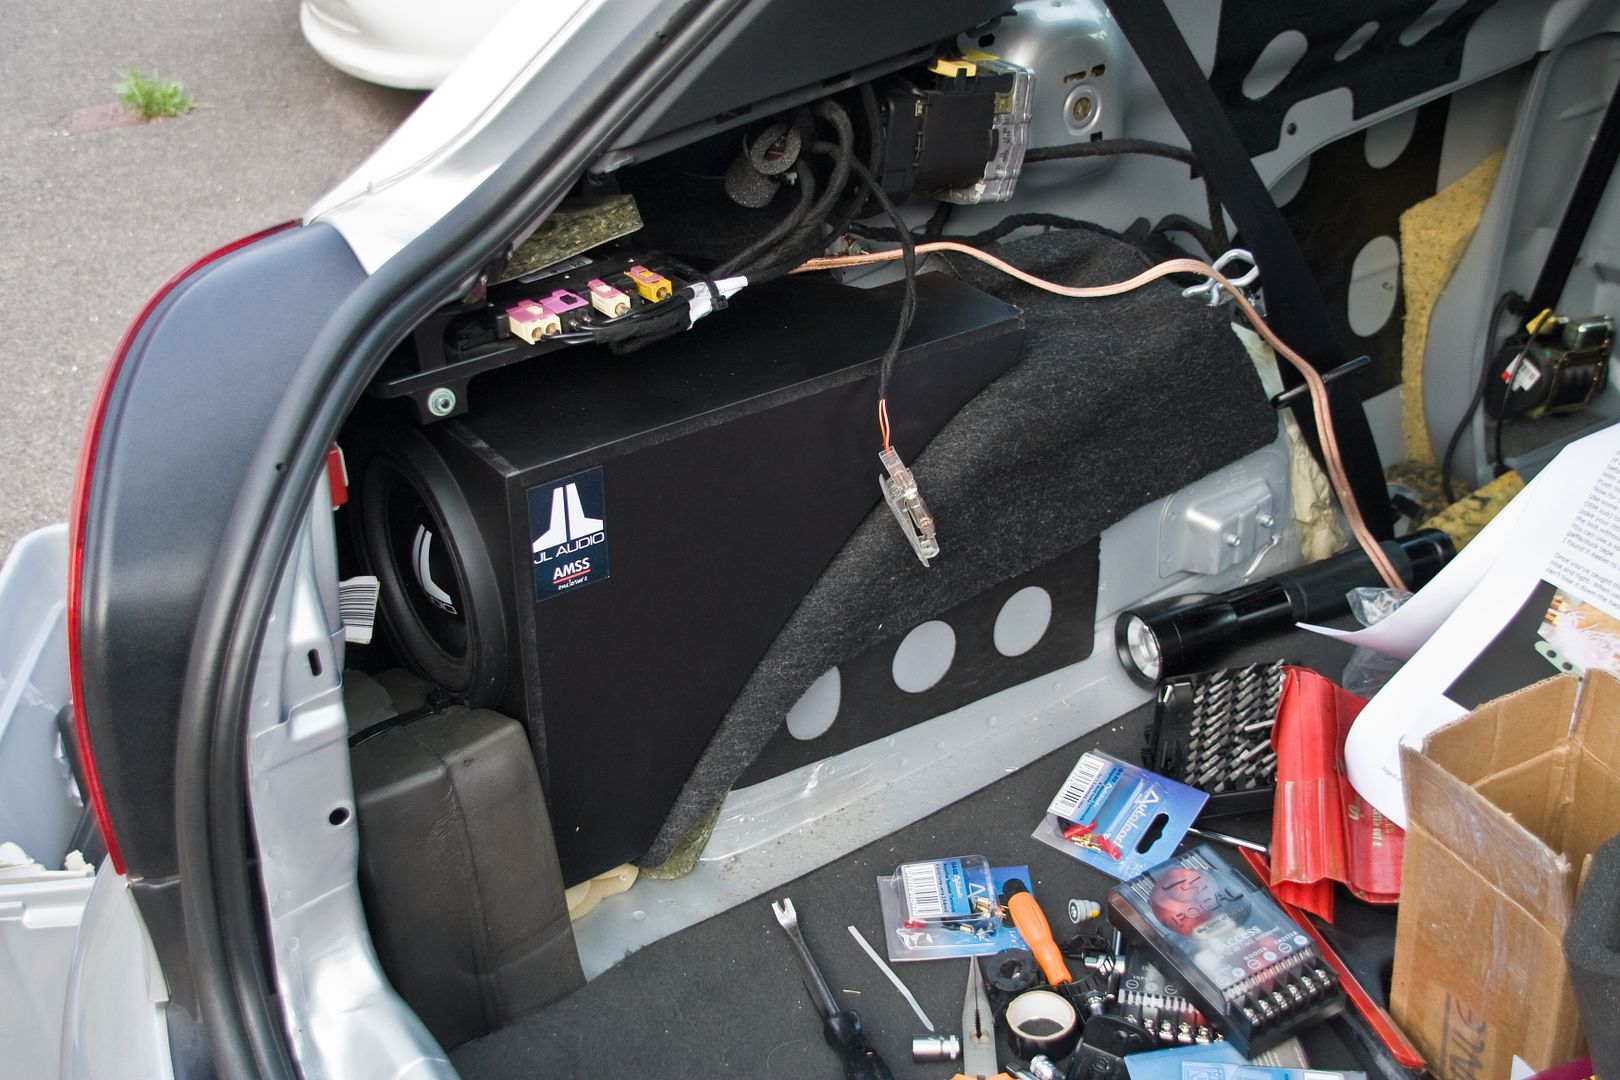
On to the sub fitting... I then removed the boot trim where the Bose sub hides... (again, clear instructions from Andy)

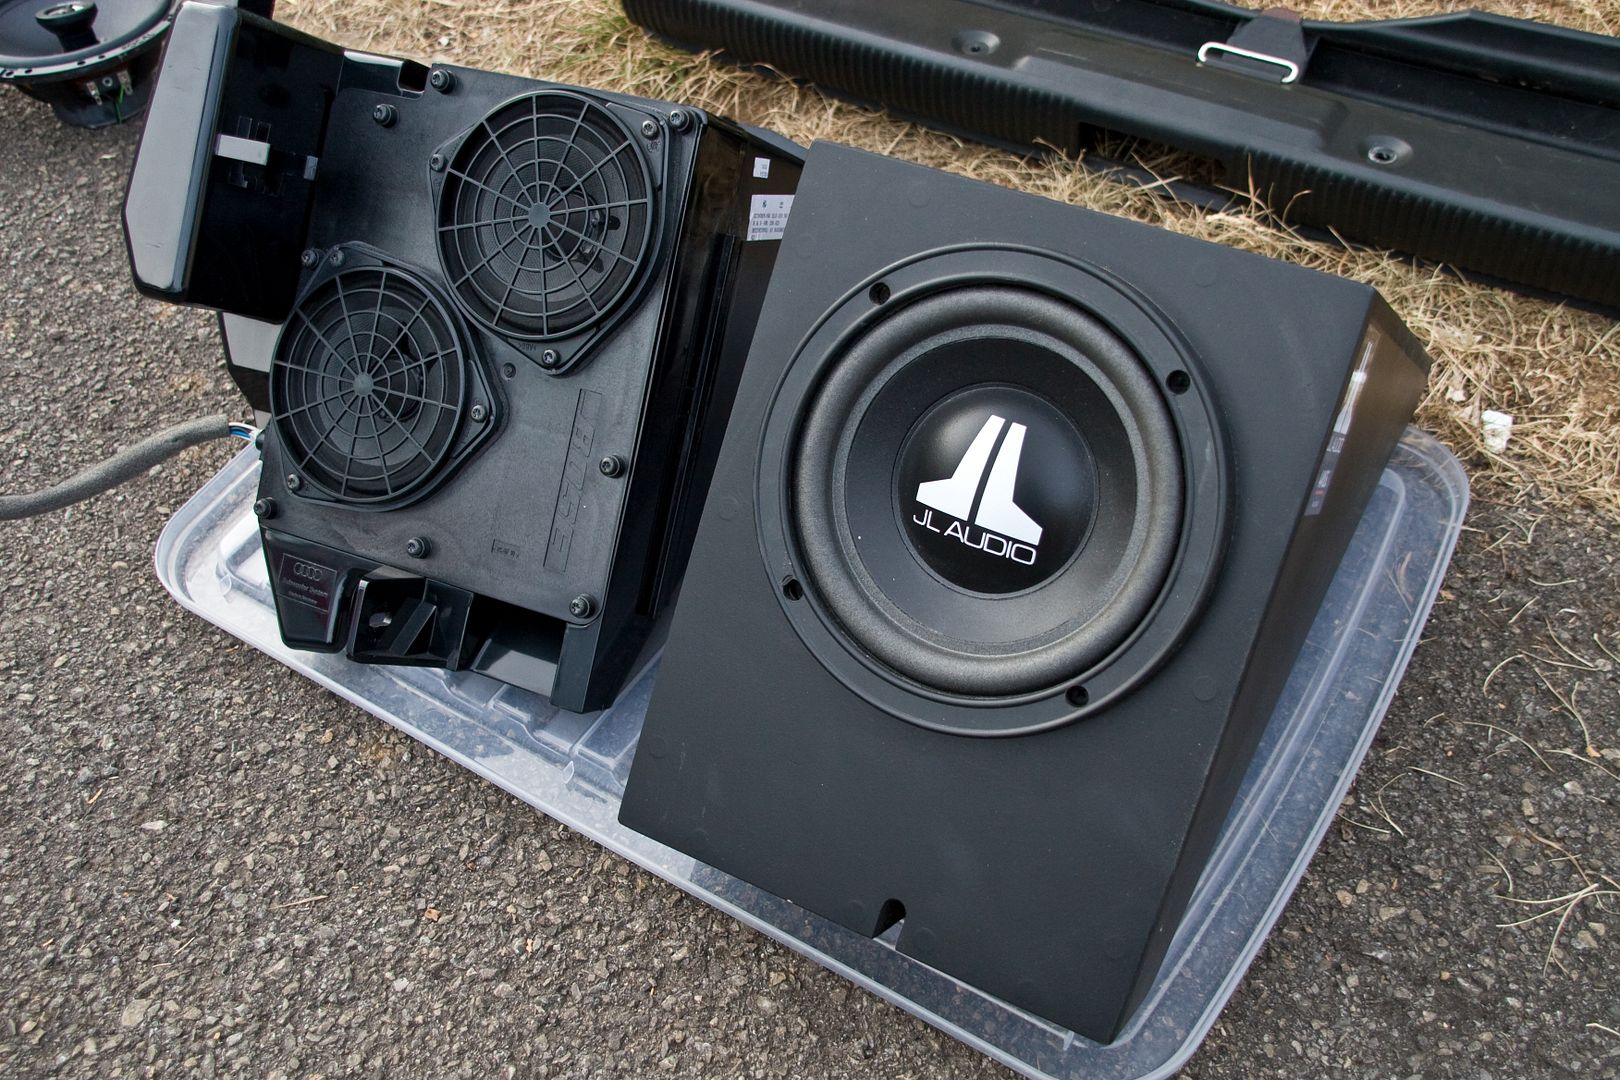
...once removed you can see the tupperware (Andy's words) sub in its entirity... clear instructions again on how to remove it and the mods needed to be done prior to fitting the sub box in...

...next to the AMSS...
...AMSS now fitted in...
...trim panel back in...
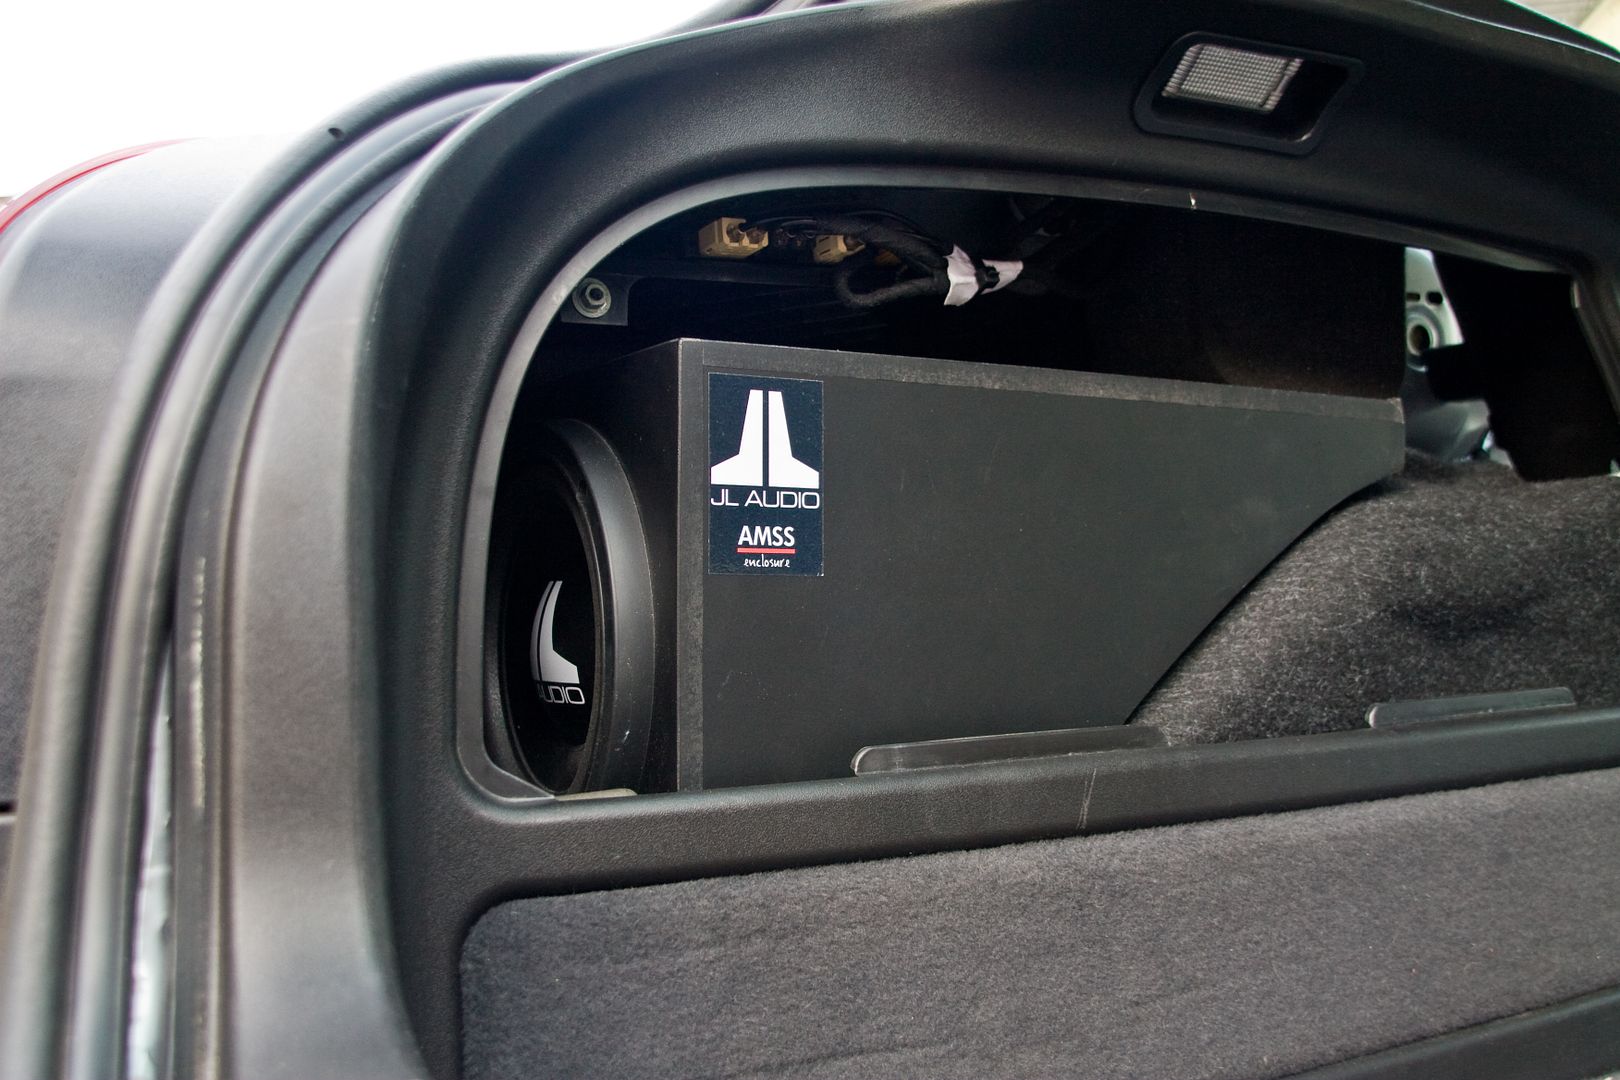
...and of course the reason for its being...

Good evenings work, more tomorrow hopefully...
<tuffty/>
Took the front kick panel off from the passenger footwell followed by the sill trim (just the interior one). Then carefully removed the rear side panel... the instructions are clear but you still have to be wary of what you are doing to prevent damaging the panel and its fixings.
There is a big lump of polystyrene behind the rear panel which will be removed so I can get the amp in there..

You can see in the pic below the some what pitiful 'Bose' rear speaker fitted to the rear panel (I have a full Bose system)...

...and here removed in comparison to the Focal I am replacing it with...

...although that too is not without its problems... fitted to the Autoleads adaptor its seems there is a little bit of a gap, I will sort this later with some trimming of the posts and sealant...

On to the sub fitting... I then removed the boot trim where the Bose sub hides... (again, clear instructions from Andy)

...once removed you can see the tupperware (Andy's words) sub in its entirity... clear instructions again on how to remove it and the mods needed to be done prior to fitting the sub box in...

...next to the AMSS...

...AMSS now fitted in...

...trim panel back in...

...and of course the reason for its being...

Good evenings work, more tomorrow hopefully...
<tuffty/>
Managed to get a little more done tonight but with dodging the showers and getting the car clear of stuff so I can driver her to work tomorrow I didn't get as much done as I would have liked...
Removed the drivers side rear panel..
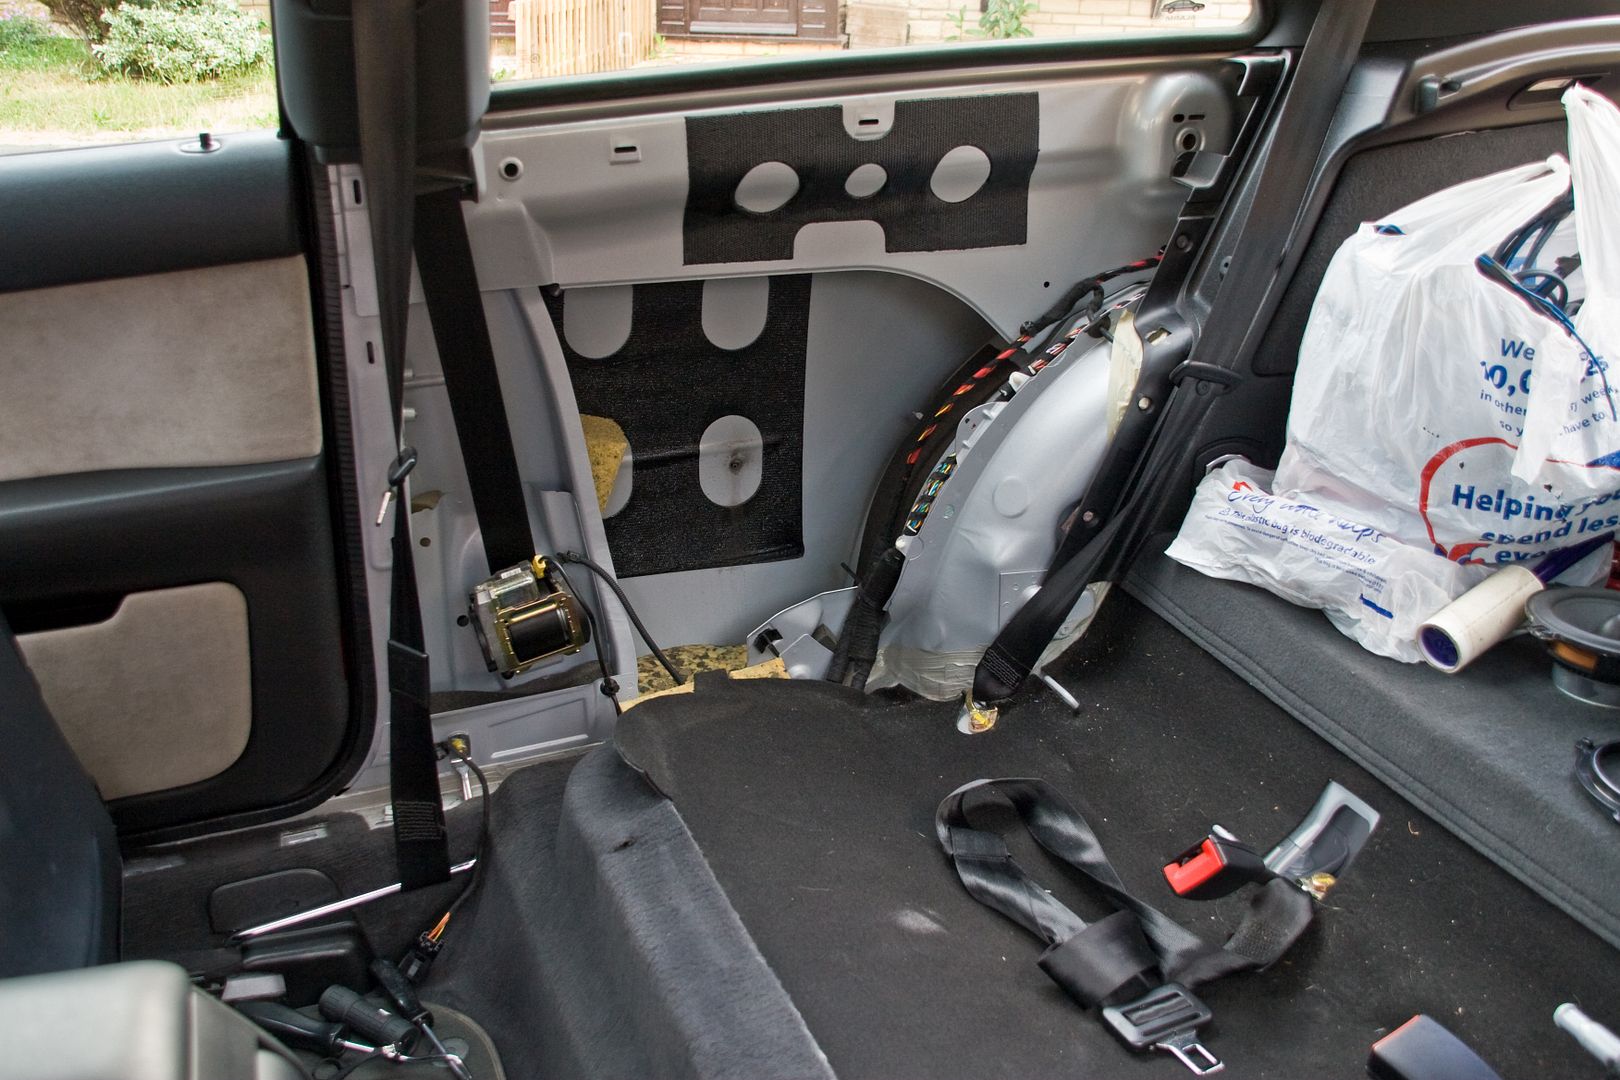
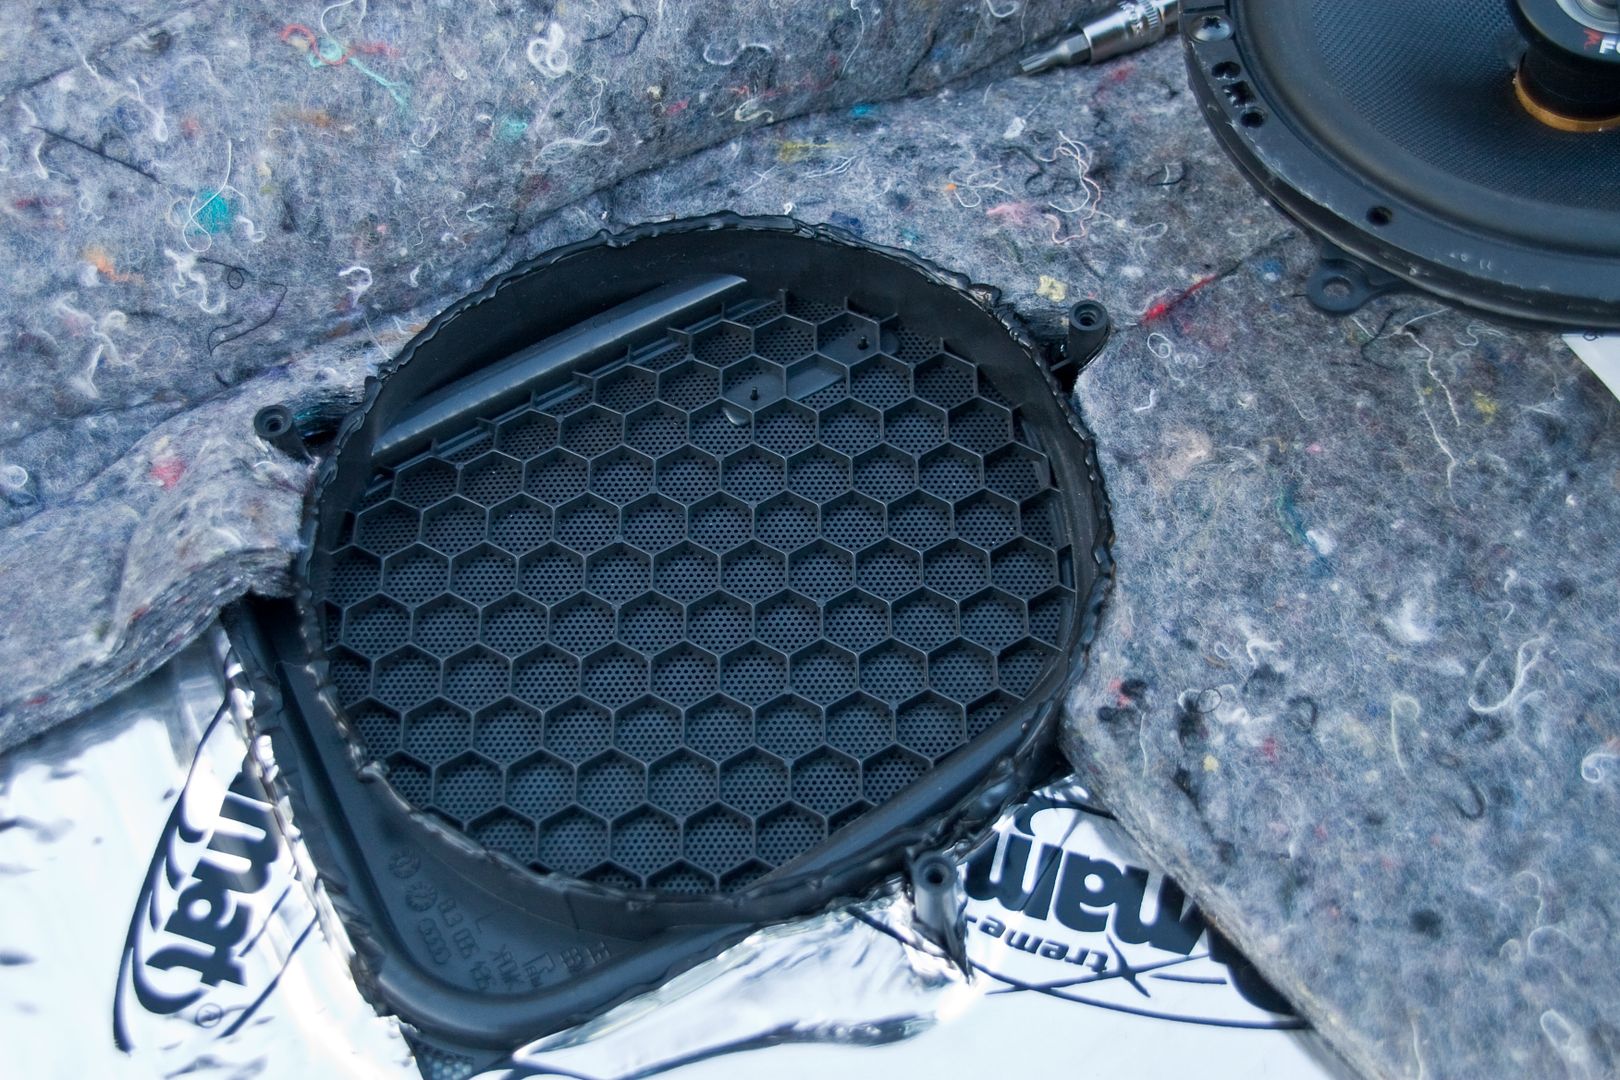
I bought a couple of Dynamat packs that come with a couple of (quite frankly) small pieces in each designed to sure up a pair of speakers... I didn't want to go silly with the stuff (mainly because its bloody expensive stuff and heavy) just stiffen the immediate area around the speakers...
The mat was fairly warm from being in the car all day but I used a heat gun to warm the panel and heat the mat after placement to smooth it into the contours...

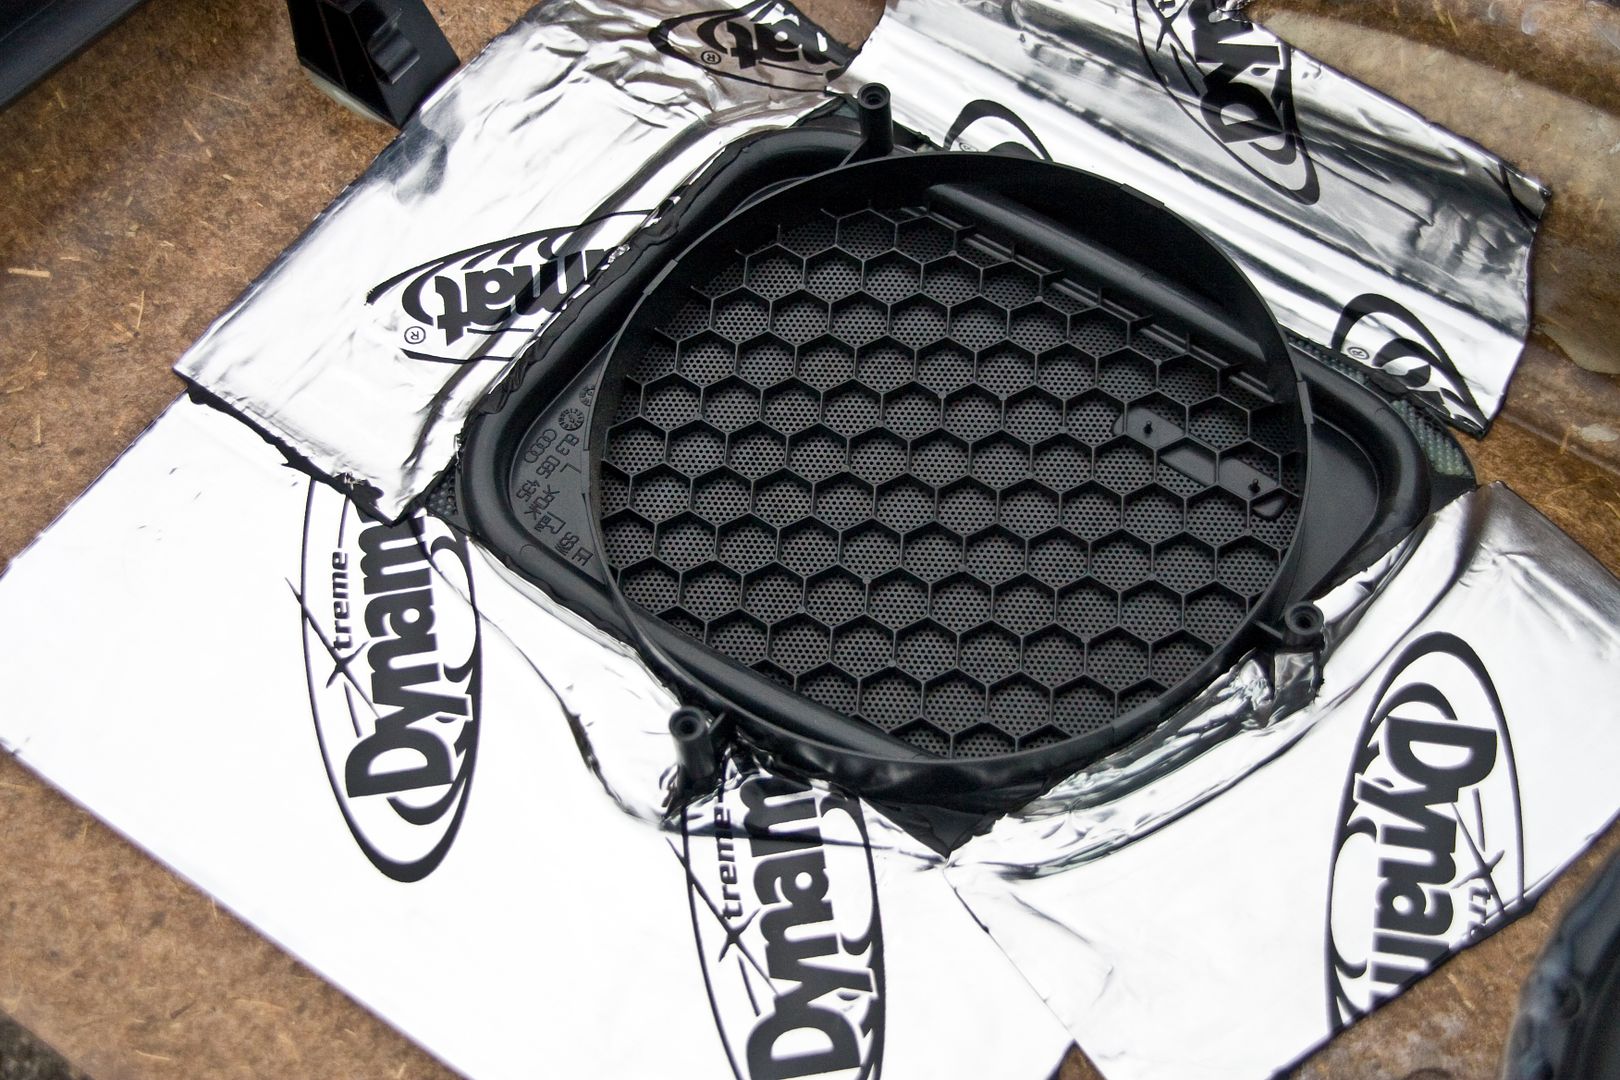
...then used a hot glue gun to stick the original sound deadening back down where I have pulled it out the way and where it had detached itself over the years...
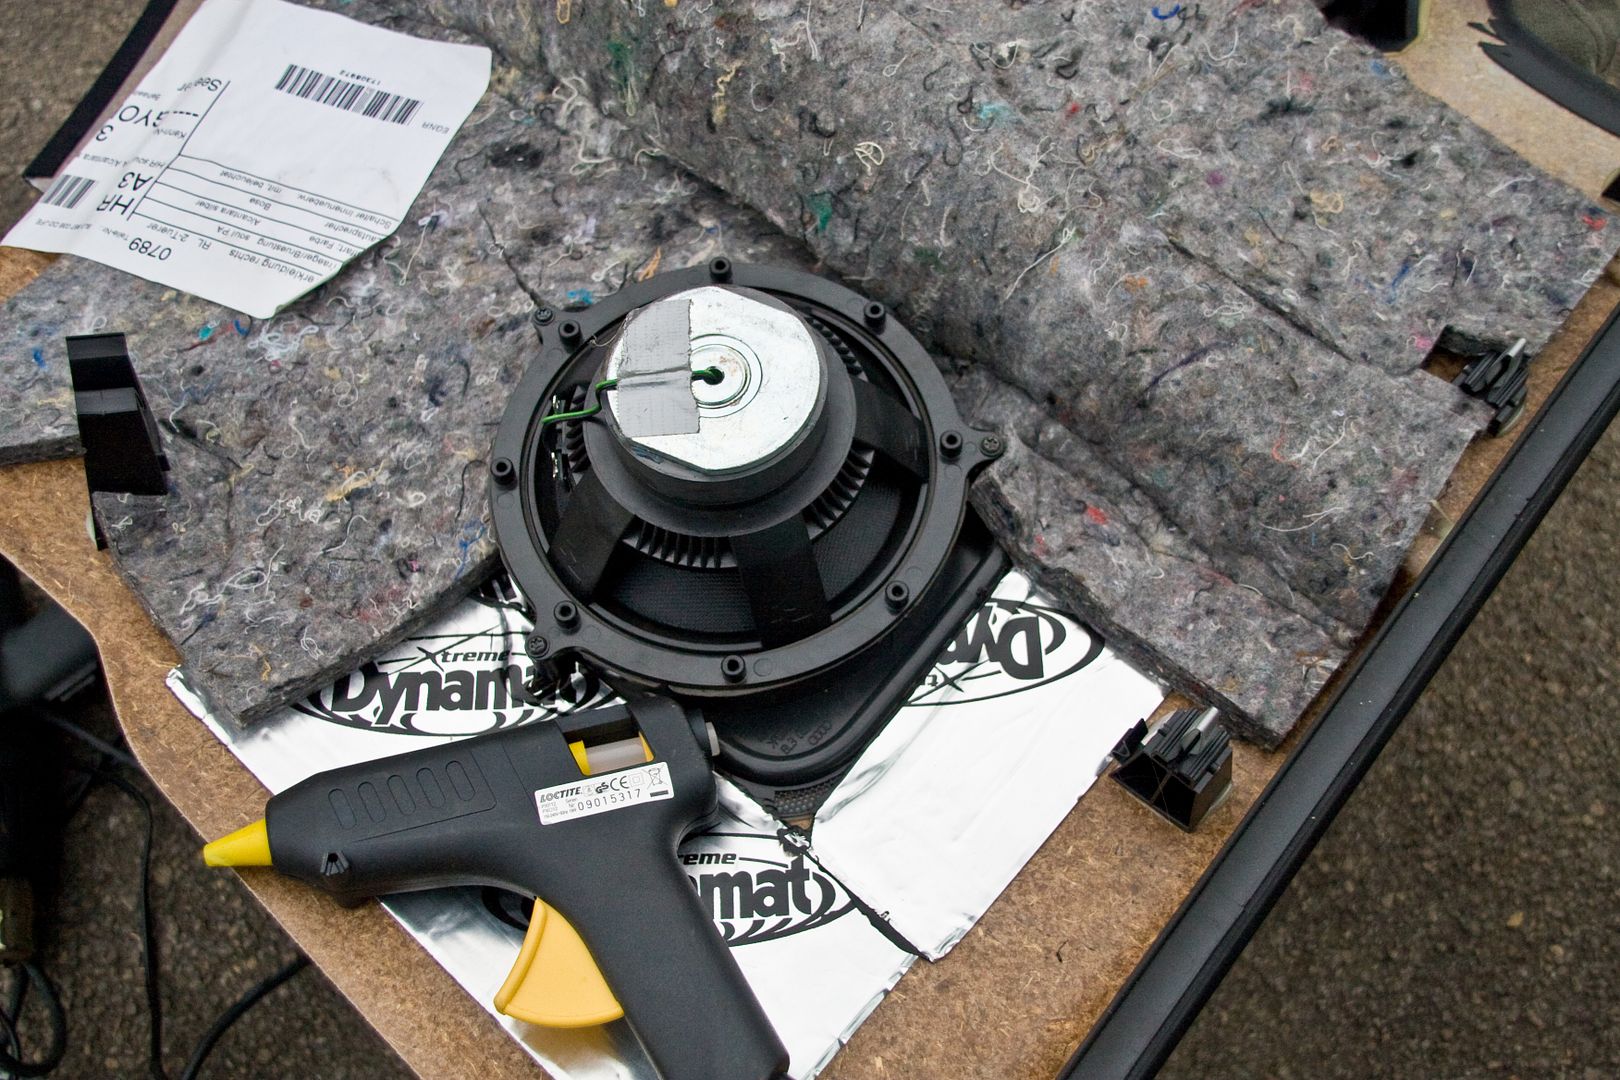
Just need to get some silicon sealant to use on the adaptors and change the spade connections on the OEM speaker looms and thats job done... should be noted that the Focal 165's I am using have an angled tweeter that rotates... I have angled this to point up and slightly back as the speakers are positioned in front of the rear passengers...
Wiring tomorrow if the showers hold off then I can mount the amps and make brackets if need be to support them and its pretty much done...
This install is going quite nicely really, much easier than some of the ones I have done in the past where I have done door builds for speakers and built amp racks and sub boxes...
Once I have finished this install then I will have a go at my other mode of transport
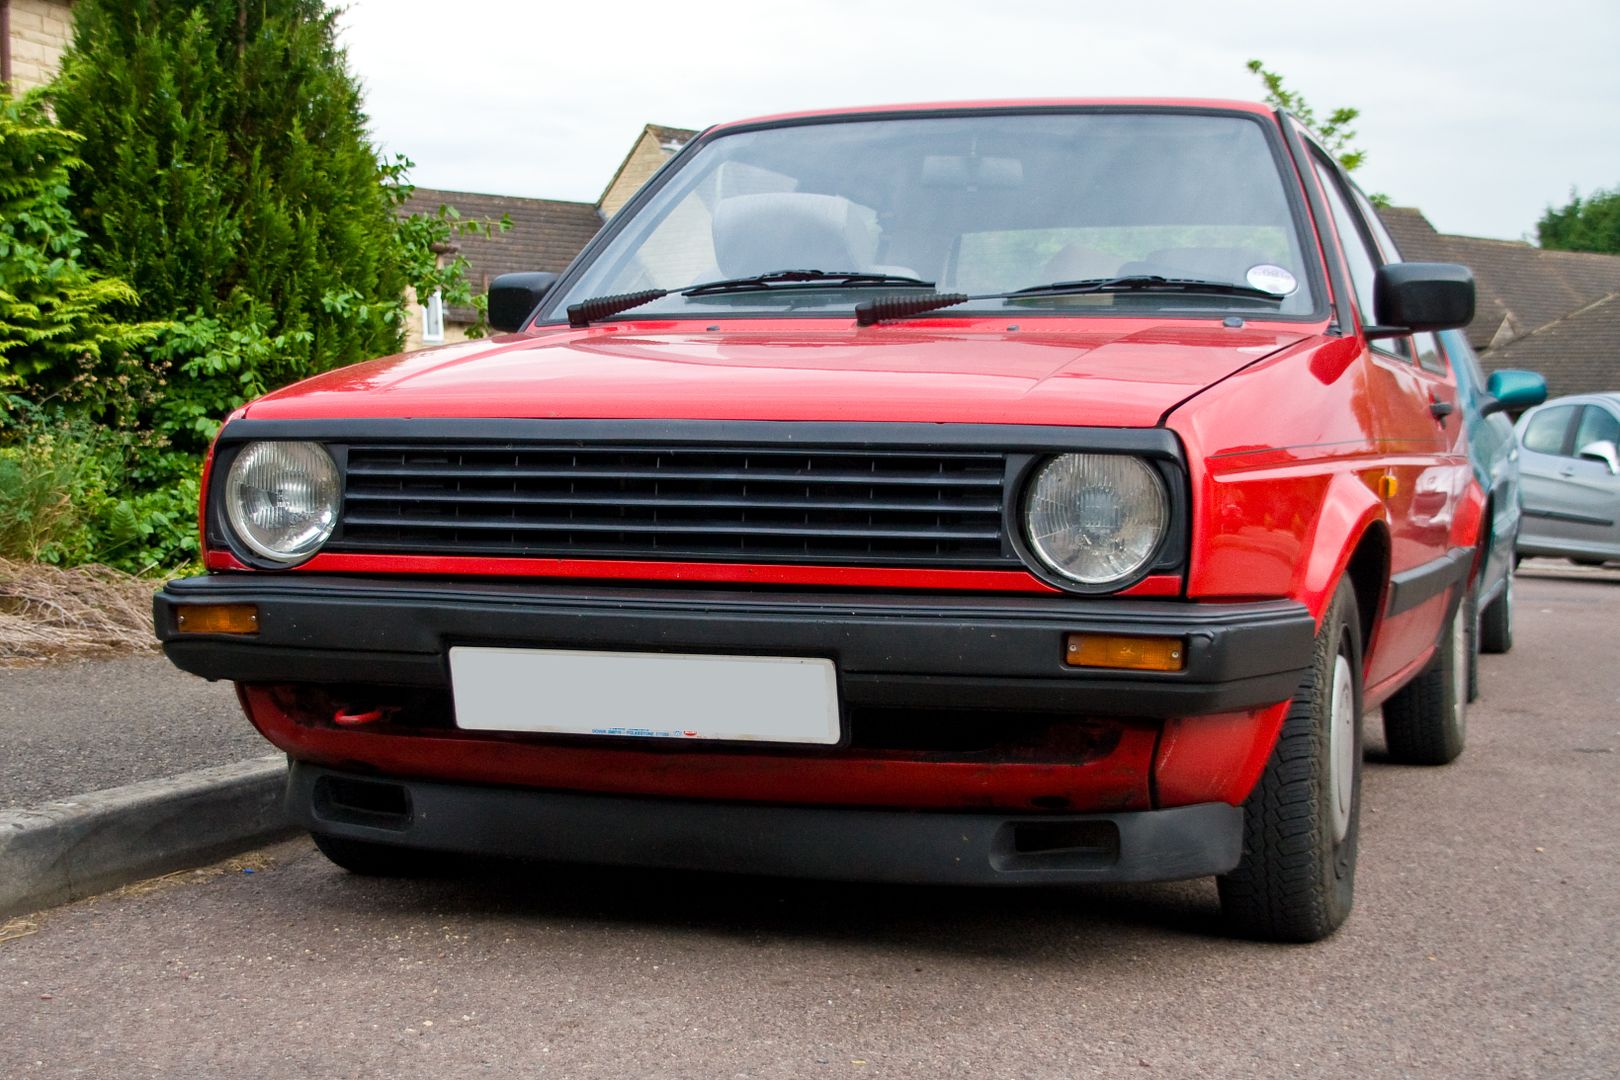
<tuffty/>
Removed the drivers side rear panel..

I bought a couple of Dynamat packs that come with a couple of (quite frankly) small pieces in each designed to sure up a pair of speakers... I didn't want to go silly with the stuff (mainly because its bloody expensive stuff and heavy) just stiffen the immediate area around the speakers...
The mat was fairly warm from being in the car all day but I used a heat gun to warm the panel and heat the mat after placement to smooth it into the contours...


...then used a hot glue gun to stick the original sound deadening back down where I have pulled it out the way and where it had detached itself over the years...

Just need to get some silicon sealant to use on the adaptors and change the spade connections on the OEM speaker looms and thats job done... should be noted that the Focal 165's I am using have an angled tweeter that rotates... I have angled this to point up and slightly back as the speakers are positioned in front of the rear passengers...
Wiring tomorrow if the showers hold off then I can mount the amps and make brackets if need be to support them and its pretty much done...
This install is going quite nicely really, much easier than some of the ones I have done in the past where I have done door builds for speakers and built amp racks and sub boxes...
Once I have finished this install then I will have a go at my other mode of transport

<tuffty/>
Audio? WTF! Listen to the tubby goin instead!
Ive now unsubscribed from this topic because of these past posts. lol.
(looking great as usual tho.)
Ive now unsubscribed from this topic because of these past posts. lol.
(looking great as usual tho.)
just as well tuffty has'nt wobbled on about "detailing" yet..
{gets coat.... }

<tuffty/>
painted floor this afternoon... bling floor -
Hah! detailing the floor! LOL.... Tony polishing the sign and you the floor... resistance (to detailing) is futile
![Cool [B)] [B)]](/forums/styles/seatcupra/oldforumsmileys/shades.gif)
<tuffty/>
erm.... i may have, erm... kinda, actually used it this week on my audi..
in my defence i did make a shambolic attempt at washing it, merely scraping off the seagull shyte which it attracts with regularity
"tuffty" made me do it... its his fault
i may also have a box of polishing "stuff" too... but not used it myself as yet,... i have resisted thus far

in my defence i did make a shambolic attempt at washing it, merely scraping off the seagull shyte which it attracts with regularity
"tuffty" made me do it... its his fault
i may also have a box of polishing "stuff" too... but not used it myself as yet,... i have resisted thus far

erm.... i may have, erm... kinda, actually used it this week on my audi..
in my defence i did make a shambolic attempt at washing it, merely scraping off the seagull shyte which it attracts with regularity
"tuffty" made me do it... its his fault
i may also have a box of polishing "stuff" too... but not used it myself as yet,... i have resisted thus far

I am gonna polish a wing and clean a wheel then leave it so you have to finish it off MWAHAHAHAHAHAHAHA!!!! etc...
...or just give it a full detail for you like last time
<tuffty/>
Due to my other job as taxi to my kids I didn't get much done today really... managed to remove the connects2 iPod controller for my old Sony HU I fitted when I first got the car... I left it in there when I change the HU over to the Alpine...
Then set about removing even more trim (the glove box this time) to start running cables...
Started with the sub amp RCA lead, amp remote wire and passenger side front speaker cables..
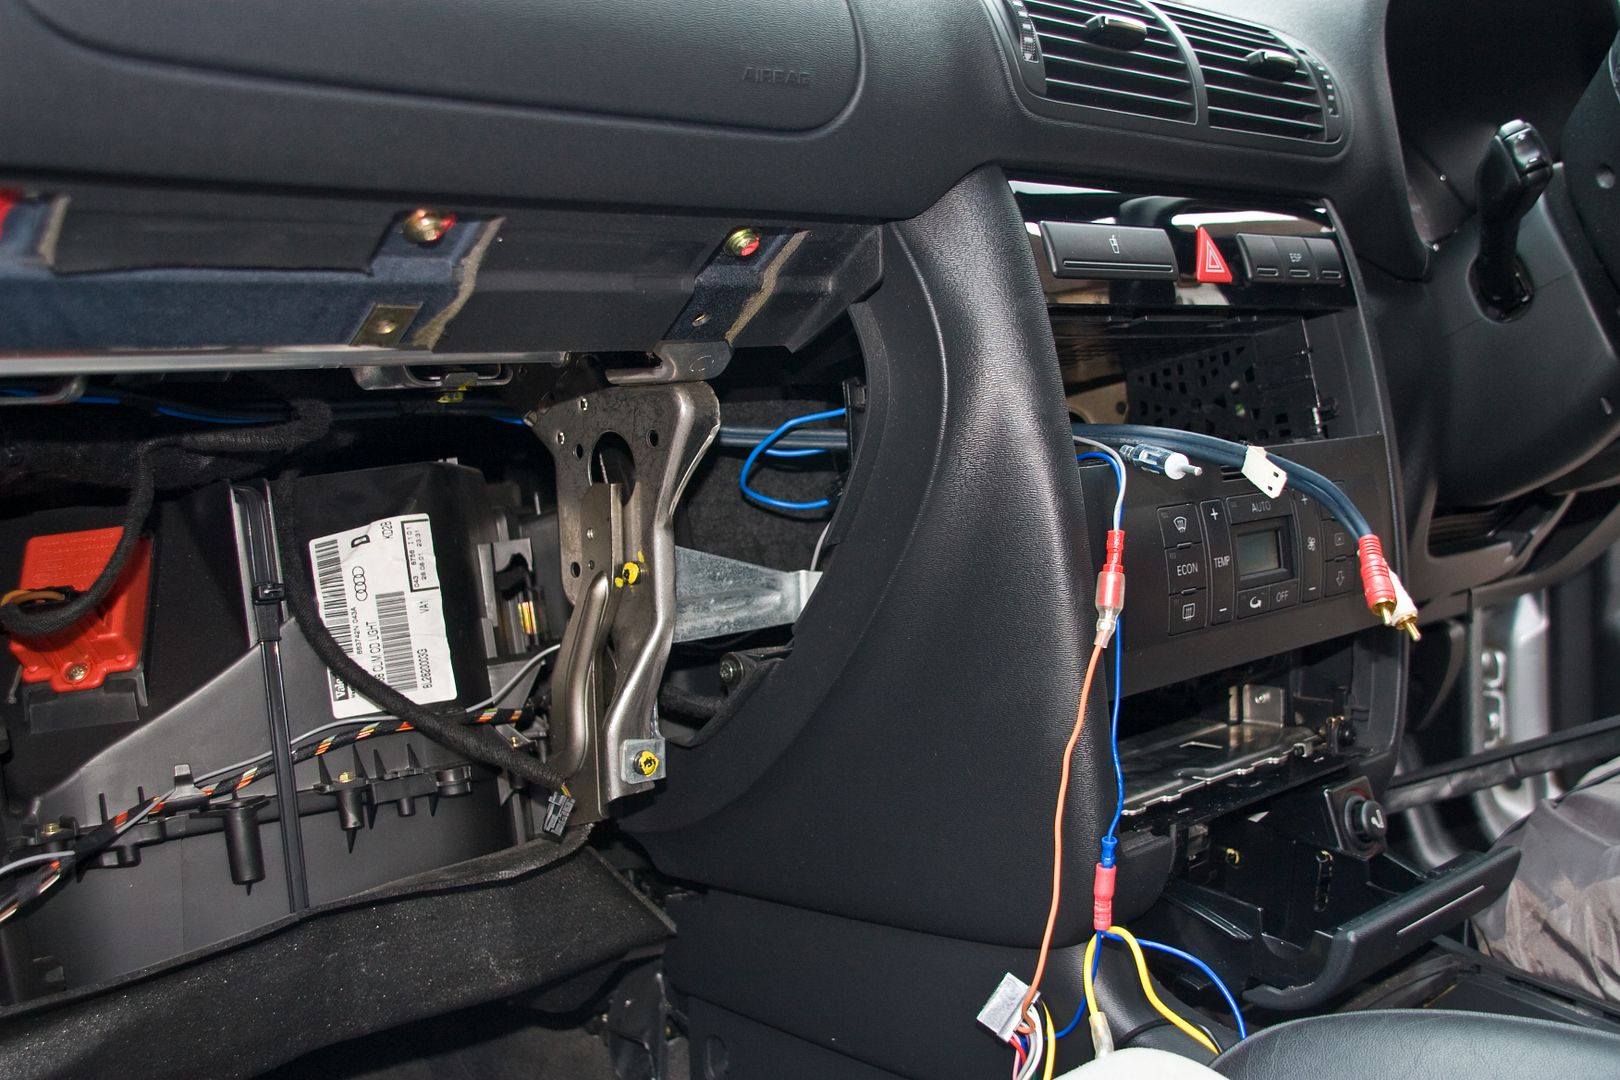
...cable tied to the loom to keep it out of the way...
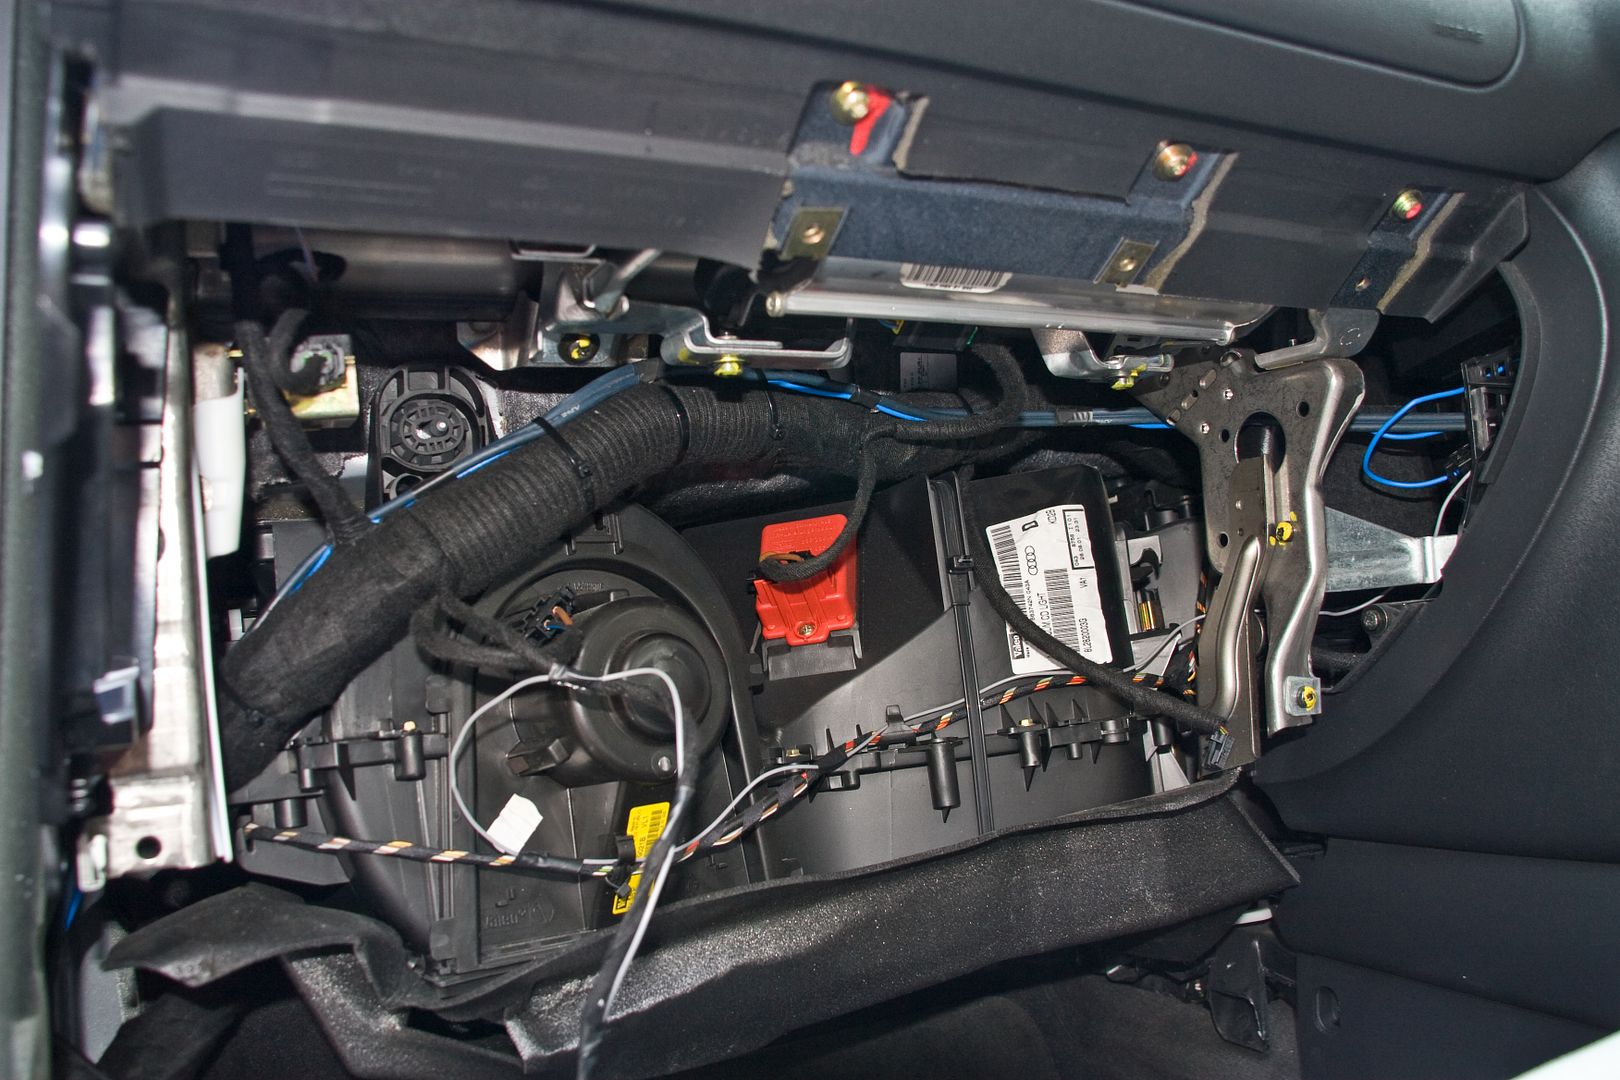
...run the cables down the side cable tying to the original loom...
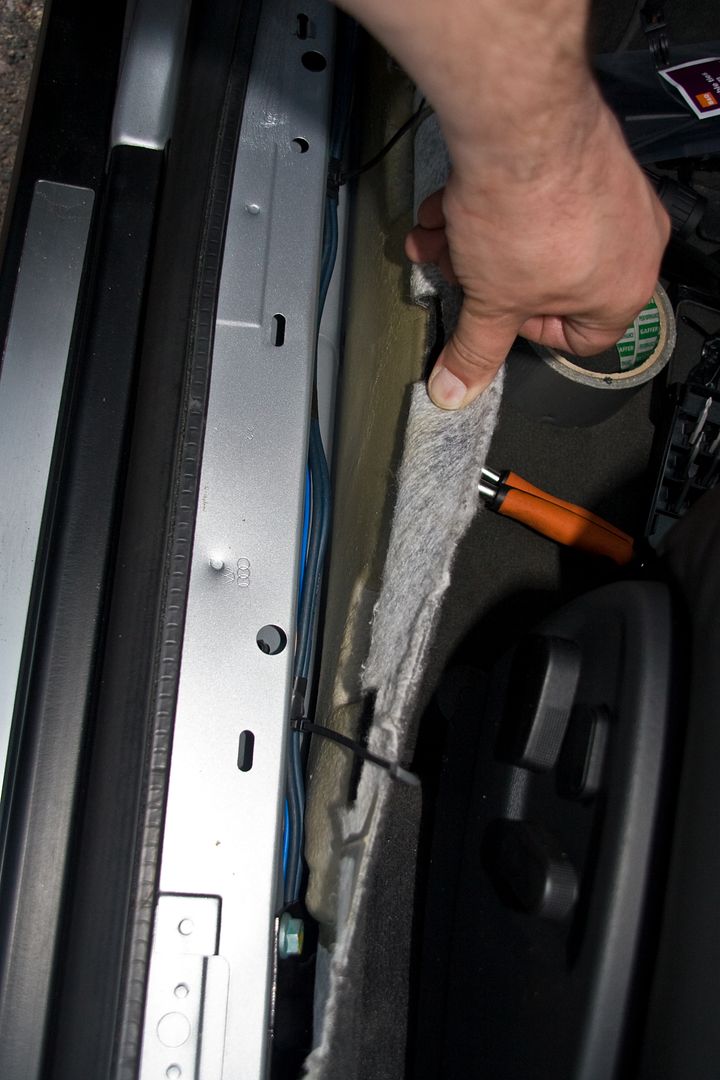
...and ran the passenger side front and rear + 4 channel amp remote wire across where the rear seat goes...

Thats it for now... more tomorrow hopefully...
<tuffty/>
Then set about removing even more trim (the glove box this time) to start running cables...
Started with the sub amp RCA lead, amp remote wire and passenger side front speaker cables..

...cable tied to the loom to keep it out of the way...

...run the cables down the side cable tying to the original loom...

...and ran the passenger side front and rear + 4 channel amp remote wire across where the rear seat goes...

Thats it for now... more tomorrow hopefully...
<tuffty/>
Busy day 'at the office'... was playing dynos for most of the day 
"...here with have the Badger in its natural habitat...."
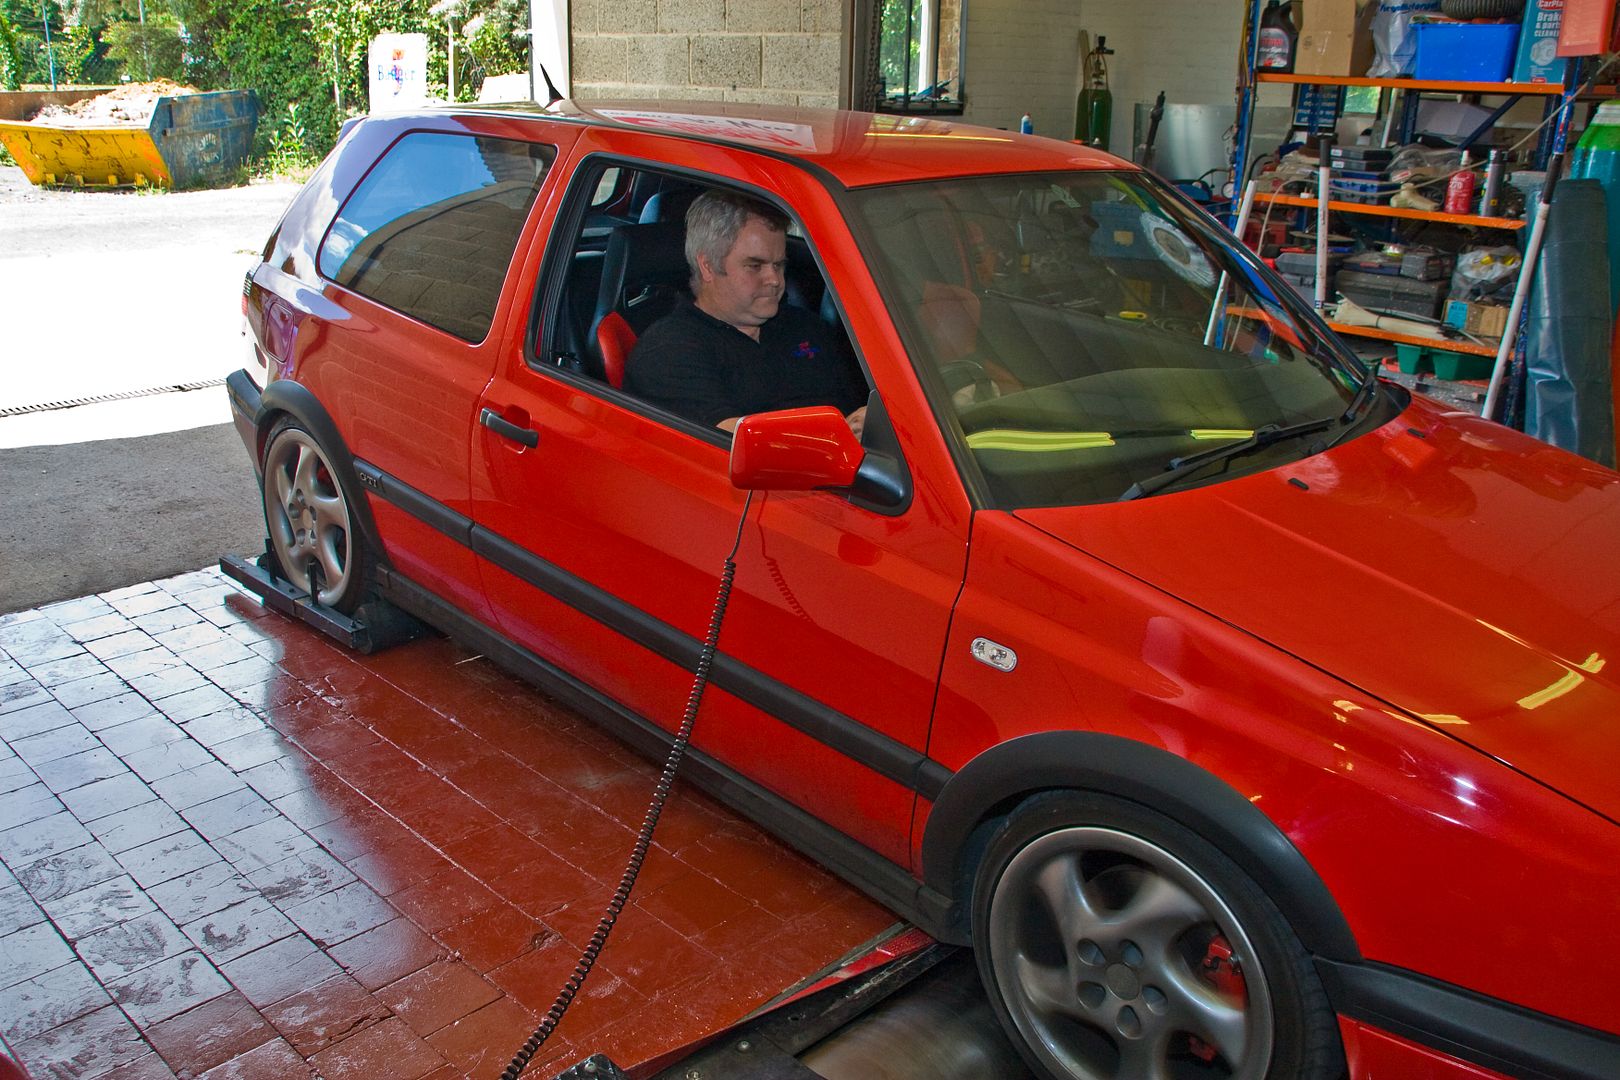
...yes I did run mine... and by run, I personally ran the car on the dyno....
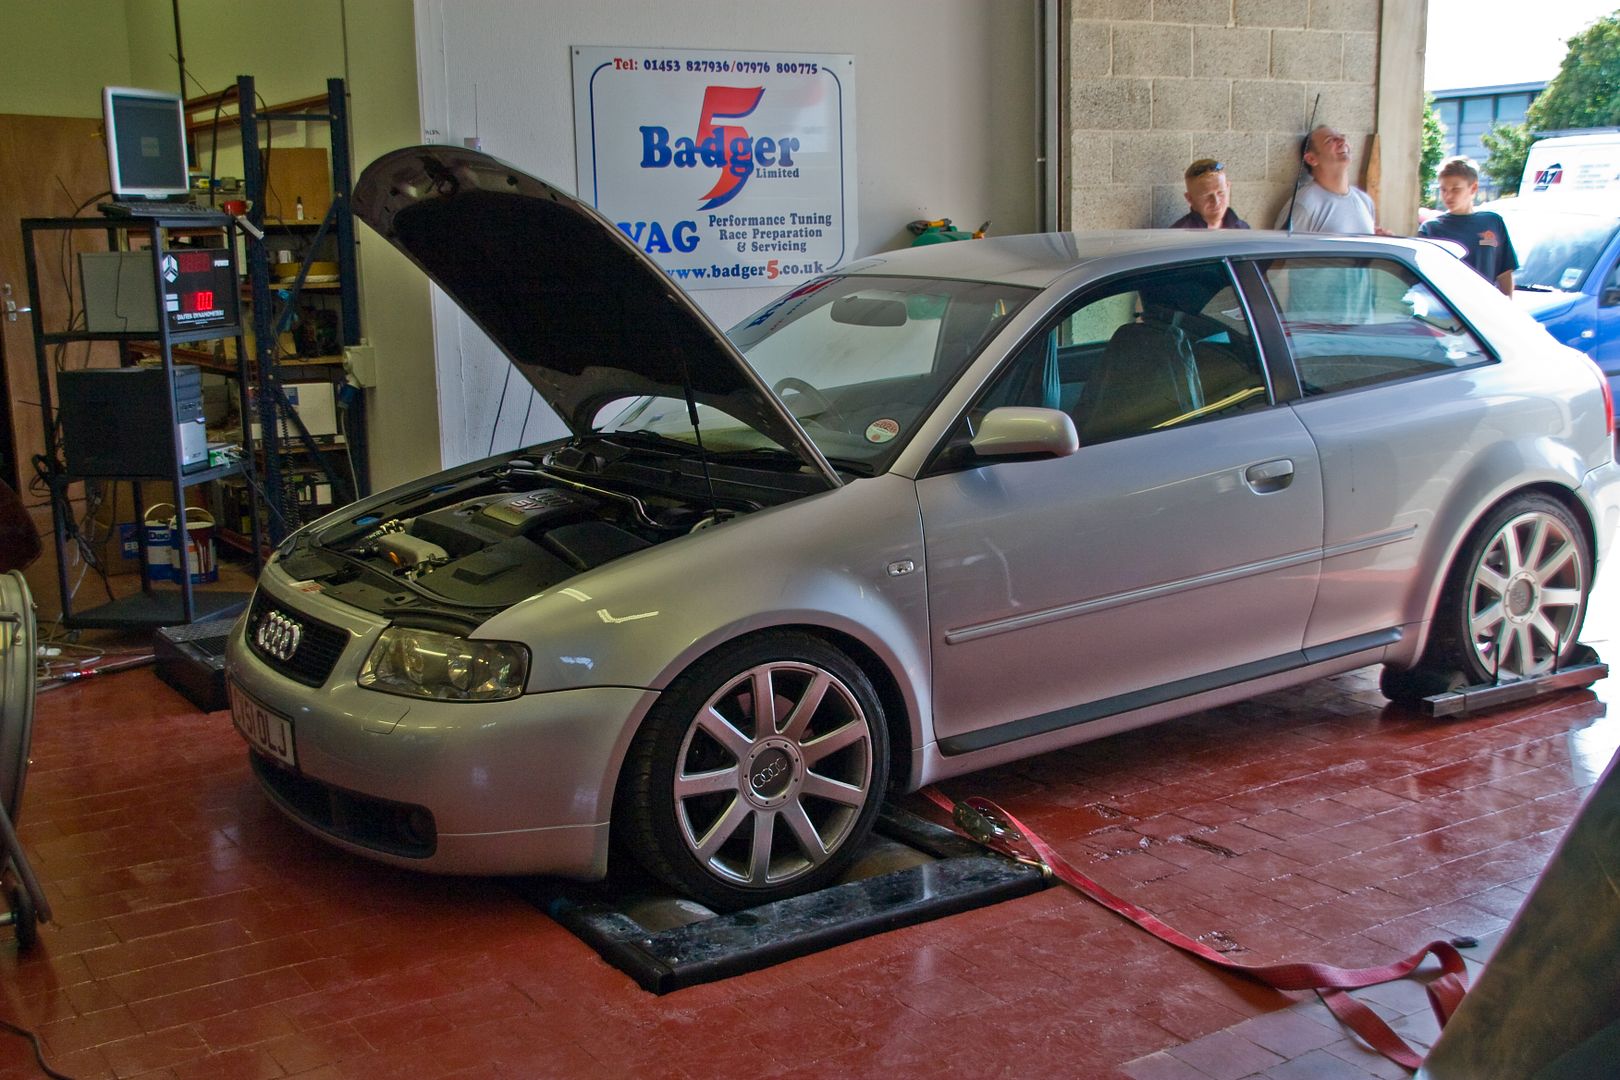
...and no I am not telling you what powered she made... yet...
...anyhoo... started work when I got back from the unit, removed the drivers side lower dash and routed the RCA leads for the 4 channel (front/rear) amp down the drivers side sill. Once done I finished off the rear speakers by using silicon sealant to seal the speakers and get rid of the gap...
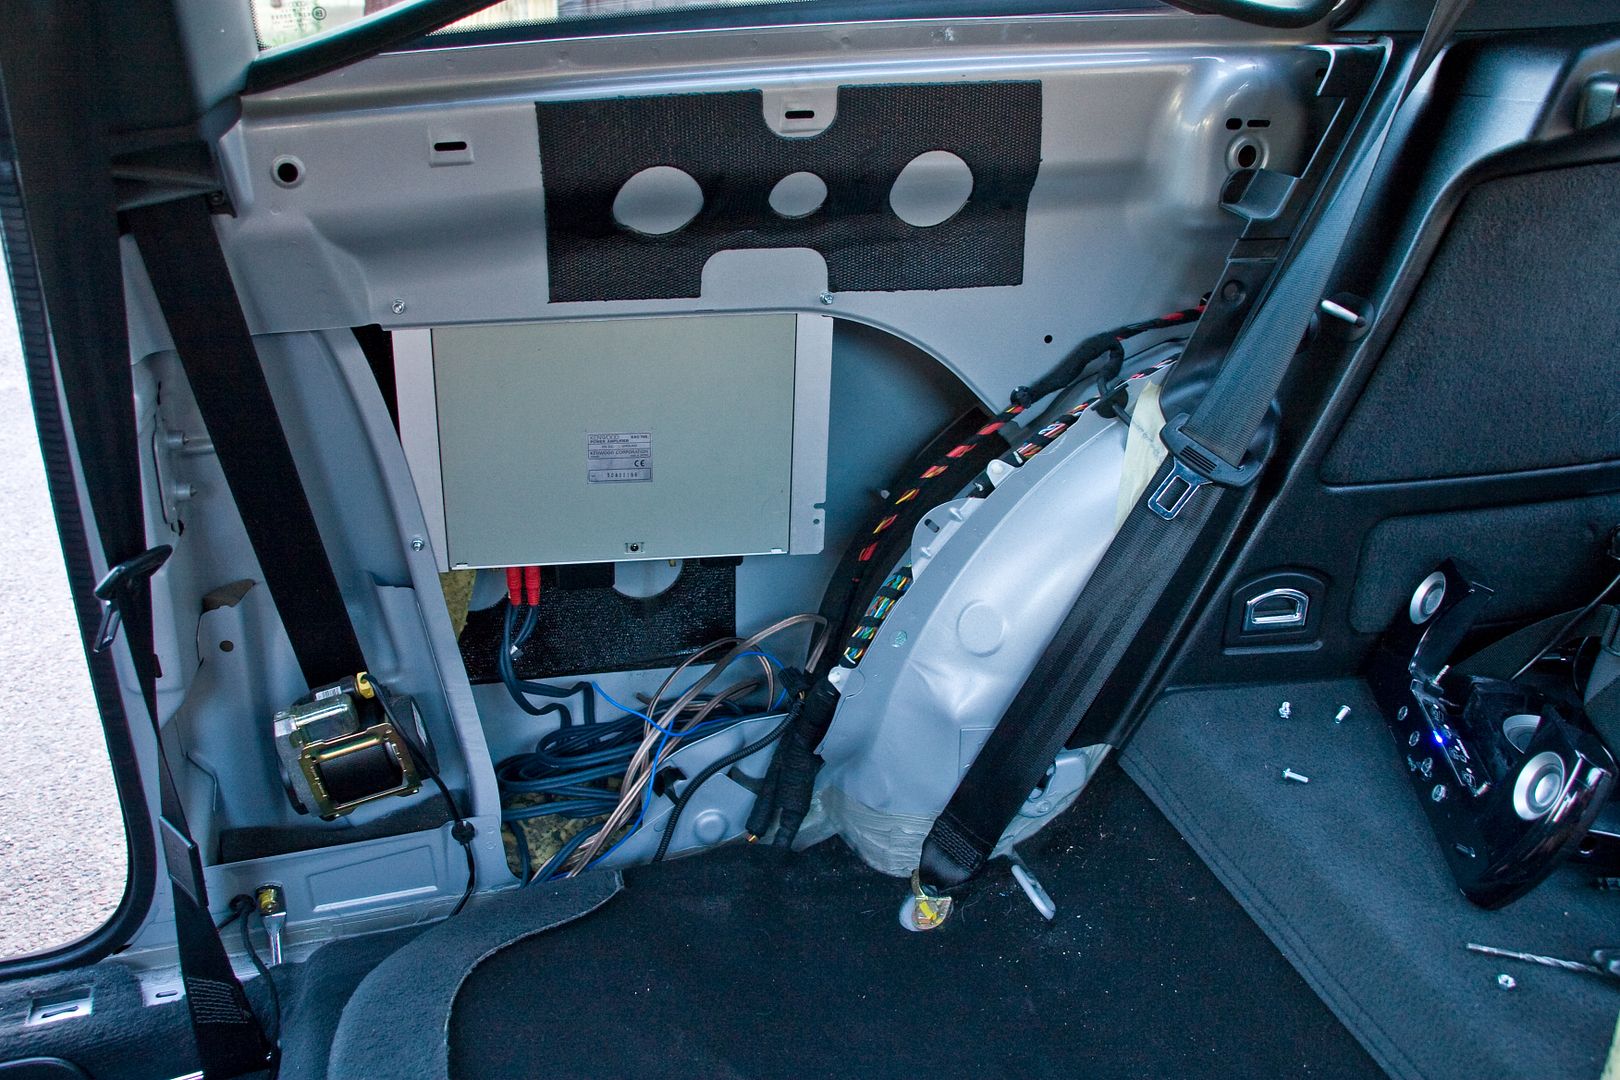
...then moved onto fitting the amps in. Marked and drilled the holes then fitted bolts to the amps... as it was going to be difficult to get to any of the fixings once the amp was in position I used the bolts like a stud by tightening a nut onto the bolt... this allowed the amp to stand off the metal work a bit (as there was a lip where I was fitting them) and allow me to easily tighten another nut with a spring washer to secure the amps...
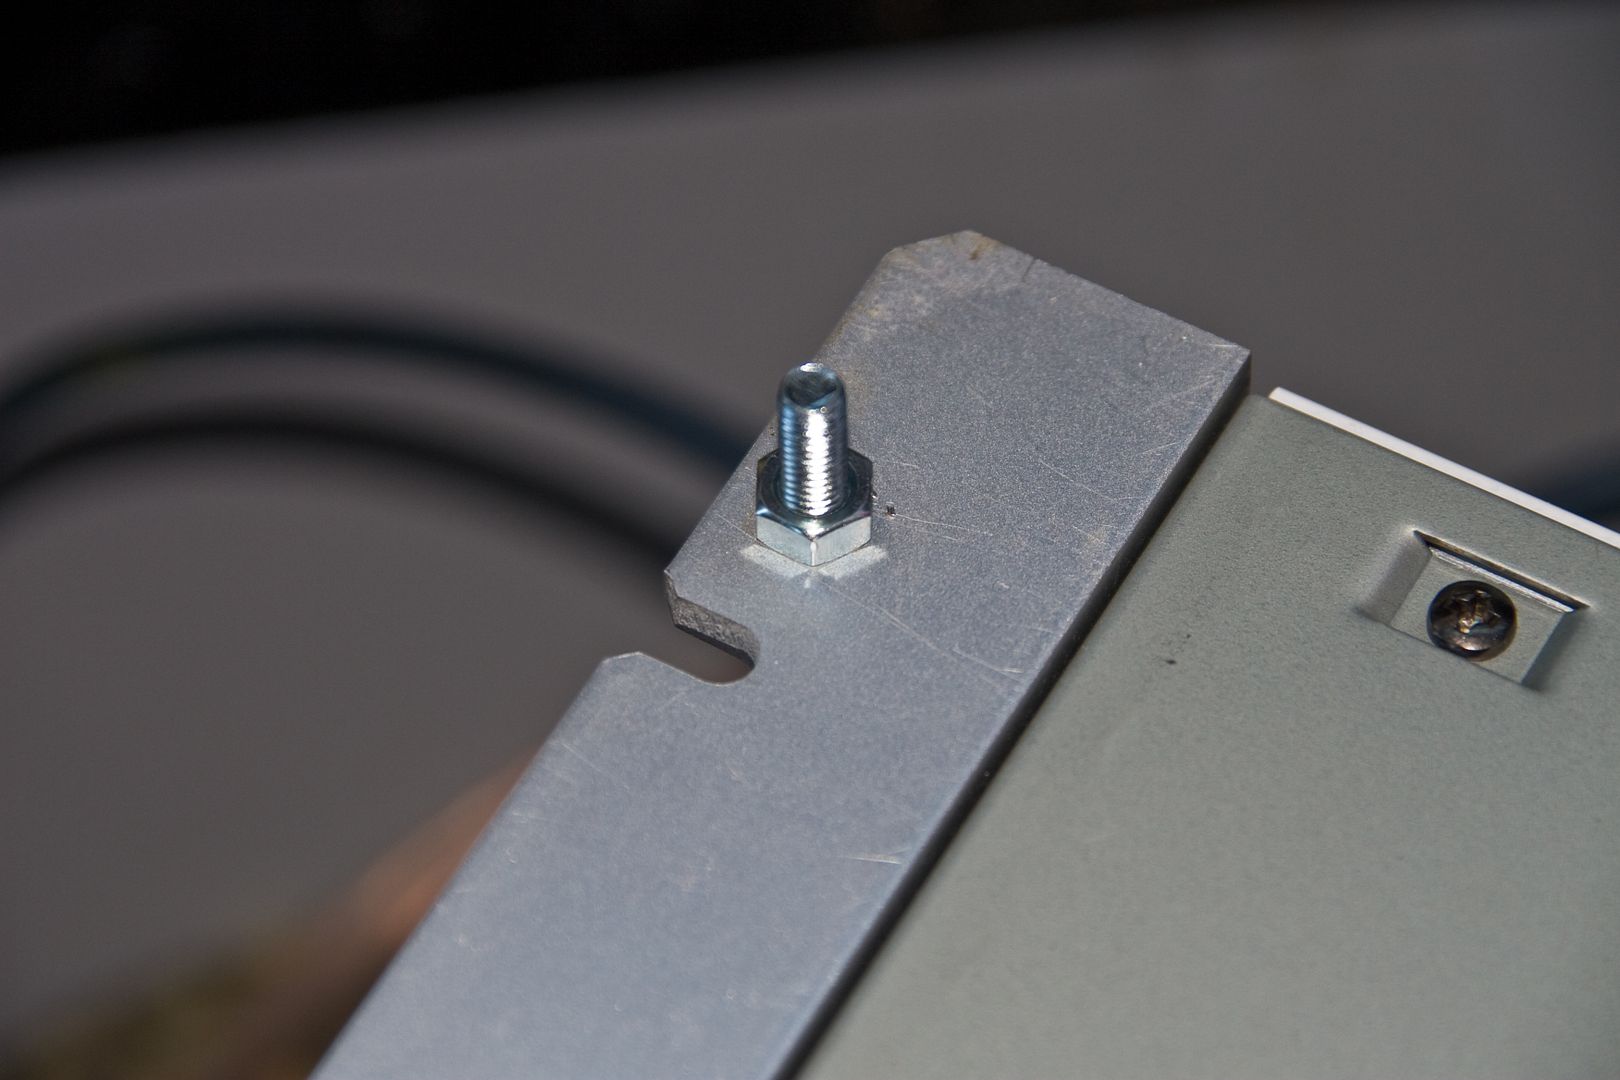
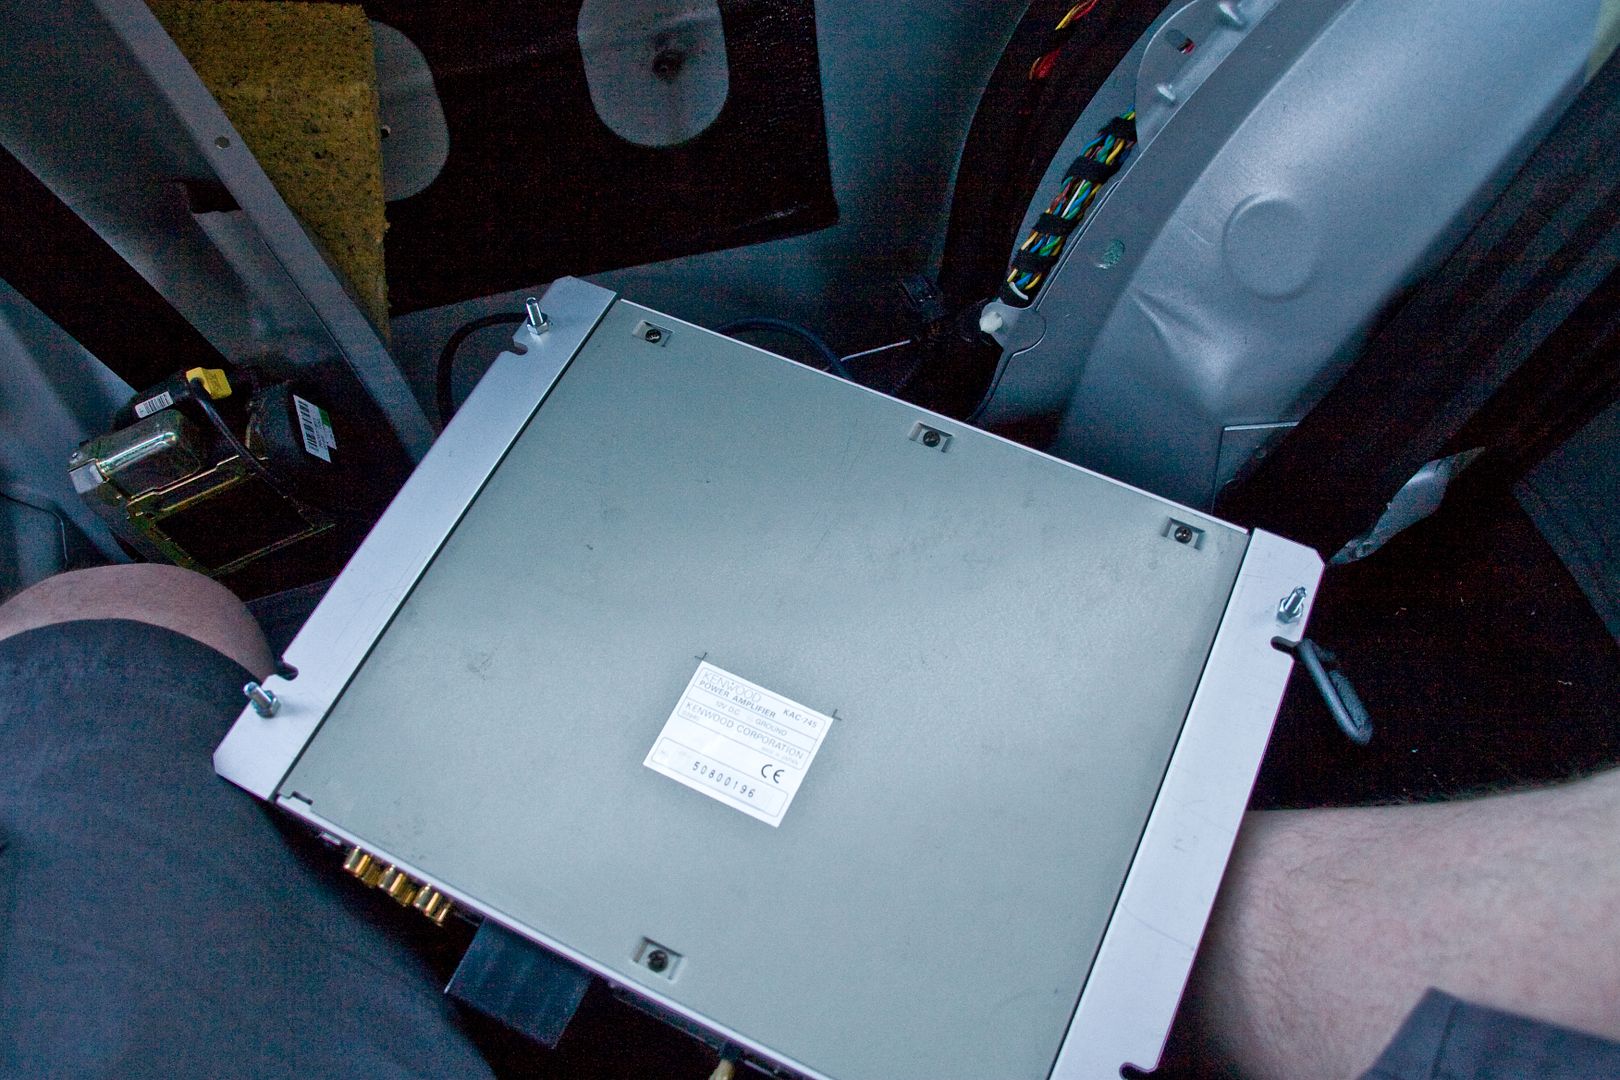
...4 channel amp in position...
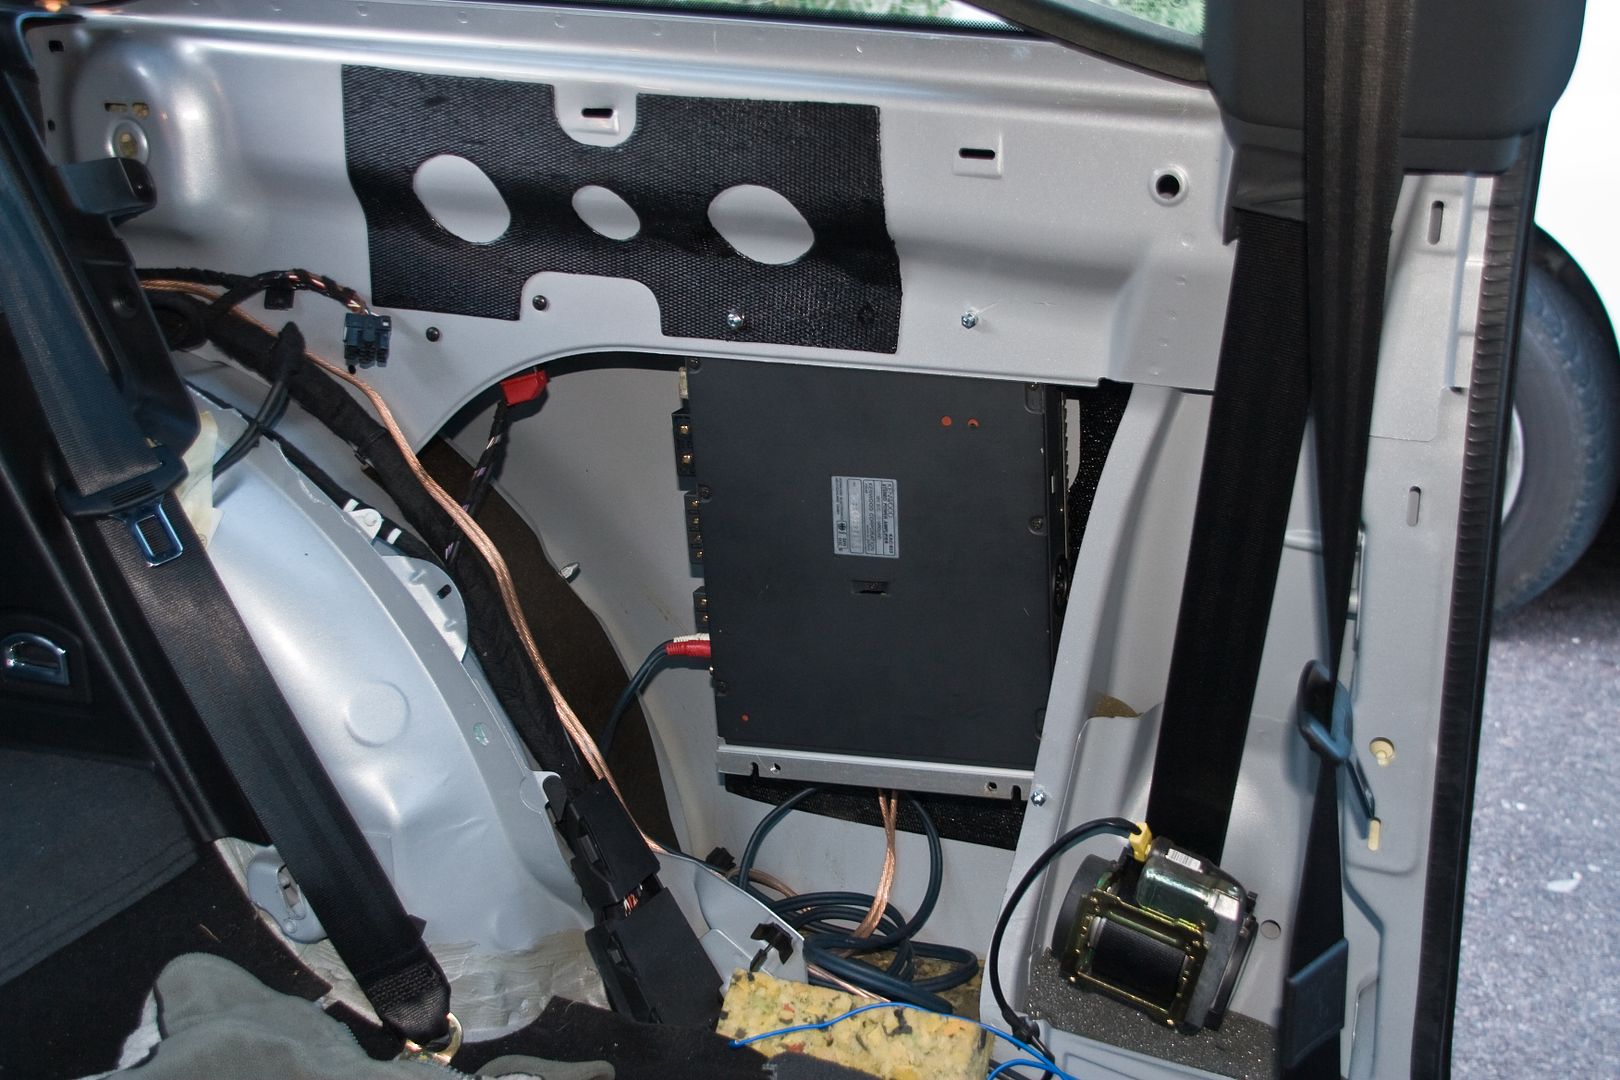
...sub amp....
...my daughter grabbed my camera and took this pic as she wanted people to see I was actually working!!
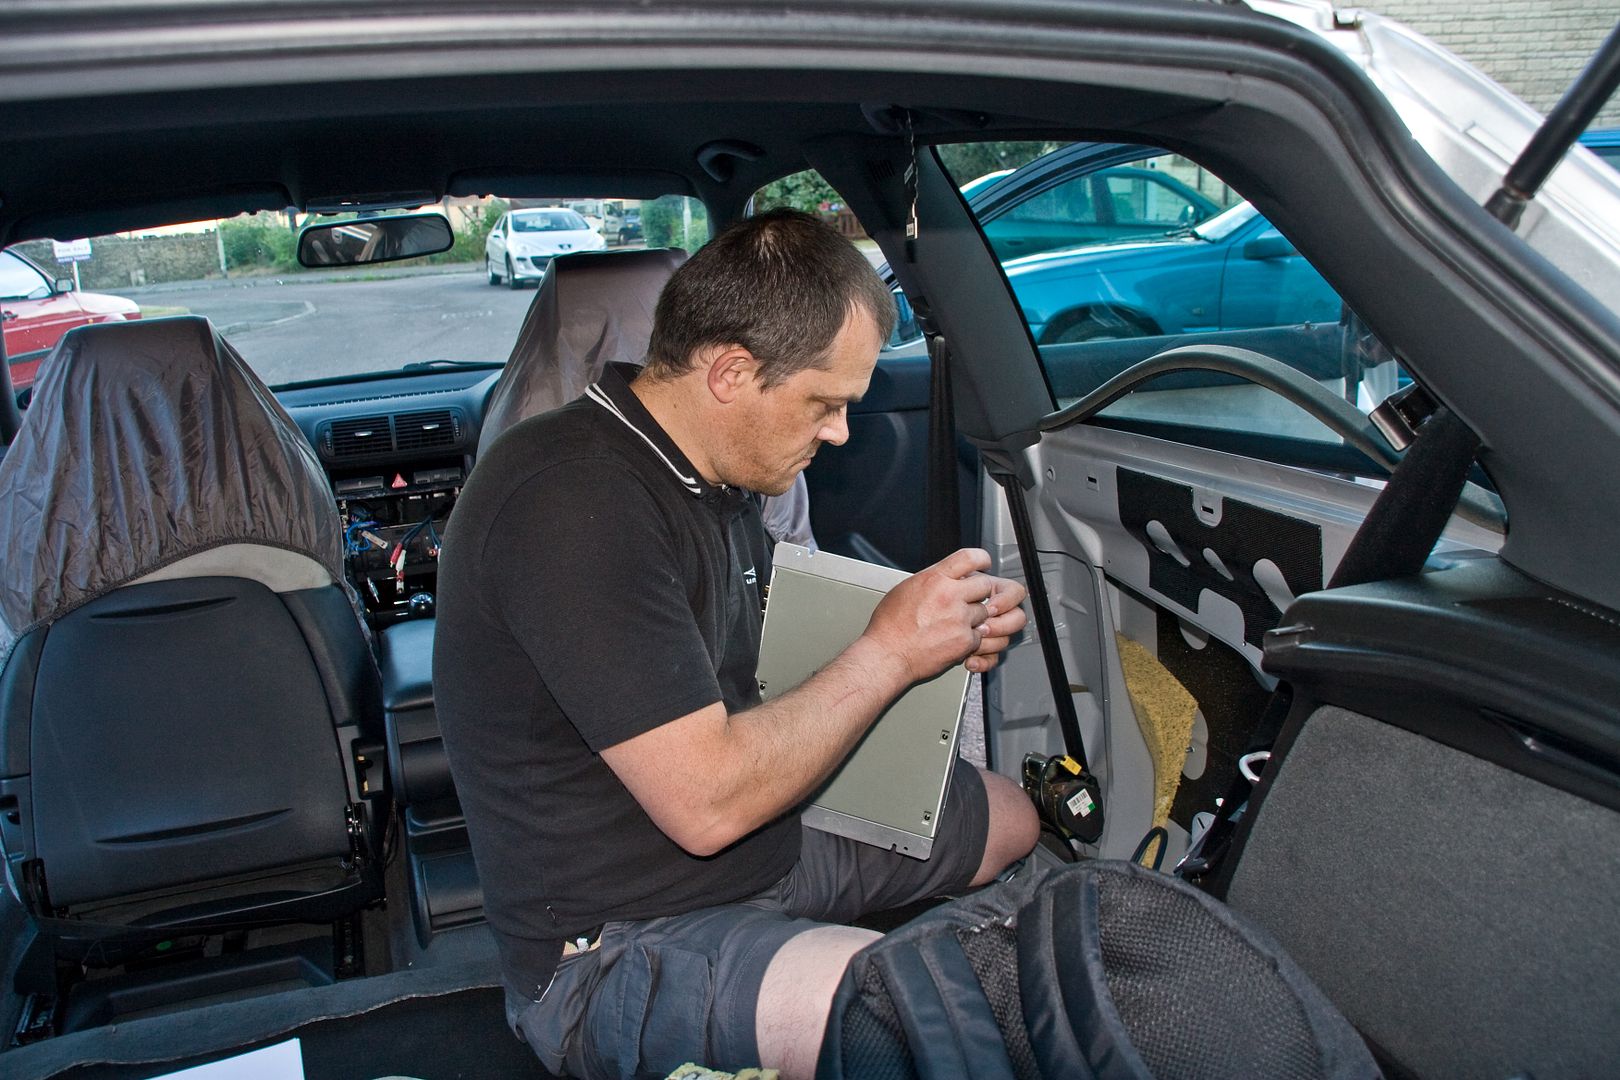
Thats most of the wires in place and hardware fitted... power cables next then front door speakers followed by final connecting it all up and powering up for the first time
<tuffty/>
"...here with have the Badger in its natural habitat...."

...yes I did run mine... and by run, I personally ran the car on the dyno....

...and no I am not telling you what powered she made... yet...
...anyhoo... started work when I got back from the unit, removed the drivers side lower dash and routed the RCA leads for the 4 channel (front/rear) amp down the drivers side sill. Once done I finished off the rear speakers by using silicon sealant to seal the speakers and get rid of the gap...

...then moved onto fitting the amps in. Marked and drilled the holes then fitted bolts to the amps... as it was going to be difficult to get to any of the fixings once the amp was in position I used the bolts like a stud by tightening a nut onto the bolt... this allowed the amp to stand off the metal work a bit (as there was a lip where I was fitting them) and allow me to easily tighten another nut with a spring washer to secure the amps...


...4 channel amp in position...

...sub amp....

...my daughter grabbed my camera and took this pic as she wanted people to see I was actually working!!

Thats most of the wires in place and hardware fitted... power cables next then front door speakers followed by final connecting it all up and powering up for the first time
<tuffty/>
Fairly busy day... doing bits to my car and helping Bill out when needed... I have now got the 4 gauge power cable in...
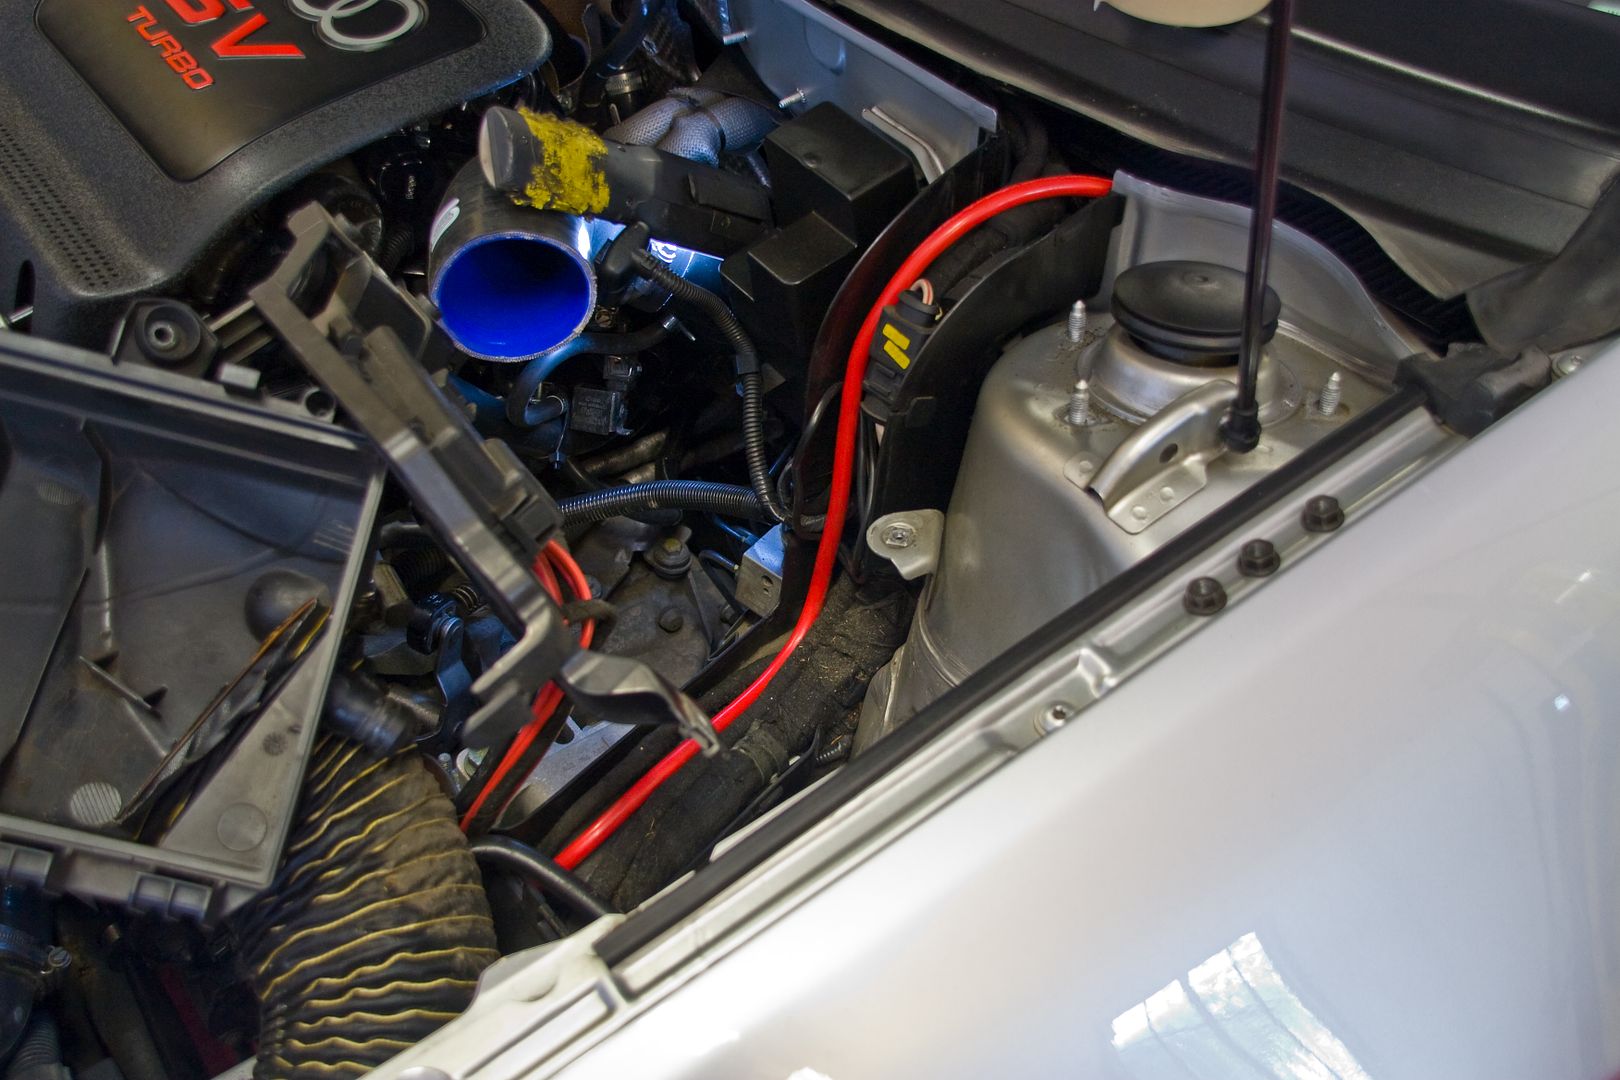
Here is the grommet to feed the power cable into the cabin... its under the scuttle cover passenger side by the pollen filter..
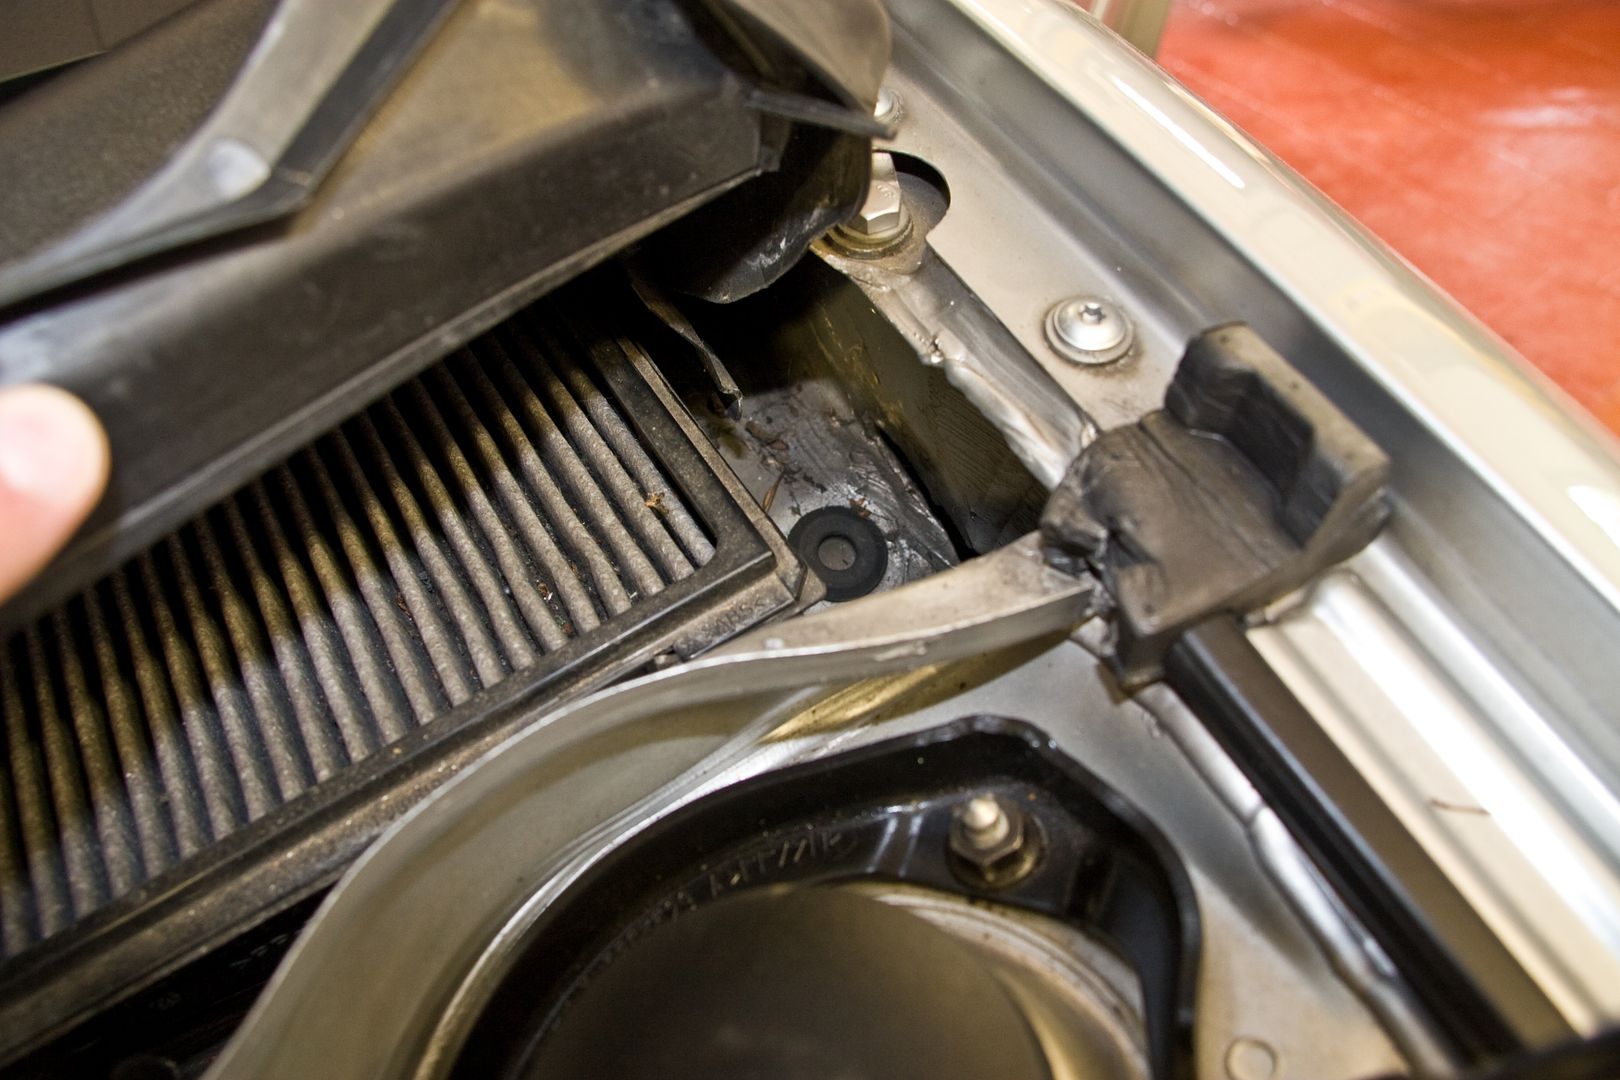
...which exits above the glove box (remove first of course) behind a bit of sound deadening that you move out the way first to allow the cable to pass through easily...
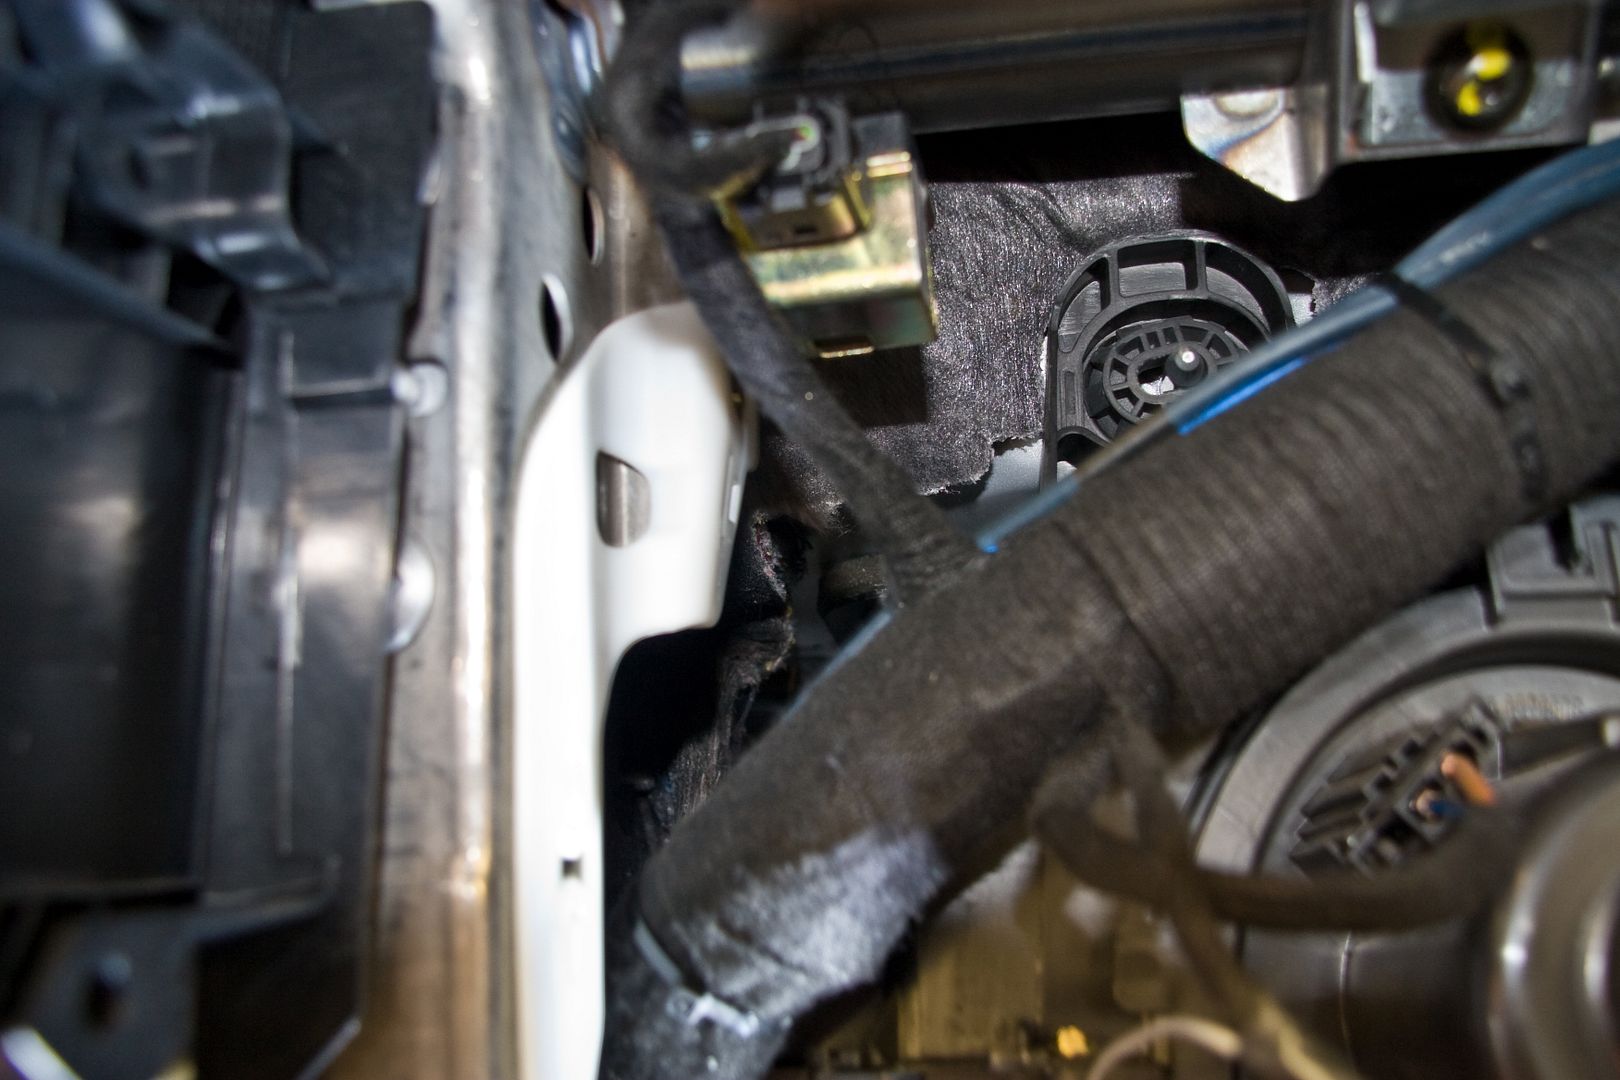
...ta..da..! etc...
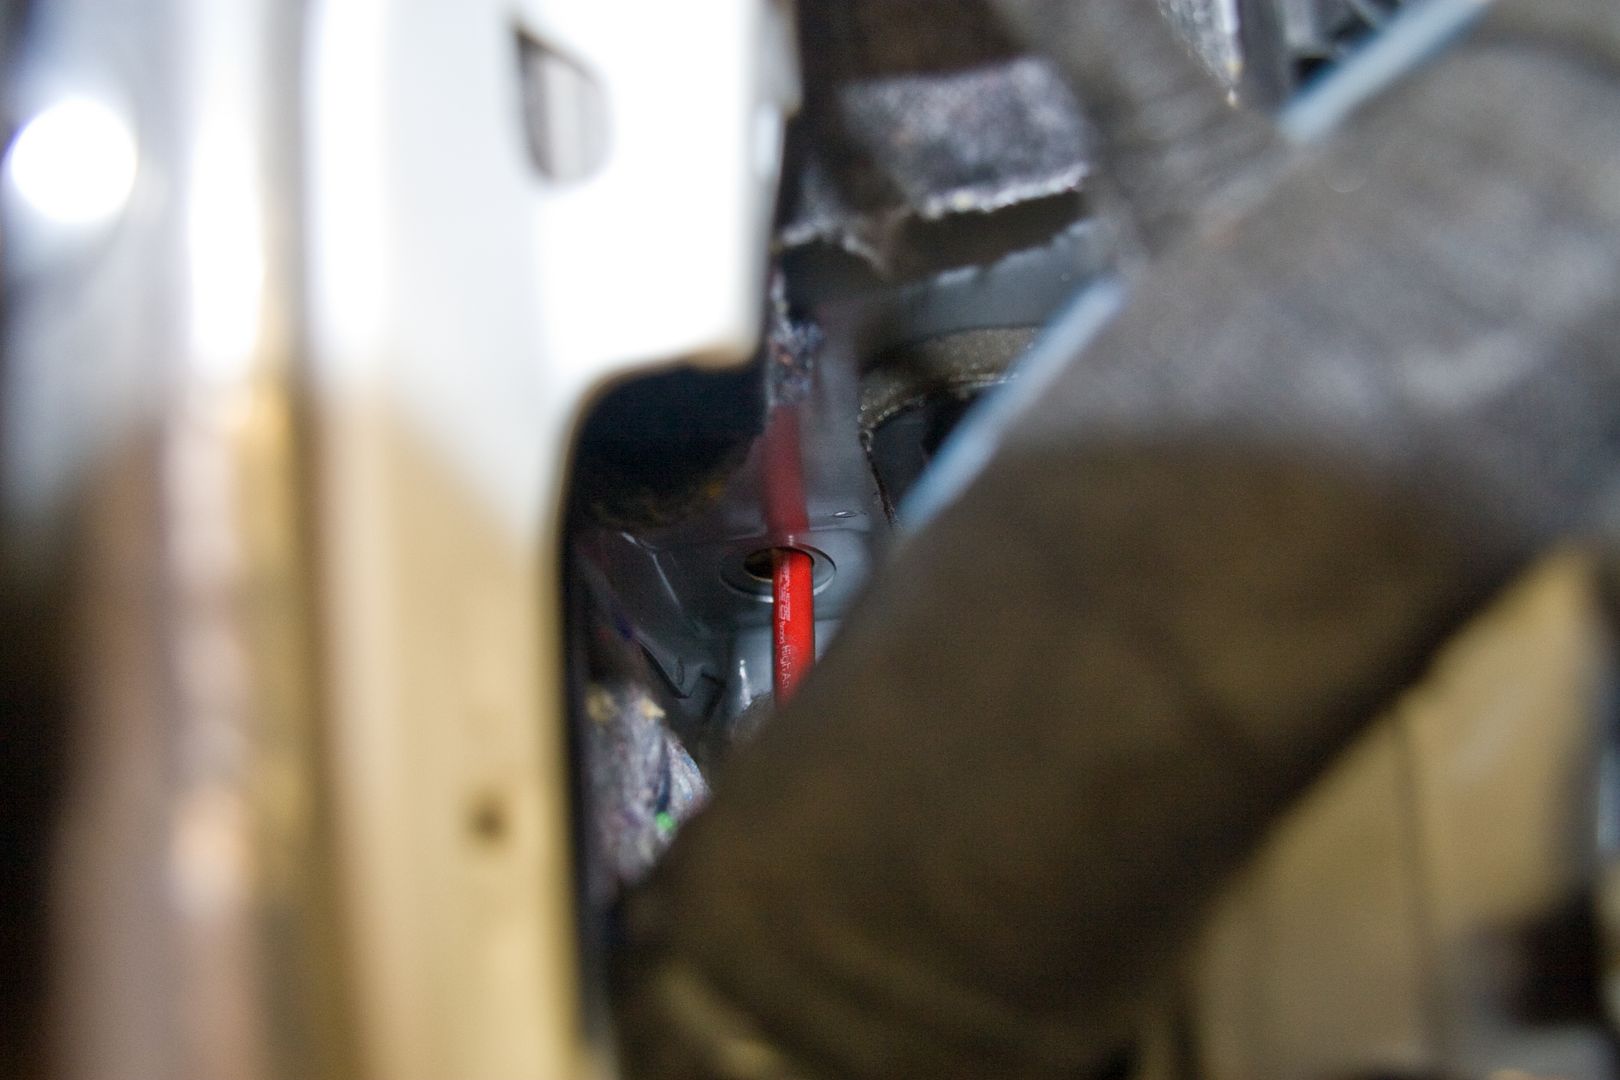
... removed the strut brace, airbox and battery/tray to allow me to route the cable through the cabling channels...
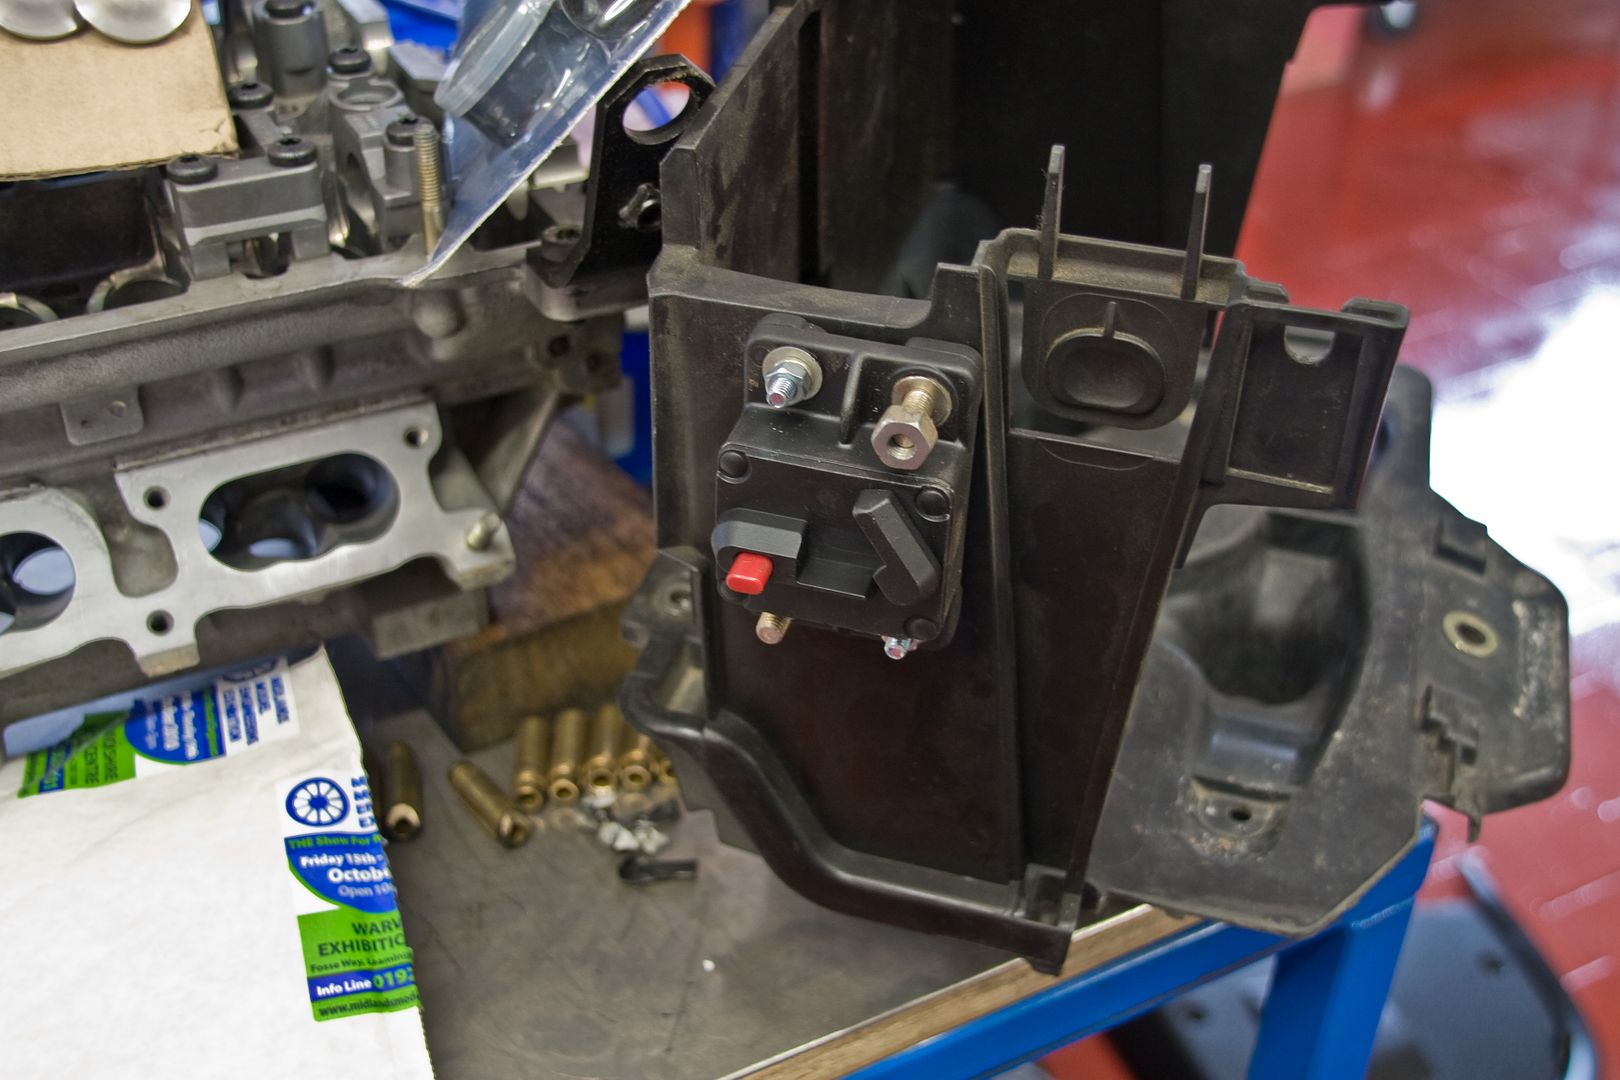
...fitted the circuit breaker to the side of the battery tray...
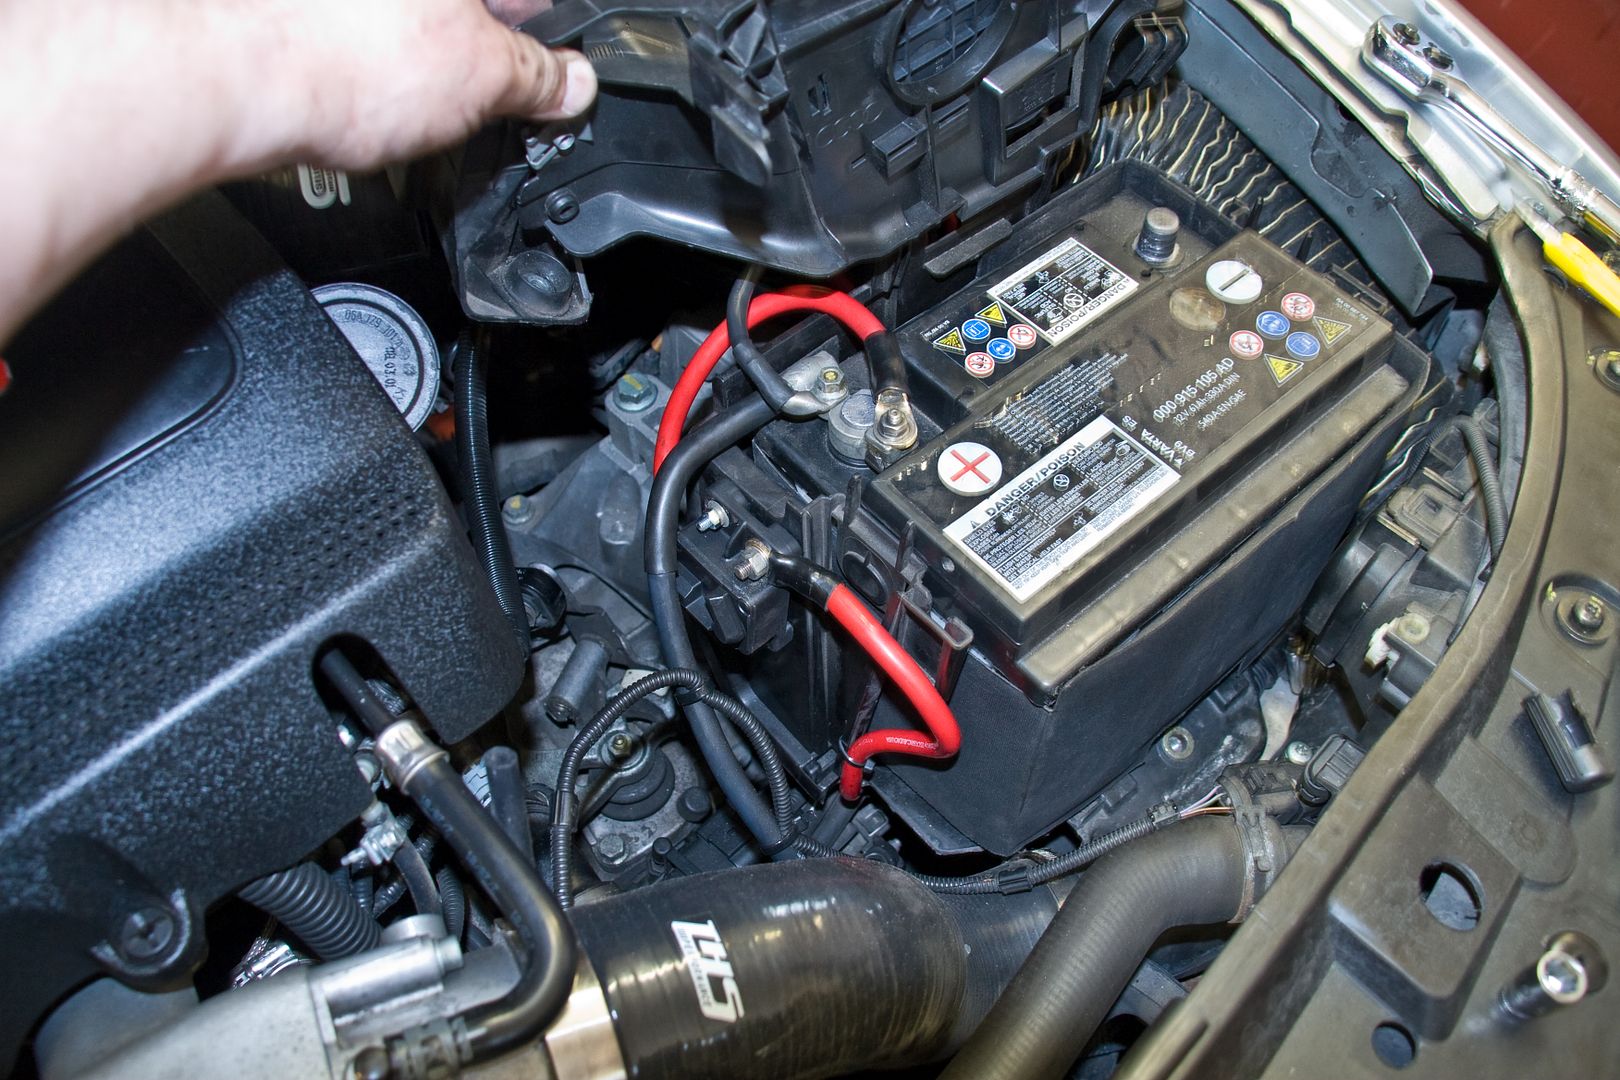
...all done...
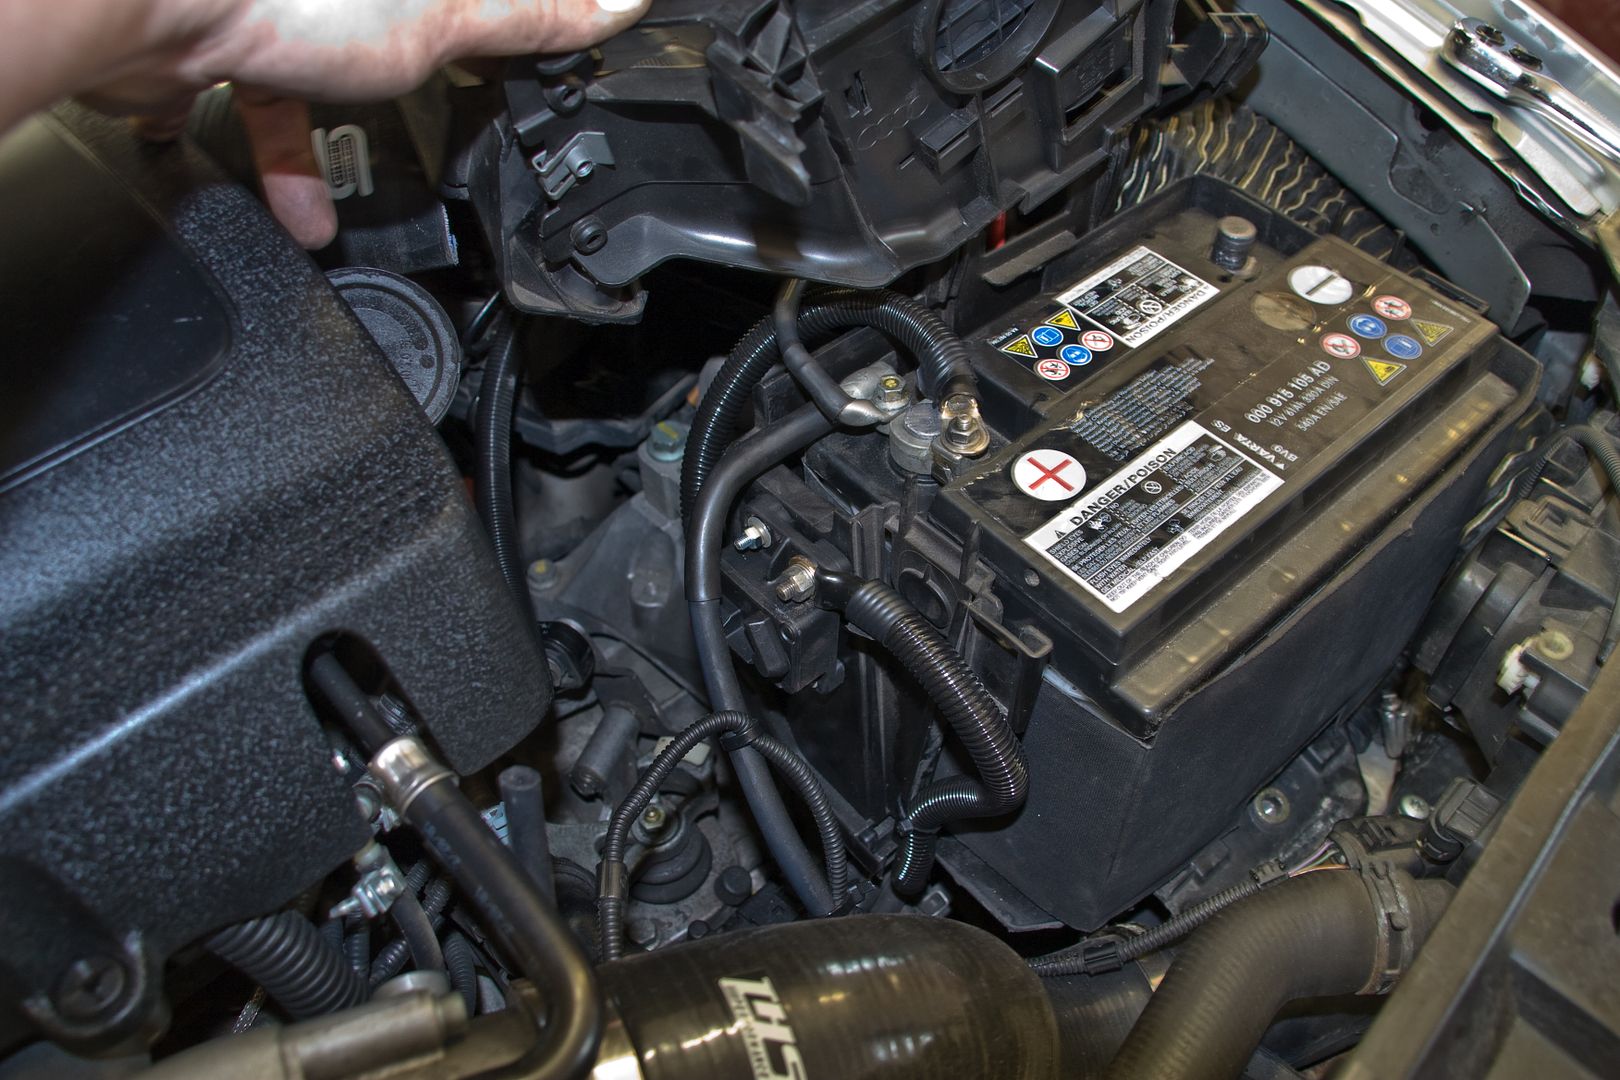
...and in keeping with the rest of the install and my car in general... stealthed...
I now need to get some more 8 gauge so I can split the main power to feed the 2 amps... all the bits I have kicking about are too short.
When I got back from the unit I had another look at the front speakers. Problem I have here is that the adaptors don't fit the Focals properly due to the cone suspension..
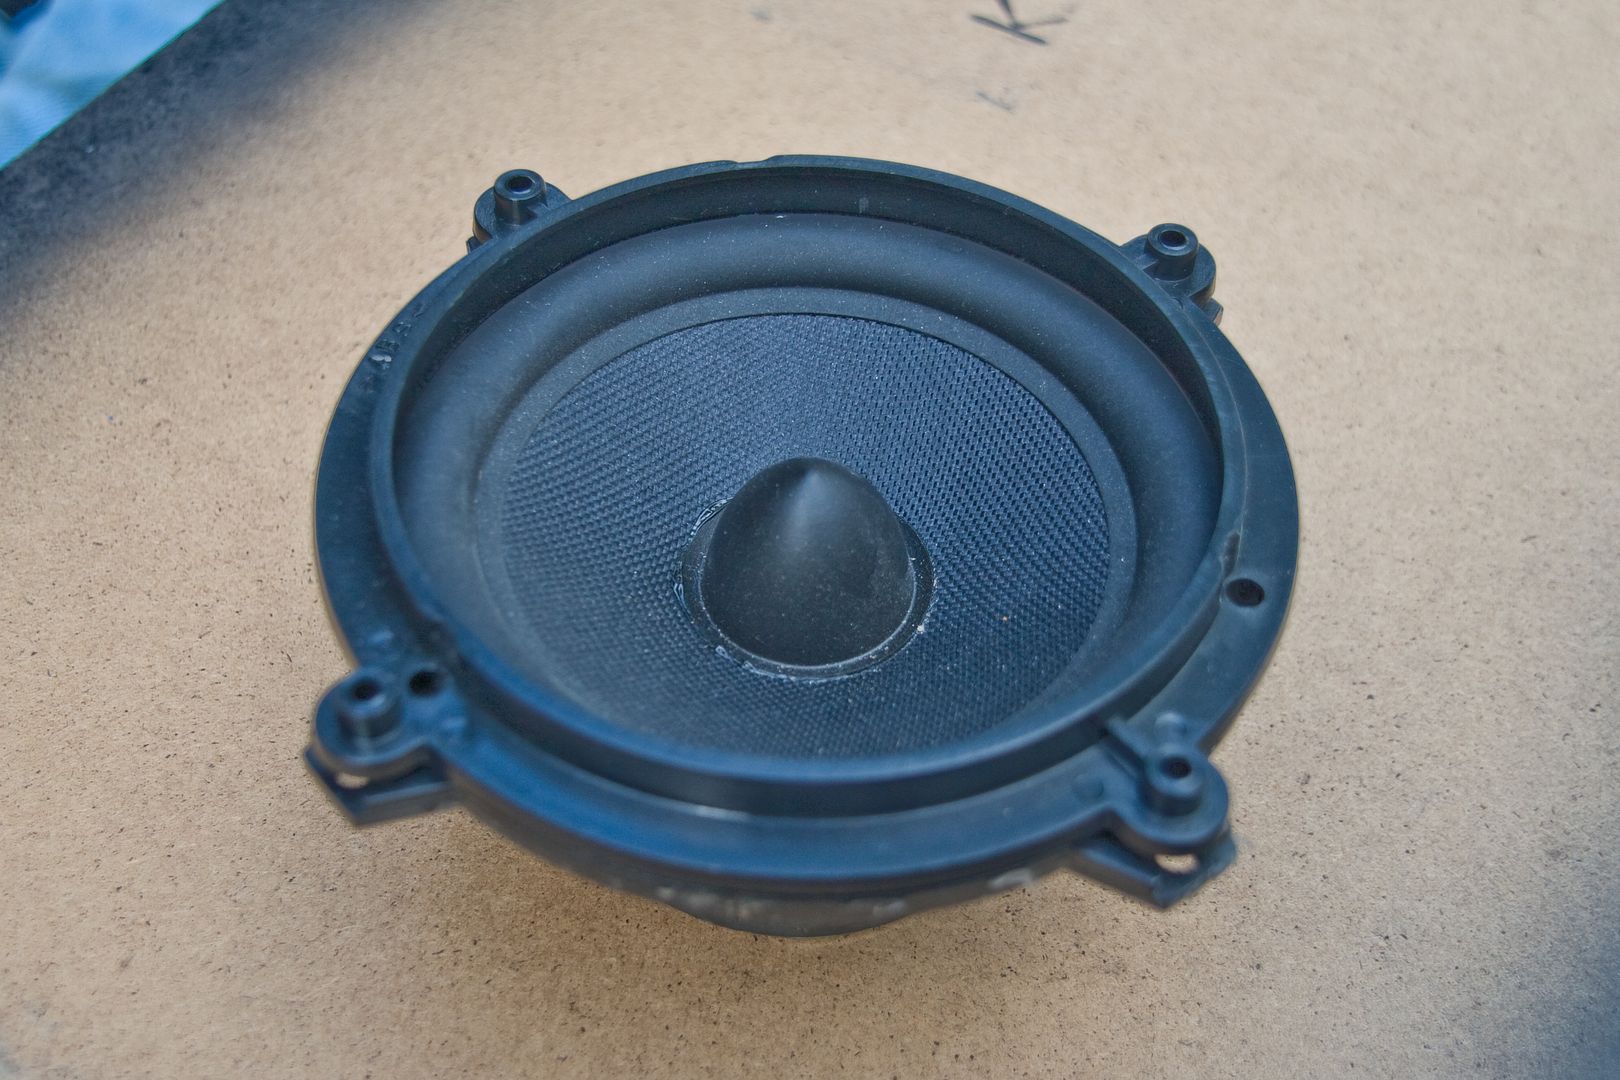
...you can see the problem better here...
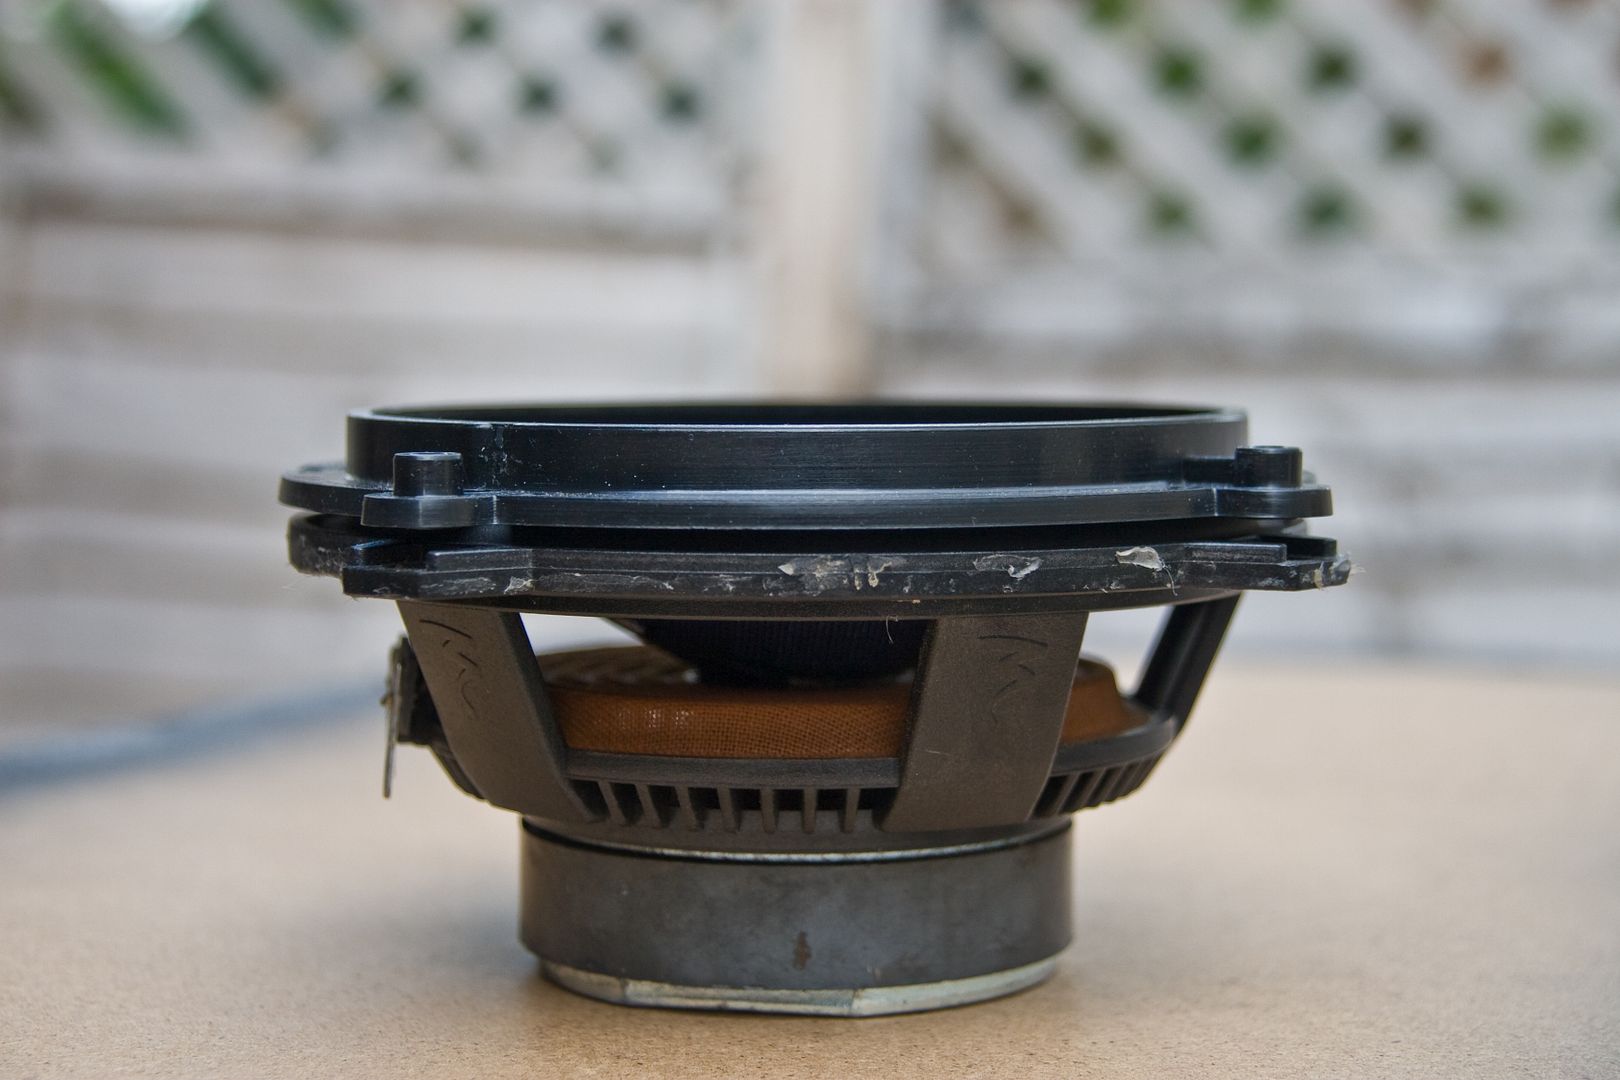
I have cut out some MDF spacers that I need to tweak and see how I get on but I think this will be the trickiest part of the install as there is not much depth to play with... the adaptors when in place look like this..
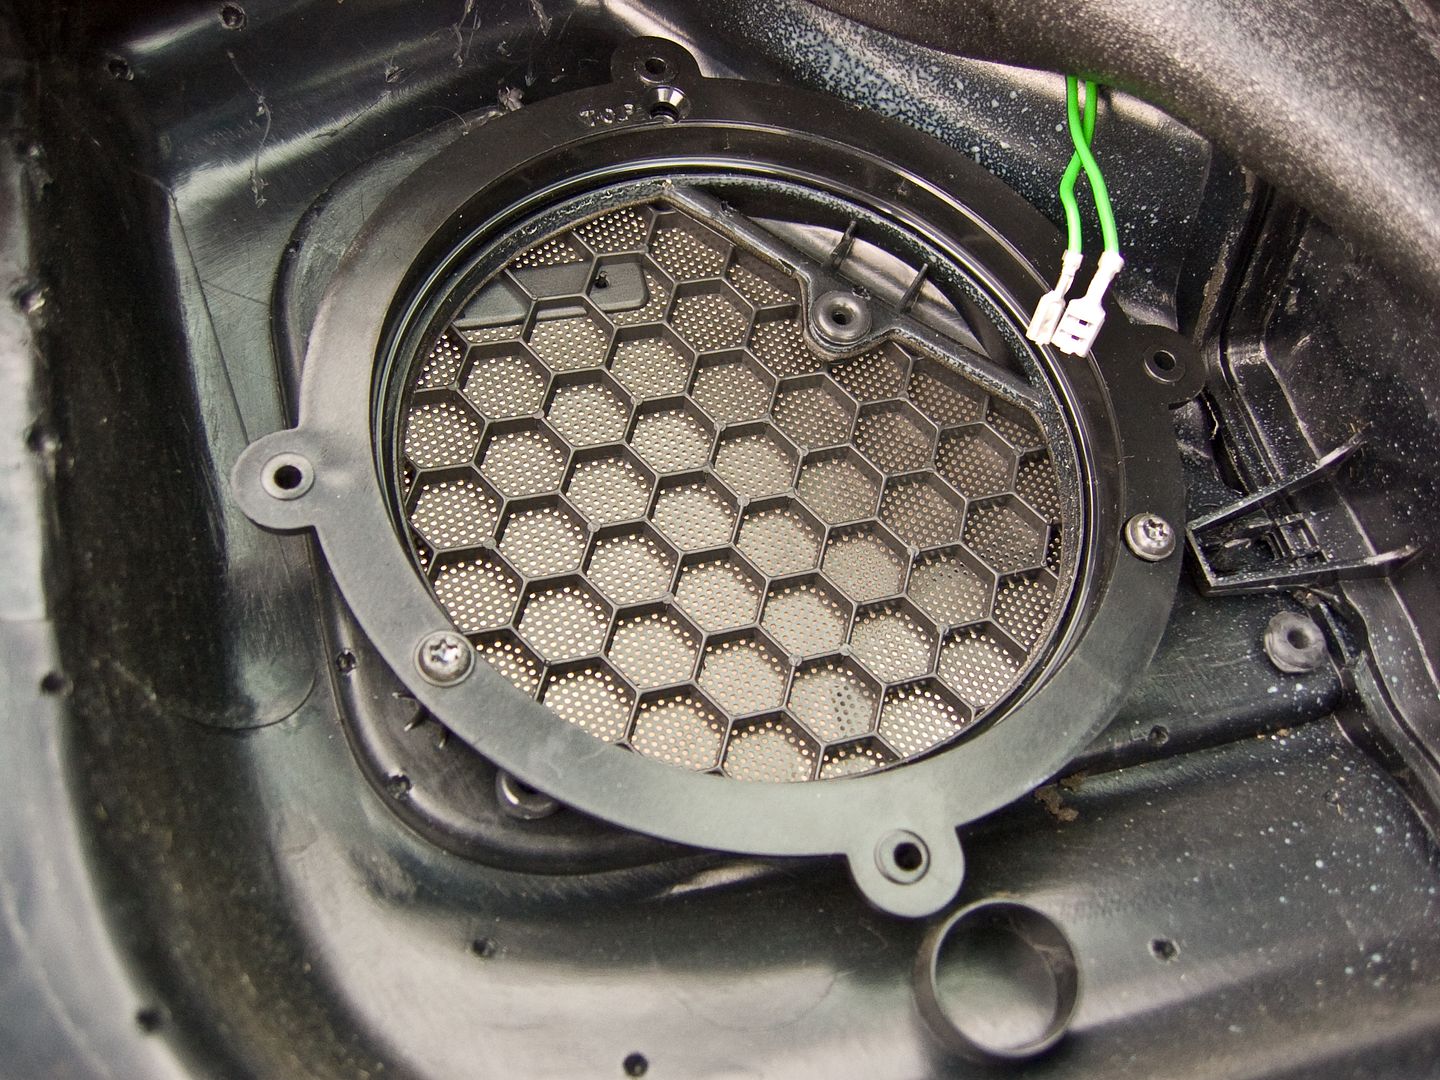
Will have a play over the next few days, probably after wiring the rest of the system up so I can concentrate on this problem...
<tuffty/>
Here is the grommet to feed the power cable into the cabin... its under the scuttle cover passenger side by the pollen filter..

...which exits above the glove box (remove first of course) behind a bit of sound deadening that you move out the way first to allow the cable to pass through easily...

...ta..da..! etc...

... removed the strut brace, airbox and battery/tray to allow me to route the cable through the cabling channels...

...fitted the circuit breaker to the side of the battery tray...

...all done...

...and in keeping with the rest of the install and my car in general... stealthed...

I now need to get some more 8 gauge so I can split the main power to feed the 2 amps... all the bits I have kicking about are too short.
When I got back from the unit I had another look at the front speakers. Problem I have here is that the adaptors don't fit the Focals properly due to the cone suspension..

...you can see the problem better here...

I have cut out some MDF spacers that I need to tweak and see how I get on but I think this will be the trickiest part of the install as there is not much depth to play with... the adaptors when in place look like this..

Will have a play over the next few days, probably after wiring the rest of the system up so I can concentrate on this problem...
<tuffty/>
Hi, just a quick one, are you running a restictor on the oil feed at all?
Thanks.
Yep
<tuffty/>
Similar threads
Model Year 20/21
Creak from steering at low speed / stationary
- Replies
- 10
- Views
- 464
- Replies
- 3
- Views
- 574


