My LCR Since '05 with Static+ Front Air Lift - Project Gone to a New Home.
- Thread starter James23Parkin
- Start date
You are using an out of date browser. It may not display this or other websites correctly.
You should upgrade or use an alternative browser.
You should upgrade or use an alternative browser.
James, I'm not sure why I haven't commented on this in so long!
The car is looking pretty damn sweet mateLoving the work. The bay is beautiful and the work on the bushes is such a good job done! Well done.
This is a cracking LCR which doesn't get enough looks on here IMO! Great work
Thanks for the nice comments Tom
Loving the updates. Going to be awesome once the kit is fully fitted!!
Thanks El. Can't wait for it to arrive now... It's raining at the moment, so can't start stripping the front, but I might just get the pop up gazebo out
James how are you stopping the wheel knocking on the compressor?
Have you utilised the original lock or working on something new?
Can't wait to see the static+ best of both worlds
Hey Tyrer,
In a previous post, I pictured the compressor mounted to the originial circular plastic cover that usually sits on top of the jack kit.
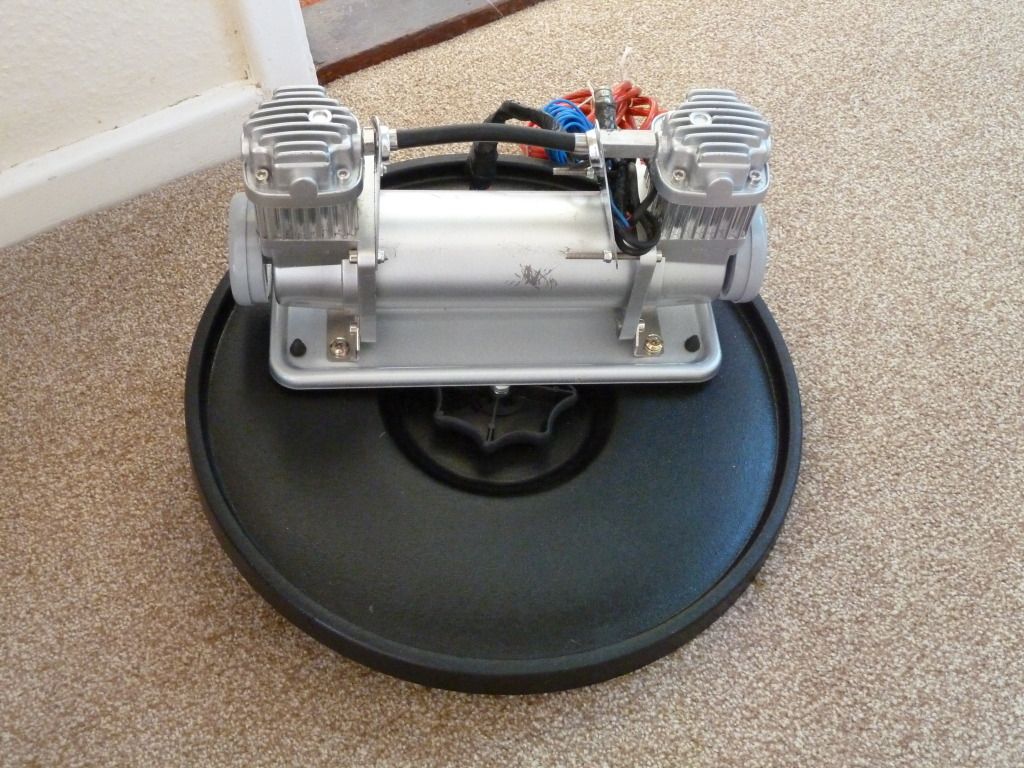
I made a circular wooden base, which sits under the the plastic and everything is bolted to that soild base. In the centre of it all is the original lock, with a shortened bolt, so everything is secured through that original fixing. There's no movement and when the compressor is on there's absolutely no vibration, which I was surprised about. The wheel itself is heavy enough so doesn't move and with the sound deadening it's quite a tight fit. I have placed a foam pad in between the compressor heads and back of the alloy, just to make sure nothing is damaged. Very functional
Last edited:
I was going to say the fins on the top of the compressor heads are there to dissipate the heat created when compressing the air but in reality this will probably only run for 30 seconds max so wont create much anyway
Good point. The compressor will run for 10 seconds at a time, as and when the car needs raising. I don't need the foam there tbh, but it's just there for piece of mind
With the weather being a bit off and on today, it hasn’t really been the ideal conditions to strip the front of the car, so I’m hopeful that the weekend will be a bit better. Hopefully the Air Lift kit will be with me by then too, so I can do it all in one, and not leave the car on axle stands all week.
I thought I would make use of a spare hour so I’ve finished off the wiring. I’ve made a plastic base plate that will hold the paddle switch and psi gauge. It’s been wrapped in black fabric; not quite a perfect match, but close enough.
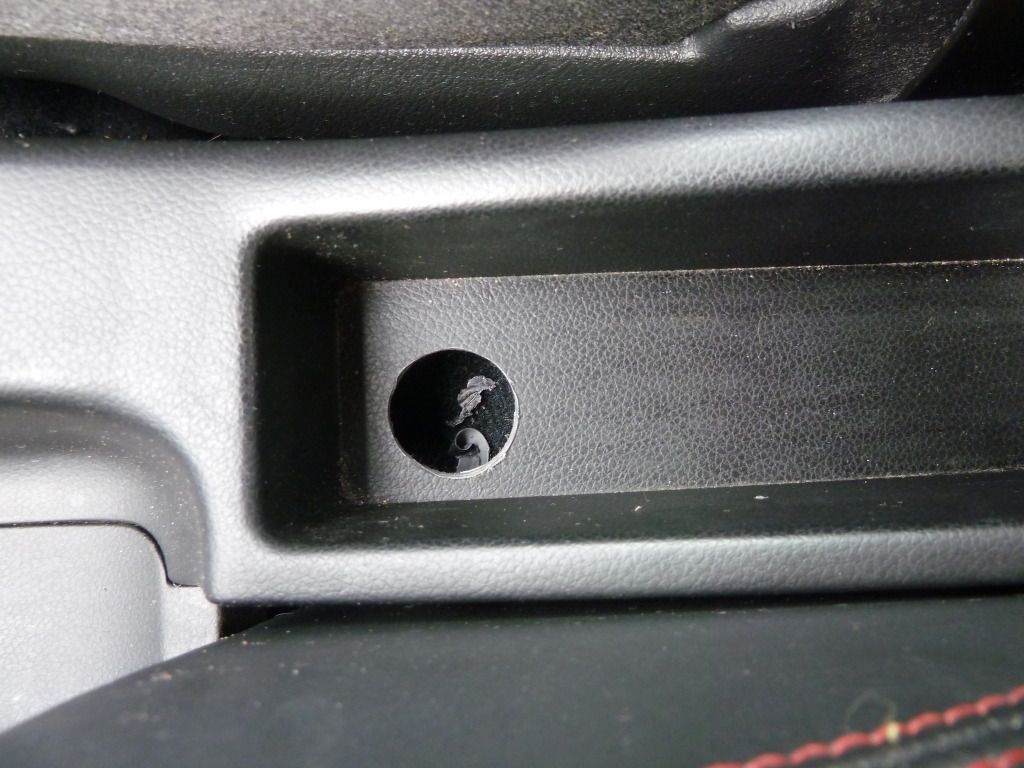
So, the wiring was today fed round to the centre console and secured. A hole was reluctantly drilled into the centre console, so that the wires could be fed through to the new panel. If this is to be removed, I can make a false floor to cover it up. This was the best option unfortunately.
The hole…
The panel…
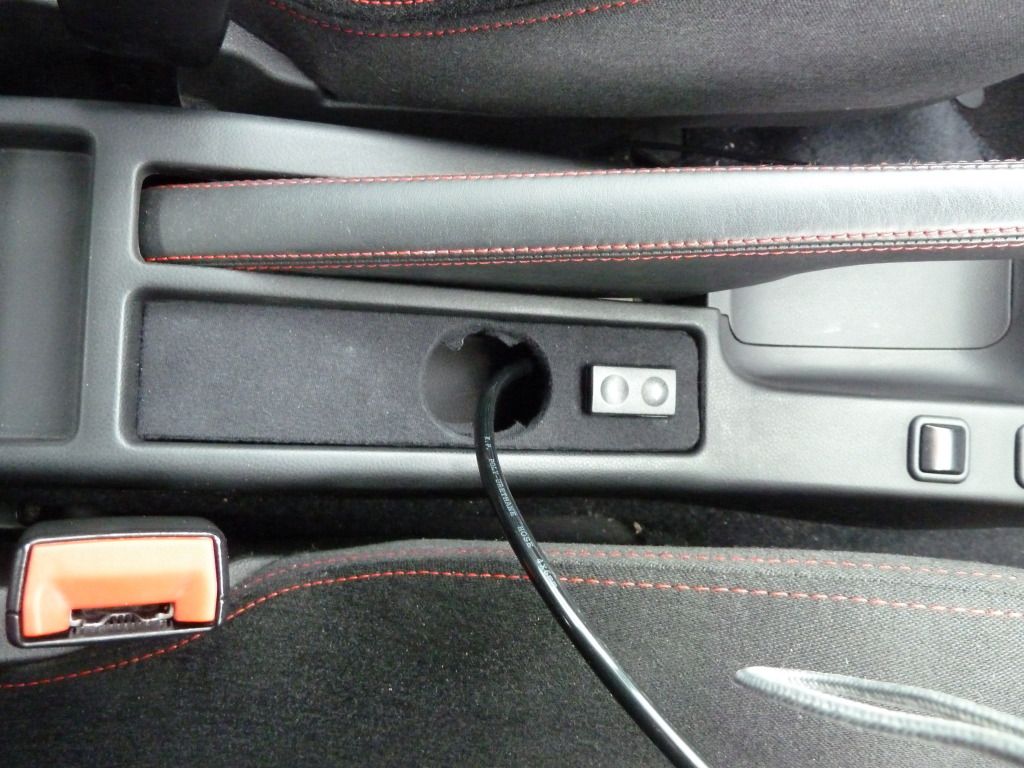
The paddle switch was wired in and fixed. The paddle switch will have two functions. Pressing upwards powers the compressor, and this will directly feed and lift the front of the car. Pressing downwards will prompt the air solenoid to release the air pressure, lowering the car. I’ve ordered the solenoid and it should be with me this week. Unlike the compressor, I’m going to locate the solenoid in the lower part of the engine bay, out of sight but functional.
Interior tidied up… The airline sticking out is for the gauge to be located to it…
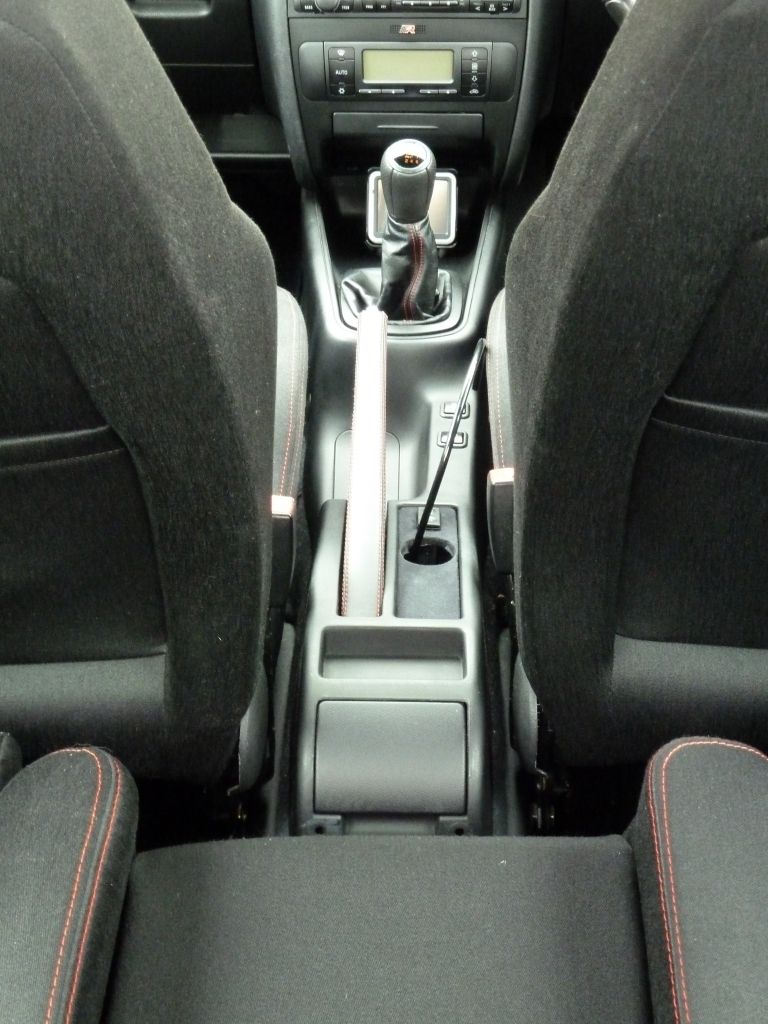
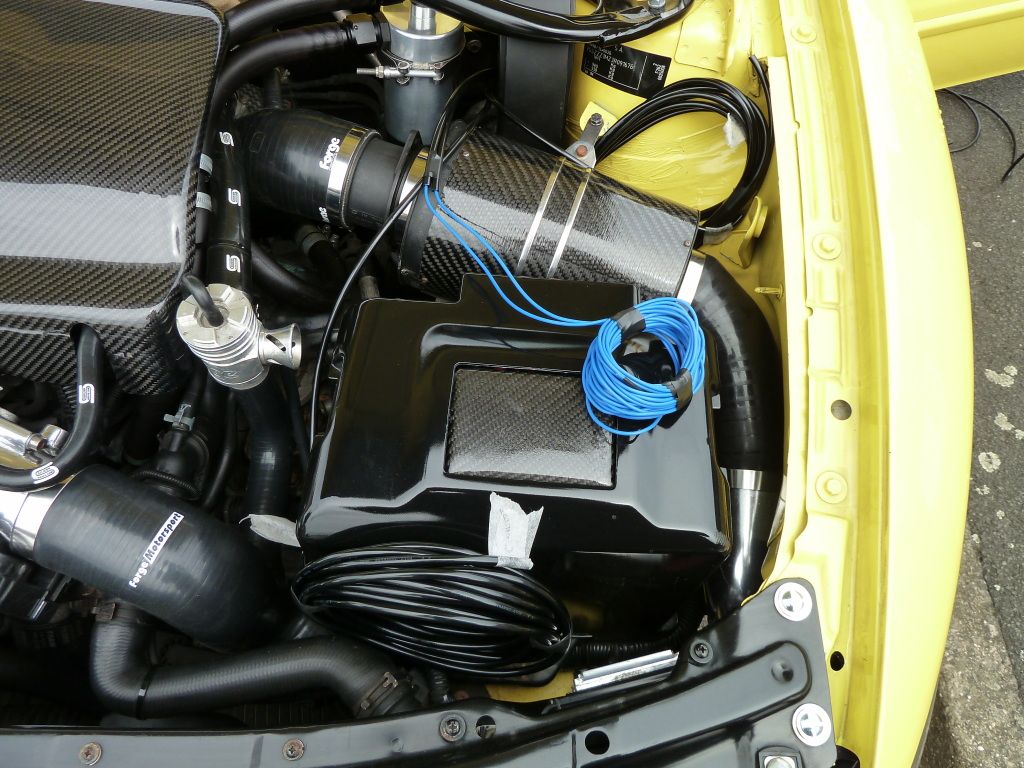
I’ve fed two airlines into the engine bay. One is a feed directly from the compressor, and one is for the psi gauge. I’ve also fed the wires for the solenoid, using the airline as an outer casing for the wires, to keep them protected.
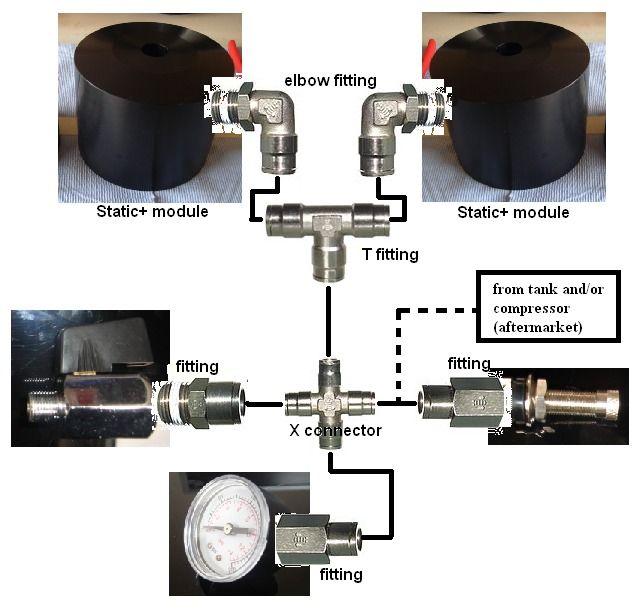
Here’s a fitting diagram, to give you a better understanding of the Static+ Air Lift kit’s layout.
So, everything is wired, fitted and fused (apart from the psi gauge). As mentioned, I’m just waiting for my deliveries and then I can get on with the mechanical stuff… fun times ahead The only other electrical thing that I might do is feed an LED light from the main dimmer switch to the psi gauge, to make it match everything else.
This is something that is relatively new to me so it's taken a bit of time to get my head around it all. I've quite enjoyed the challenge of something new and it's nice to know it's all my own work.
Thanks for looking. Comments/ advice very much welcome
I thought I would make use of a spare hour so I’ve finished off the wiring. I’ve made a plastic base plate that will hold the paddle switch and psi gauge. It’s been wrapped in black fabric; not quite a perfect match, but close enough.
So, the wiring was today fed round to the centre console and secured. A hole was reluctantly drilled into the centre console, so that the wires could be fed through to the new panel. If this is to be removed, I can make a false floor to cover it up. This was the best option unfortunately.
The hole…

The panel…

The paddle switch was wired in and fixed. The paddle switch will have two functions. Pressing upwards powers the compressor, and this will directly feed and lift the front of the car. Pressing downwards will prompt the air solenoid to release the air pressure, lowering the car. I’ve ordered the solenoid and it should be with me this week. Unlike the compressor, I’m going to locate the solenoid in the lower part of the engine bay, out of sight but functional.
Interior tidied up… The airline sticking out is for the gauge to be located to it…

I’ve fed two airlines into the engine bay. One is a feed directly from the compressor, and one is for the psi gauge. I’ve also fed the wires for the solenoid, using the airline as an outer casing for the wires, to keep them protected.

Here’s a fitting diagram, to give you a better understanding of the Static+ Air Lift kit’s layout.

So, everything is wired, fitted and fused (apart from the psi gauge). As mentioned, I’m just waiting for my deliveries and then I can get on with the mechanical stuff… fun times ahead
 The only other electrical thing that I might do is feed an LED light from the main dimmer switch to the psi gauge, to make it match everything else.
 This is something that is relatively new to me so it's taken a bit of time to get my head around it all. I've quite enjoyed the challenge of something new and it's nice to know it's all my own work.
Thanks for looking. Comments/ advice very much welcome
Amazing updates James. People need to take note of the quality of work here! Dont change car, as you will regret it!
Thanks Maz. It's a learning curve that's for sure. I have no intension of getting rid of the car. It's a nice hobby that alwys gets me away from a fairly stressful professional life. I'm lucky enough to have this as a second car, so it can just sit if it needs to. Balancing a social life is the hardest part...
Been keeping a constant look out for a thread for your new Audi. I'm sure you'll be on another site with it, but I hope to see some pictures of it sometime soon. I really hope things have settled down a bit and that you can enjoy motoring again.
James
Good, I do regret not being able to keep the Leon so I try and encourage everyone else to keep theres!Thanks Maz. It's a learning curve that's for sure. I have no intension of getting rid of the car. It's a nice hobby that alwys gets me away from a fairly stressful professional life. I'm lucky enough to have this as a second car, so it can just sit if it needs to. Balancing a social life is the hardest part...
Been keeping a constant look out for a thread for your new Audi. I'm sure you'll be on another site with it, but I hope to see some pictures of it sometime soon. I really hope things have settled down a bit and that you can enjoy motoring again.
James
Not sure there will be a thread for the Audi James but I will be detailing her soon so may do a writeup. Had the car a week and went on holiday (came back today) so only been with the car for couple of days. Been concentrating on cleaning the supersport front seats so they are up to standard today. Engine bay needs some attention too. Car does feel quite quick, different feeling than the 335d.
Maz
Good, I do regret not being able to keep the Leon so I try and encourage everyone else to keep theres!
Not sure there will be a thread for the Audi James but I will be detailing her soon so may do a writeup. Had the car a week and went on holiday (came back today) so only been with the car for couple of days. Been concentrating on cleaning the supersport front seats so they are up to standard today. Engine bay needs some attention too. Car does feel quite quick, different feeling than the 335d.
Maz
A write up is encouraged
I had an email from Adam at Stance Solutions this morning to let me know that he'd received my air cups back from the machinist today  The diameter of the inner O-rings needed to be widened from 20mm to 22mm to accept the width of my KW strut arms. They've been assembled and were shipped this afternoon.
Hopefully I'll get a call from the courier tomorrow/Friday.
So excited now... Kid in a sweet shop doesn't come close...
Smiles all round...
James

Hopefully I'll get a call from the courier tomorrow/Friday.
So excited now... Kid in a sweet shop doesn't come close...
Smiles all round...
James
Smiles not all round...
Well, the kit still hasn't arrived I'm sure it'll be here on Monday.
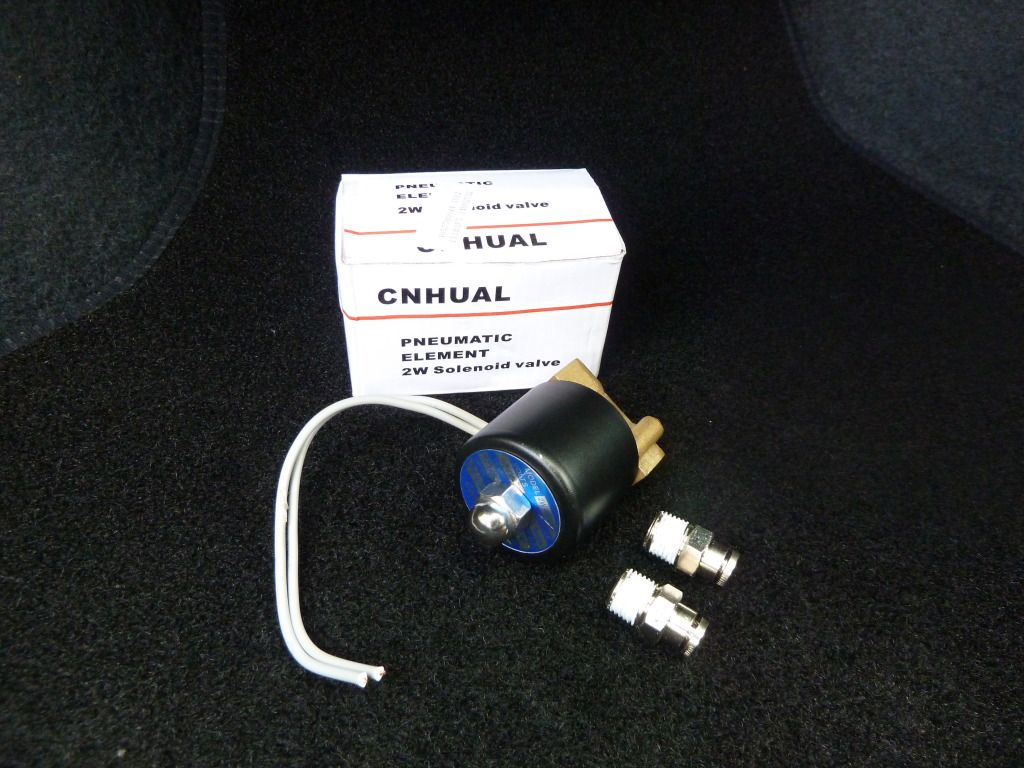
However, my solenoid arrived yesterday so i fitted that in between the showers this afternoon. The solenoid itself is electrically operated and when not powered it rests in the closed position. So, with a current it will release the air pressure within the system, and this is going to be operated by pressing downwards on the paddle switch. It cost a tenner and was bought with ¼ inch BSP fittings. To convert that fitment to a 6mm od airline I bought a couple more fittings from Bee-Fittings (64p each).
With the wiring already plumbed in, I just had to connect the wires and make a mounting bracket for it to sit securely within the engine bay.
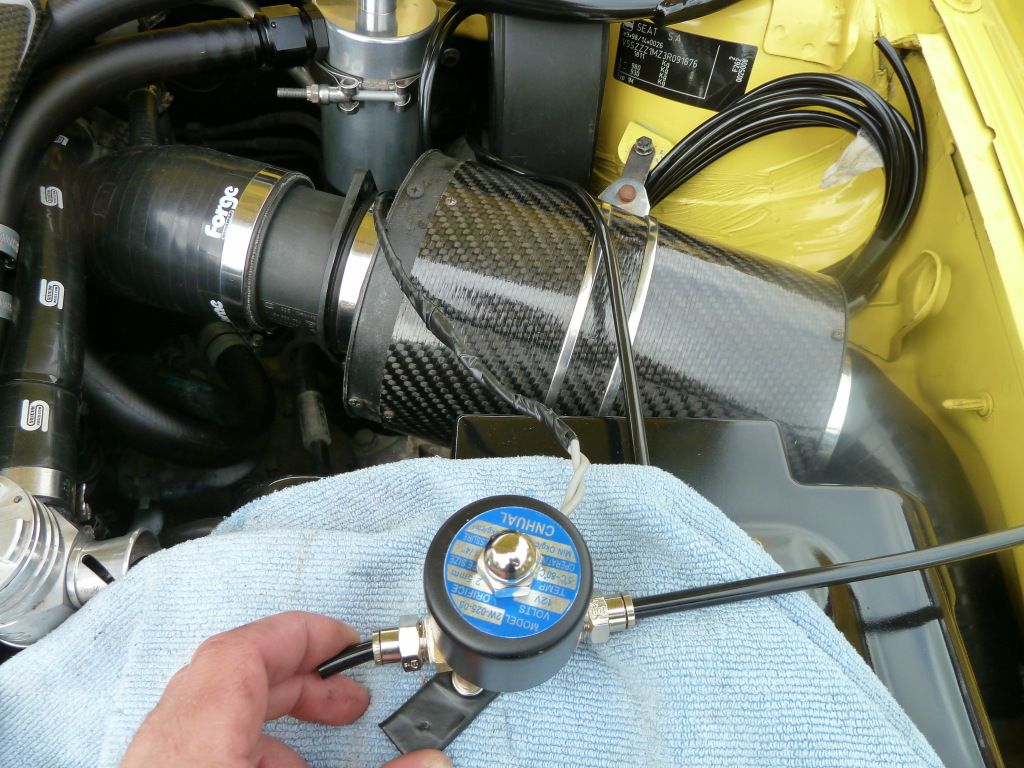
It sits fairly discreatly and looks nice and neat imo.
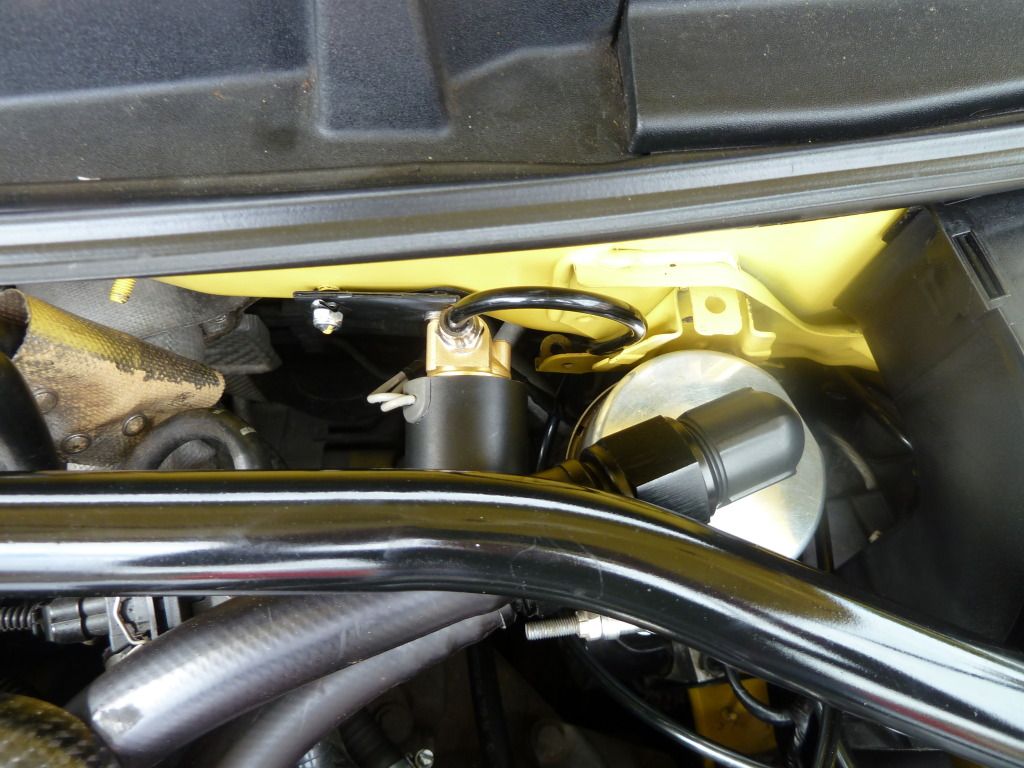
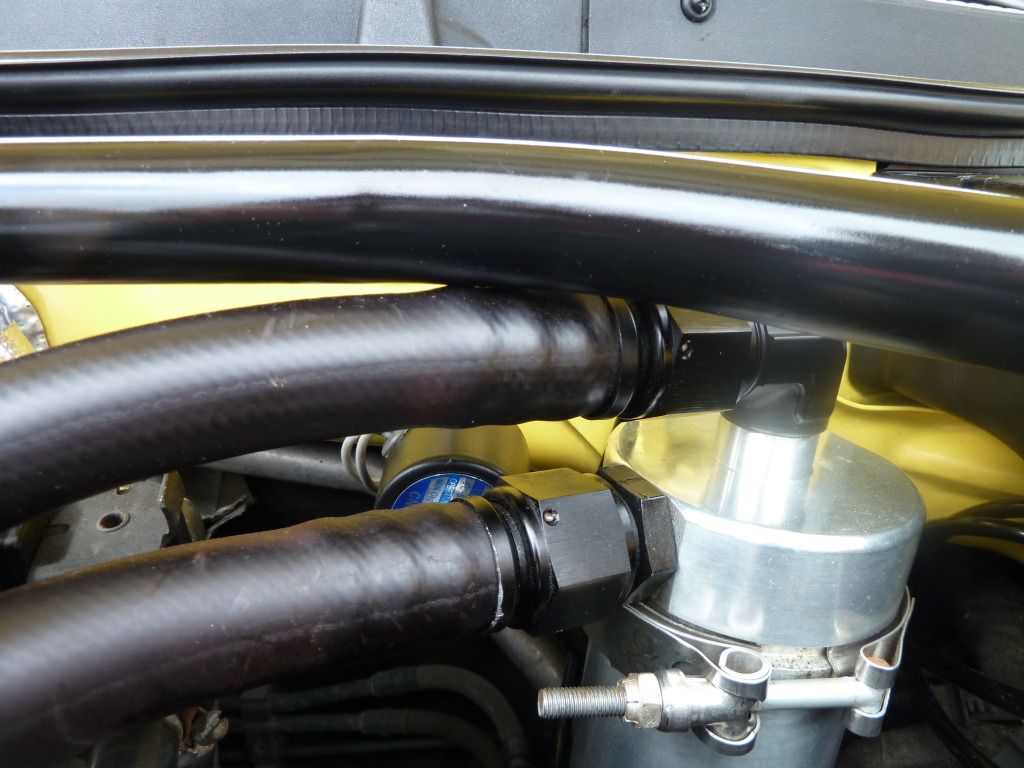
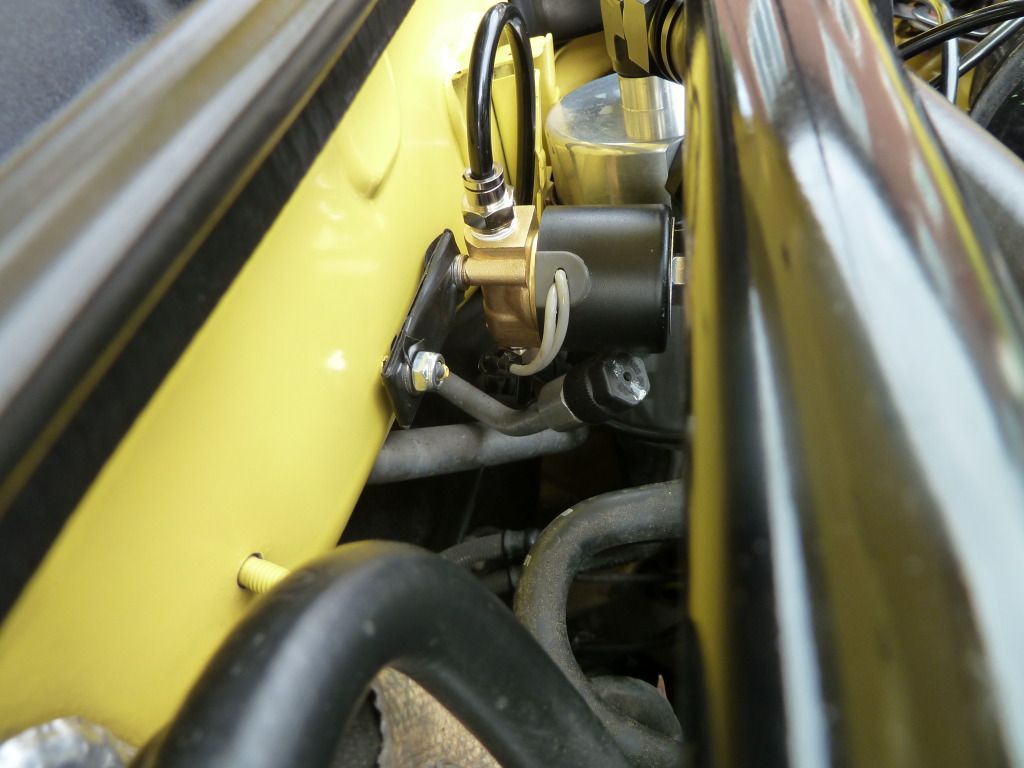
So I’m just waiting for the kit to finally arrive so I can get the car up on axle stands and get everything fitted before I go on holiday in a couple of weeks.
Sorry the update isn’t more exciting…
James
Well, the kit still hasn't arrived
However, my solenoid arrived yesterday so i fitted that in between the showers this afternoon. The solenoid itself is electrically operated and when not powered it rests in the closed position. So, with a current it will release the air pressure within the system, and this is going to be operated by pressing downwards on the paddle switch. It cost a tenner and was bought with ¼ inch BSP fittings. To convert that fitment to a 6mm od airline I bought a couple more fittings from Bee-Fittings (64p each).

With the wiring already plumbed in, I just had to connect the wires and make a mounting bracket for it to sit securely within the engine bay.

It sits fairly discreatly and looks nice and neat imo.


So I’m just waiting for the kit to finally arrive so I can get the car up on axle stands and get everything fitted before I go on holiday in a couple of weeks.
Sorry the update isn’t more exciting…
James
Last edited:
Hi All,
Having come back from the gym this morning, and with the sunshine out, I thought I would just get on with the removal of the front suspension.
Having jacked up the car and got the front on axle stands, I removed the wheels and decided to replace the brake pads first. That was a battle that I didn’t enjoy at all, and I needed to resort to drastic measures to remove the pads. As some will know, the Brembo retaining pins can become difficult to remove/ceased at the rear of the callipers, after a period of time. This was the case today
After using a punch, WD40 and a bit of heat, none of them would budge. I know that the retaining pins are roughly 60 quid new but it’s something that I’ll just have to take on the chin, if my repair plan doesn’t work.
So, I got the Dremel out and made two cuts in each of the pins. The first cut was completely cut through and the second one was partly way through; enough so that it would bend and be easier to repair later on.
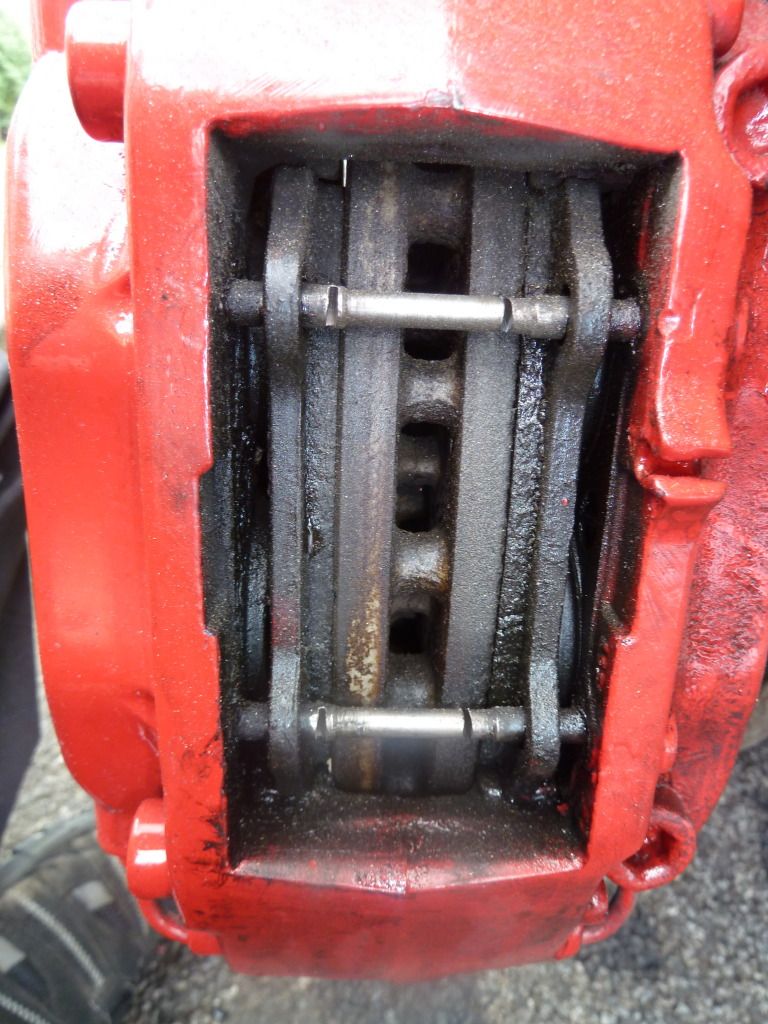
With the cuts made, the fronts of the pins came out with very little effort, as expected. The rears required a big whack with a solid bar, but they also came out.
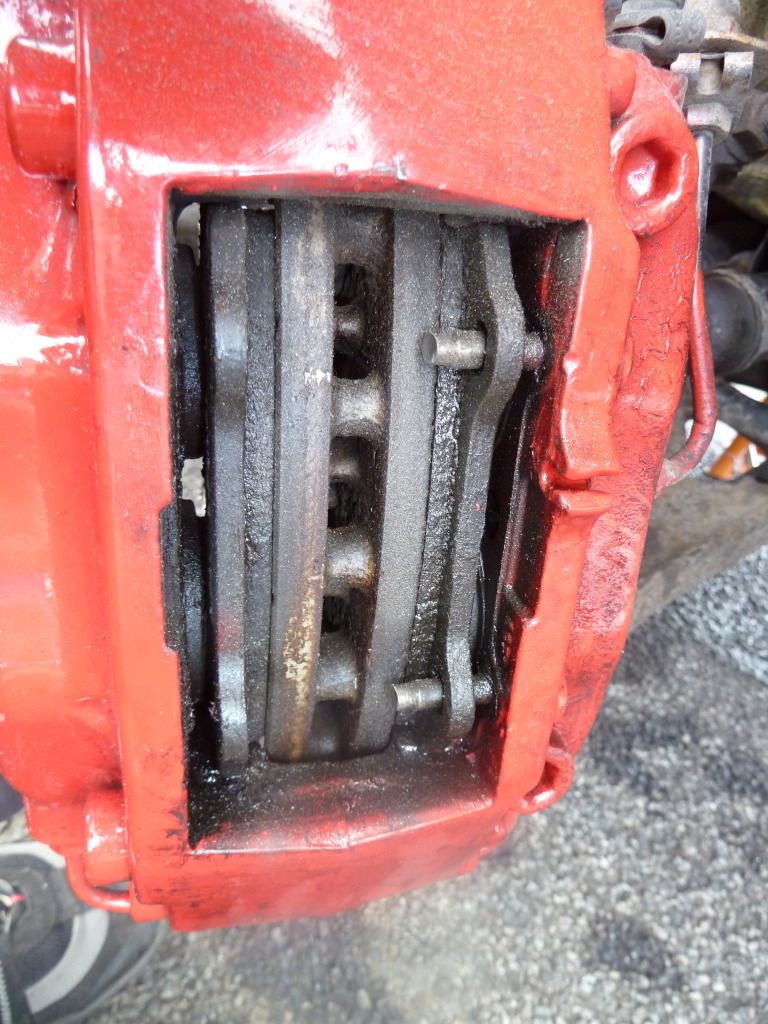
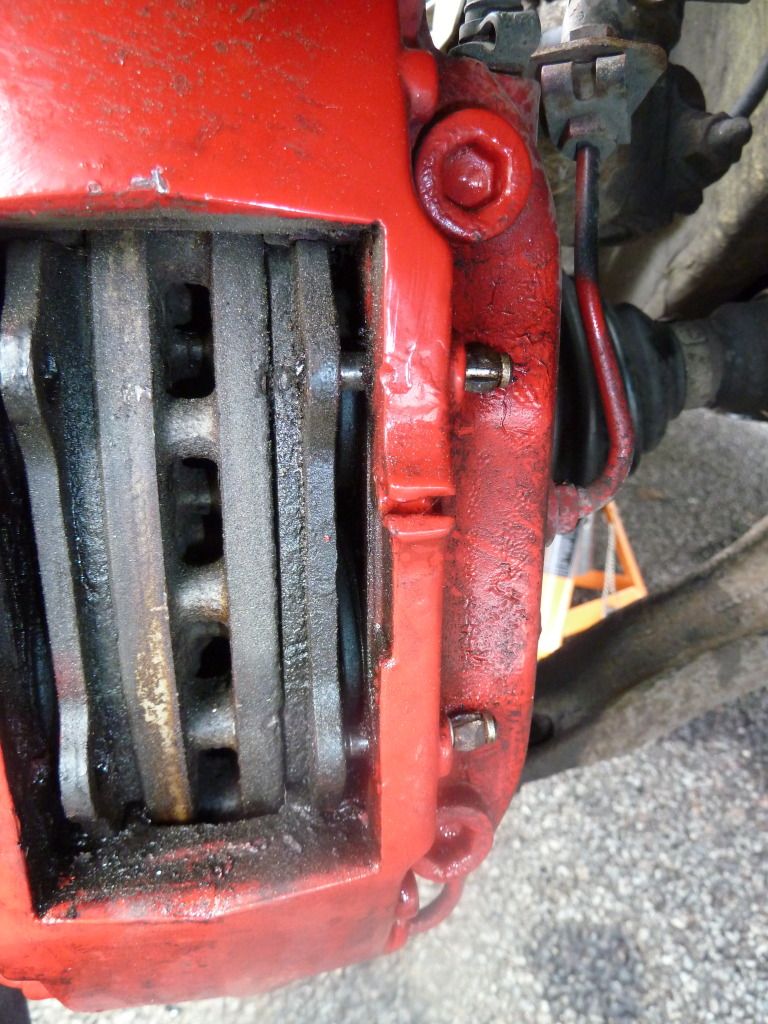
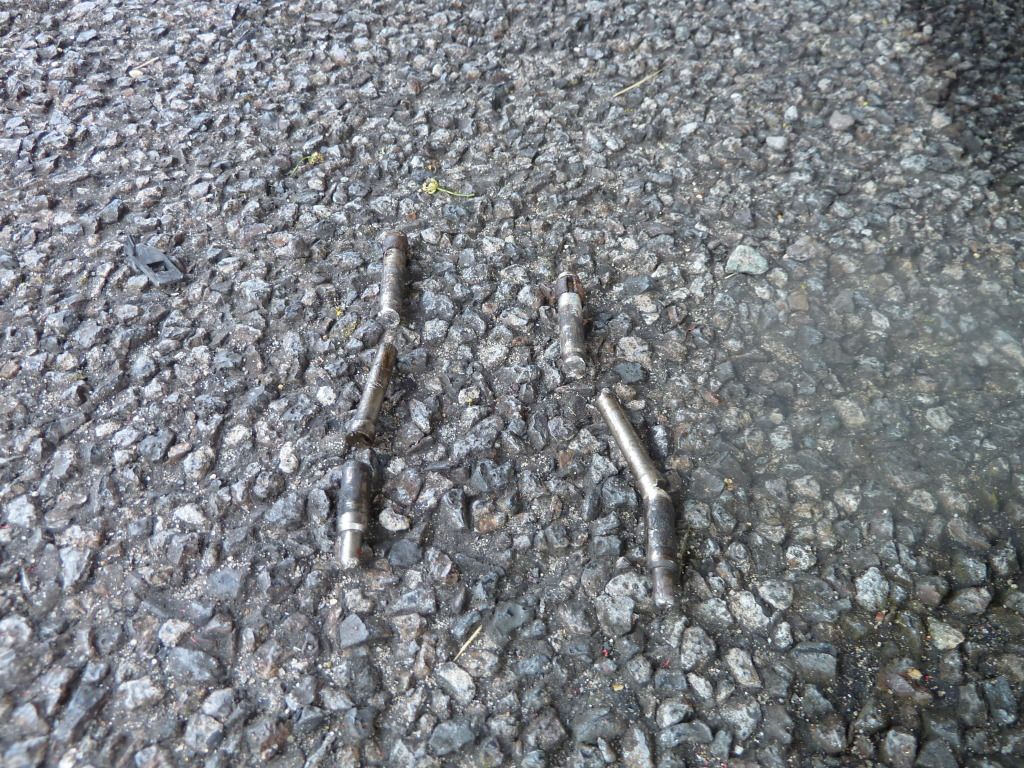
With the pins out, the pads came out and they were replaced with some new ones.
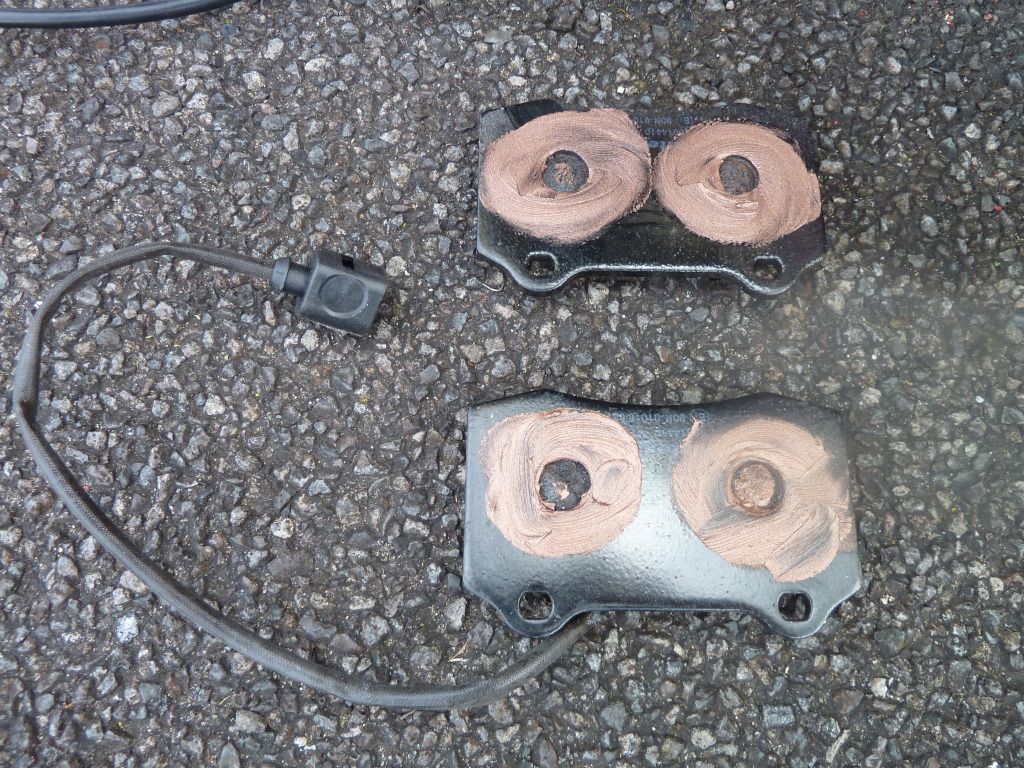
My Mrs popped to Halfords for me to pick up some chemical metal. I have used this to marry the pins back together. We’ll see if this sets solidly. If not I’ll have to buy new retaining pins (very likely). I’ll make the call tomorrow. Someone might suggest other ways of getting round this, but I couldn’t see any other option. Nothing would budge at all… I then gave them a good clean, and will touch them up if needed before putting the wheels back on.
I then undid the hub/strut nut holding the suspension leg on the driver’s side. I used the usual technique for undoing rusted bolts (wire brush, WD40 and heat). Eventually that budged. I then remove the tie rod arm from the arb. This bolt nut wouldn’t budge after three heat cycles, so I got the grinder out. Success Then I removed the nut holding the ball joint to the hub. Hard work
Looking at the wishbone and particularly how the front bush is mounted, I’m just not sure I can get them off. I’m thinking I’ll replace everything else, and when the car has its new front tyres fitted and tracking done, I’ll get the guys to switch over the wishbones. A bit defeatist but I just think it’s a little far beyond my reach.
I’ll potter in the evenings after work with a hope that everything will be in at the weekend. I’ve got to loosen everything on the passenger side first, then I’ll remove the front suspension struts and go from there.
Thanks for reading
Having come back from the gym this morning, and with the sunshine out, I thought I would just get on with the removal of the front suspension.
Having jacked up the car and got the front on axle stands, I removed the wheels and decided to replace the brake pads first. That was a battle that I didn’t enjoy at all, and I needed to resort to drastic measures to remove the pads. As some will know, the Brembo retaining pins can become difficult to remove/ceased at the rear of the callipers, after a period of time. This was the case today
After using a punch, WD40 and a bit of heat, none of them would budge. I know that the retaining pins are roughly 60 quid new but it’s something that I’ll just have to take on the chin, if my repair plan doesn’t work.
So, I got the Dremel out and made two cuts in each of the pins. The first cut was completely cut through and the second one was partly way through; enough so that it would bend and be easier to repair later on.

With the cuts made, the fronts of the pins came out with very little effort, as expected. The rears required a big whack with a solid bar, but they also came out.


With the pins out, the pads came out and they were replaced with some new ones.

My Mrs popped to Halfords for me to pick up some chemical metal. I have used this to marry the pins back together. We’ll see if this sets solidly. If not I’ll have to buy new retaining pins (very likely). I’ll make the call tomorrow. Someone might suggest other ways of getting round this, but I couldn’t see any other option. Nothing would budge at all… I then gave them a good clean, and will touch them up if needed before putting the wheels back on.
I then undid the hub/strut nut holding the suspension leg on the driver’s side. I used the usual technique for undoing rusted bolts (wire brush, WD40 and heat). Eventually that budged. I then remove the tie rod arm from the arb. This bolt nut wouldn’t budge after three heat cycles, so I got the grinder out. Success

Looking at the wishbone and particularly how the front bush is mounted, I’m just not sure I can get them off. I’m thinking I’ll replace everything else, and when the car has its new front tyres fitted and tracking done, I’ll get the guys to switch over the wishbones. A bit defeatist but I just think it’s a little far beyond my reach.
I’ll potter in the evenings after work with a hope that everything will be in at the weekend. I’ve got to loosen everything on the passenger side first, then I’ll remove the front suspension struts and go from there.
Thanks for reading
Last edited:
I'd personally buy new pins wouldn't trust chemical metal in some thing that's holding pads in , Why did you undo the hub nut if your changing the suspension ? Unless your doing other bits and i haven't read
Deleted member 12147
Guest
I'd personally buy new pins wouldn't trust chemical metal in some thing that's holding pads in , Why did you undo the hub nut if your changing the suspension ? Unless your doing other bits and i haven't read
Yeah, I agree. I'll speak to seat in the morning.
I undid that nut still with the intention of removing the wishbones; they have new ball joints. I'll persevere and see where I get.
Great updates coming mate,detailed as ever.
I'm the same as you and love the looks of the BMC, looking at yours does the green filter go straight onto the MAF and your got the bmc case as just a surround.
As my bmc is damaged around the MAF end so I'm wondering if I need to get a new end or if it don't matter
I'm the same as you and love the looks of the BMC, looking at yours does the green filter go straight onto the MAF and your got the bmc case as just a surround.
As my bmc is damaged around the MAF end so I'm wondering if I need to get a new end or if it don't matter
Similar threads
- Replies
- 183
- Views
- 11K

