• Guest would you be interested in CUPRA or SEAT valve caps? let us know in the poll

  • Welcome to our new sponsor Lecatona, a brand dedicated to enhancing performance for VAG group sports cars, including SEAT, Audi, Volkswagen and Škoda. Specializing in High Pressure Fuel Pump (HPFP) upgrades.

Team GTR - Leon Cupra R

skylion

Guest
So glad my work place doesn't mind me receiving these deliveries :)

I can't say anything about you receiving deliveries considering last week my alloys + tyres were delivered to the office lol.
 
Last edited by a moderator:

EL

Forever Alive
Mar 17, 2008
2,931
1
Bickley, Bromley
Oil Cooler Fitting

So first things first, I needed to make sure all that was going to help with fitting the oil cooler was fully prepared for the day. Therefore an early morning trip to the café was needed for some major fry-ups :)

Once back we began on the car. Already the weather was playing nasty by pissing it down so we pushed the car half way into one of the spare garages. Taking the bumper was a lot more straight-forward than when we took it off first time round when doing the front mount intercooler but as you know time consuming as Seat really are OTT with the amount of screws you need to undo. We then started looking at the different options on where we can mount the oil cooler.

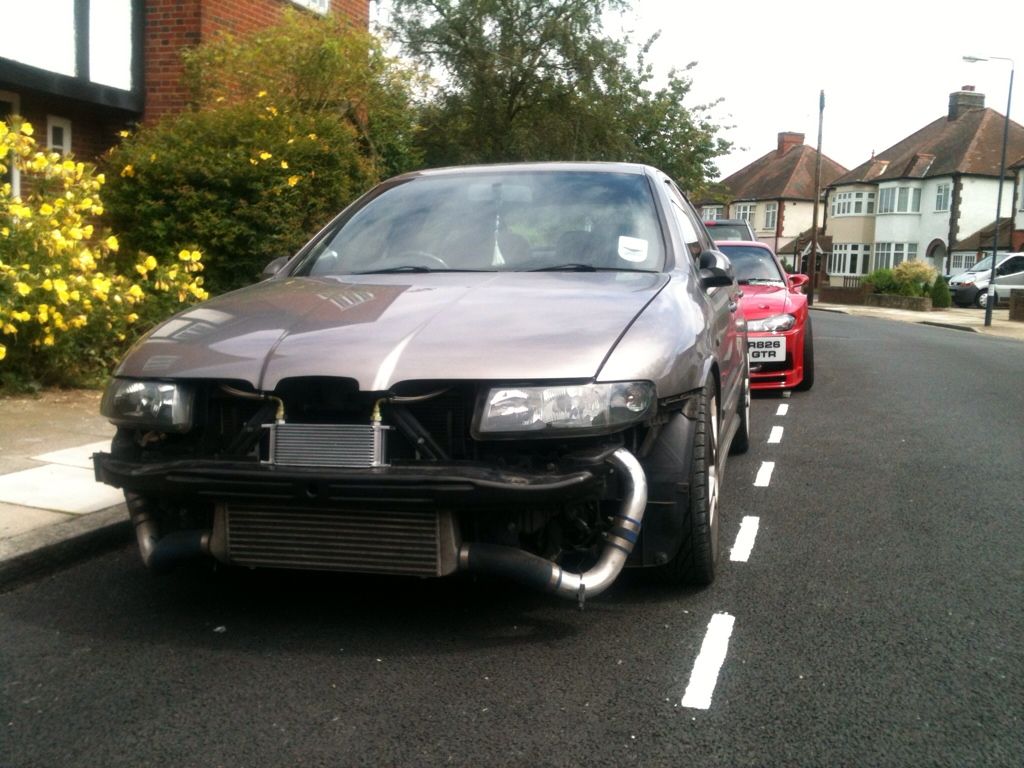
The main issue we found is simply space. We placed it up front just above the FMIC and thought that it is an ok place to mount it but if we can we would rather have it mounted higher or somewhere else. We tried to mount the cooler upside down as the fittings would not let it go higher the right way up but found it was hitting the front bumper when it was placed back on. We looked at mounting it towards the side where the old side mount intercoolers were but thought that the gap available there for air flow is limited due to the intercooler hosing. For some intercoolers this would be a great place to mount it such as the Airtec one by AmD as the piping comes down and around leaving that whole section open. We also thought about mounting the oil cooler low down up front, so just in front of the massive FMIC so great air flow, loads of areas to make the brackets to mount it but the only issue we had this time was that I did not have enough hose to connect it up with it being extremely tight. So in the end we decided to stick with mounting it above the FMIC.

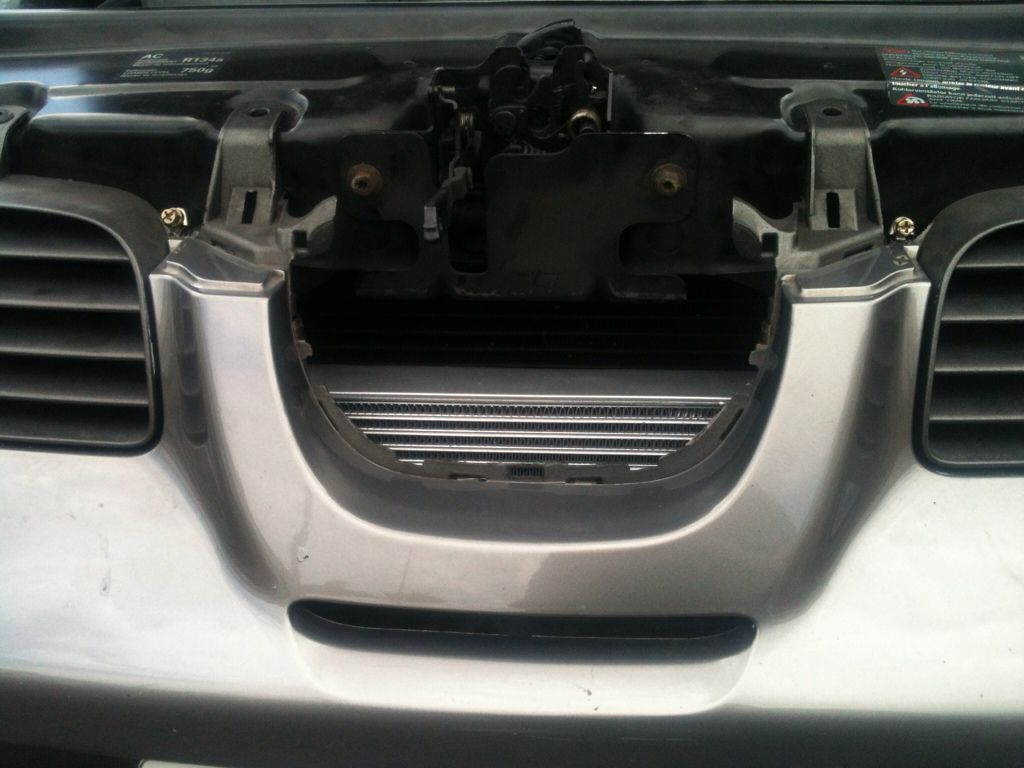
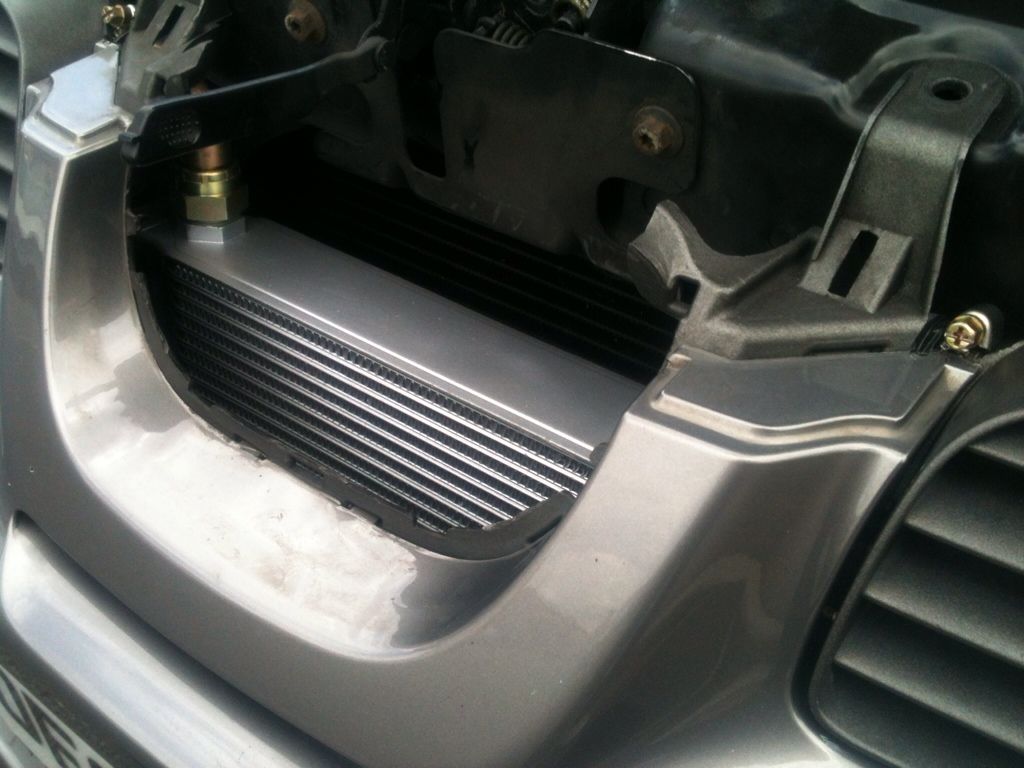
We realised that in order to mount it there we still had to do some cutting and adjusting. We slightly trimmed the crash bar by making two slits and pushing it flat so that the oil cooler could sit on top of this and bolt straight on to it. This gives us the perfect height we needed plus somewhere to mount it securely.

Next up was the messy bits. We unscrewed the oil filter (be prepared for some oil drip) and removed the OE thermal jacket (OE oil cooler, again be prepared for some coolant loss) and unscrewed the threaded bolt which holds it all together. This is then changed for the short one purchased from Seat. There are two coolant hoses which feeds into the OE thermal jacket which need to be blocked off or connected together. We decided to trace these back to where they start and remove both hoses and fit one hose making the ‘circuit’ so to speak.

So far so good, everything going well and ticking along as hoped until disaster. The sandwich plate I purchased is a generic one, which does not have the centre threaded bolt where the oil filter would screw on to DOH!!!! This is needed as the short bolt purchased from Seat is too short to reach through the sandwich plate and allow for the oil filter to bolt to. So the way it works is that this piece would connect to that bolt and stick out from the sandwich plate allowing the oil filter to securely screw on. After a lot of head banging we decided to stop the work there until I get this one single piece and then we can finish the install and put the car back together. The piece that I needed is: MOCAL OIL COOLER SANDWICH PLATE CENTRE BOLT 3/4UNF Bit of a bummer that we couldn’t get the install down completely but know what is needed so the car will have to wait until next weekend.

Some pics after the essay above :lol:

IMG_1569.jpg

IMG_1570.jpg

IMG_1571.jpg

IMG_1572.jpg

IMG_1578.jpg

IMG_1577.jpg

IMG_1579.jpg

IMG_1581.jpg

IMG_1582.jpg

IMG_1583.jpg

IMG_1584.jpg


A massive thanks to the Team GTR guys for today. Couldn't have got this far this quickly without them to be honest. Looking forward to finally getting it finished and then hit Brands for some proper abuse!
 

t0m

LCR 225
Apr 29, 2007
8,133
7
Kent
Brilliant write up mate! Cooler looks at home there. Be great when it's all done.

Team GTR do a great job :)
 

EL

Forever Alive
Mar 17, 2008
2,931
1
Bickley, Bromley
Brilliant write up mate! Cooler looks at home there. Be great when it's all done.

Team GTR do a great job :)

Cheers mate. Bit of a long one write up but thought I might as well write it all as I never heard of half these when researching unless my shed is special :p
 

DOLBY

Active Member
Jun 24, 2006
2,934
98
North of London
www.facebook.com
So are you saying the bolt u brought from SEAT is not needed as the eBay item is the one u need?

Want to be getting mine ASAP so need all the exact parts. Cheers


Sent from my iPhone when I should be working....
 

Harris.

Active Member
Apr 5, 2010
366
0
Essex Bruv
Looks awesome mate. I'm gonna bite the bullet and get one I think. Possibly Doing a brands session on the 1st August.
 
Last edited:

EL

Forever Alive
Mar 17, 2008
2,931
1
Bickley, Bromley
Cheers gentlemen :) It's a fiddle job but getting there now. Also forgot to mention, you may have realised that we removed the battery, this was to give us extra room when disconnecting the coolant hoses to the OE cooler. The single hose which we have used can just about be seen in the 3rd to last pic. It's the one which is closest to the gear linkages which looks like it has a small cut out section. Guessing so that it didn't rub on anything when in its original place.

Another bit of advice I forgot to mention is to make sure you have some spare oil and coolant to top up afterwards. You don't lose much but will be best if you do have some aside.

The short thread is required from Seat as the original one on the car is far too long meaning the oil filter will not sit flush to th sandwich plate. The sandiwch plate I purchased did not have a middle adaptor which connects to the new short thread purchased from Seat and then the oil filter connects to this. Il get a pic once it's done as it will be easier to show rather than explain.
 

EL

Forever Alive
Mar 17, 2008
2,931
1
Bickley, Bromley
Just ordered the centre extension bolt from Merlin Motorsport. It is the same one as the ebay item I posted earlier but the listing had ended so looked around to find another. The one you need is this: EXTENSION BOLT 3/4UNF

I am sure there are thermostatic sandwich plates which have this extension bolt included. My advice is if you can get one of those then do so otherwise you need to purchase it separately like I have
 

EL

Forever Alive
Mar 17, 2008
2,931
1
Bickley, Bromley
Just heading out for a drive. It's alright to drive like this right :dance:

422d0a4d.jpg


Just popped back to the garage to check the bolt and can confirm it is the correct one
 

EL

Forever Alive
Mar 17, 2008
2,931
1
Bickley, Bromley
Oil Cooler Fitting Part 2

Happy to say the oil cooler install is now complete :)

Firstly fitted the short bolt purchased from Seat and made sure that was on securely. Next up I fitted the fittings to the hose, which was a proper tight fit, and fitted one to the sandwich plate. Then fitted the sandwich plate and screwed in the mocal extension bolt I purchased last which holds the sandwich plate in place. A new oil filter was then screwed to the end of this bolt. The piggy bit was to get the other hose fitted to the sandwich plate. Space is limited with these cars making it a bit of a pita but got there in the end.

Fitted the bumper back on and realised I needed to cut two small sections of the plastic trim in order for it to fit back on properly. The bit I cut is not seen once all of the pieces are fitted back together (have a look at the pics below, it is where the jubilee clips are).

Topped up the oil with what I had and started the car to make sure there are no oil leaks. Went for a drive as well and all looks good with no leaks or anything.

a7c19320.jpg

66833c98.jpg

07b8f7a4.jpg
 
Progressive Parts, performance parts and tuning specialists