what have you done to your car today ?

MoToJoJo

Active Member
Mar 25, 2014
823
653
Northants
Afternoon turned out nice so decided to have a go at the shock absorbers after I finished work.

They beat me.

First time trying out the Milwaukee impact wrench and that did the job fine - had a little trouble at first getting the wheel bolts out, but it's a mix of a lack of copper slip on the threads and me worrying about waking the dead by leaving it on the third setting until they came out.

Everything was going fine with the shocks - the impact wrench even got the lower shock bolt out that's been rusted in place for years (it stripped half the thread...!) - until I tried to get the lower shock out of the knuckle. I bought some spreaders and was expecting it to be easy, but I couldn't really find anywhere to put the spreader in, and where I did put it, which was about an inch or so under the bolt hole, it seemed too low to actually do anything. I couldn't get it in any higher because the fin on the shock got in the way and when I hit the knuckle with a hammer, the spreader fell out, so it obviously wasn't spreading as much as it should have.

Sprayed plenty of penetrating lube in and around the strut as well. All that did was give me PTSD from when I was trying to get snapped bolts out back in March.

As the girlfriend is going to be using the car for the next fortnight, I didn't want to do anything drastic that might take it off the road, so will just leave it a while.

Since the car was on axle stands I decided to fit the horn that @Thai-wronghorse sent me. Proper pain in the arse that was. Had to remove the foglight grill and take the foglight out to get the bolt for the high tone one back in. They don't make it easy for you. Remembered to test it before I'd put everything back together though. Nice to have a proper baaaaarp sound again.

So, this is just my experience, when I was changing my front shocks I had to belt the ever-loving **** out of them. Did all the steps you did, undid everything, spread the thing, applied lube, some gentle taps before just pounding away at it…. get your minds out the gutter. Used a rubber mallet then an extension bar and mallet. Took a while and it helped not having the whole leg removed from the car. Don’t know an easier way (aside from taking it to the garage) sorry.

On the upside, at least your impact wrench works!
 
  • Like
Reactions: iammooks

Sl1ced

Active Member
Oct 10, 2020
797
404
Don’t know if this applies to your situation but. My take is. If something is coming off to re replaced, I’m quite destructive to get it off as I know the binmen will take it on Fridays.


Sent from my iPhone using Tapatalk
 
  • Like
Reactions: iammooks and Rich.T

Thai-wronghorse

Self proclaimed Cupra R addict & butcher!
Dec 3, 2015
2,240
1,093
Kent
With the correct size hub spreader no stress or amount of bashing is required.
I pull these apart very frequently and it only takes a few minutes to separate them once you know how.
Correct tooling and technique is key here.

Sent from my SM-G986B using Tapatalk
 
  • Like
Reactions: iammooks

mty12345

Active Member
Jun 17, 2011
3,907
538
bristol
I've been violated by my suspension when a spring snapped at my parents place in Cornwall. Was january and I didn't have access to all my tools. #MeToo
 
  • Like
Reactions: iammooks

Battoussai

Active Member
Mar 22, 2016
474
130
Portugal
And why not a unique dial design for eye catching? :)
novo dia.jpg
 

Attachments

  • novo noite.jpg
    novo noite.jpg
    279.8 KB · Views: 76

iammooks

Active Member
Nov 27, 2018
1,784
1,172
With the correct size hub spreader no stress or amount of bashing is required.
I pull these apart very frequently and it only takes a few minutes to separate them once you know how.
Correct tooling and technique is key here.

Sent from my SM-G986B using Tapatalk
That was what I was thinking when I visualised taking it apart - the spreader went in and the lower shock just pulled out like it had been covered in butter.

I actually got two spreaders - one longer than the other - but the only way I can see it working effectively is if I can put it in between where the pinch bolt goes through, but that's blocked by the locator fin from the shock absorber.

It looks like these are definitely the original shocks - they have the VW/Audi branding on them - so it's possible something's happening below the surface, but from all the videos I've seen of spreaders, when they're in place properly, they're really wedged in there and they're certainly not falling out on their own.

What am I doing wrong?
 

Yellow fr

Gone to new owner so seat less for now
Sep 6, 2018
1,547
1,062
Sandbeds West Yorkshire
That was what I was thinking when I visualised taking it apart - the spreader went in and the lower shock just pulled out like it had been covered in butter.

I actually got two spreaders - one longer than the other - but the only way I can see it working effectively is if I can put it in between where the pinch bolt goes through, but that's blocked by the locator fin from the shock absorber.

It looks like these are definitely the original shocks - they have the VW/Audi branding on them - so it's possible something's happening below the surface, but from all the videos I've seen of spreaders, when they're in place properly, they're really wedged in there and they're certainly not falling out on their own.

What am I doing wrong?

Nothing you have to put it in where the tab on the shocker ends push it in and turn it spray some wd40 give the hub a tap if it falls out just pop it back in when the shocker come out about half way move the tool up a bit and start again they do pop out every now and again but just stick with it when out just clean both parts up and put some grease on them and you can just push the hub up on the shocker and push the bolt through with ease


Sent from my iPhone using Tapatalk
 
Jun 27, 2021
13
4
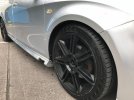
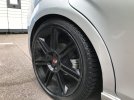
Fitted some coilovers off a Touran to my Mk2 Leon. Can come down at the front more but not the back. Next on the list is get my wheels powder coated and callipers painted, just undecided on colours still at the moment.
 

Attachments

  • 89FAC7B4-15A3-4D18-B015-C20E64172D51.jpeg
    89FAC7B4-15A3-4D18-B015-C20E64172D51.jpeg
    902 KB · Views: 78
  • EEB9B370-7FCD-483F-AAF8-5670BCA10270.jpeg
    EEB9B370-7FCD-483F-AAF8-5670BCA10270.jpeg
    571.6 KB · Views: 71
  • D67CF727-FDA1-4E29-9A9D-1607F3AF2FE1.jpeg
    D67CF727-FDA1-4E29-9A9D-1607F3AF2FE1.jpeg
    548.9 KB · Views: 69
  • Like
Reactions: Rich.T

Sparkie

Angling Adict.
Sep 25, 2009
2,541
779
Middlesex
what kind of lips/splitters yall got on fr bumper and where u got them from?

Cupra R skitter fits. Just need to cut down the central uprights with a Stanley knife.


Badger5 Custom Map + TIP,
3”Custom exhaust, FMIC, Bosh 550’s, BC Coilovers, ARB’s +loads more.
 

iom

Active Member
May 18, 2021
22
5
finland
it looked way better on the ground and the wheel gap is horrendous but can drive stress free now and and damn it feels good compared to the 6 year old cheapest adjustable coils. power wise can't feel no change from the 3" decat, got to still get few bits before changing the stock tune.
here's a better pic of it lifted, needs fatter tires for sure
 

Attachments

  • Screenshot_20210715-005029.jpg
    Screenshot_20210715-005029.jpg
    105.8 KB · Views: 80
  • Like
Reactions: Rich.T

Rich.T

Active Member
Feb 15, 2020
1,609
932
Yesterday i checked inside the catch tank after about 300ish miles. Still bone dry in there. So will look at removing it all together at some point. Then took it for a hand car wash.

Today i was going to fit the new brake pads but have got rattling front rollbar link(s). Will buy a pair this week and kill 2 birds with 1 stone at a later date.
Im sure i fitted a pair on it last year.
 

Nathan penney

Active member
Jul 8, 2017
723
836
Liverpool
Evening all. What a hot day... well I spent it on the sofa watching BTCC.. then cleaned a few fish tanks... then washed the dailey View attachment 25221
I got all in the race car mood from watching btcc , so went to the yard. From having to do modifications to the front panel I thought I would respray that. So gave it a sand down and scotchbrite . Cleaned it and gave it a 1 over with paint. View attachment 25223

Didn't come out to bad... even a bit shiney too View attachment 25224

So that's now drying . So tomorrow after work I should be able to rebuild the front end 9f the thing so there's less stuff laying about the workshop. As we know stuff either goes missing some how. Or gets broken
I washed my daily today.
Similar to yours manic 172. Lol
D117602F-DA5E-4791-BBBA-0ED8456D5B2A.jpeg
6F072C20-A1A6-492A-B6C7-5D375D99F5DE.jpeg

Couple of small jobs to get on the Leon before MOT re test so washed my van instead.
 

Rich.T

Active Member
Feb 15, 2020
1,609
932
Had a fracis with an X5 on the way home from work.
Just driving along the dual carriageway with him sat on my back bumper. So opened the taps 😁

Took it semi easy as the cambelt history is moody and it needs a service.

Rich
 
  • Like
Reactions: Nam-uk and iammooks

Dazzalcr

Active Member
Aug 10, 2019
302
284
Lancashire
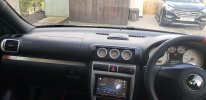
Done a service on her, although probably did not need to with the amount I've driven here lol,
Also a quick question I have gauges where my center vents use to be, can you still use the heating system and air con as normal or will it effect the way the gauges work, always wondered this?
Cheers
 

Attachments

  • 20201023_145844.jpg
    20201023_145844.jpg
    443.1 KB · Views: 72
  • Like
Reactions: Rich.T
Lecatona HPFP (High-pressure Fuel Pump Upgrades)