-
Hey Guest - Would you be interested in branded CUPRA or SEAT number plates for your car? 👉 Check out the designs and register your interest now
My LCR Since '05 with Static+ Front Air Lift - Project Gone to a New Home.
- Thread starter James23Parkin
- Start date
I've just read through Tuffty's and Prawns' threads and it seems simple enough to remove the subframe; 4 bolts holding the subframe; 4 bolts holding the steering rack; 2 bolts for the dog bone mount; and ball joints if you're removing the frame from the car. Do I powder coat this whilst it's off??? Mmmmm...
Last edited:
Subframe, wishbones and dogbone mount removed for a refurb...
Much easier than I thought...
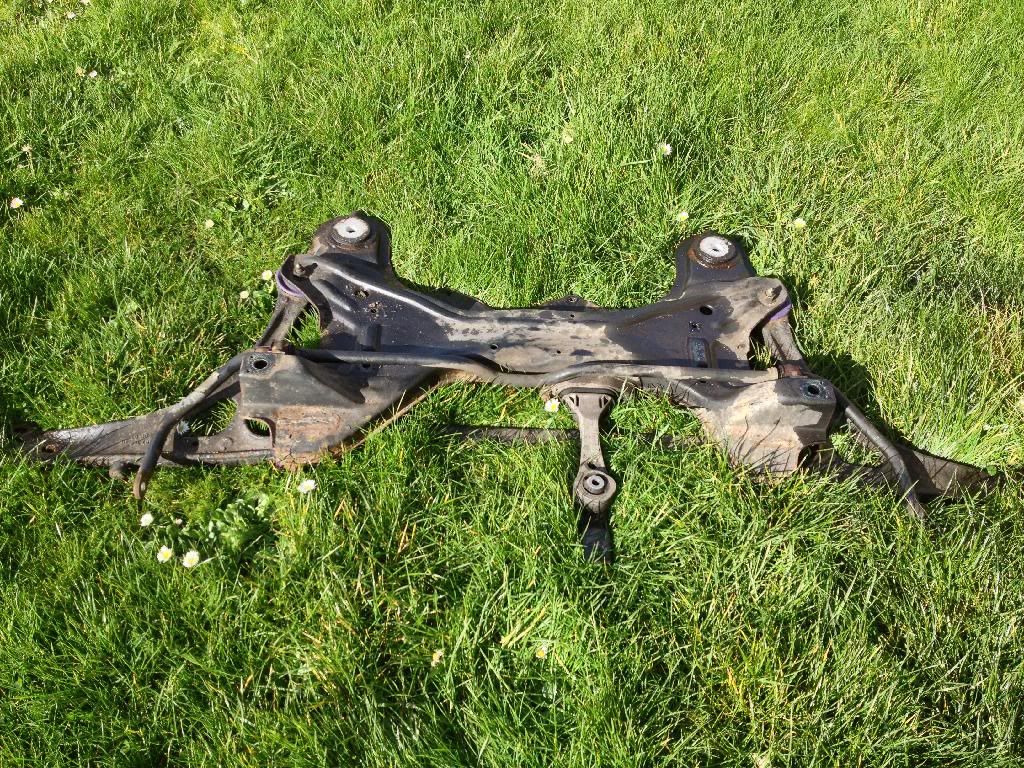
4 main bolts holding the subframe, 4 bolts holding the steering rack, 2 bolts holding the dogbone mount and 6 bolts holding the ball joints then voila!! Actually in pretty good condition considering its age.
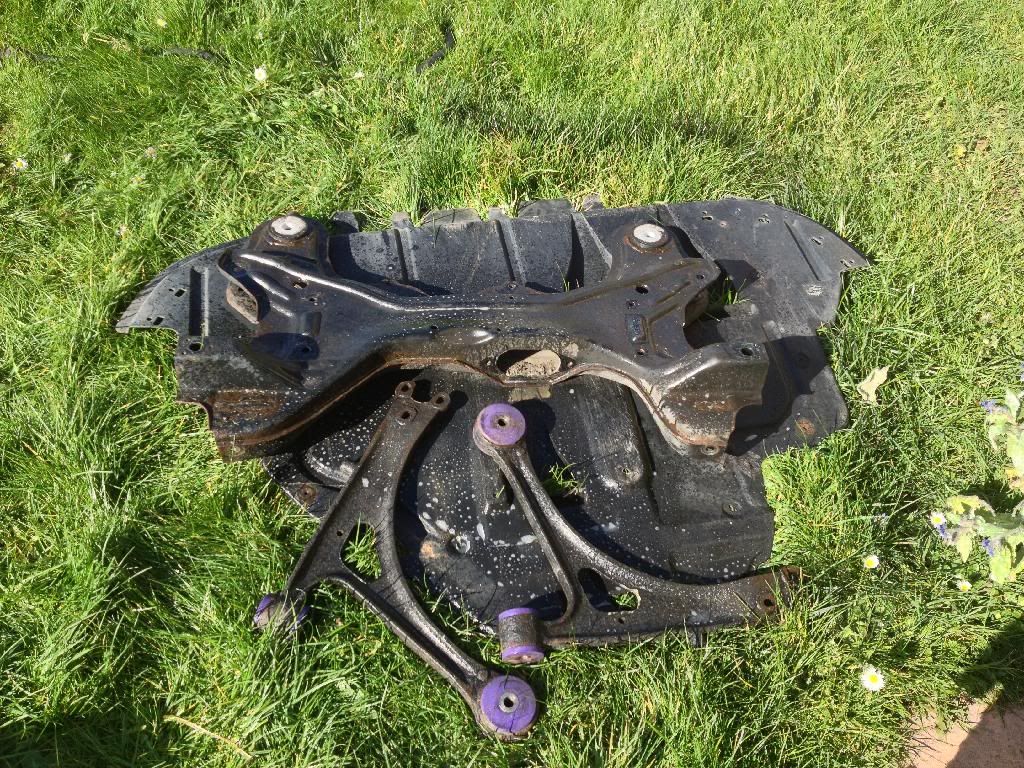
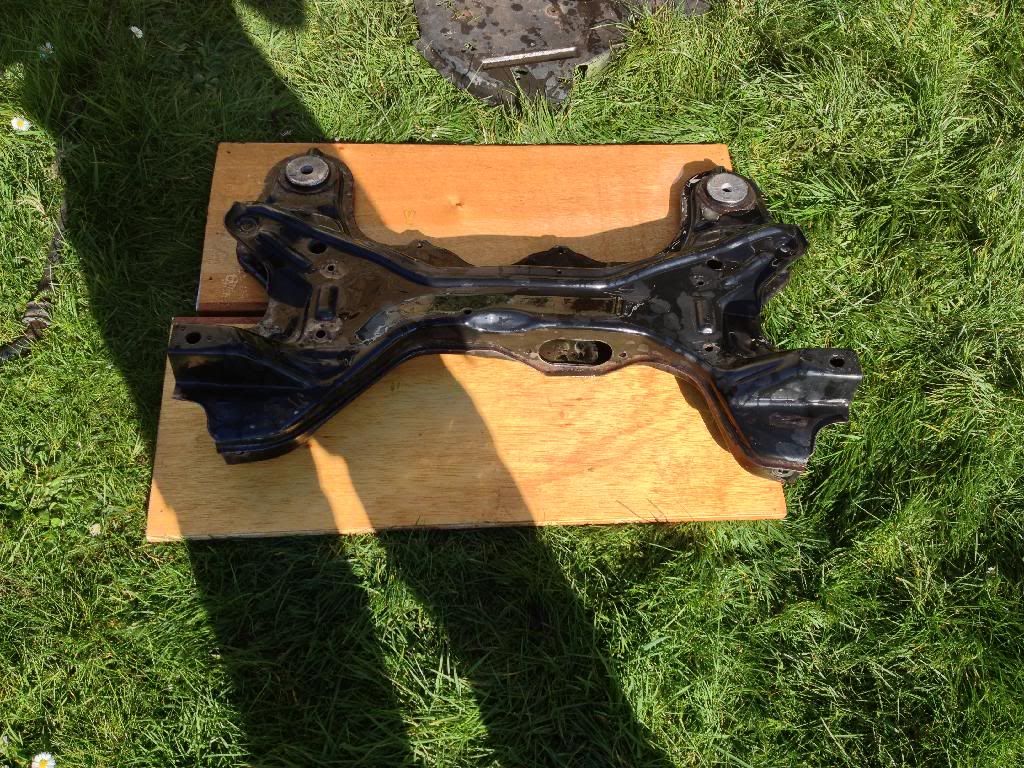
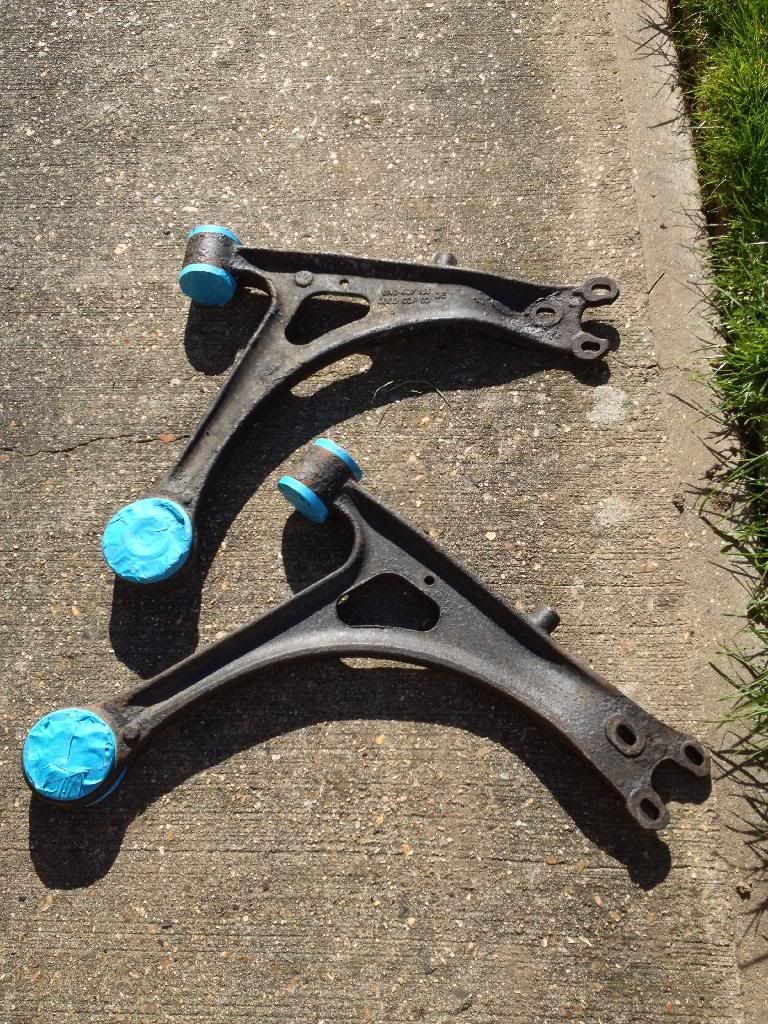
All taken apart, wire brushed and rust treated before having my first go with U-Pol Gavelex stone chip using a spray gun powered by the compressor. Goes on so well and the finish is just brilliant. So much so that I didn't add a black top coat, but instead just lacquered. Really happy with the results. I'll let it cure tonight and then reassemble tomorrow evening. Pictures of the end product will be taken tomorrow once all buttoned up.
I also stone chipped the brake splash guards and sanded down the R32 ARB, zinc primed, black top coat and lacquer finished all in 2k for durability.
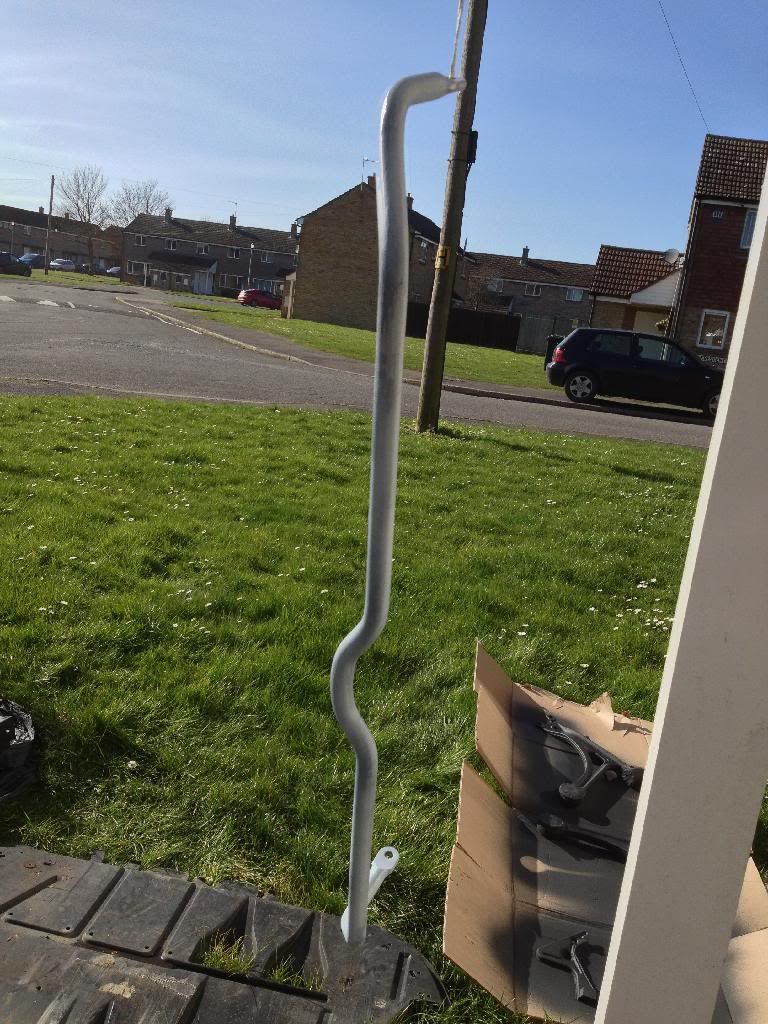
Thursday's plan will be to stone chip and paint the the wheel arches, paint the hubs, roll the arch lips and then it's assembly time - whoop
Underwhelmed by Ultimate Dubs. There really were loads of nu-wave cars there which had loads of cash thrown at them. Outside was much better!
Much easier than I thought...

4 main bolts holding the subframe, 4 bolts holding the steering rack, 2 bolts holding the dogbone mount and 6 bolts holding the ball joints then voila!! Actually in pretty good condition considering its age.


All taken apart, wire brushed and rust treated before having my first go with U-Pol Gavelex stone chip using a spray gun powered by the compressor. Goes on so well and the finish is just brilliant. So much so that I didn't add a black top coat, but instead just lacquered. Really happy with the results. I'll let it cure tonight and then reassemble tomorrow evening. Pictures of the end product will be taken tomorrow once all buttoned up.
I also stone chipped the brake splash guards and sanded down the R32 ARB, zinc primed, black top coat and lacquer finished all in 2k for durability.

Thursday's plan will be to stone chip and paint the the wheel arches, paint the hubs, roll the arch lips and then it's assembly time - whoop
Underwhelmed by Ultimate Dubs. There really were loads of nu-wave cars there which had loads of cash thrown at them. Outside was much better!
Fantastic work and attention to detail as always mate. Wish I had your patience for these things! Glad you got the subframe off ok, looks like a good finish. How hard is it to roll the arch lips? I'm worried about catching the fronts when I get my new spacers on.
Was also underwhelmed compared to the first UD I went to, agree on the nu-wave comment but most of inside is just company demo stuff now.
Was also underwhelmed compared to the first UD I went to, agree on the nu-wave comment but most of inside is just company demo stuff now.
More progress made today...
Thanks chaps
So, I had another productive day on the car today. First off, I reassembled the refurbished subframe, wishbones, dogbone mount (I refurbed that 3 yrs ago!!!), and R32 FARB. Really pleased with how robust the stonechip is.
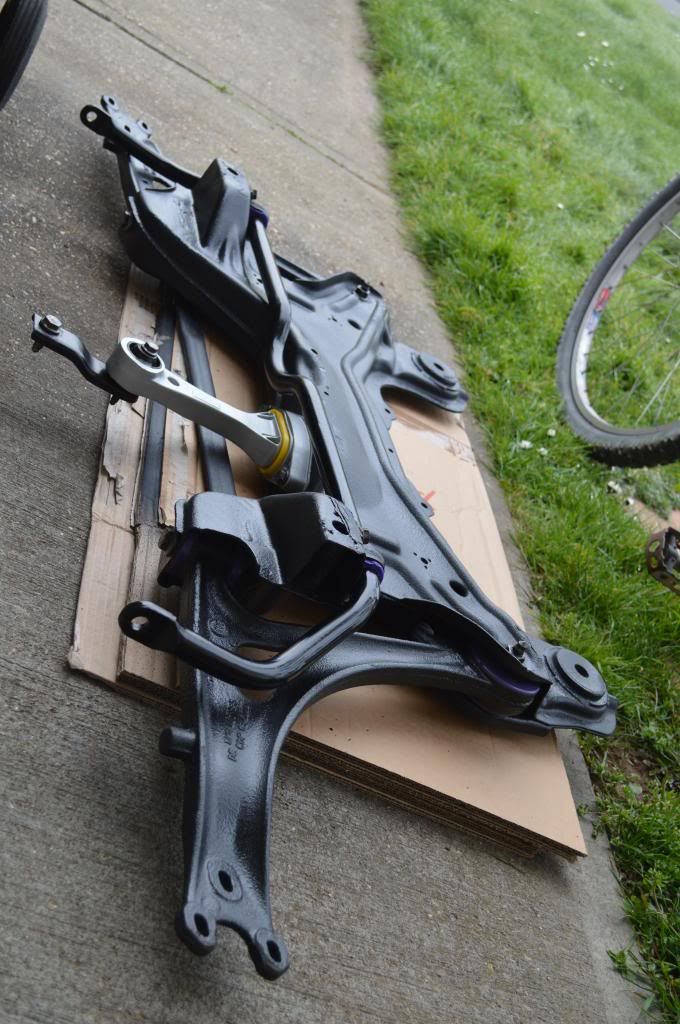
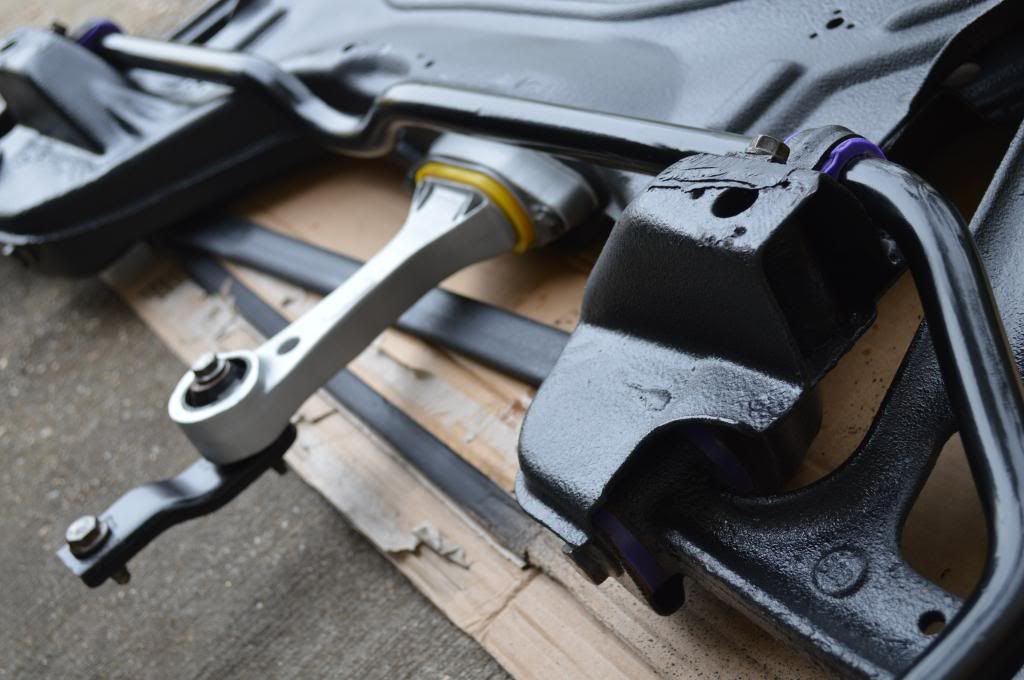
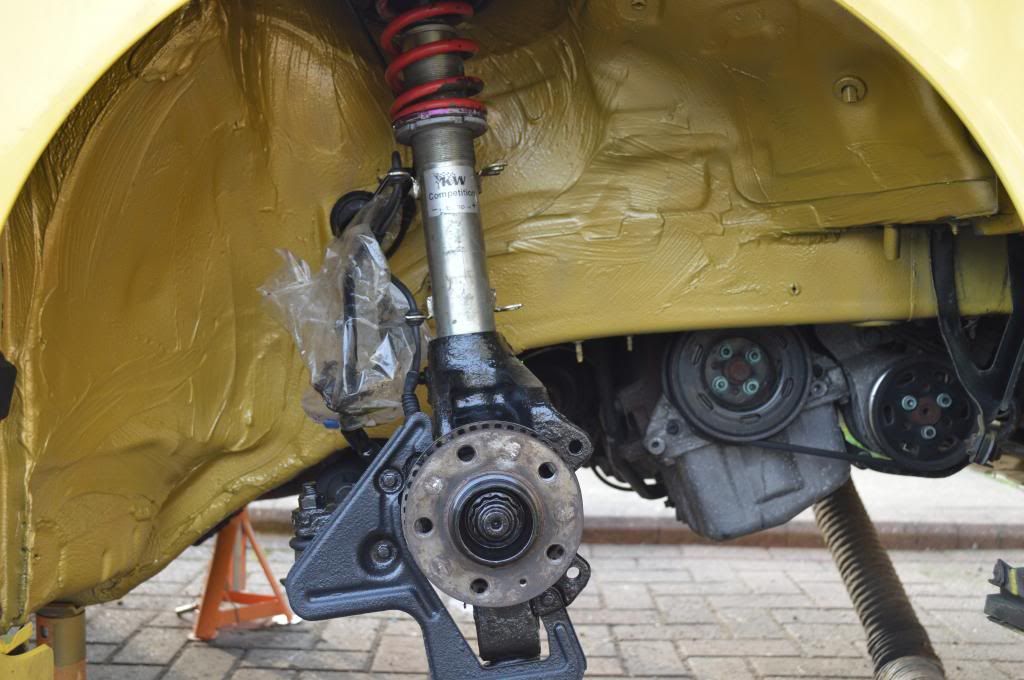
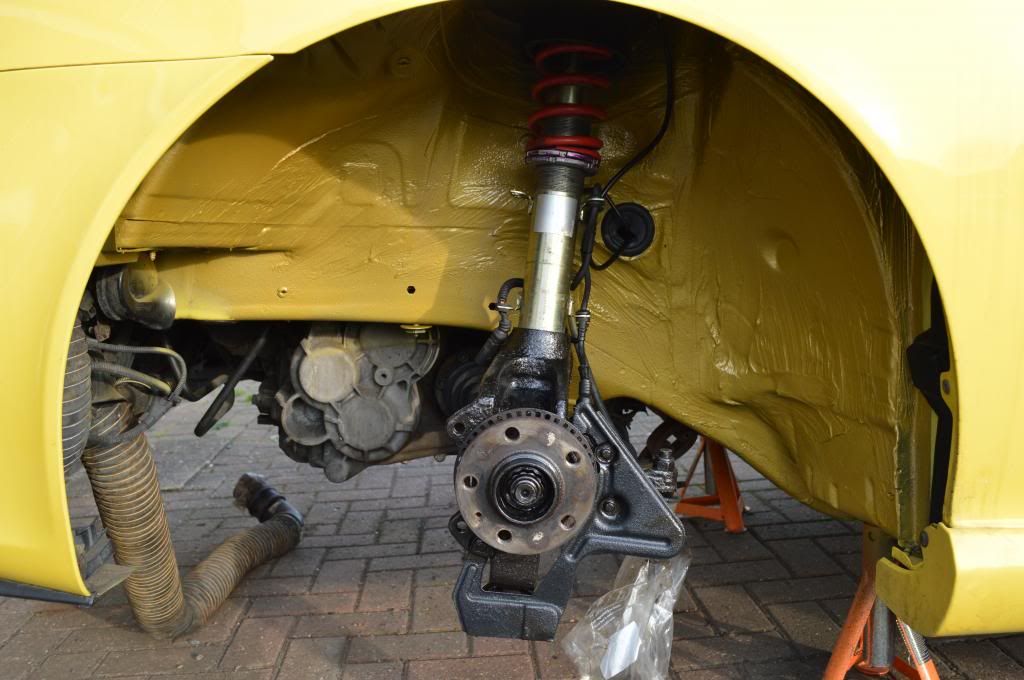
I then started the task of stripping down the arches by removing all the plastics, steam cleaning away all the dirt with a hand-held steam cleaner that I purchased for the house Once cleaned, I masked up the areas and stonechipped, top-coated and lacquered them. Pretty chuffed with the results with no sign of any overspray (smiles)
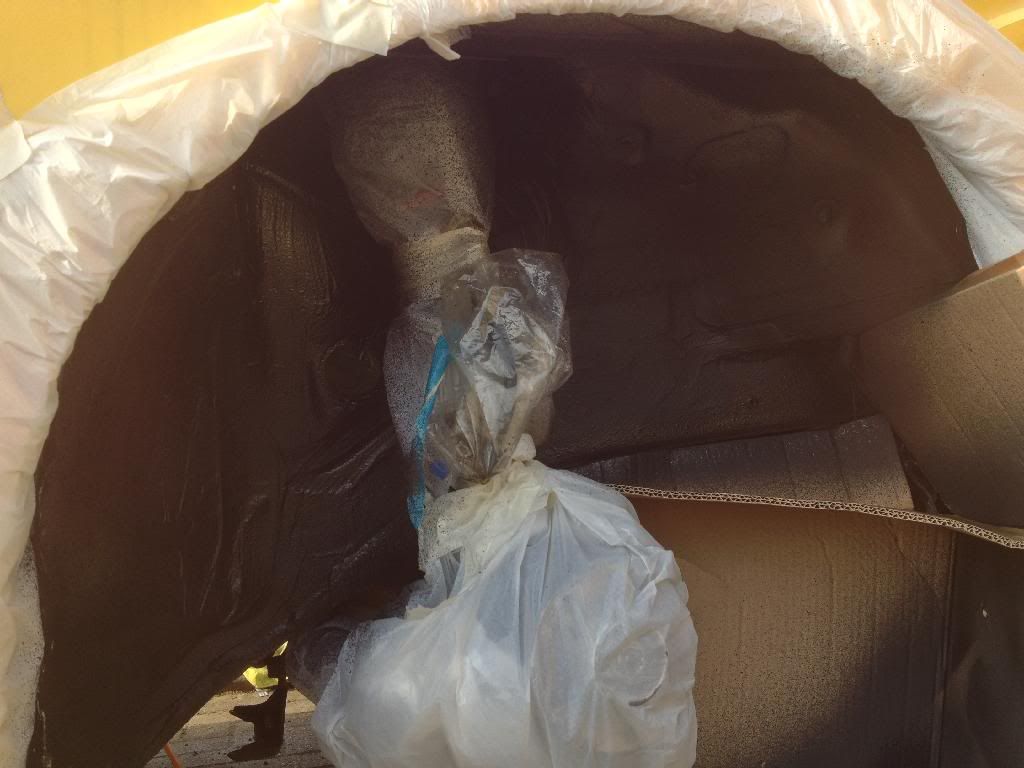
Being impressed with how robust the stonechip was, I decided to cover the lower plastics, which attach to the floor; finished off with topcoat and lacquer. Really pleased, so I think I’m going to do the arch liners too. The idea behind is that they should hopefully weather well and be easier to clean.
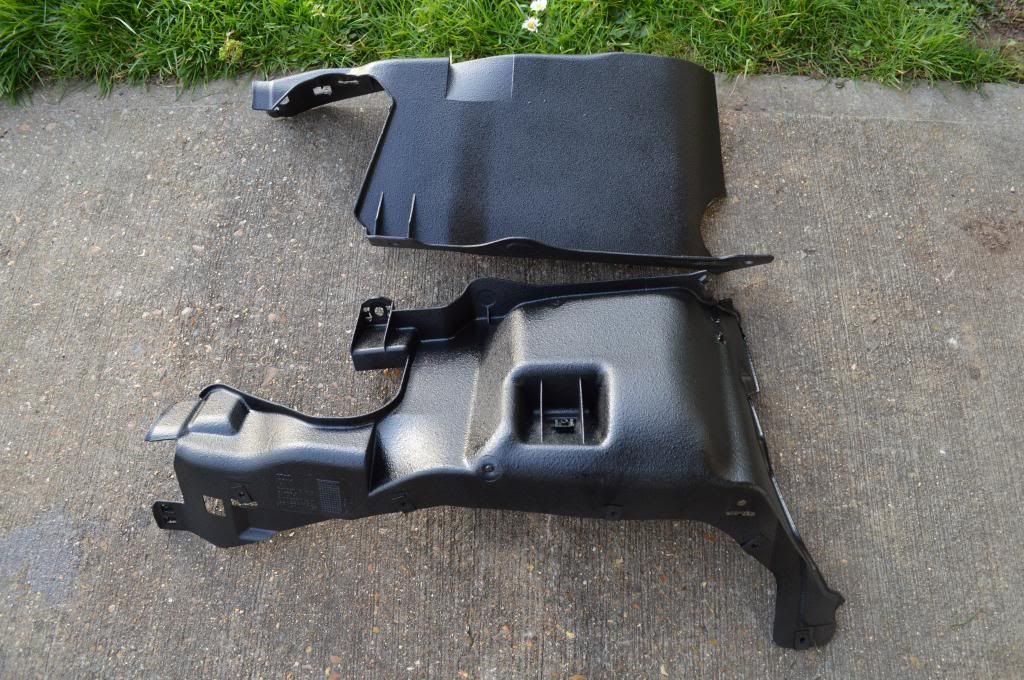
I then wire brushed and painted the hubs with Hammerite and then reassembled all the bits. Remaining to fit is the subframe and arch liners, which will be done first thing once I have rolled the arch lips. Then its BRAKE FITTING TIME Might be able to bleed the brakes tomorrow if time permits then that'll be project done
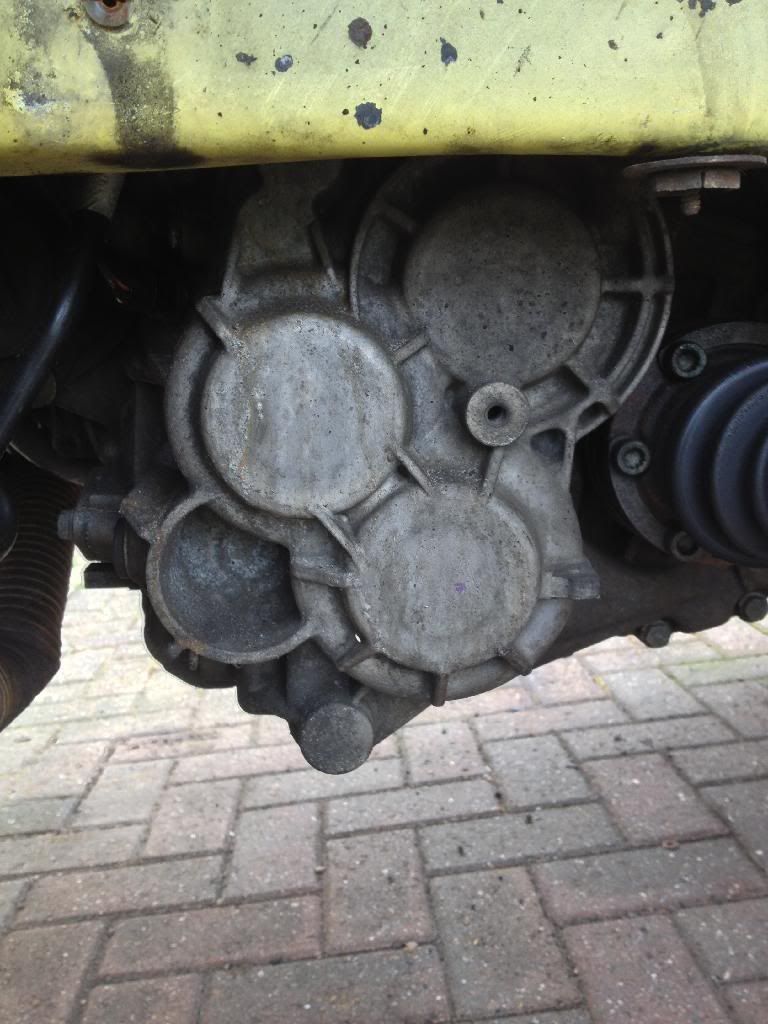
On a side note, I went to do the well talked about gearbox mod, but it seems I have a different casing I'll save the parts until the gearbox gets an LSD in the years ahead.
Fantastic work and attention to detail as always mate. Wish I had your patience for these things! Glad you got the subframe off ok, looks like a good finish. How hard is it to roll the arch lips? I'm worried about catching the fronts when I get my new spacers on.
Was also underwhelmed compared to the first UD I went to, agree on the nu-wave comment but most of inside is just company demo stuff now.
Looking good James.
I agree about ultimate dubs. I did like the white Cupra R inside tho.
Cracking work as always mate
Thanks chaps
So, I had another productive day on the car today. First off, I reassembled the refurbished subframe, wishbones, dogbone mount (I refurbed that 3 yrs ago!!!), and R32 FARB. Really pleased with how robust the stonechip is.


I then started the task of stripping down the arches by removing all the plastics, steam cleaning away all the dirt with a hand-held steam cleaner that I purchased for the house

Being impressed with how robust the stonechip was, I decided to cover the lower plastics, which attach to the floor; finished off with topcoat and lacquer. Really pleased, so I think I’m going to do the arch liners too. The idea behind is that they should hopefully weather well and be easier to clean.

I then wire brushed and painted the hubs with Hammerite and then reassembled all the bits. Remaining to fit is the subframe and arch liners, which will be done first thing once I have rolled the arch lips. Then its BRAKE FITTING TIME
 Might be able to bleed the brakes tomorrow if time permits then that'll be project done

On a side note, I went to do the well talked about gearbox mod, but it seems I have a different casing

Wow! Could eat ya dinner off those inner arches! 
Can't wait to see those brakes, going to be awesome.
Can't wait to see those brakes, going to be awesome.
Epic Fail…
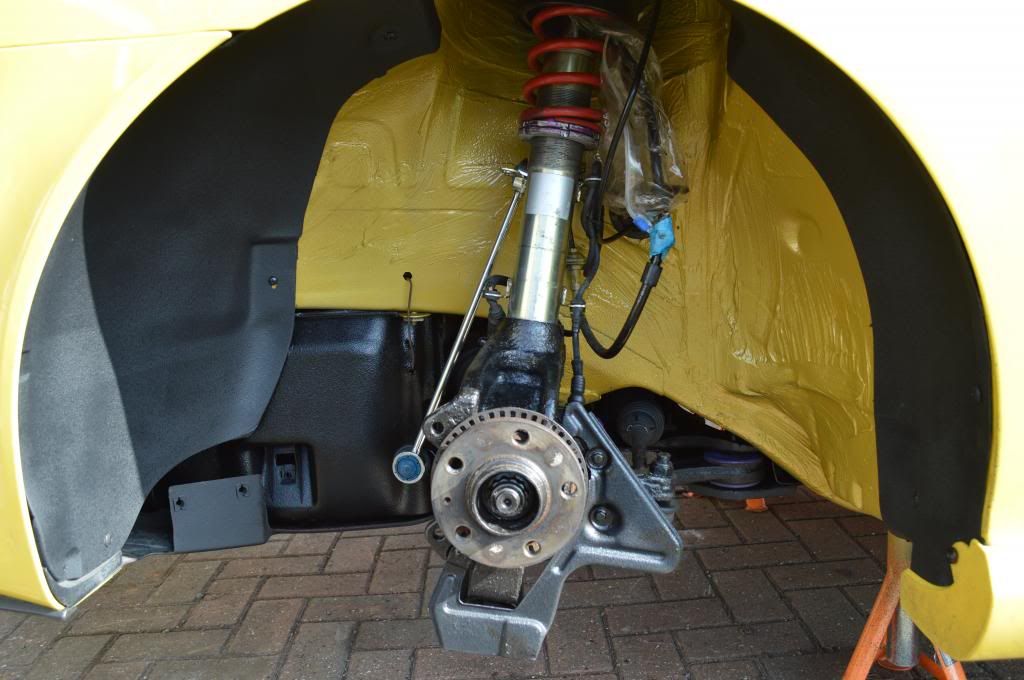
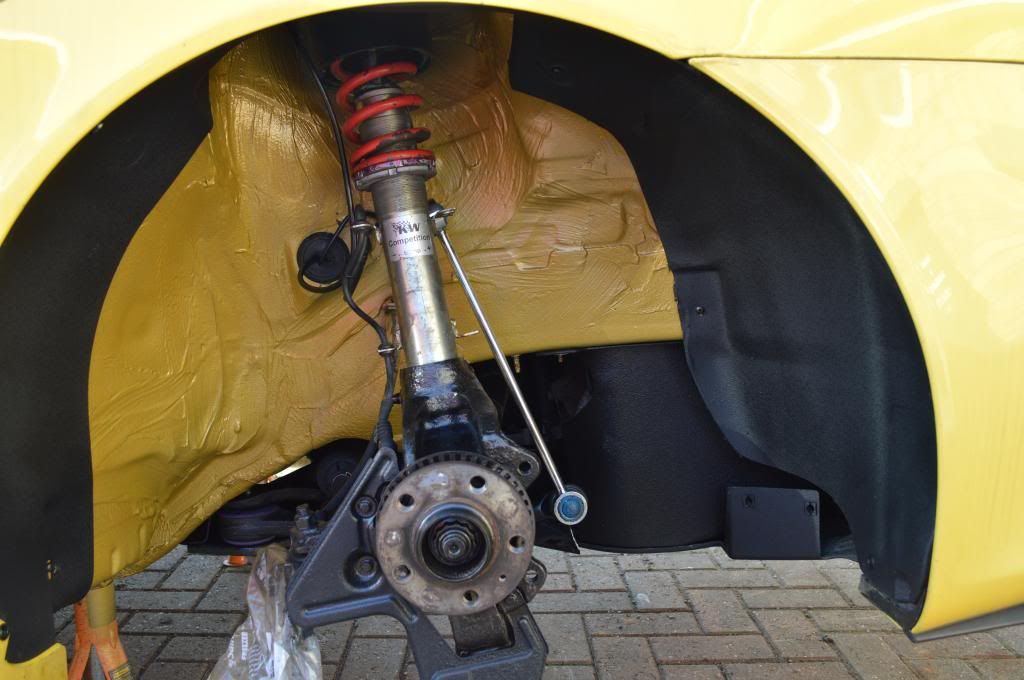
Started off the day by fitting the subframe and buttoning everything up. Then cleaned and stone chipped the arch liners and floor before fitting everything back on the car. I was planning on rolling the arch lip but on further inspection, the arch liners are integral to a good fitment of the arch liner, so I didn’t bother doing it; the wheels never rubbed anyway, even at its lowest point. I have however wasted money buying an arch roller, so I’ll sell that on and recoup some of the money for the rear end project. I was really pleased with how everything was looking so I broke for lunch.
Passenger side…
Driver side…
I then got out the brakes, fitted the carrier mounting brackets to the hubs and then I hit a problem! The size of the bolts for the carrier to caliper is different to the carrier to hub, which I didn't spot! I could have at that point! So, I've had to stop. I’ll try and source some bolts over the weekend, but I'm back to work next week and so any time for the car will be very limited.
Started off the day by fitting the subframe and buttoning everything up. Then cleaned and stone chipped the arch liners and floor before fitting everything back on the car. I was planning on rolling the arch lip but on further inspection, the arch liners are integral to a good fitment of the arch liner, so I didn’t bother doing it; the wheels never rubbed anyway, even at its lowest point. I have however wasted money buying an arch roller, so I’ll sell that on and recoup some of the money for the rear end project. I was really pleased with how everything was looking so I broke for lunch.
Passenger side…

Driver side…

I then got out the brakes, fitted the carrier mounting brackets to the hubs and then I hit a problem! The size of the bolts for the carrier to caliper is different to the carrier to hub, which I didn't spot! I could have
Problem solved...
M16 x 40mm from Screwfix Direct I'll use some lock tight with them and keep an eye on them as they are not high tensile. I might speak to David at Sere if it becomes an issue. Hoping to steal an hour tomorrow or Monday to put the brakes on, at long last. Can't wait to see what they look like
M16 x 40mm from Screwfix Direct
Problem not quite solved...
I managed to have a spare half hour to fit the calipers this morning whilst the little man was having a mid-morning nap so I set about fitting a caliper with the new bolts. Problem being that the largest socket I had was only a 23mm and the M16 hex is 24mm... So off to Halfords I went to get the socket. Hopefully I'll be able to get some time after work in the week. Desperate to get these on now, and give a decent update!!!
I managed to have a spare half hour to fit the calipers this morning whilst the little man was having a mid-morning nap so I set about fitting a caliper with the new bolts. Problem being that the largest socket I had was only a 23mm and the M16 hex is 24mm...
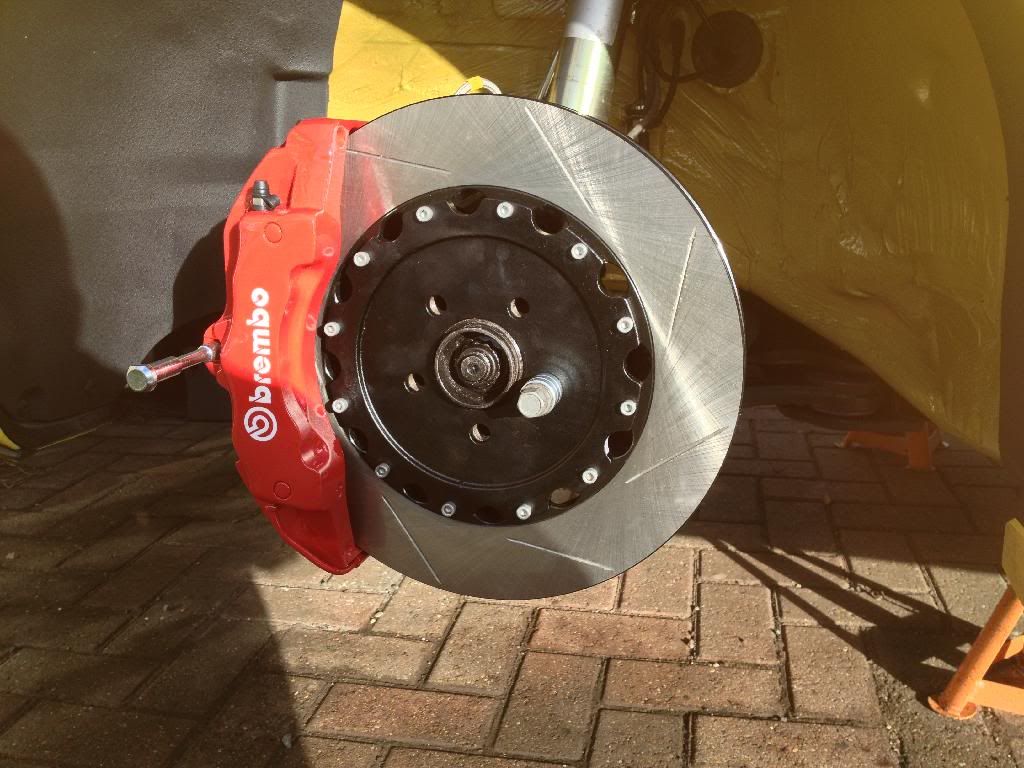
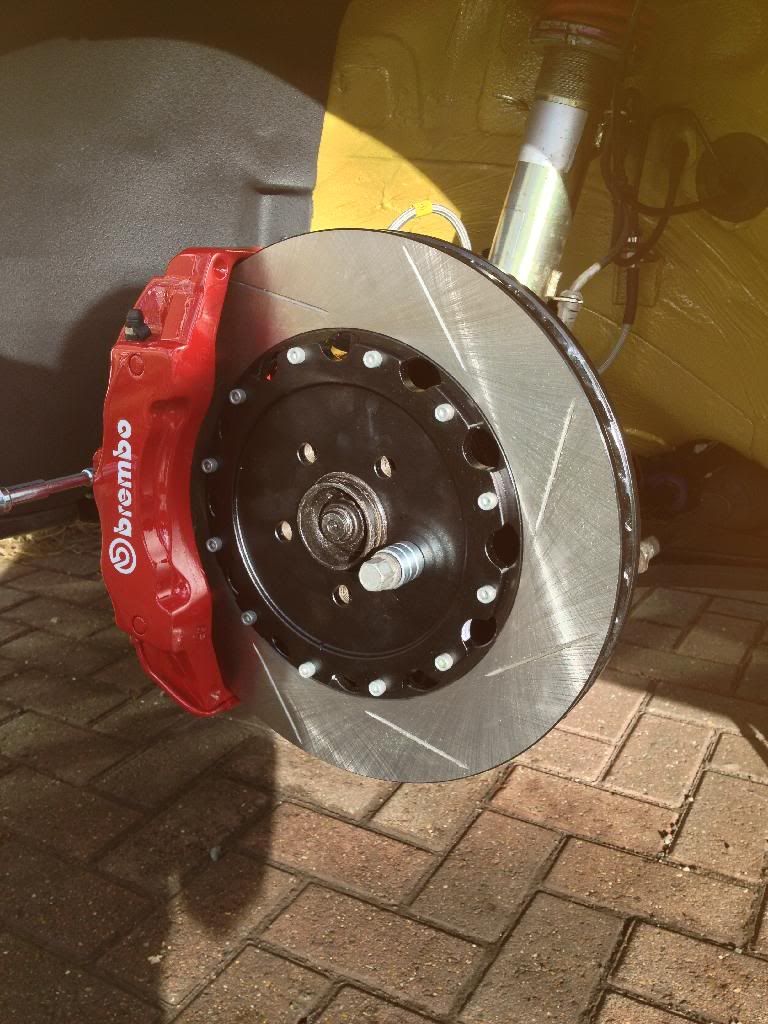
Brembo 6 pots are on...
Well, they're on. Brake lines attached.
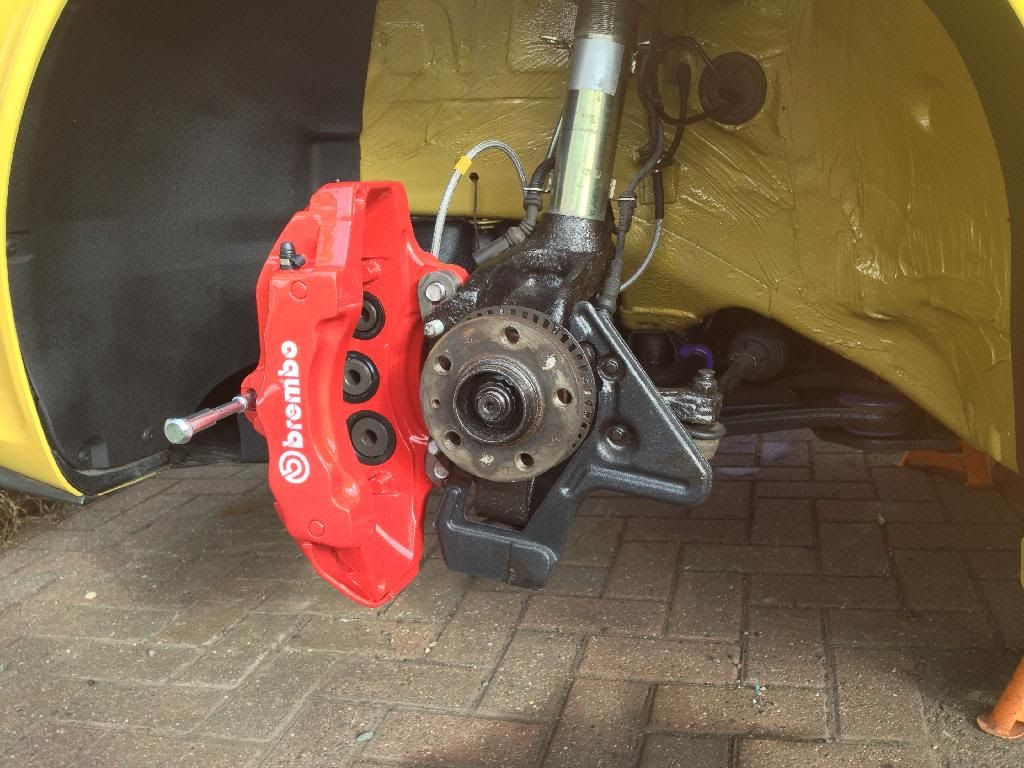
I married up the disc and I've discovered that I need to shim the calipers back a few millimetres. So, tomorrow afternoon I'll remove them along with the carrier brackets and fit the shims at the hub, which I think is the best place to do it. The hopefully it'll be there (he says....).
Well, they're on. Brake lines attached.

I married up the disc and I've discovered that I need to shim the calipers back a few millimetres. So, tomorrow afternoon I'll remove them along with the carrier brackets and fit the shims at the hub, which I think is the best place to do it. The hopefully it'll be there (he says....).
They look impressive! Were you right about the standard lines being the same?
Cheers Adam. Yes mate, usable brake lines as the have the same union connection at the rear of the caliper so should save you some money. The HEL ones are a perfect fit though.
Looking forward to seeing the wheel over the top of them mate, but they look good
Cheers Tom
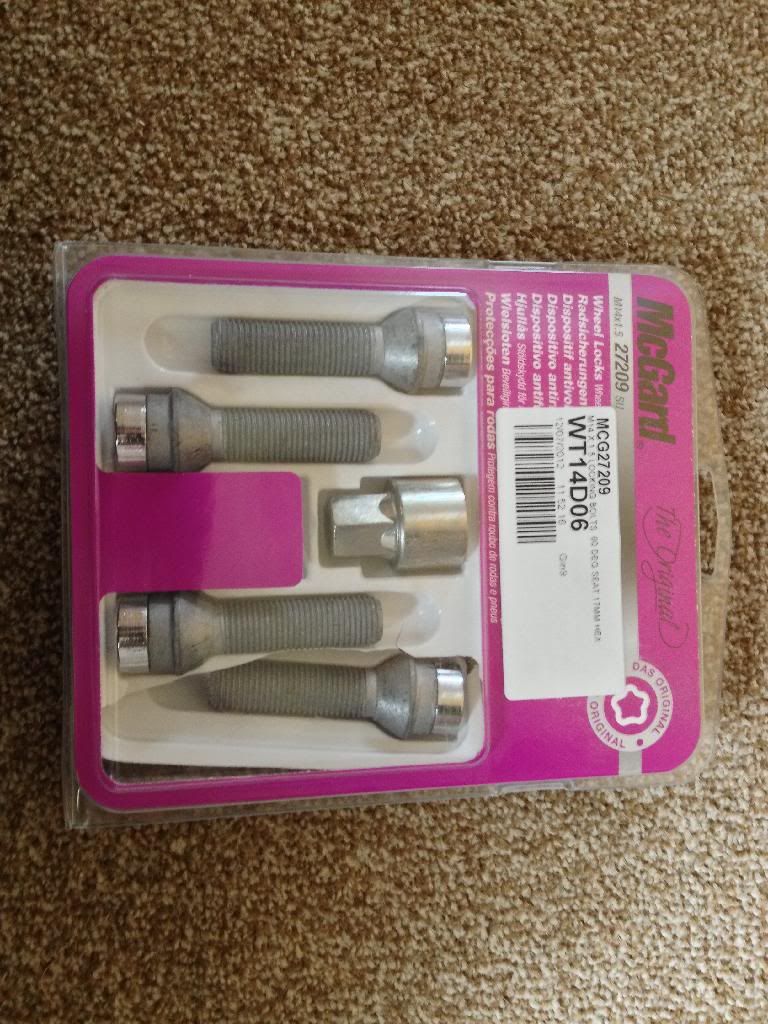
Don't tell anyone but I ran my wheels without locking wheel nuts for 4 yrs, so I bought some extended locking wheel nuts from Darren (DGJDrummer) for £25 posted, which I think was a good buy.

Last edited:
Fighting with brakes...
I'll go on record and say that I wish I forked out the £2k for the ECS BBK, rather than sourcing all the parts myself. EVERYTHING is fighting me
So with a need to shim and reposition the bolt holes slightly, I did this:
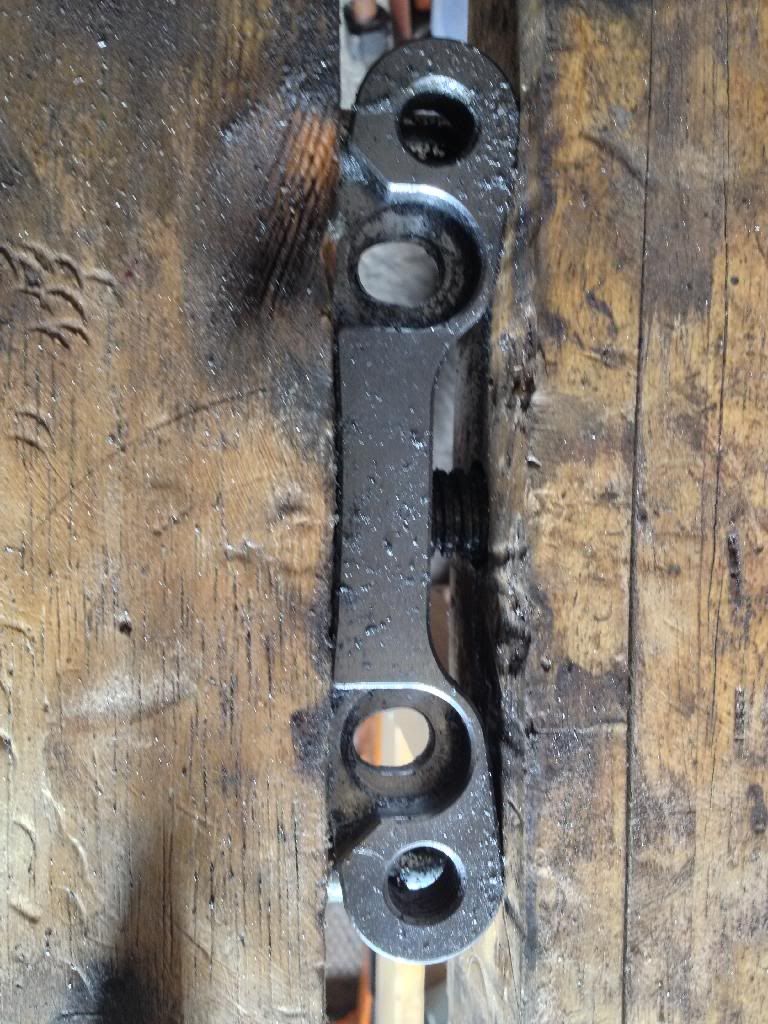
Three attempts later to shim the caliper rearwards slightly got the perfect fitment. In the process however, it shredded one of the threads on the hub... FFS (think that's the first time I've sworn on print on my RR thread)... In the rain and sleet, I re-helicoiled the thread. Job done. Then I discovered that the outer facing brake pad is fouling the bell by a few mms, so I'm gonna have to sand down the front lip before fitment, but then that's it for the passenger side... On to the drivers side then... Looking good mind
I'll go on record and say that I wish I forked out the £2k for the ECS BBK, rather than sourcing all the parts myself. EVERYTHING is fighting me
So with a need to shim and reposition the bolt holes slightly, I did this:

Three attempts later to shim the caliper rearwards slightly got the perfect fitment. In the process however, it shredded one of the threads on the hub... FFS (think that's the first time I've sworn on print on my RR thread)... In the rain and sleet, I re-helicoiled the thread. Job done. Then I discovered that the outer facing brake pad is fouling the bell by a few mms, so I'm gonna have to sand down the front lip before fitment, but then that's it for the passenger side... On to the drivers side then... Looking good mind


Last edited:
Similar threads
- Replies
- 190
- Views
- 12K


