csd_19

Full Member
May 11, 2005
2,279
28
Angus / Edinburgh
One thing I did notice was the GSF drop link boots were totally ripped open. These have only been on the car for about 2 years, so lessons learned again there. The OEM ones were fine after 6 years.
So these will be changed out, does anyone know of a uprated part to replace these??
If not I'll be happy with OEM ones.

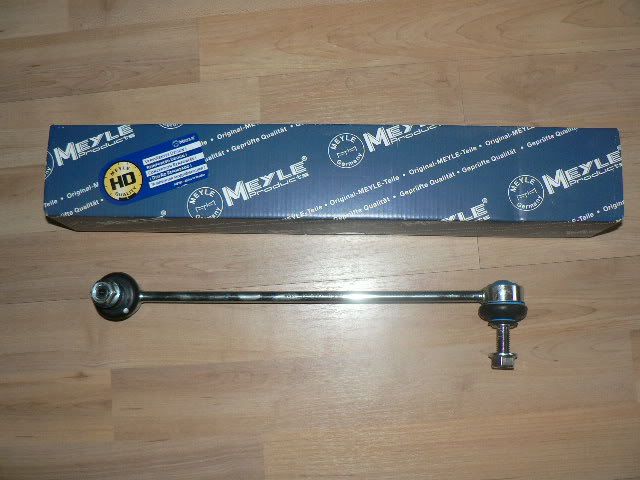
What length are the OEM ones Wull? I got a set of Meyle Heavy Duty ones for the Volvo and they have the same ARB/damper style as the LCR. Just wondering if they possibly make something that'd fit. ;)
 

Willie

LCR Track car
Aug 6, 2004
8,939
1
Sunny Scotland
Very roughly, as in with a plastic ruler, 340mm long with ends 90 degrees opposing.
M6 x 25mm threaded ends.
Both ends rose jointed and booted
 

csd_19

Full Member
May 11, 2005
2,279
28
Angus / Edinburgh
Very roughly, as in with a plastic ruler, 340mm long with ends 90 degrees opposing.
M6 x 25mm threaded ends.
Both ends rose jointed and booted

Hmmm the ones I have here are 335mm from centre-centre, but 180 degrees opposing. Rose jointed and booted too.

Supposed to be rather better than the OE stuff, I'll have a dig and see what else is about ;)
 

Willie

LCR Track car
Aug 6, 2004
8,939
1
Sunny Scotland
Hmmm the ones I have here are 335mm from centre-centre, but 180 degrees opposing. Rose jointed and booted too.

Supposed to be rather better than the OE stuff, I'll have a dig and see what else is about ;)
If you find anything give us a shout but happy enough to use OEM through SereMotors
 

Willie

LCR Track car
Aug 6, 2004
8,939
1
Sunny Scotland
So went on a little tool shopping freee. I broke my 10mm cheap assed spanner but TBH I wasn't using this as your supposed to be and I did get 50 spanners for £20.
So went out and picked up some mid range Bahco combination spanners, a copper/hide hammer and a proper 10mm Allen key socket.
The Qualtec 10mm biit is being replace but will not be used for this same job again as I'm perhaps pushing this beyond its design characteristics, lol

So pictures:

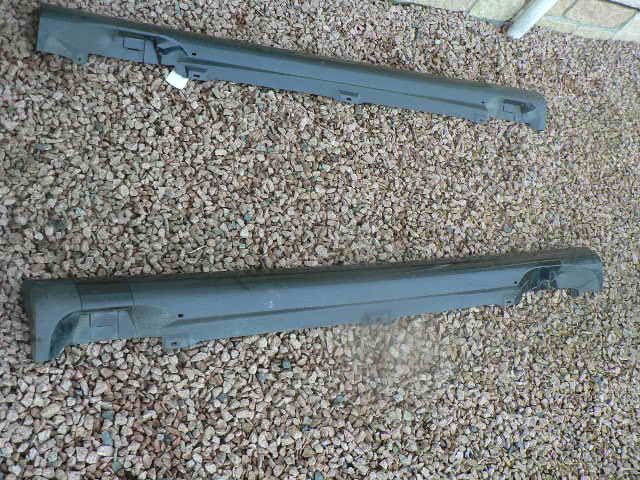
Tired and very stone chipped skirts

P1060878.jpg


I've sprayed these with my rattle tin gloss black, there currently drying.

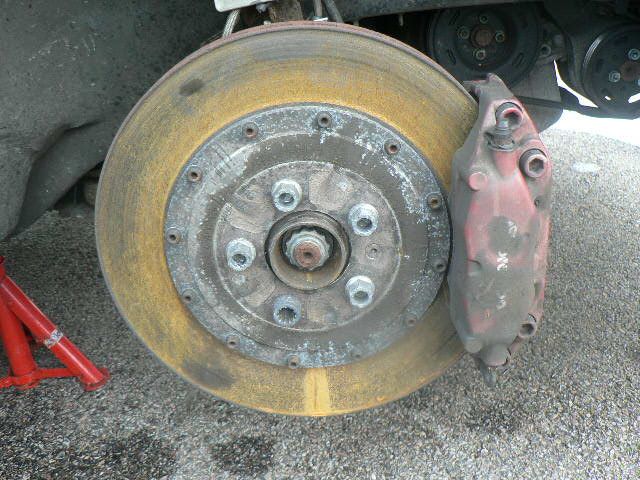
Well used stoppers, still plenty of life left in the rotors after lots of use, a set of DS2500 pads and half way through a set of DS3000 pads.

P1060879.jpg


This caliper will be replaced with the newly sealed one I have spare.

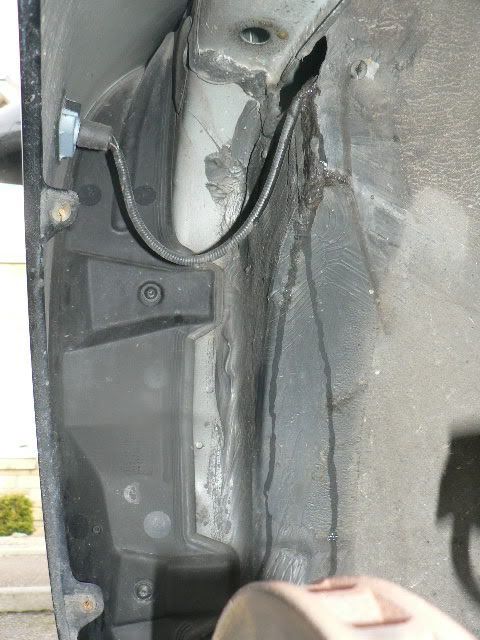
I removed the arch liners and all seems much better in the front compared to the rear. There is lots more underseal here and very little if any rust.

P1060880.jpg


P1060882.jpg


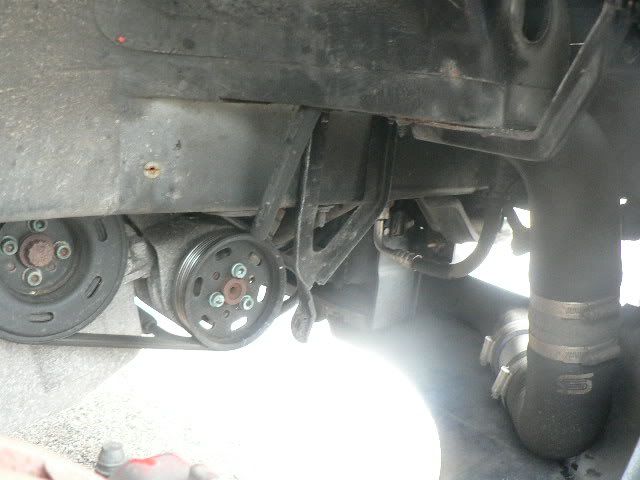
Picture from below showing the S3 upper strutt brace in place

P1060881.jpg


So, yesterday was all about getting the strutts off.
Learning from when I removed the OEM strutt I decided to drop everything off first before even looking at the strutt tops.

So, all the bolts and nuts were wire brushed and soaked with Plus gas, this was left over night the previous night and reapplied several times. The strutt lower clamp bolt was removed. Due to the strutts being stainless steel these just slipped off, the sub frame was lowered and the ARB drop links were removed. These were the GSF ones which were a total waste of time and money.
With all of this done the hub carrier were easy to push off of the coilovers, leaving them dangling still attached to the tops.
Next the nuts were removed which was holding the coilovers into the turrets.
These are a total PITA.
As there bound and rebound adjustable there is no back up allen key slot in the top for removing these, just 2 flats.
As I said this is where the cheap assed spanner bit the dust.
So new spanner in hand and some unusual techniques later, there free and off.
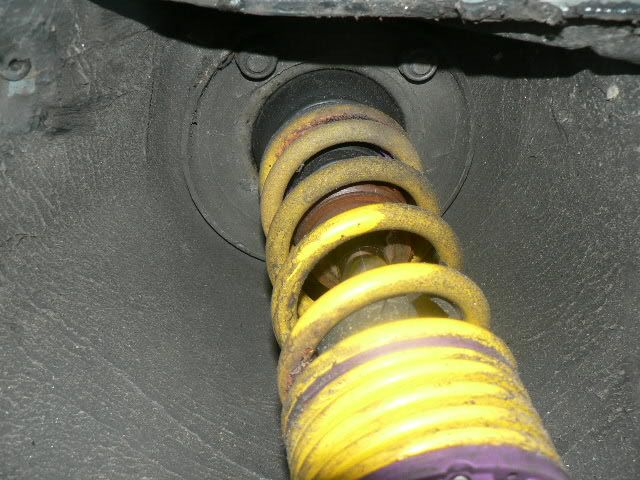
As there SS there looking like new. I'm going to measure these up before stripping them down, cleaning them up and rebuilding these with the new bushes and bearings.
 

jonjay

50 Years of 911
Jun 27, 2005
5,843
1
Essex
Awesome Willie. Really enjoying your thread even if my OCD'ness is going off the radar.

I would clean up the hoses so they dont crack etc... Some water and WD40 should do the trick.
 

Willie

LCR Track car
Aug 6, 2004
8,939
1
Sunny Scotland
Awesome Willie. Really enjoying your thread even if my OCD'ness is going off the radar.

I would clean up the hoses so they dont crack etc... Some water and WD40 should do the trick.
Ha ha.
The engine bay shots will really send you over the edge ;)

Just found out about new on the radr uprated suspension pieces as yet untried on the LCR/S3/TT/ Octy VRS

:)
 

Willie

LCR Track car
Aug 6, 2004
8,939
1
Sunny Scotland
So got the bleed nipples out of my spare OEM Brembo caliper, and like others are finding this ended up stripping the last few threads.
I dressed this up with a plug tap, M10 x 1 metric fine, and it looks okay but not 100% sure about it TBH.
I have a price from SereMotors for a new one so might go down that route.
These calipers are sided, they have an arrow for the tyre rotation/direction.
Now TBH I don't think it would make a huge difference if these were put on the other side as the only apparent difference is that there is a larger piston on the lower side when fitted correctly, where this would be on the upper side.
Still thinking over this one TBH.

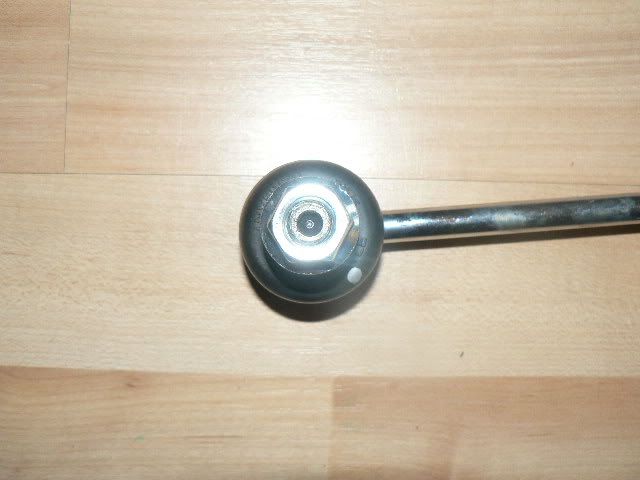
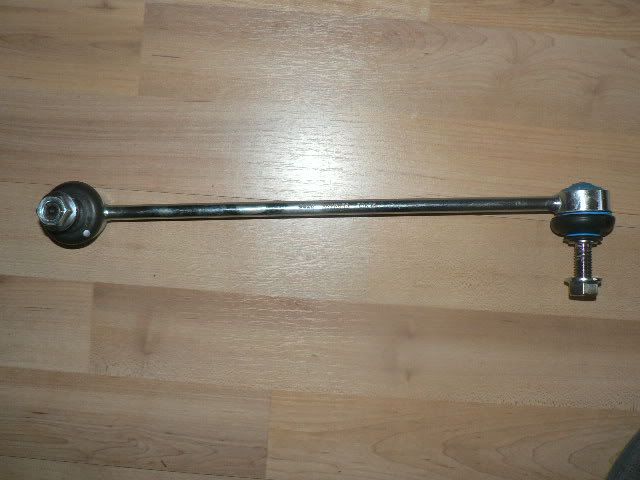
Next up I was made aware of an aftermarket ARB drop link through www.allgermanparts.co.uk
This company did a group buy on another forum for another Marque, Volvo.

These are designed as an upgrade to the OEM pieces in a couple of areasfor the LCR.
TBH I don't know that I'm going to feel much difference from these but as they are cheaper and better built than the OEM ones I couldn't lose.
I have tried the GSF ones, but never again.

P1070001.jpg


P1070003.jpg


P1070002.jpg


These are for our set up but I have never heard of anyone running these, or even trying them, so TALLY HO!!
LOL

Next up, I've stripped out my coilovers and have managed to strip down one and in the process of stripping down the other.
As these are inox line KWV3's its a far easier task than if these were galvanised or just plain carbon steel. I'm sure some people do get on okay with non stainless steel strutts, but the amount of maintenance these would need on top of everything else a car needs is just too much hassle for most people.

These are a bit more difficult than the OEM strutts to strip down due to the top adjustments on the coilovers being where the Allen key back up point is. This lead to there being 10mm flats on top sides of the strutt, what a PITA this is to use!!
Never mind, its getting sorted out now.
I'm putting a click more stiffness on some of the settings so will see how this goes this year. TBH I didn't feel the need for a stiffere setting this year but due to the solid engine mounts I though a 'wee bit' more stiffness would suit :)

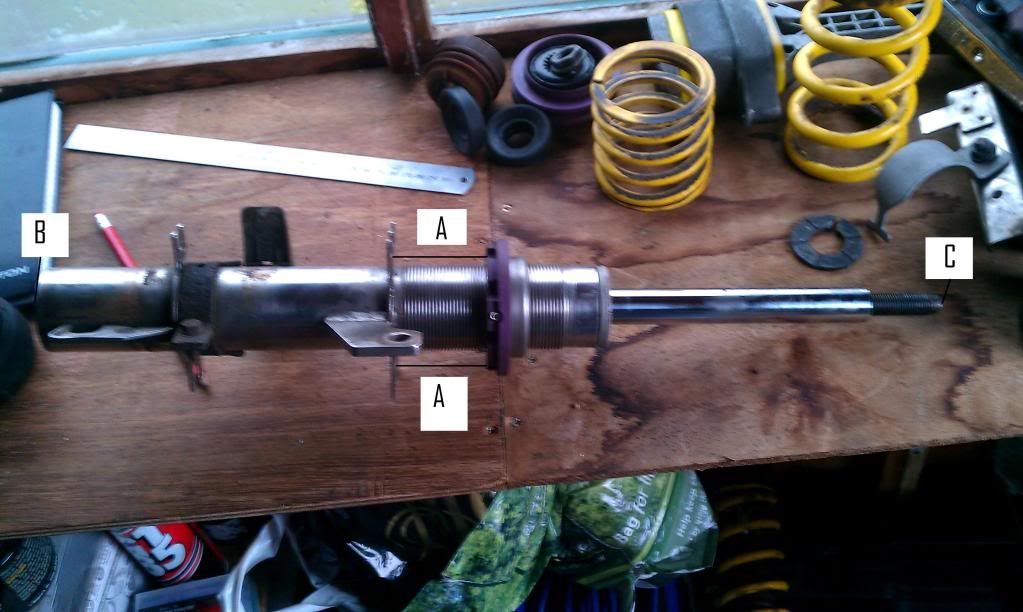
Coiloverwithtags.jpg


Looking at the picture above I'm running;

Offside:

- A = 45mm

- B = 5 clicks from stiffest

- C = 8 clicks from stiffest

Near side:

- A = 48mm

- B = 5 clicks from stiffest

- C = 8 clicks from stiffest

Refer to link for details on adjustments.

http://www.kw-suspension.com/pdf/Einstellanleitung_2-fach_Competition.pdf

I've just spoken to KW in the UK regarding servicing of these unit.
Thankfully it will be obvious when these need doing, with oil leakage. As there are none of these signs on mine there good to go for another years fun :)
 

robertj

weight is the enemy
Are you adjusting the rears too? Now's the time to adjust the rebound on those, while you've got them off the car.
Actually while you've got them there Willy, can you see markings on the springs? I'm intrigued to know whether the springs are the same rating on the V3s and the Clubsports.
On the Clubsports the front springs are marked KW 10 - 60 - 80 / KW 80-170 and the rears are marked KW1011.
 

Willie

LCR Track car
Aug 6, 2004
8,939
1
Sunny Scotland
Willie how do you have so much time min? I can't even get my car cleaned!

Top write up? But why the difference in mm between n/s and o/s?
Min I work offshore so usually have time on my hands for ****ing about with whatever when all you normal people are at work.

It wasn't till I was about to strip out my OEM suspension that I realised the height differences of the suspension set ups on a car.
As this is a German/Spanish car it was built to be a left hand drive car.
When doing my initial measurements the car sat 1/4" higher on the near side than the offside.
this would have been to account for a a fat Jose or Fritz levelling out the suspension with his lardy ass.
So this is another benefit of coilovers that not many people know about ;)

So mine are 1mm higher on the offside prior to me getting into the car and level with me in the car.
 

Willie

LCR Track car
Aug 6, 2004
8,939
1
Sunny Scotland
Are you adjusting the rears too? Now's the time to adjust the rebound on those, while you've got them off the car.
Actually while you've got them there Willy, can you see markings on the springs? I'm intrigued to know whether the springs are the same rating on the V3s and the Clubsports.
On the Clubsports the front springs are marked KW 10 - 60 - 80 / KW 80-170 and the rears are marked KW1011.
I've had a 'wee fiddle' with the rears too ;)

I'll check this for you and PM you the numbers
 

Willie

LCR Track car
Aug 6, 2004
8,939
1
Sunny Scotland
Are you adjusting the rears too? Now's the time to adjust the rebound on those, while you've got them off the car.
Actually while you've got them there Willy, can you see markings on the springs? I'm intrigued to know whether the springs are the same rating on the V3s and the Clubsports.
On the Clubsports the front springs are marked KW 10 - 60 - 80 / KW 80-170 and the rears are marked KW1011.

Mine are:

Shock unit 100-1005

Main spring 60-170 GBGB

Helper 20-60-100

Cannot see the rears just now
 

Willie

LCR Track car
Aug 6, 2004
8,939
1
Sunny Scotland
After a few days of messing about I've finally gotten back onto the car.

I needed a vice to get the last coilover stripped down and my two friends that have vices both have these out of order.
So I thought feck it and built a work bench and bought a vice for myself.

So coilovers stripped down, cleaned up and confirmed the above stiffness settings.
These were built up with new OEM top mount bushes and bearings then fitted back on the car.

I took the opportunity to check the tightness of my S3 strutt brace. It wasn't slack but did manage a 1/8th of a turn on each bolt so nice and tight now.

Also when fitting the coilovers back in I used a jack to push the hub carrier up to the bottom of the coilover unit. I initially thought this was all the way up but on checking there was a bit of a stand off between the stop on the unit and the hub carrier. A swift smack with a hide hammer sorted it out. I never thought about this before as thought the jack would have pushed this all the way home, but every day's a school day.

With both sides built back up I got around to under sealing the sills, below where the skirt will be sitting when fitted. This should last a few years.

Next up will be to put the front brake calipers back on, front wheels back on and bleed the back and front calipers. From this I'll see if I'm going to change out the offside caliper or not.

Once all this is done it'll be onto the more exciting parts like the timing belt, sump, oil pump, engine mounts, light weight battery, induction set up and catch can set up.
 

dholdi

Active Member
Jul 3, 2008
931
4
Preston
So got the bleed nipples out of my spare OEM Brembo caliper, and like others are finding this ended up stripping the last few threads.
I dressed this up with a plug tap, M10 x 1 metric fine, and it looks okay but not 100% sure about it TBH.
I have a price from SereMotors for a new one so might go down that route.
These calipers are sided, they have an arrow for the tyre rotation/direction.
Now TBH I don't think it would make a huge difference if these were put on the other side as the only apparent difference is that there is a larger piston on the lower side when fitted correctly, where this would be on the upper side.
Still thinking over this one TBH.

Hi Willie,
Have you considered helicoil inserts for the bleed nipple holes ?
Not sure reversing the calipers is a good idea, the pistons being different sizes will exert different pressures on the pad ( If I remember my Physics lesson correctly ) If you reverse one side then more pressure will be applied to the trailing edge of the pad rather than the leading edge. Might upset things.
Cheers.
 
Lecatona HPFP (High-pressure Fuel Pump Upgrades)