• Guest would you be interested in CUPRA or SEAT valve caps? let us know in the poll

  • Welcome to our new sponsor Lecatona, a brand dedicated to enhancing performance for VAG group sports cars, including SEAT, Audi, Volkswagen and Škoda. Specializing in High Pressure Fuel Pump (HPFP) upgrades.

Quattro Cupra R Mk2 Project

lsg60

Active Member
Mar 31, 2014
320
0
This is awesome, I take my hat off to you sir. Looks like it's time for me to buy a few scratch cards....
 

Gagwithgaffer

Active Member
May 28, 2013
82
3
North Yorkshire
Project Update

AWDThread-AutotechnicaandMilltekBanner549x288pixels_zpsb939e27b.jpg


Hi Everyone!

In this update we’re focussing on the recent works carried out by Milltek Sport, we took Kung Fu down to their development centre in Derby last week to have a full custom exhaust installed and I have to say the quality of the work and their design is awesome! We’re very pleased with the outcome and are proud to have partnered with them for this project.

It became apparent that the old system would no longer fit when we first acquired the Audi S3 rear axle and R32 fuel tank. We had fitted a new turbo back Milltek system only last summer when we went to Stage 2+ so it was a little frustrating knowing we would have to change it again.

The old silencer box was situated slap bang in the middle of where the fuel tank sits (a saddle tank is used on the S3/R32 to give way for the propshaft down the middle of the car) We also found that the route of the piping was going to clash with the rear axle and diff assembly.

So we needed to find a new solution!

We met the guys from Milltek at their trade stand at the Autosport International Show back in February. We explained to them the works in hand and our future plans for the car. They showed a lot of interest in our build and after a couple of meetings they offered to help us with the project. This really was a dream come true! The chance to team up with one of the highest profile exhaust brands on the market. We kept in touch with their Managing Director Steve, during the last few months providing frequent updates of the build. Eventually the time had come to take the car down to Derby and get the new system installed.

For those who aren’t familiar with the Milltek brand, see the extract from their website below:

The Pedigree

More than 31 years of continuous exhaust development and technical expertise are drawn upon to develop the ultimate Milltek Sport range of performance products, offering an ever-expanding comprehensive selection of performance exhausts which build on the successes of key marques like Audi, Volkswagen, Porsche, BMW and Nissan.

This has placed Milltek Sport at the forefront of tuning companies and owners 'must have' list. Milltek Sport have appointed key distributors and are currently exporting to more than 80 countries around the world.

Milltek Sport exhausts are produced in high quality type-304 aircraft grade stainless steel. This material is anti-magnetic (other manufacturers' stainless steel may not be) and is less susceptible to discoloration. This quality of stainless steel is used on all pipework and the total construction of the silencer. Mandrel bending ensures full flow bends for better gas flow and Milltek systems are increased in bore to ensure ultimate performance without the loss of mid-range torque.

All Milltek exhausts are designed, developed and manufactured in-house in the UK.


So the big day had finally come. Pretty much all the mechanical works for the AWD were now complete, all we had left to do was to fit the exhaust and sort the electrics. The Cupra was not yet ready to hit the public roads so we loaded it onto Andy's trailer.

Leonmouningtrailer900x675pixels_zps342010cd.jpg


20140419_104210900x675pixels_zps5979200f.jpg


Oh good, it fits! just…

20140419_104939900x675pixels_zpsb58f4c0d.jpg


We got the Cupra well strapped in and was ready to go!

20140422_125810900x675pixels_zpsd4a8dff3.jpg


A little while later…

A couple hours of towing down the M1 through typical UK rush hour traffic and we soon arrived at Milltek:

20140422_151625900x675pixels_zps02d6c695.jpg


Getting the Cupra off the trailer was easier said than done, we volunteered Ben for the occasion!

Bensatoncrate900x675pixels_zps377c8d0b.jpg


We got singed in, met with Dave and the team and had a quick tour of the car showing them the works we’d been doing. Milltek’s chief engineer took plenty of notes as we discussed the options around the new design of the exhaust, covering every bit of detail from the sound output to its performance, also a new choice of tailpipes:

20140422_151826900x675pixels_zps70a2558b.jpg


Ben drives the Cupra into the workshop where we say our final goodbyes before the lads get to work:

20140422_152124900x675pixels_zps0ef32387.jpg


The Milltek crew needed a few days to carry out the works so we left the car with them until the following week.

Dave and his team first got the Cupra up onto the ramp to inspect the job in hand:

DSCF0041900x675pixels_zps3c25f827.jpg


The first inspection of the route for the new system, the guys were figuring out the best way to best match the middle section up to the ATP downpipe:

DSCF0044900x675pixels_zps10bc1b95.jpg


The team soon got to work and within a matter of days they had fabricated up a new mid to rear section to include the two silencers. Two props held up the piping whilst they checked for correct alignment:

DSCF0045900x675pixels_zps1721e67a.jpg


DSCF0047900x675pixels_zpsc2c2e289.jpg


DSCF0049900x675pixels_zps87f417f5.jpg


The new three inch piping fits snuggly around the rear axle and Haldex diff:

DSCF0053900x675pixels_zps3e7b0191.jpg


DSCF0054900x675pixels_zps0bf193b4.jpg


New shiny tailpipes are fitted into position. The latest innovation from Milltek is to supply detachable units, if they become discolored or need to be changed then this can now be done without having to replace the whole of the rear section, a great feature!

DSCF0056900x675pixels_zpsc9dc3804.jpg


DSCF0062900x675pixels_zps0bd8fc0c.jpg


The new system is assembled into position:

DSCF0066900x675pixels_zps964864b8.jpg


The two silencers were fabricated from scratch, you’ll notice how the engineers have put a indent into the top of the box sections to make it fit snuggly underneath the propshaft. This is an awesome piece of engineering which has helped to keep the system tucked in well underneath the chassis so nothing sticks out underneath, a useful feature giving good clearance under the car:

DSCF0068900x675pixels_zpsc0f10ea0.jpg


The photo below shows the new mid-section mated perfectly up to the ATP down pipe, a custom flange was welded onto the new Milltek pipe to give an OEM style fitment. The wire coming off the LHS is the EUGO sensor which measures the air/fuel ratio. The sensor shown in the photo below is the existing unit that is wired back to the engine’s management system.

We recently bought a Wideband Aif/Fuel Ratio Gauge which will be used in in addition to the existing unit. The Wideband kit comes with a steel bung that is used to mount the sensor, we handed this adaptor piece to the Milltek team and they very kindly welded it onto the new down pipe. This gives a more permanent fixture compared to using an aftermarket bracket which involves drilling a hole into the pipe.

The air/fuel ratio gauge is essential for our next round of tuning on the engine. When the turbo boost levels are increased beyond the levels that the engine’s ECU can read (typically above 2bar) you have to make sure the air and fuel mixture is set to the correct levels otherwise you risk causing major damage to the engine.

If you put too much fuel into the mix without the correct amount of air then the car runs too rich which can actually hinder the performance. The real danger is when you pump too much air into the fuel mixture which causes the engine to run too lean, this overheats the system and can cause major damage, possibly warping the cylinder head and cracking the engine block.

Photo below shows the full exhaust assembly, a top design feature worth noting are the straight lines and minimal curvature in the piping, this greatly helps to reduce the back flow pressure. When comparing against the S3 or the R32, the rear silencer is typically installed underneath the boot floor plan where sharper 90 degree bends are required to connect to the rear tail pipes.

DSCF0070900x675pixels_zps1edc2736.jpg


DSCF0073900x675pixels_zps1363bf52.jpg


Custom brackets are welded to hold up the rear section to the underneath of the chassis:

DSCF0076900x675pixels_zps5437d5c1.jpg


DSCF0078900x675pixels_zps0bf904f5.jpg


New tailpipes fitted into their final position:

DSCF0079900x675pixels_zpsb8bd9a90.jpg


The exhaust is finally installed :)

The engineers then have to carry out a sound test to make sure the new system meets within the required decibel levels. We explained to Milltek our plans to take the Cupra out onto the race track. A lot of track day chiefs will carry out sound level checks before you're allowed to race, this is mainly due to noise pollution for local residents. Two silencers were installed on our system to give the right level output. Milltek advised that fitting the silencers do not hinder the performance or increase the back flow pressures in any way shape or form.

DSCF0081900x675pixels_zps3c7359b3.jpg


The Cupra was ready to pick up after a couple of days and so we popped it back on the trailer and made our way back to Autotechnica’s HQ in Hull to complete the next round of works.

In the end we opted for a resonated system which generally gives more of a discreet sound output. The non-resonated versions are a lot louder and can sound a bit more sportier, but one has to put up with the increase in cabin noise when driving (can also pose a bit of a sound clash against your top dollar ICE!)

The Cupra Rs aren’t exactly the best for sound proofing, but in this case the Milltek system is just right, not too loud unless you’re driving through the city tunnels! We didn’t want the Cupra’s exhaust to bounce against building down the street but give more of a defined and crisp output.

Sound wise I would say Milltek have hit a perfect balance. You get a deep throaty sound which roars with rage once you slam down the throttle and a nice sounding warble when idle.

It was reassuring to find that Milltek had designed the system well and fitted in snugly to the underneath of the car, nothing sticks out of place and the twin pipes out the rear fill in the gaps of the rear valance very nicely. There is still a sufficient amount of space to squeeze a brush in between the tail pipes and the bumper which makes it nice and easy to keep the system looking clean and sparkling! The twin tail pipes are not so big that they ruin the look of the car, IMO they are a good size, you know you have something quite special under that chassis, a quality construction that should last for many years to come.

The workmanship and the materials appears to be the best we have seen on an aftermarket system at this level, especially the welding work which is something else! Milltek had definitely exceeded all of the expectations we had for appearance, sound quality/level and performance increases. The new system has been a surely welcomed improvement to the car and certainly makes it look a lot more substantial and ready for business!

So no doubt you’ll be wandering what it sounds like? Fantastic!

Turn the key, fire up the engine and you soon know there is something pretty awesome going on underneath the hood! We haven’t yet taken the Cupra out onto the road as we still have the wiring to do for the AWD system, but fail not we’re sure Kung Fu will scream with delight once we really open up the valves!

I think all in all, REVO made a good choice partnering with Milltek and we highly recommend their kit to others.

Credits

So a big big thank you to Steve, Dave and the development team from Milltek Sport who have done a great job, this system really is unique, one of a kind! Oh and was made in Britain! Ha!

Also a big thanks to Andy, Ben and the team from Autotechnica who took the time out to get Kung Fu down to Derby and back.


So we are now coming close to getting the car out on the road for the very first time since January, exciting times!

Unfortunately I didn’t get time to take any further pics before we put all the interior back in, it was all a bit of a mad panic rush last Saturday to get the car back together again. The first show of the season is coming up in two weeks’ time so it’s all hands on deck at the moment!

Whilst the interior was out, we also installed the cabling for a future ICE system, this includes new speaker and power cabling to the front of the car, also the RCA and remote leads for the amplifier pre-outs. Our budget probably won’t stretch to the ICE this season as we are planning for more treats on the engine, coming soon! More on this later ;)

Thanks again to everyone for your continued support, back shortly!
 

jreedy

turbo'd ep3- Fr tdi leon
May 13, 2008
369
1
sheffield
Absolutely love it.

Credit to all involved with the project and good luck finishing it all off
 
May 6, 2009
3,500
0
Northallerton, N yorks
Awesome [B)] i see you're from yorkshire! You should join vagcars.co.uk too, it's a local forum with lots of nice metal, one of the members is doing a 4wd mk1 leon too, you can battle it out on one of our drag days when his is done haha
 

Gagwithgaffer

Active Member
May 28, 2013
82
3
North Yorkshire
AWD is alive!

AWDThread-AutotechnicaandMilltekBanner475x249pixels_zps3fb04291.jpg


Hi Everyone,

In this update we have some exciting news! Our Cupra is alive and now driving all four wheels! :D

The last few weeks have been manic to say the least! We left ourselves with little time to get Kung Fu ready for the first show of the season. Rest assured, Andy and his team from Autotechnica worked around the clock to get the final stages of the works completed and we were then able to carry out the first road trials.

During the last update, we painstakingly put the Cupra’s interior put back in again and had got all necessary cabling for the Haldex and secondary fuel level sensor to the front of the car.

We started to wire in the Haldex system which communicates onto the system CAN Bus, a vehicle bus standard designed to allow microcontrollers and devices to communicate with each other within a vehicle without a host computer. The modern CAN Bus system greatly reduces the amount of cabling required in a modern motor, in essence it simplifies the communications topology between main components that require data from the engine’s ECU and main electrical components.

So Ben got to work on the wiring, well once he’d finished his cup of tea!

IMG_4351900x1350pixels_zpsdd71f44a.jpg


The next job was to wire in the cables from the secondary fuel level sensor which involved removing the speedometer and clock assembly. To remove the speedometer, we had to take out the centre air vent console, this then allowed access to some of the fixings that hid behind the dashboard.

You’ll also notice we’ve started to wire up the AEM Fuel/Air Ratio sensor and Turbosmart E Boost Controller. These will come in handy when we start to push the boost levels beyond the reading capacity of the engine’s ECU.

There aren't that many options for gauge pods with the MK2, unfortunately we couldn't find any vertical pillar mounts available on the market. For the AEM gauge, we decided to use an air vent adaptor which requires the removal of the existing air vent assembly. This is done by removing the side panel to the fuse board (of which you can see in the photo above) You then have to unclip the vent mechanism from the inside of the dashboard.

The Turbosmart boost gauge is mounted using a pod pillar holder that sits within the front triangular window adjacent the dashboard, the first job was to black out the window so no one can see the wiring to the gauge from the outside. This little window is a real bugger to work on! I bought a roll of black plastic vinyl wrapping from Homebase. We originally looked at using window tint film, but to be honest the area to be covered was so small, it really wasn’t worth the bother and still looks good with the plastic covering anyway.

SpeedoRemoved900x675pixels_zps7fcab5d6.jpg


Weblinks for the gauge holders:

Vent Pod Gauge

Triangular Pillar Pod

We’re pleased with both above items, the gauge pillar pod from Nomad Racing is made from a tough fibreglass construction, looks are a bit deceptive on the website as it appears to be made from moulded plastic, but it is well made and very durable. The unit is sprayed black once constructed. It is installed using just one countersunk screw that holds the pod up against the interior lining of the car.

Photo below shows the Nomad Racing pod before we mounted it into it’s final position. The power cable and plastic air hose was pulled through a hole that was drilled using a 20mm hole saw and arbour. We made the opening through the plastic trim that sits behind where the pod holder is fixed. No wiring will show once it’s installed.

BoostGaugePodInstall900x675pixels_zpse63c9239.jpg


So we finally completed the terminations of the cabling required for the Haldex. We had just three days before the first show of the season so the pressure was on!

We plugged the laptop into the ECU port, opened up the VAG Com software and got to work on the configuration. Some hours later and a bit of head scratching, we pulled out the lead and got the car up on the ramp.

So we gripped our teeth, started up the engine and then drove successfully through the all the gears. All four wheels started whizzing round…. and guess what!

We didn’t see any fault lights or ESP/ABS warnings appear! Hoorah! :)

So we now started getting rather excited at the possibility that we had a working car!

For some videos on the action, find us at the remappers.com UTUBE channel

So the first stage was a success, but more testing was required. Andy and Dave took the Cupra out on the road and put it through its paces. They were very pleased to find that everything worked first time!

This was a massive relief given some of the troubles that others had previously encountered. Further road tests were carried out and we didn’t see any fault lights come on once! Just pure AWD heaven!

We now had just one day left before the car show, I went to Hull on the Saturday. Dave and I fitted a new front splitter from Triple R Composites (photos shown later on in the thread). We got the Autotechnica van packed up with the trade tent, slung a few plastic chairs and tables in the back and then I got to take Kung Fu back home for the very first time since January!

Aghhh I was so excited, my first drive in the Cupra as an AWD!

First pull out onto the main road and I could instantly feel the difference! The rear Haldex started kicking in almost instantly!

So I set off on my journey home with a big cheeky grin on my face! :D Every now and then slamming the throttle in the low gears to see what Kung Fu could really do. About an hour later I arrived back in my home town and rushed straight for the hills! lol

Before the AWD conversion was done, first and second gear was a complete waste of time, with 450bhp through the front wheels alone, I was starting to lose my faith in the Cupra.

And now...

Woosh! First and second gear is absolutely awesome! There was ZERO Wheelspin as it flew up the hill climbs like a wasp on steroids! Cornering is also massively improved, with new antiroll bars and the Billstein B14 Pro coilover kit, this Cupra sticks to the road like a roller coaster on rails!

So I had a couple hours of fun but then it was straight back home and down to work, I had a lot of cleaning, hoovering and polishing to do ready for the show in morning.


First Show of the Season

CustomandModifedCarShow_zps3a5d31ed.jpg


About the show: Extract from the Facebook Page

This is a custom modified car show , everyone welcome. This is a tribute day to the late Andy Harrison who tragically passed away aged 37. We are showing our grateful appreciation to this fantastic Charity. We will have Show & Shine competitions with trophies to the winners 4 classes to enter. special 7' rides, VW club ..., TVR and other clubs are invited plus cruise clubs. Also the Helicopter will be attending as will the Police, Fire and Ambulance displays .Confirmed Mark Dixon from tv trucks , trains & planes, Mike Newman the blind land speed record holder and worlds fastest Postman Pat Van. Lets make this a special day by showing your support.

The REVO team had been in touch with Andy and had asked us to hold the REVO stand on their behalf. This was really exciting and a real privilege for our Cupra to take prime position at the show. Andy also took his own car down to join Kung Fu at the stand, an Audi S3 with plenty of goodies under the hood and a rather nice new set of rims which sparkled in the heat of sun!

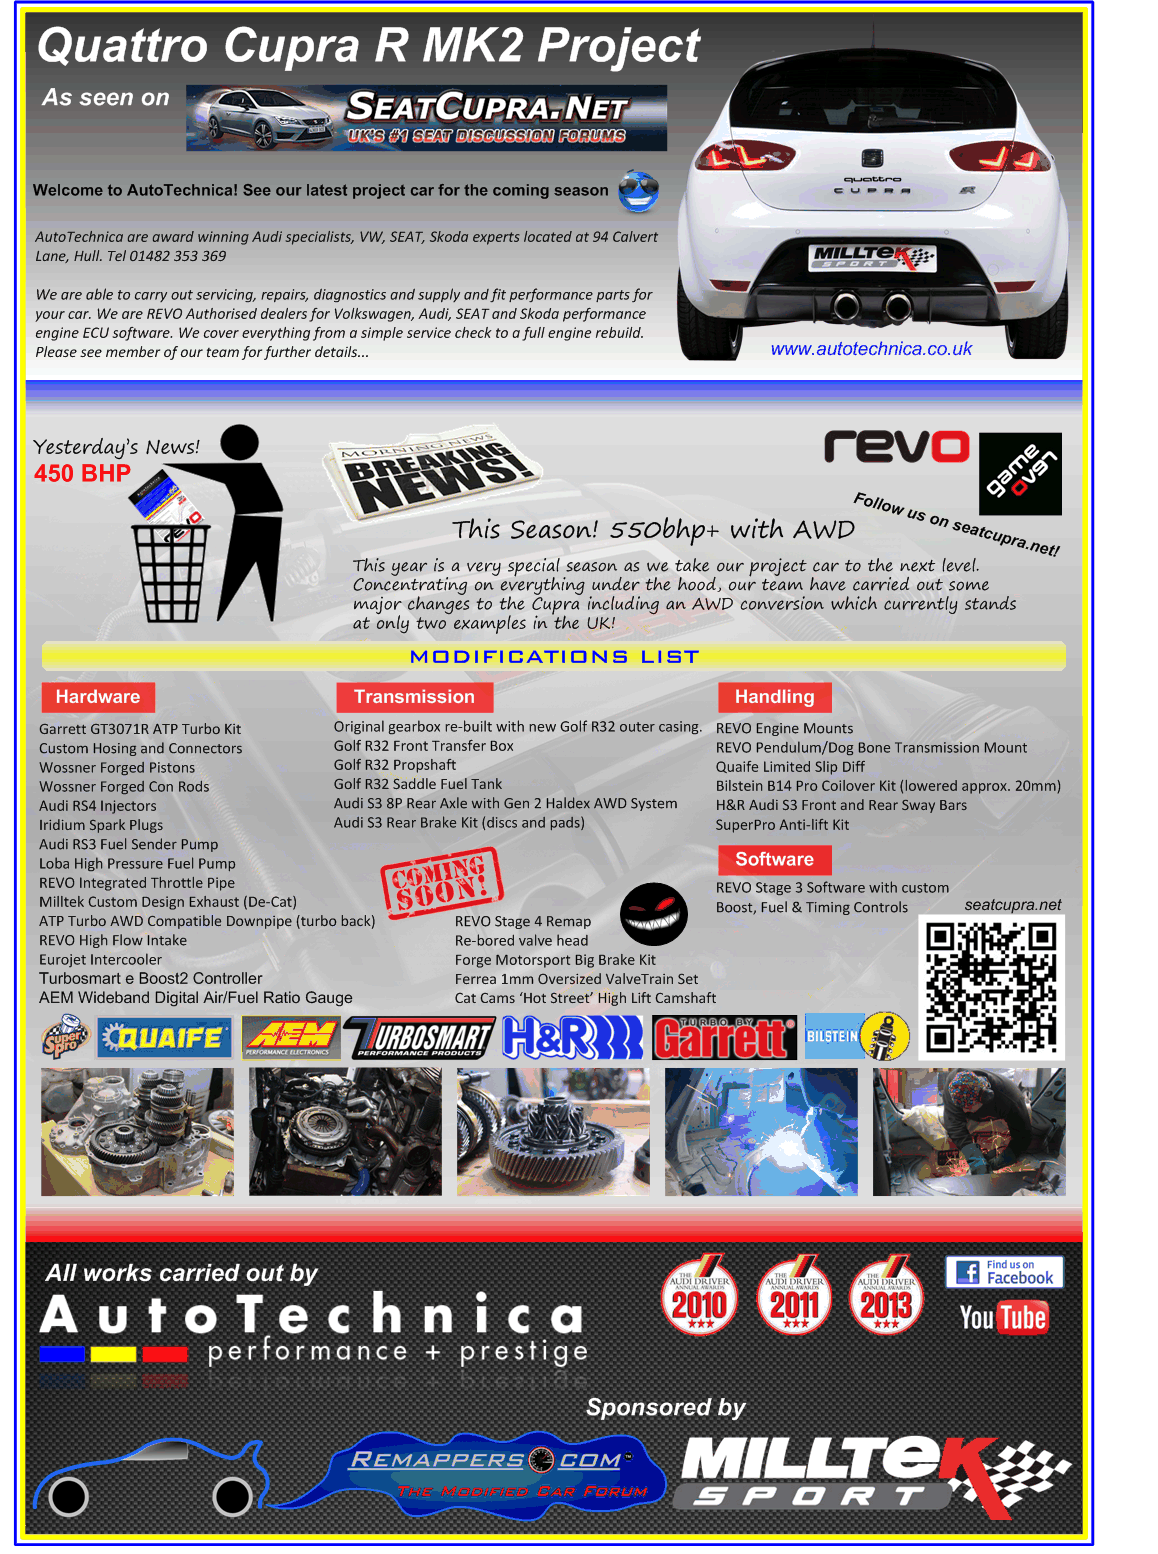
The picture below shows the car spec sheet that we designed for the show.

CarShowSpecSheet--Updated2742014--_zps5ebaf06f.gif


Photo below shows the REVO trade stand hosted by ourselves and James Leng, President & Chief Operating Officer for the REVO Group. James bought a highly tuned supercharged S5 with him to compliment the car display. It was a great opportunity to meet him and discuss our up and coming plans for the project:

IMG_4443900x600pixels_zps4149ebaf.jpg


Mark Dixon, a familiar face on the TV from the Eddie Stobart Series was also there as one of the organisers. Mark also had 2qty Revo Ladies by his side so I asked him very nicely if I could borrow them for 5mins! ;)

IMG_4366900x675pixles_zpsf18a7cc0.jpg


We were all very pleased with the new front splitter from Triple R Composites, given the car is black and white, it really blends in looking very much an OEM product, almost like it was always meant to be there. The splitter finishes off the bumper just nicely, not too low to the ground but it pokes out at the front just enough to give the car a smarter and more aggressive stance.

The splitter was quite easy to fit, it took Dave and I about an hour to install it. The only awkward part was accessing the nuts and bolts around the side, we had to unfasten the front wheel arch plastic inner linings to get access to the fixings inside the front bumper. Anyone with skinny arms to reach those inner fixing points will be an advantage! lol

IMG_4363900x600pixels_zps57a6288e.jpg


The Cupra parked up alongside the spec sheet for everyone to see. We got plenty of interest from lots of people which was really cool:

IMG_4439900x600pixels_zps7f0704b3.jpg


We left the boot floor open most of the day so people could see it was no ordinary Cupra!

IMG_4435900x600pixels_zps171291d0.jpg


We also left the front windows open for people to have a peek inside, but then trouble appeared! The Yorkshire Air Ambulance chopper arrived and landed only 50 metres away, blasting every car in the near vicinity with runway dust and particles of burnt tyres!

Aghhhhh it took me ages to hoover Kung Fu out the night before… Rats!

20140518_102933900x675pixels_zpsab43bb79.jpg


Later on I discovered a fine film of dust all over the car! so I had to go back over the body work with a polishing cloth several times that day! We were positioned quite close to the main stage where all the action was taking place and the chopper had parked up!

IMG_4459900x600pixels_zpscd4fa3a7.jpg


One of the main features of the show was the Lassa Drift Team who were awesome! Hats off to the guys for managing to show off their talent in such a small area:

IMG_4407900x600pixels_zpsc43db660.jpg


Part of their show was to drive donuts around some volunteers who were stood in the middle of the tarmac whilst the drift cars skimmed around them within an foot of their legs! On this particular occasion I have to say Mark Dixon’s girlfriend looked a bit little concerned! I’m just glad I was wearing sun glasses that day because the spray of burnt rubber in your face was not a nice experience! Especially as it was approaching the hottest day of the year so far!

IMG_4402900x600pixels_zps1d2fe08d.jpg


IMG_4406900x600pixels_zpsff3acb13.jpg


At one point we thought one of the drivers was going to collide with one of the girls, he skidded his rear wheels around and parked up right next to her with an inch to spare, apparently this was all part of the stunt though! (we hope) Try telling her that! [:@]

IMG_4400900x600pixels_zps6e8a8ad2.jpg


To be continued...
 

Gagwithgaffer

Active Member
May 28, 2013
82
3
North Yorkshire
First Show of the Season Continued...

CustomandModifedCarShow_zps3a5d31ed.jpg


So shortly after all the excitement with the drift team display, James Leng pulls the S5 from the display stand and decides to join in on some of the action. He agreed to have a race around the circuit with one of the Lassa drift team drivers. He pulls up round to the starting line:

IMG_4427900x600pixels_zpscbeb46ba.jpg


IMG_4410900x600pixels_zps42825e45.jpg


Getting ready into position:

IMG_4419900x600pixels_zps868178b2.jpg


And they’re off! Very quickly…

IMG_4428900x600pixels_zps21179a04.jpg


They raced like warriors towards the far end of the circuit, around the bottom and back up the far side towards the finish line. Meanwhile the Lassa stunt driver managed to slip in a few drifts before coming back up towards the finish… Come on REVO, GO GO GO!

IMG_4429900x600pixels_zps64e7d2b0.jpg


With only a few metres apart, the S5 bombed it up towards the finish line. The whole crowd roared with excitement, all shouting their support for these two guys who were both intent on winning! Thankfully both cars made it to the finish line in one piece! S5 with smoking brakes! Lol

IMG_4433900x600pixels_zps383c1673.jpg


Mark Dixon awaits the arrival of the two racers to welcome them both back to the finish:

IMG_4415900x600pixels_zpsa98ee358.jpg


IMG_4430900x600pixels_zps77c586d5.jpg


All in all it was a great day and a good start to the up and coming show season. The weather was a real scorcher and we all suffered terrible sun burn for the following week! Big thanks to Andy, James, Mark and the rest of the crew that made this show one to remember. It was a real success with thousands of people turning up, more than ever expected. Hopefully the show will return again next year.

IMG_4453900x600pixels_zps0b5d326b.jpg


So the end of the day had finally come, we packed up our things and headed on our way back to Hull. This was my last chance for a quick spin in the Cupra before we returned it back to the Autotechnica HQ.


So what happens next? Well we have some more tricks up our sleeves…

We’ve ordered some more treats for the engine which are currently in production and due to arrive within the next two weeks.

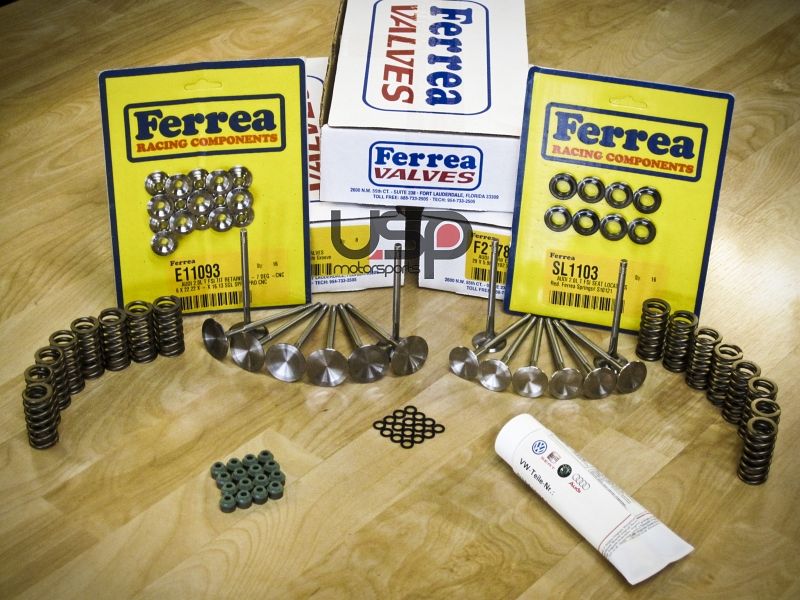
First item on the cards is the uprated Ferrea valve train.

http://www.uspmotorsports.com/FerreaValvetrainKit/2.0TFSI.html

FerreaValveTrainKit_zpsb66fa7a9.jpg


Now that we have AWD and a means of utilising all the available power, we’ve decided that Kung Fu simply isn’t fast enough!

OK, yes first and second gear is immense, but bear in mind that AWD eats a lot of horses!

Better traction and more friction soaks up the muscle, the mid-range power on our Cupra is good, but it could also be a lot better, so we’re now maxing it to the next level. Our current target is to have the car ready for the big shows later on this season, including the GTI International. (we're only a month away... crikey!)

In addition to the uprated valve train, USP Motorsports are currently in the process of CNC machining a new head for us and then boring out the valves with an extra 1mm clearance. They will also be pre-assembling the valve train for us before sending it across to the UK.

Ferrea components are notorious for being rock solid and can take a lot of battering, they are designed for high revving engines and will enable us to go beyond the 8k rev limit.

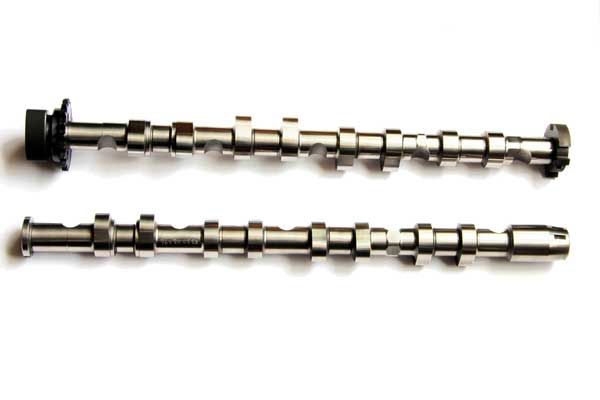
Next on our list is a Stage 3 high lift cam from Cat Cams in the UK (currently being made for us)

http://www.catcams.co.uk/acatalog/Audi--VW--2.0L-TFSI.html

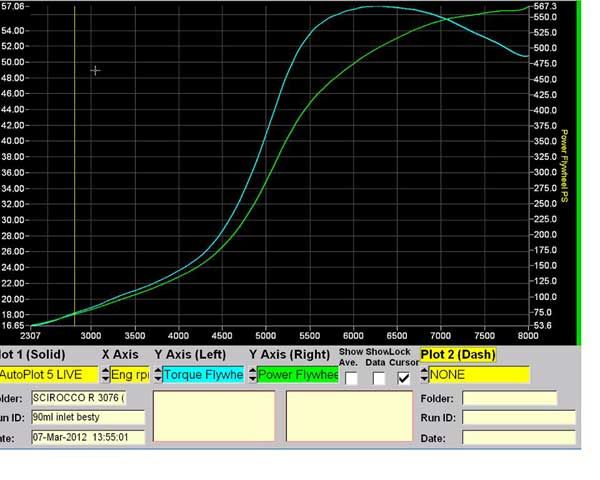
Before and after dyno testing has proven that the Cat Cams 7602002 ‘Stage 3’ profiles adds a stunning 72 bhp and 38 lb.ft of torque to suitably modified engines. Well Kung Fu will be more than suitably modified by the time we’ve finished with him so fingers crossed we’ll get some real performance at our disposal!

Welcome to the world of lumpy sounding engines! Trips to Asda no longer recommended!

Cat-Cams-7602002-TFSI-Stage_zps111438b2.jpg


Scirocco-R-TFSI-Dyno-test_zps6f0152d0.jpg


The next task is we’ll need to change the pistons (again!) unfortunately we didn’t think far enough ahead when we fitted the Wossner units before XMAS. When using a high lift cam, the valve pockets on the piston heads have to be machined deep enough to stop them colliding with the valves. We’ve ordered a set of forged JE Pistons through Cat Cams which are being machined especially for our project.

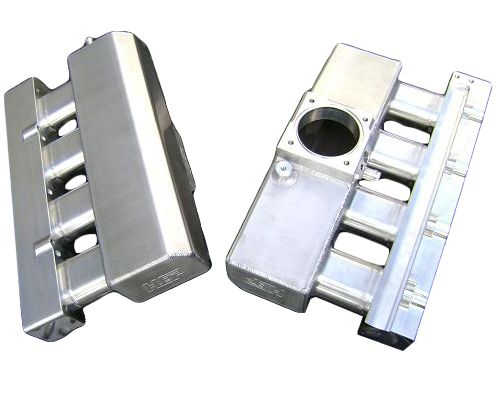
In order to allow the extra fuel and air to be forced into the engine, we will be replacing the inlet manifold with a higher flow rated unit. The inlet manifold on the standard 2.0TFSI engine is quite restrictive and will not allow for big gains in BHP.

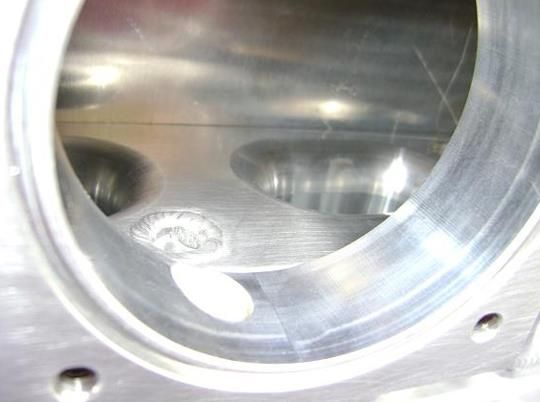
Below is the T Short runner performance intake manifold for the VW 2.0T FSI engine. When increasing boost levels or upgrading your turbocharger beyond factory limits, it is important that the engine has the ability to deliver the extra pressure into the cylinders. In high-boost applications, we need to make sure the charged air is not bottle necked at the intake manifold, restricting potential power. This high-flow intake manifold will improve flow far beyond factory limits, giving the ability for better response and higher HP!

http://www.uspmotorsports.com/2.0TFSISTAGE1PerformanceIntakeManifold-HEP.html

InletManifold_zpse580b0d1.jpg


ScreenClip000459_zps36c8981d.jpg


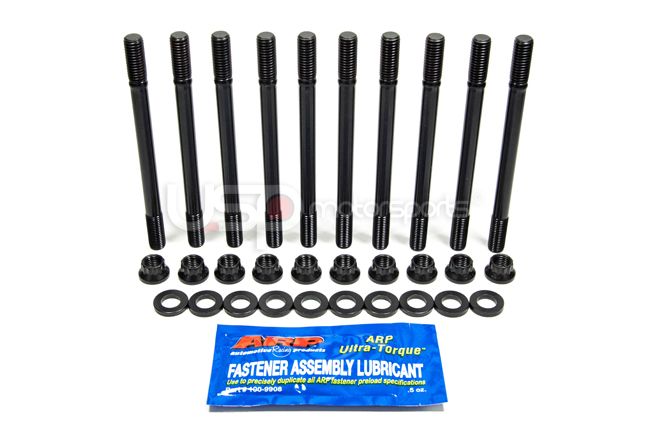
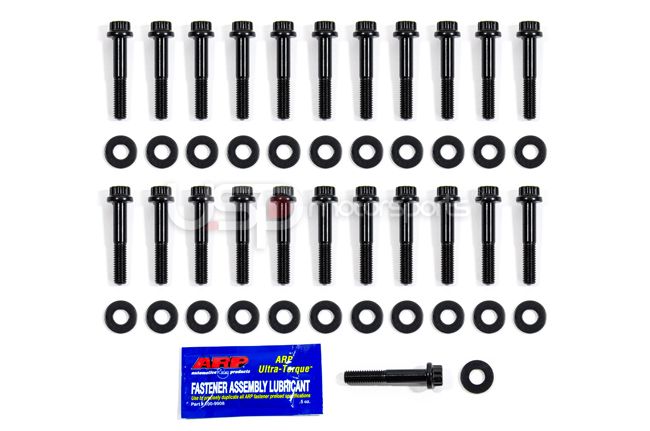
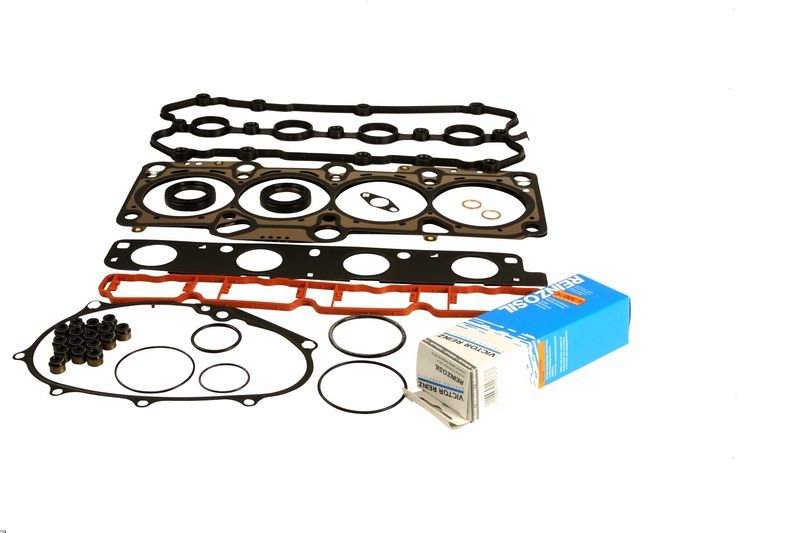
Some other parts we’ll soon be fitting include strengthened fixings for the engine head, cams and uprated gasket. We definitely don’t want our engine coming apart under this extra strain! We also want it last longer than 20k! lol

http://www.uspmotorsports.com/ARPheadstudkit2.0TFSI.html

ARPHeadStudKit_zps5b6397ae.jpg


http://www.uspmotorsports.com/ARP-Camshaft-Girdle-Bolt-Kit-2.0T-FSI.html

ARPCamshaftBoltKit_zps1a1653b2.jpg


http://www.uspmotorsports.com/CylinderHeadGasketSet-VW/Audi2.0TFSI.html

HeadGasketKit_zpsdf89e45c.jpg


All the above parts above have been sourced through USP Motorsports in America and Cat Cams in the UK. It had taken us numerous emails backwards and forwards and many hours of research to decide on the best kit for our application. If you’re looking to do similar mods then I’d highly recommend giving these guys a call and they’ll be able to help you with your build.

So the next month is going to be a busy one, we will have to do a another full rebuild of the engine. So this really should be the last time we dig this deep but it’ll def be worth it.

Once the parts are fitted then we need to run in the new pistons for a few hundred miles, we then head down to REVO HQ to let the scientists do their magic. We’ll keep you updated with our progress during the next phase of the works and hopefully all will be complete in time for the next show… wish us luck! We may need it! Lol

Credits

Massive thank you to Andy, Ben and the team for all the hard efforts made recently, we have successfully transformed the Cupra into an AWD monster! the next stage of works will make it completely insane!

Thanks to the forum members for your continued support...
 
Last edited:

Bignod00

Active Member
Nov 9, 2009
2,202
3
Lincoln/40,000 ft.
Simply amazing work my good man! So full of admiration (and a little bit of jealousy) and I cannot wait to see the finished article.....it'll be a true weapon! ;)
 
Jan 3, 2014
593
0
Unbelievable write up. If I had the money I'd definitely do something like this. Hats off to everyone involved. Truly magnificent machine

Sent from my SM-N9005 using Tapatalk
 
SEATCUPRA.NET Forum merchandise