You can still fit pipes in front of it by either moving its position or cutting the not needed bits off the front of the battery trayWell i found a guy that is willing to fabricate the piperwork for me to whatever i want, i just need to figure out what i need, especially when it comes to the cold side pipes to the manifold, that flipping battery is in the way and i don't want to relocate it to the boot.
Any suggestions.?
-
Hey Guest one of our sponsors Progressive Parts is running Black Friday and Cyber Monday offers - more details here
You are using an out of date browser. It may not display this or other websites correctly.
You should upgrade or use an alternative browser.
You should upgrade or use an alternative browser.
What did you use to build up the preassure mate?
I used a compressor, but because i fitted the leak tester with a regular tyre valve stem and gauge, there is nothing stopping you going and using somewhere that has free air.
Last edited:
fancy making me one of these.....
also, did you unclip pcv return to tip and block that end?
Yes, you need to take of the oil cap off and plug the hole going form the PCV to the TIP.( or u can pinch it if you feel lucky!)
I don't know why i haven't made one before, it literally took me a few minutes to diagnose a leak rather that dicking around with logs and wondering if i actually have a leak or is something else wrong.
I thought boost leaks was done by removing the charge pipe top intercooler hose and testing back down the hose so that it doesn't go throught the turbo as it pops the turbo seals , that's how Amd done mine any way
daves ibiza
Guest
yeah id do it through the charge pipe also, if i were to go through tubby then 10 psi max would be sufficient to find a leak.
good if you have a split in the tip to do this way.
ill be going through turbo, but as said 10 psi only.
good if you have a split in the tip to do this way.
ill be going through turbo, but as said 10 psi only.
Even through the top intercooler hose I only done 18psi this was plenty to hear where the air was leaking from ,
I thought boost leaks was done by removing the charge pipe top intercooler hose and testing back down the hose so that it doesn't go throught the turbo as it pops the turbo seals , that's how Amd done mine any way
You can do it either way, just don't run to much PSI through if you are going through the turbo.The Charge pipe is the safest way but i wanted to check my TIP and other connections so i went thru the TIP itself.
I would say if you are unsure do it though the Charge pipe.
WOW what a car, you've clearly got a eye for details. Great work!
The stage 2 results are rather interesting, it goes to show it's not all about the peak power output more how early and long you have the power for.
I will be definately following this thread in the future, i may even steal a few of your ideas while im at it.
Keep up the good work.
 Great work!
 The stage 2 results are rather interesting, it goes to show it's not all about the peak power output more how early and long you have the power for.

I will be definately following this thread in the future, i may even steal a few of your ideas while im at it.
Keep up the good work.
WMI installation Part 1
Part 1:
Right Lads( and ladies) between Business trips/holidays/shite weather and family commitments i managed to find 5hrs spare today so i decided to get my WMI install going.I purchased a Devils Own Stage 2 kit with progress 3bar map sensor build in.I have been toying with the idea of WMI for a while and a hybrid turbo but before i go hyrbid i decided to give this a go as some peeps where reporting very good gains from it. At first i was slightly intimidated by what this would involve and the thought of injecting water/methanol into the intake but i have got used to the idea now so i felt confident to install it.I have been reading countless threads on this over the past few weeks, so i had a good idea what i was in for.
A few decisions i made before i started.
: I would definitely install the nozzle a few inches after the cold side of the cooler rather than just before the throttle body, its better for atomisation (so I hear!)
: I decided to use the washer bottle for my water meth mix until I get a proper boot install going, reason being i am screwed for space in my bay. I can use the built in low level sensor instead of additional wiring.I can still use the my water/meth mix to clean the windows without any damage to the paint assuming i don't create to strong of a mix. I am not worried about running out of mix as i will be installing an on/off switch for the pump ( in case the missus is driving, LOL)
: I would have to install the pump 6ft away from the water/meth tank: reason, i have Fu$k all space on the drivers side of the bay, its a gravity feed so as long as the pump is lower than the tank i should be good. I cleared this with Devil's own and they said it wouldn't be a problem. Again this is another reason to get the boot build going.
:I will initially run one Nozzle that’s capable of running 4gph of mix, later I plan on adding a second nozzle.
Anyways, here's a few pics of the progress I made today, I am having some problems getting the WMI controller kicking in at the right PSI, so at the moment I am only injecting water, I will go at it again tomorrow to try and get it sorted.
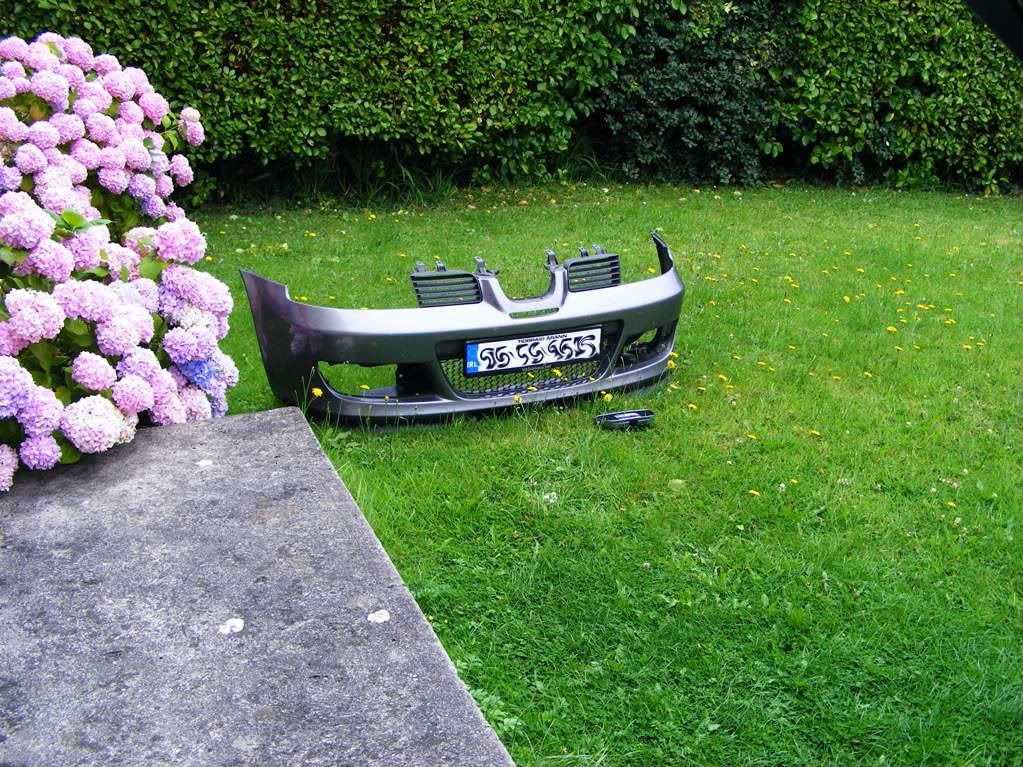
Bumper off
Mounted a mounting bracket to the passenger side bumper, as it was the only space i could find.
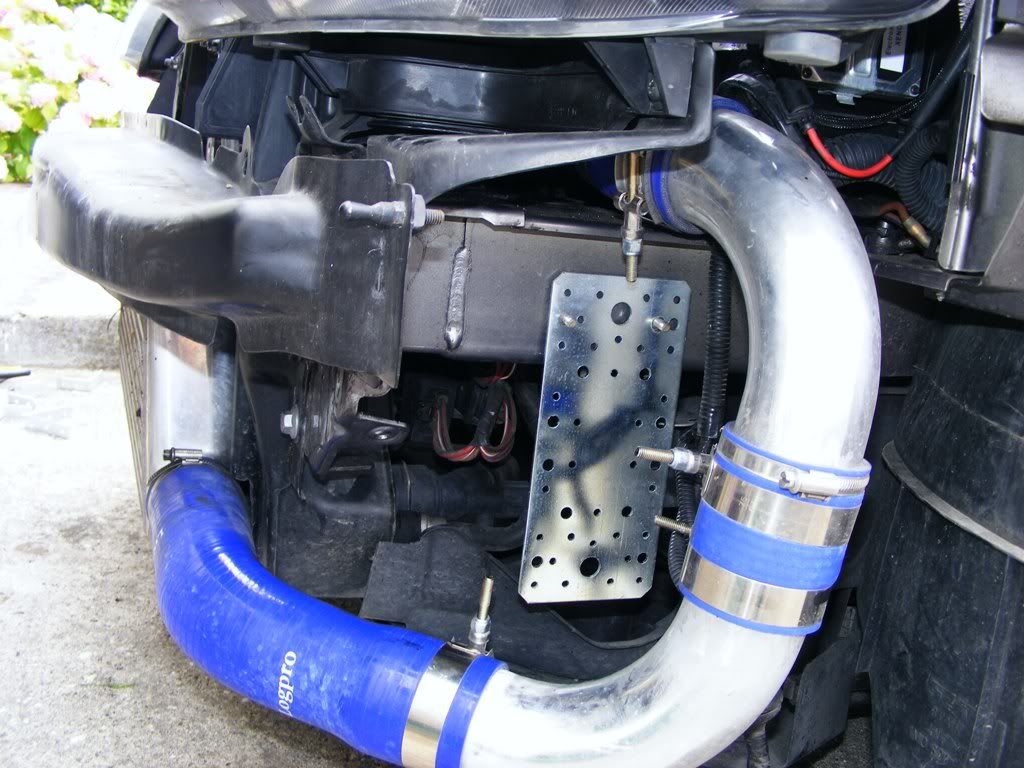
Just about got the pump mounted, I had to alter the rotation of some of the IC piping clamps and i wanted to be sure that nothing would rub.
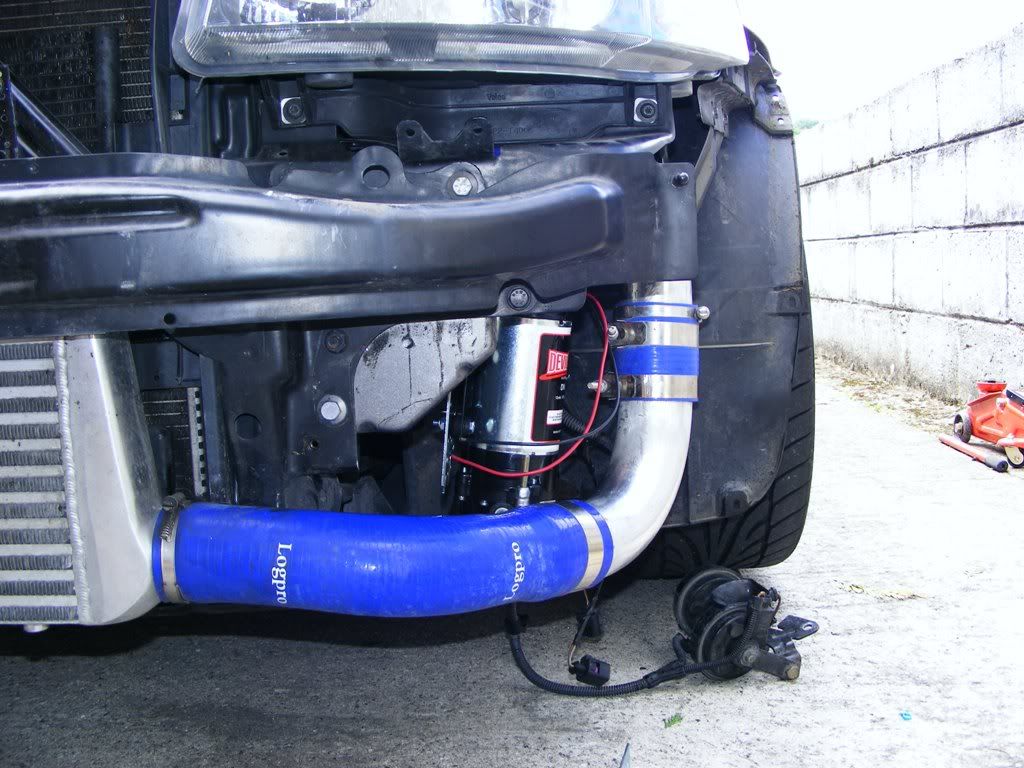
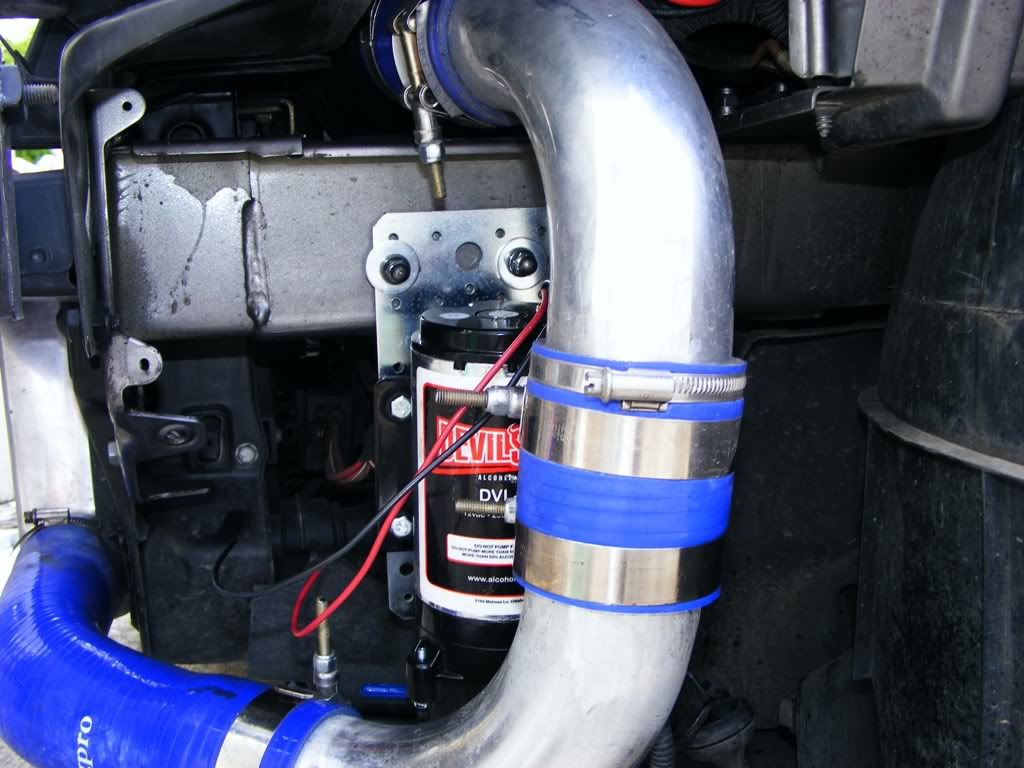
Next up was mount the nozzle adaptor on the cold side.
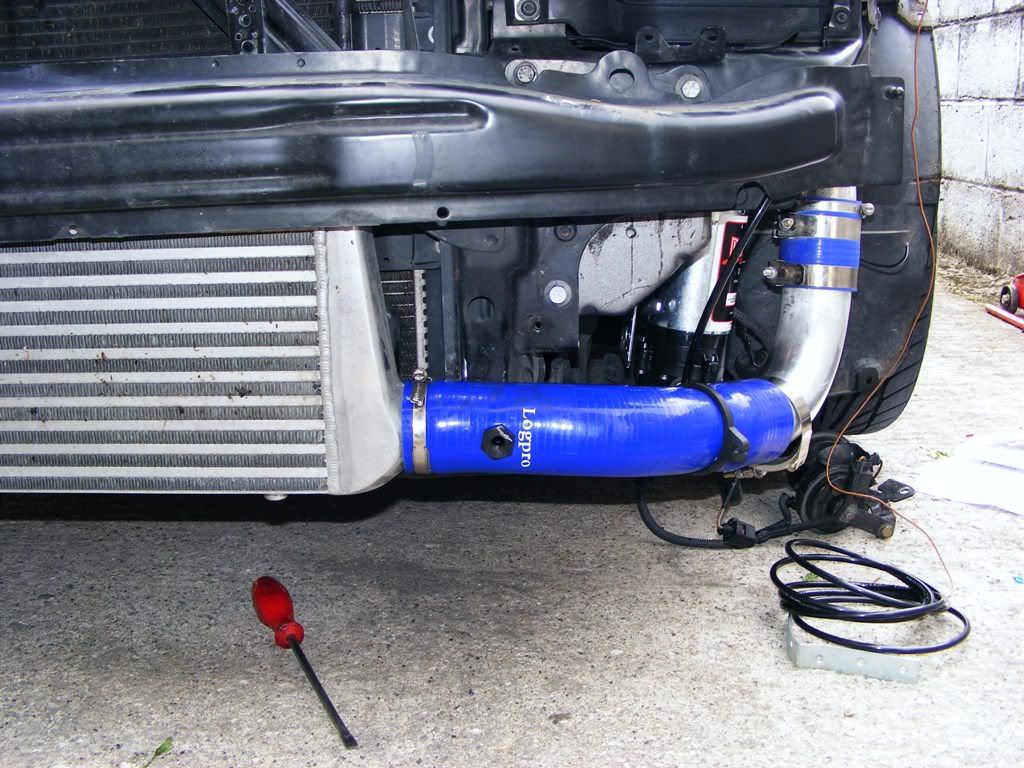
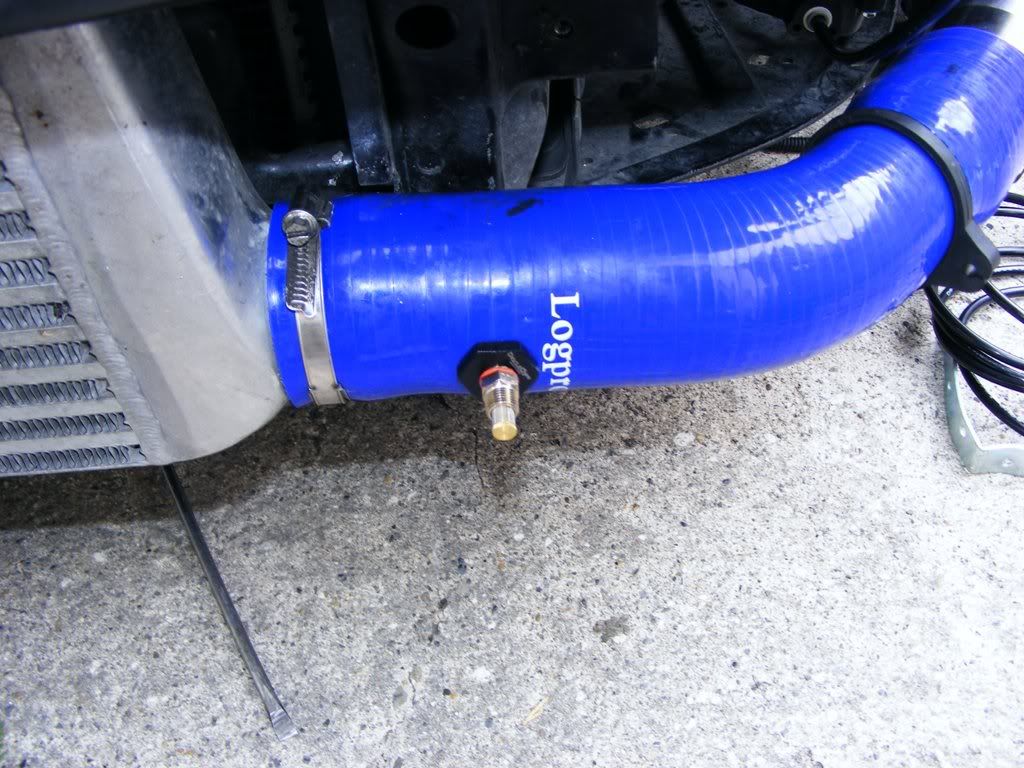
Then i routed the tubing from the pump to a check valve and then in the the nozzle end
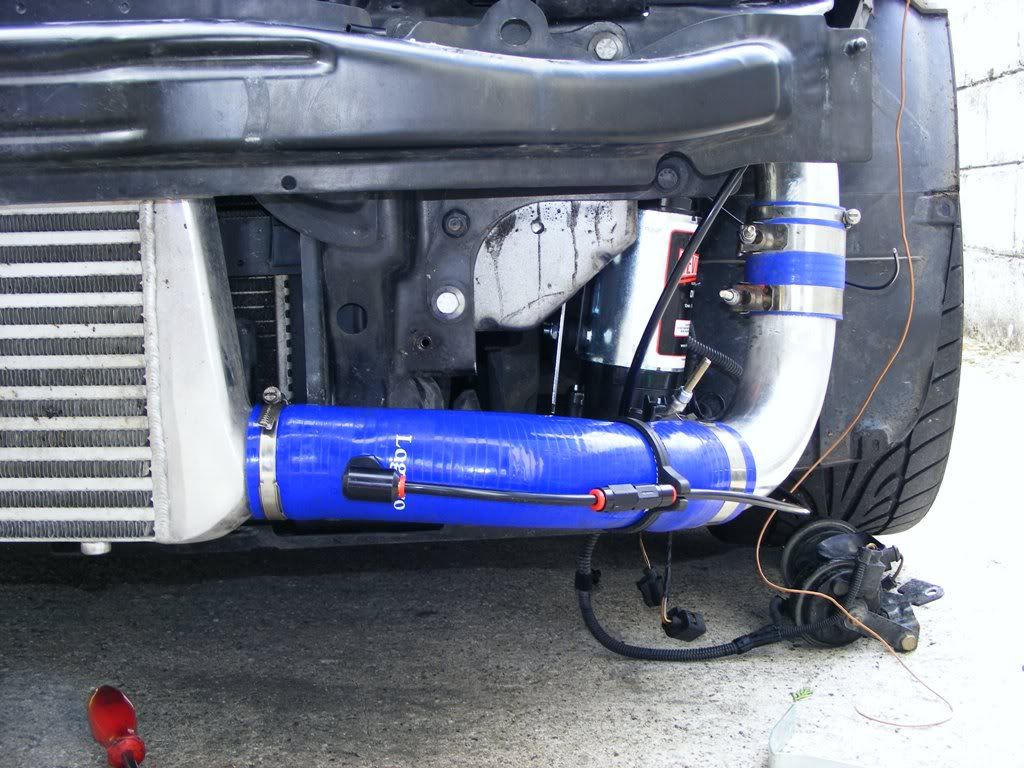
I ran the tubing from the tank along the crash bar, it was the most direct route and its better than having even more junk in the bay.
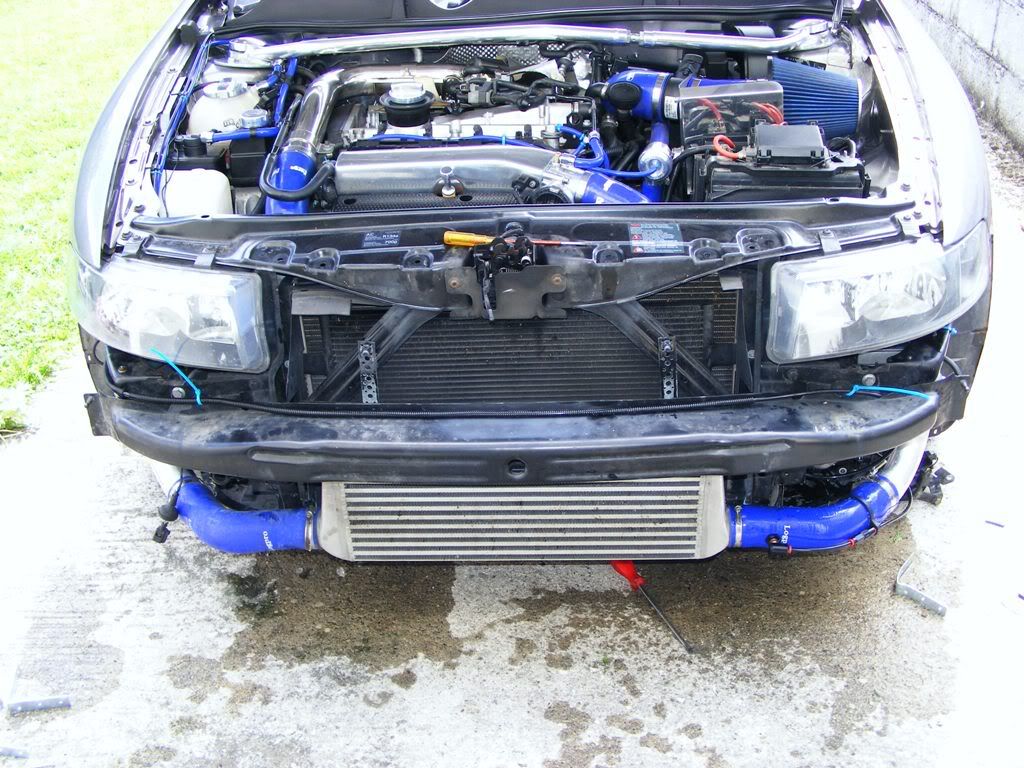
Part 2 below i could only post 10 pics per post
Part 1:
Right Lads( and ladies) between Business trips/holidays/shite weather and family commitments i managed to find 5hrs spare today so i decided to get my WMI install going.I purchased a Devils Own Stage 2 kit with progress 3bar map sensor build in.I have been toying with the idea of WMI for a while and a hybrid turbo but before i go hyrbid i decided to give this a go as some peeps where reporting very good gains from it. At first i was slightly intimidated by what this would involve and the thought of injecting water/methanol into the intake but i have got used to the idea now so i felt confident to install it.I have been reading countless threads on this over the past few weeks, so i had a good idea what i was in for.
A few decisions i made before i started.
: I would definitely install the nozzle a few inches after the cold side of the cooler rather than just before the throttle body, its better for atomisation (so I hear!)
: I decided to use the washer bottle for my water meth mix until I get a proper boot install going, reason being i am screwed for space in my bay. I can use the built in low level sensor instead of additional wiring.I can still use the my water/meth mix to clean the windows without any damage to the paint assuming i don't create to strong of a mix. I am not worried about running out of mix as i will be installing an on/off switch for the pump ( in case the missus is driving, LOL)
: I would have to install the pump 6ft away from the water/meth tank: reason, i have Fu$k all space on the drivers side of the bay, its a gravity feed so as long as the pump is lower than the tank i should be good. I cleared this with Devil's own and they said it wouldn't be a problem. Again this is another reason to get the boot build going.
:I will initially run one Nozzle that’s capable of running 4gph of mix, later I plan on adding a second nozzle.
Anyways, here's a few pics of the progress I made today, I am having some problems getting the WMI controller kicking in at the right PSI, so at the moment I am only injecting water, I will go at it again tomorrow to try and get it sorted.
Bumper off

Mounted a mounting bracket to the passenger side bumper, as it was the only space i could find.

Just about got the pump mounted, I had to alter the rotation of some of the IC piping clamps and i wanted to be sure that nothing would rub.


Next up was mount the nozzle adaptor on the cold side.


Then i routed the tubing from the pump to a check valve and then in the the nozzle end

I ran the tubing from the tank along the crash bar, it was the most direct route and its better than having even more junk in the bay.

Part 2 below i could only post 10 pics per post
WMI installation Part 2
Part 2:
Time to mount my horn again i was tight for space but managed to get it attached to the frame and out of the way. I also covered any parts of the tubing that might rub on the body with spare silicon tubing i had lying around.
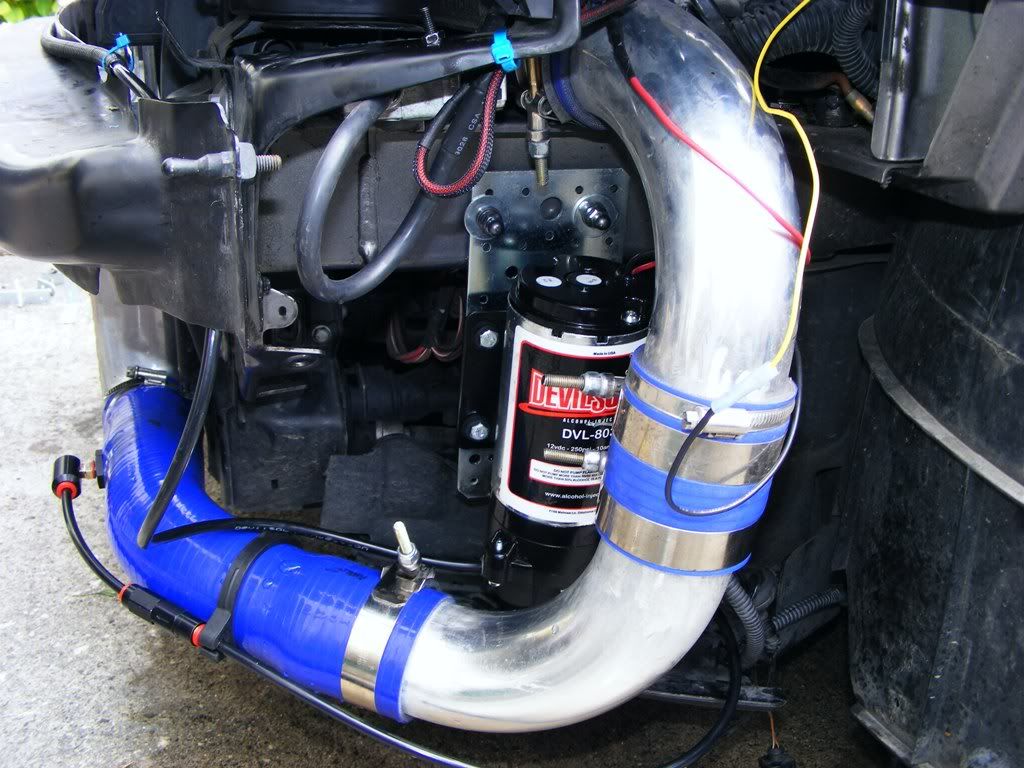
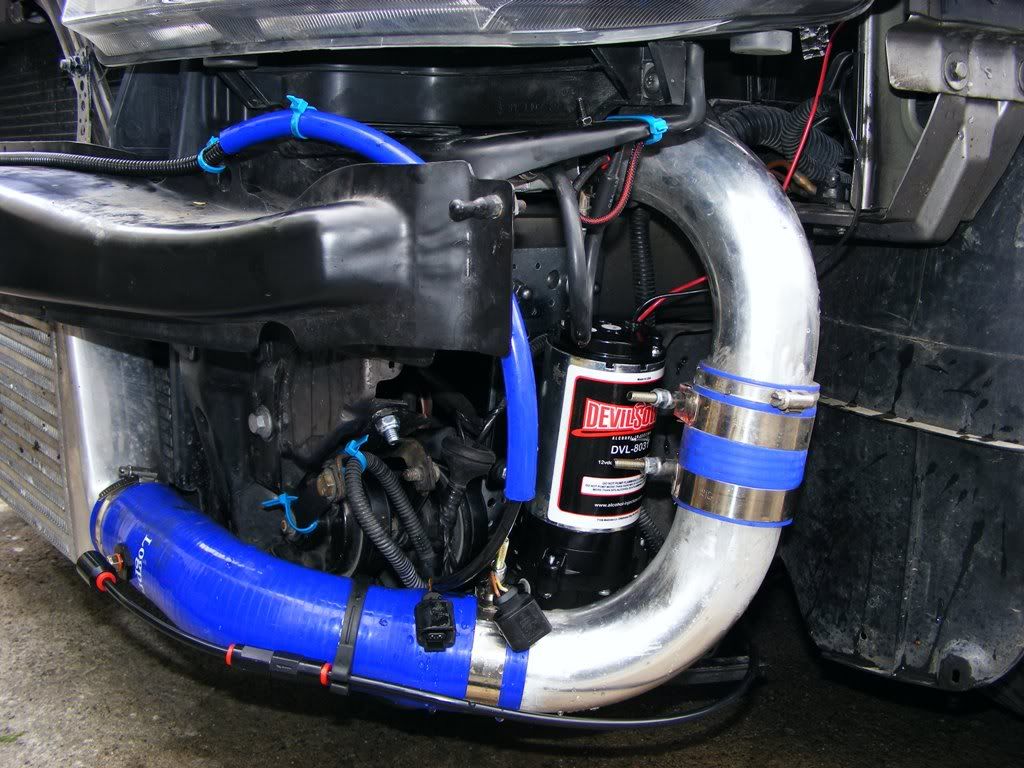
From here i needed to run a boost tap from the controller as it has a built in 3bar MAP and i also need to connect the pump to the WMI controller.
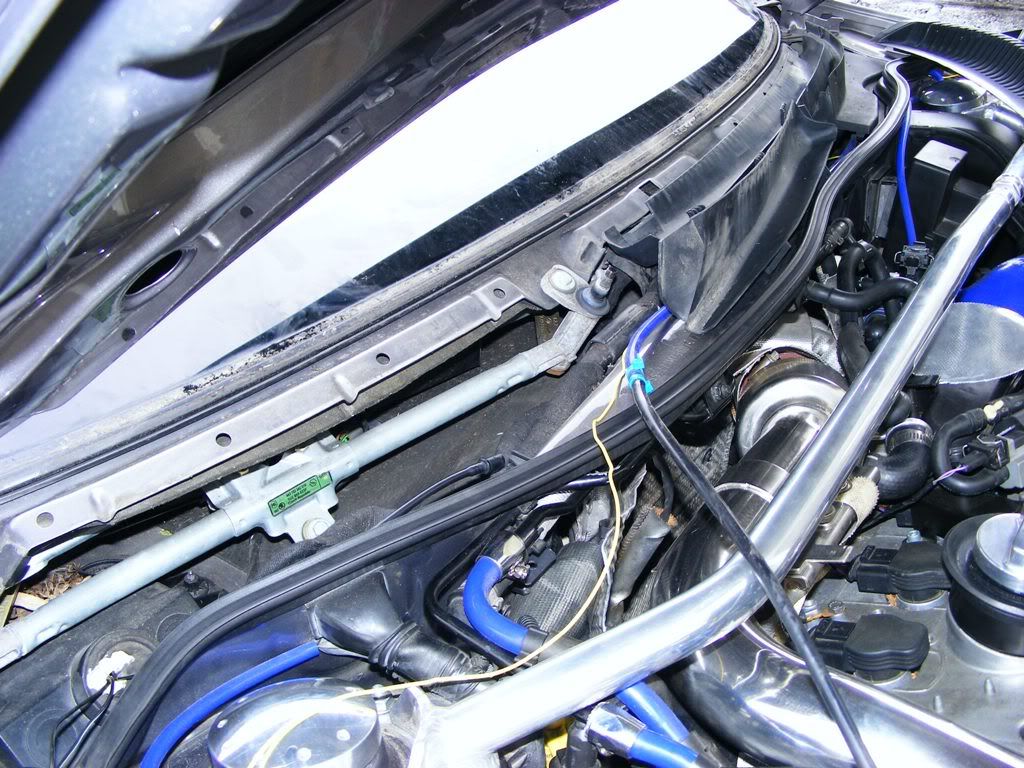
I went up the side of the bay and then under scuttle panel and through the firewall into the cabin so i could hook it up.
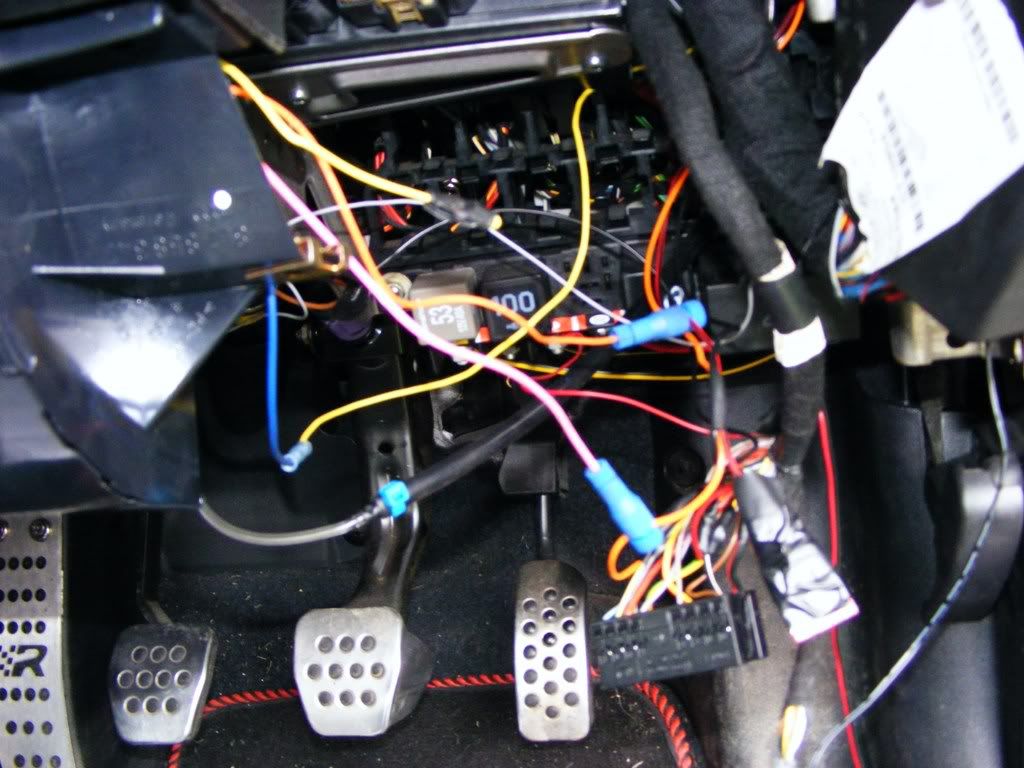
Wiring next, I hate wiring, but posi taps make life so much easier these days and i only need a connection to the pump, an earth, a constant 12v and a switched 12v feed.
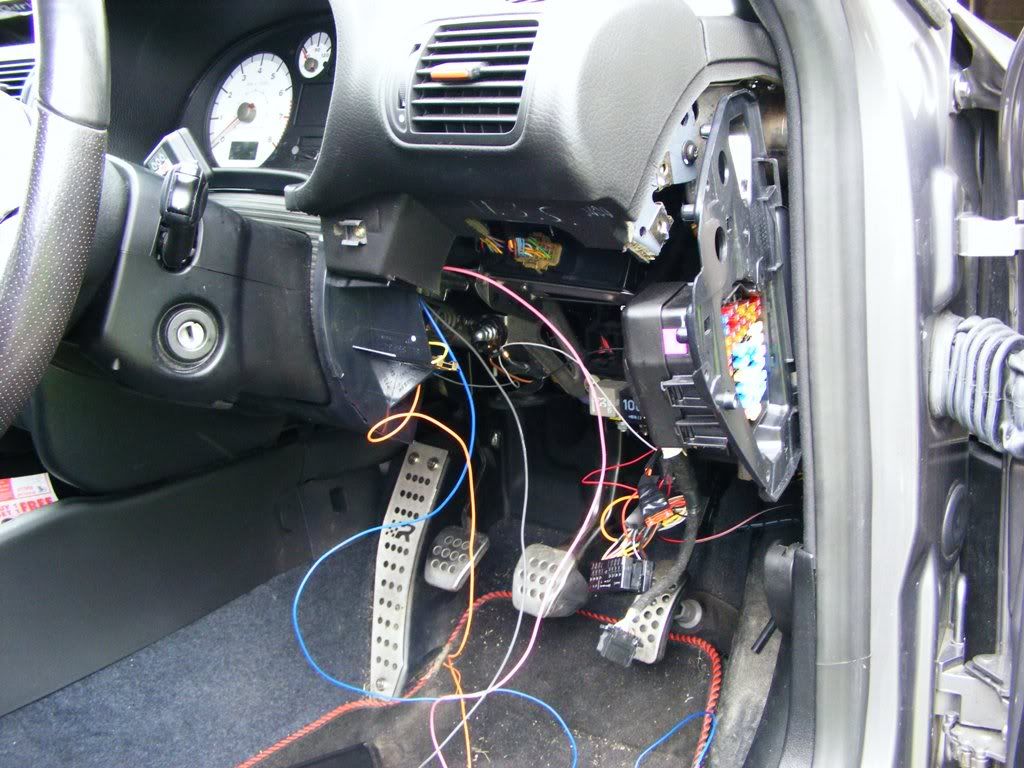
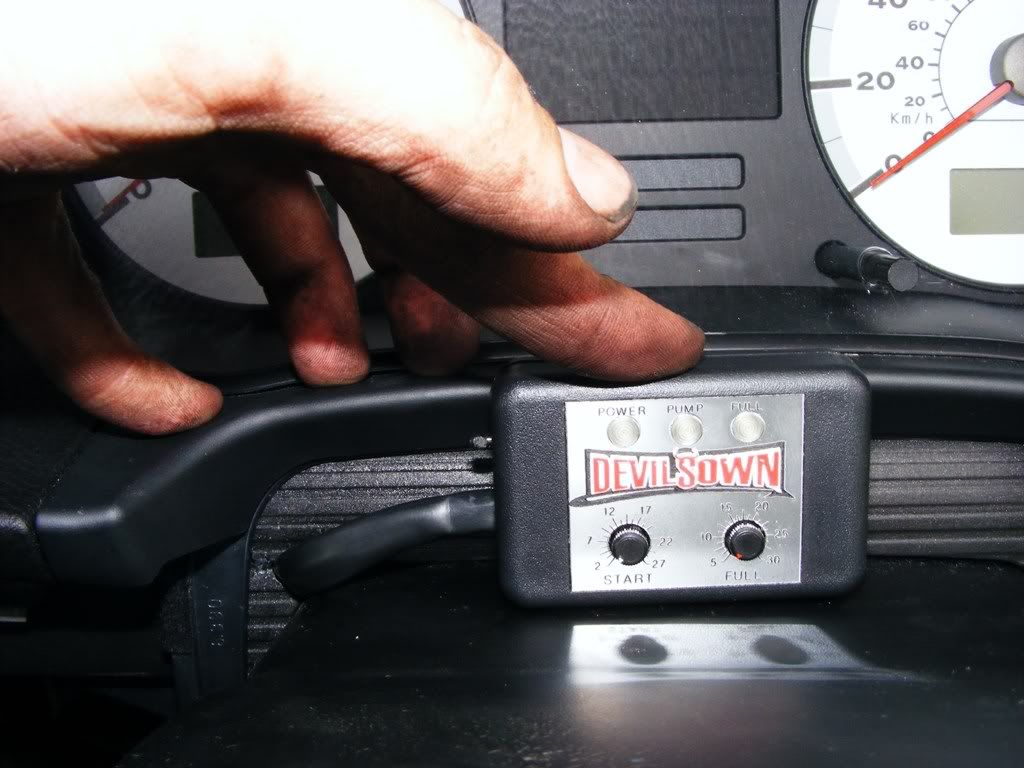
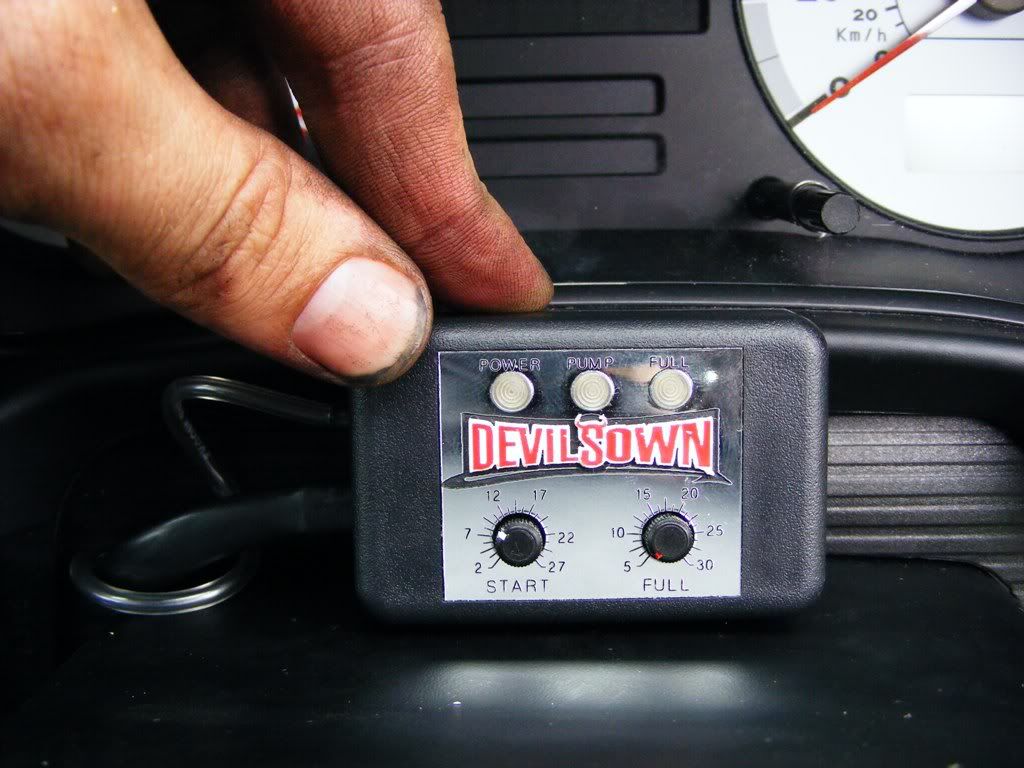
I then ran the wiring up on the top of the steering wheel column, i just need some Velcro to seat it down properly but i think this was the better spot for it so i can make on the fly adjustments and also keep and eye on the information LEDs.
That’s it for now folks, i still have more to do with this, like clean up the wiring in the bay, just waiting on some convoluted wiring sleeves and i should be down.
When i have it up and running fully i will post up some logs, then pile on the timing and then get an RR, i am trying to hit RR number 70

Any questions or comments are welcome.
Cheers
Rob
P.S Edit, since installing this i found the WMI controller to be faulty :-( (DO are sending a new one) and i also re-wired the controller to go to the junction block under the dash as its a leaner approach and also re-routed the wiring to the pump to use the ducting that run under the airbox/air filter
Part 2:
Time to mount my horn
 again i was tight for space but managed to get it attached to the frame and out of the way. I also covered any parts of the tubing that might rub on the body with spare silicon tubing i had lying around.

From here i needed to run a boost tap from the controller as it has a built in 3bar MAP and i also need to connect the pump to the WMI controller.
I went up the side of the bay and then under scuttle panel and through the firewall into the cabin so i could hook it up.

Wiring next, I hate wiring, but posi taps make life so much easier these days and i only need a connection to the pump, an earth, a constant 12v and a switched 12v feed.


I then ran the wiring up on the top of the steering wheel column, i just need some Velcro to seat it down properly but i think this was the better spot for it so i can make on the fly adjustments and also keep and eye on the information LEDs.


That’s it for now folks, i still have more to do with this, like clean up the wiring in the bay, just waiting on some convoluted wiring sleeves and i should be down.
When i have it up and running fully i will post up some logs, then pile on the timing and then get an RR, i am trying to hit RR number 70


Any questions or comments are welcome.
Cheers
Rob
P.S Edit, since installing this i found the WMI controller to be faulty :-( (DO are sending a new one) and i also re-wired the controller to go to the junction block under the dash as its a leaner approach and also re-routed the wiring to the pump to use the ducting that run under the airbox/air filter
Just looking at the photos and one thing is clear, i should have run the water/meth feed along the bottom of the crash bar and not the top, DOH.Never mind my bumper comes on and off more than a lady of the night knickers 

Nice work there mate. Shame about the controller, hopefully it all works perfectly fine when you get a new one. Keep us updated!
Similar threads
- Replies
- 7
- Views
- 3K
- Replies
- 41
- Views
- 10K


