Seen lots of threads on here about wanting to know how to wire up the halfords auto gauge boost gauge. lots of people wanting to know what wire goes where so here it goes!!!
This is a guide on the correct way to fit/wire it up so you get it to light up and save the setting you last had it on, This does work as its the way i wired it up to my car and it works how it should.
1. Get some silicone 4mm inner diameter pipe about 3 metres worth.
2. T it from the FPR.
3. Drill hole in the grommet hole next to the main wiring loom under the scuttle panel but dont push the drill in too deep pearce your way through the foam with a screwdriver carefully
4. Push pipe trough hole and retrieve from the inside ( this takes alot of time and patience!!!) put a big blob of silicone around the pipe going into the car.
5. feed it up to your pillar pod and push into gauge.
Wiring THE CORRECT WAY.
Obviously extend all the wires from the gauge!!
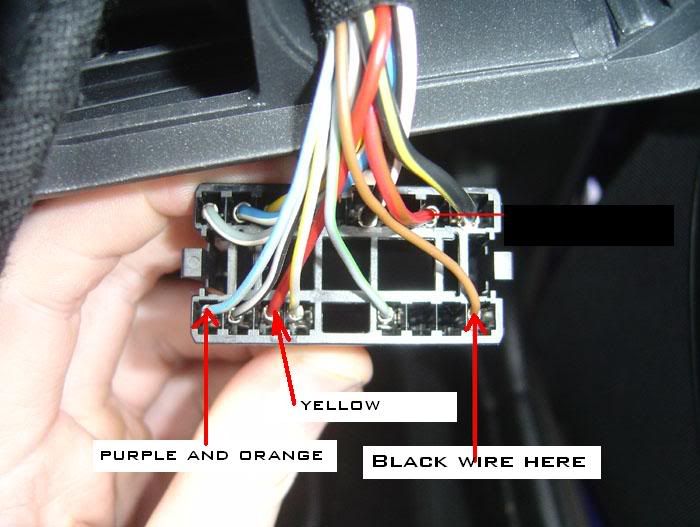
6. join the black gauge wire (earth) to the brown wire on the light switch block
7. Join the purple and orange gauge wire(switched live) together and then join it to the grey wire with blue tracer on on switch block
8. join the yellow gauge wire (positive) to the fat red wire on the light switch block.
The gauge will light up when you put the ignition on. It will also dim when you use the dimmer.
The gauge readings (for a standard map 225) were 14 psi or 1 bar peak and 20 inhg
Hope this helps and clears things up for people?
Comments as usual are welcome?!


 please