This guide show’s you in brief how to remove the secondary air injection pump, valve, pipe work plus brackets. All that is required is removing six bolts, three nuts and a bit of time (and patience).
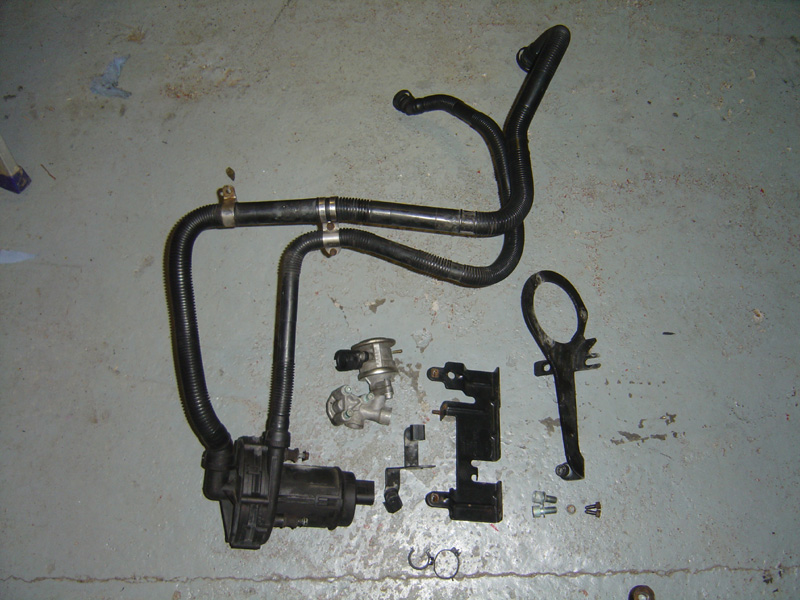
First things first, once everything has been removed you should be left with all the following, of course if you still run an engine cover that bracket will still be attached.
First step is to un-plug the pump and remove the three 10mm nuts that hold the secondary air pump onto the holding bracket, this is the easy bit. Once the nuts are off don’t bother to try and pull the pump out because it won’t happen, trust me.
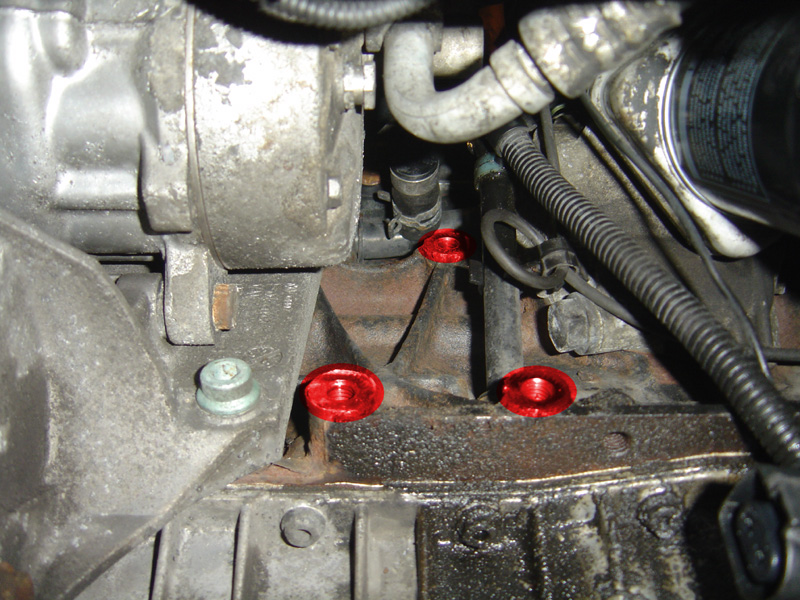
Once you have done the above next step is to remove the three allen key bolts (highlighted by the picture below) that hold the bracket onto the block, this can be tricky. I found it best to use a combination of allen keys and a ratchet spanner with an allen key adaptor. The top bolt car be awkward, once cracked off it can be just as easy to remove it by hand.
With these removed the pump is free to come out, however before pulling it out remove all wire and hose clips from the pipes there attached to and gently feed the tubes down over. It may be required to unclip one from the pump, to do this simply squeeze the pipe and pull.
Once all that has been done you have removed the big bulky easy bits, next bit (if doing the job properly) is to remove the vacuum valve. To remove the valve you will need to remove the water pipe which is in the way, approx 500ml’s of coolant will be lost and you will need to replace this!
To remove the water pipe undo the two bolts and you should be able to pull it to one side with ease. Once the water pipe is loose you can access the three bolts on the valve. Remove these three bolts and voila the valve falls off in your hands.
Now before attempting all this you should have made or purchased a blanking plate, Intergrated Engineering stock these and they are roughly £16.00 delivered. Once the valve has been removed fit the O-Ring into the blanking plate and attach it to the block where the valve once was.
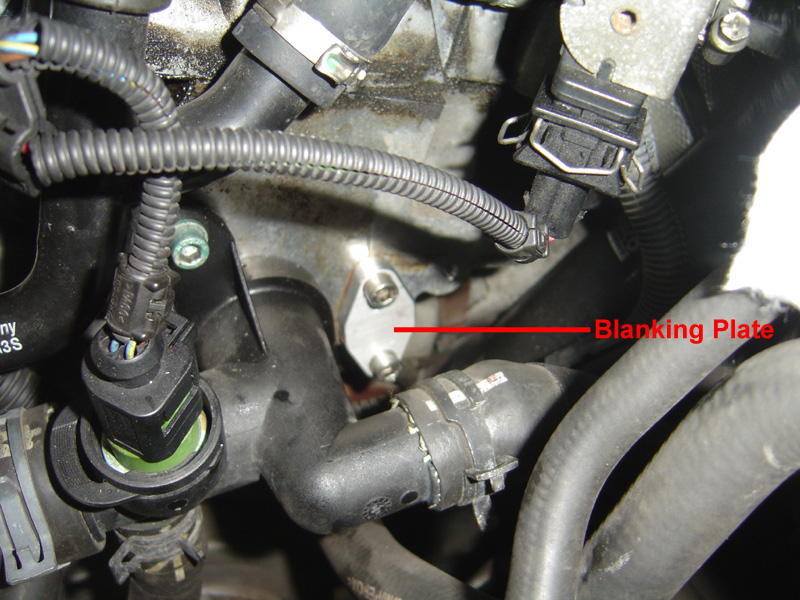
Below you can see the blanking plate fitted to the block, I forgot to get pictures of the valve fitted to the block.
Remember to re-fit the water pipe, but before bolting it straight back on dry both the block and the pipe surface to help ensure a good seal, after all you don’t want a coolant leak.
Also you will need to remove the vacuum pipe from the SAI valve, trace it back and remove it, as you can see from the pictures below I now have my pipe going straight from the N112 to the second actuator line. If you own a K03S or bigger turbo, simply blank off the N112 with some vacuum hose with a bolt in the end.
Whilst I was at it I also decided to remove the N249 and bracket on top of the engine, before doing this you will need to have bypassed the N249 (do a search). The bracket is removed with three bolts and once removed makes the engine look much cleaner.
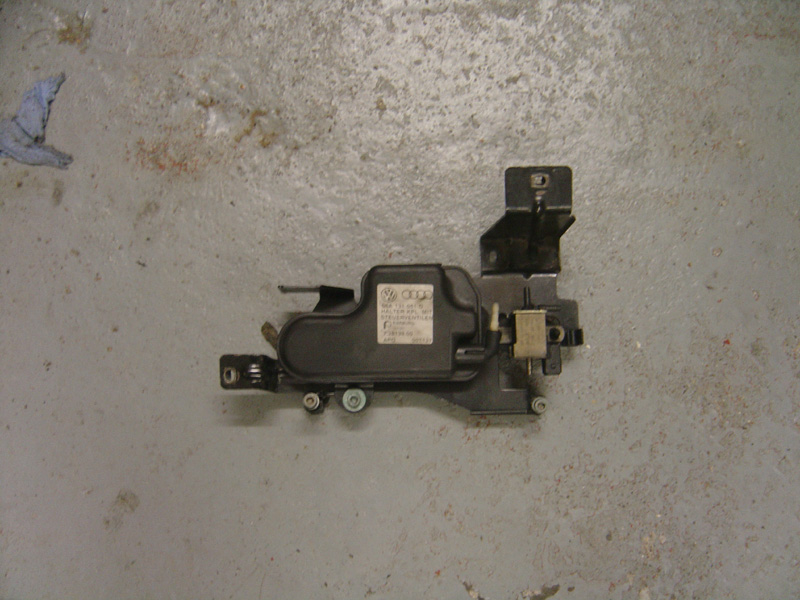
You will have to make a bracket to support the N112 valve which is still left in place, this can be made at home with a bit of aluminium. But as you’ll no doubt agree the engine now looks a lot less cluttered.
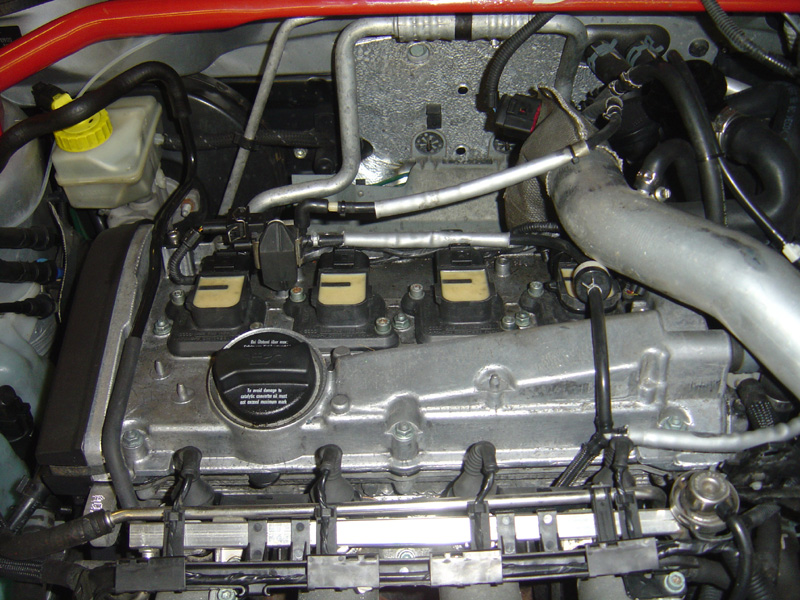
To keep the ECU happy, and stop the engine light been a permanent fixture on your dash you will need to fit a 330 ohm resistor into the plugs on everything that has been removed.
I’ll get picturesof this once I’ve made mine up, however it is perfectly safe to use the car without these, it may give an engine light, it may not but you will see an engine fault code in VAG-COM.
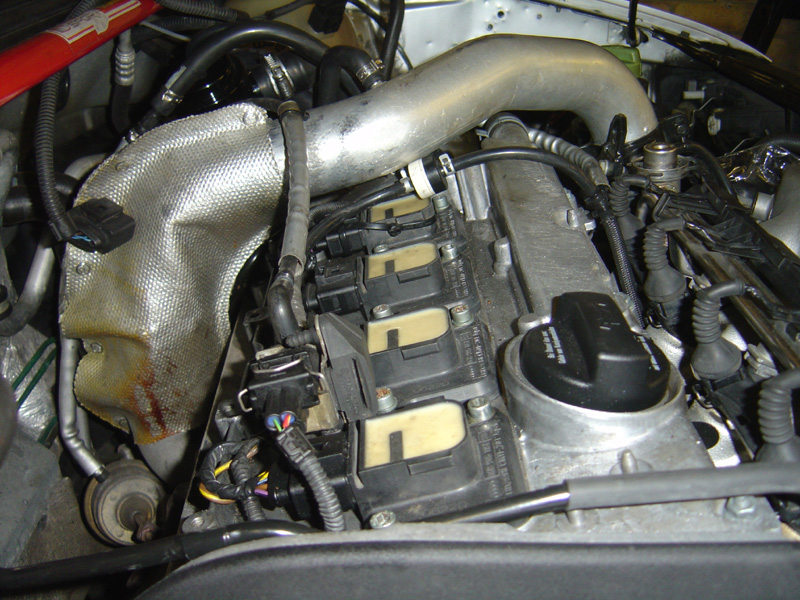
Hope this has been of some use, further guides to follow will no doubt be bypassing airbags, removing the carbon canister and altering the tank breather system as well as a N249 valve guide.
First things first, once everything has been removed you should be left with all the following, of course if you still run an engine cover that bracket will still be attached.
First step is to un-plug the pump and remove the three 10mm nuts that hold the secondary air pump onto the holding bracket, this is the easy bit. Once the nuts are off don’t bother to try and pull the pump out because it won’t happen, trust me.
Once you have done the above next step is to remove the three allen key bolts (highlighted by the picture below) that hold the bracket onto the block, this can be tricky. I found it best to use a combination of allen keys and a ratchet spanner with an allen key adaptor. The top bolt car be awkward, once cracked off it can be just as easy to remove it by hand.
With these removed the pump is free to come out, however before pulling it out remove all wire and hose clips from the pipes there attached to and gently feed the tubes down over. It may be required to unclip one from the pump, to do this simply squeeze the pipe and pull.
Once all that has been done you have removed the big bulky easy bits, next bit (if doing the job properly) is to remove the vacuum valve. To remove the valve you will need to remove the water pipe which is in the way, approx 500ml’s of coolant will be lost and you will need to replace this!
To remove the water pipe undo the two bolts and you should be able to pull it to one side with ease. Once the water pipe is loose you can access the three bolts on the valve. Remove these three bolts and voila the valve falls off in your hands.
Now before attempting all this you should have made or purchased a blanking plate, Intergrated Engineering stock these and they are roughly £16.00 delivered. Once the valve has been removed fit the O-Ring into the blanking plate and attach it to the block where the valve once was.
Below you can see the blanking plate fitted to the block, I forgot to get pictures of the valve fitted to the block.
Remember to re-fit the water pipe, but before bolting it straight back on dry both the block and the pipe surface to help ensure a good seal, after all you don’t want a coolant leak.
Also you will need to remove the vacuum pipe from the SAI valve, trace it back and remove it, as you can see from the pictures below I now have my pipe going straight from the N112 to the second actuator line. If you own a K03S or bigger turbo, simply blank off the N112 with some vacuum hose with a bolt in the end.
Whilst I was at it I also decided to remove the N249 and bracket on top of the engine, before doing this you will need to have bypassed the N249 (do a search). The bracket is removed with three bolts and once removed makes the engine look much cleaner.
You will have to make a bracket to support the N112 valve which is still left in place, this can be made at home with a bit of aluminium. But as you’ll no doubt agree the engine now looks a lot less cluttered.
To keep the ECU happy, and stop the engine light been a permanent fixture on your dash you will need to fit a 330 ohm resistor into the plugs on everything that has been removed.
I’ll get picturesof this once I’ve made mine up, however it is perfectly safe to use the car without these, it may give an engine light, it may not but you will see an engine fault code in VAG-COM.
Hope this has been of some use, further guides to follow will no doubt be bypassing airbags, removing the carbon canister and altering the tank breather system as well as a N249 valve guide.


