-
Welcome to our new sponsor Lecatona, a brand dedicated to enhancing performance for VAG group sports cars, including SEAT, Audi, Volkswagen and Škoda. Specializing in High Pressure Fuel Pump (HPFP) upgrades.
-
The forums will be offline for maintenance on Friday 15th November at 10pm for up to an hour. Thank you for your patience.
Audi S3 GT3582R stroker Build (previously GT3071r)
- Thread starter tufftybloke
- Start date
You are using an out of date browser. It may not display this or other websites correctly.
You should upgrade or use an alternative browser.
You should upgrade or use an alternative browser.
No reason... its the same way round as the std TB on the OEM mani... it has to be said that the TB does push down on the coolant hosing going from the top of the rad to the side of the head so using the TB in the orientation INA suggests may prevent that but it was in there long enough for me to really pay too much attention...
<tuffty/>
I read a post from Don R who designed the SEM intake where he said having the TB oriented so the flap valve opens towards the rear of the intake provides the best distribution of flow. Ie the hinge vertical not horizontal. It's a post on the vortex forum if you care about it.
Looking for some more dyno posts from this monster of yours
![Cool [B)] [B)]](/forums/styles/seatcupra/oldforumsmileys/shades.gif)
Good friend George dropped off my cam cover today all blasted.... so after a wash and a rinse to remove any media that may be left I got on with a bit of painting... not much left to say really so here are a few pics... just before the bloody rain started!!!!
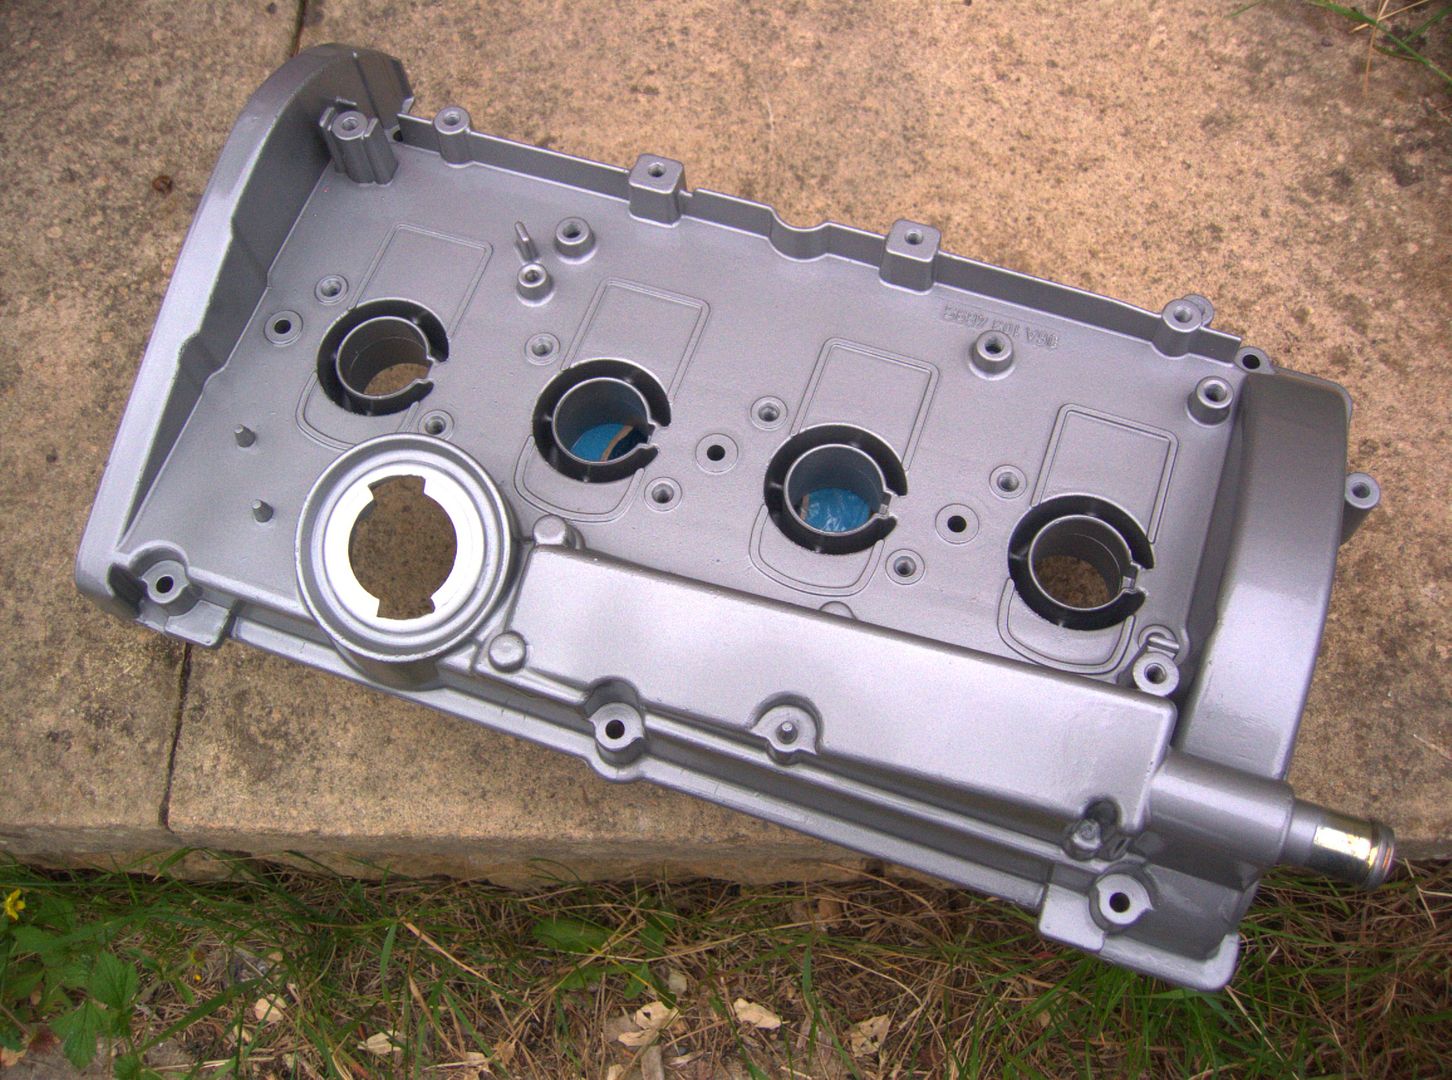
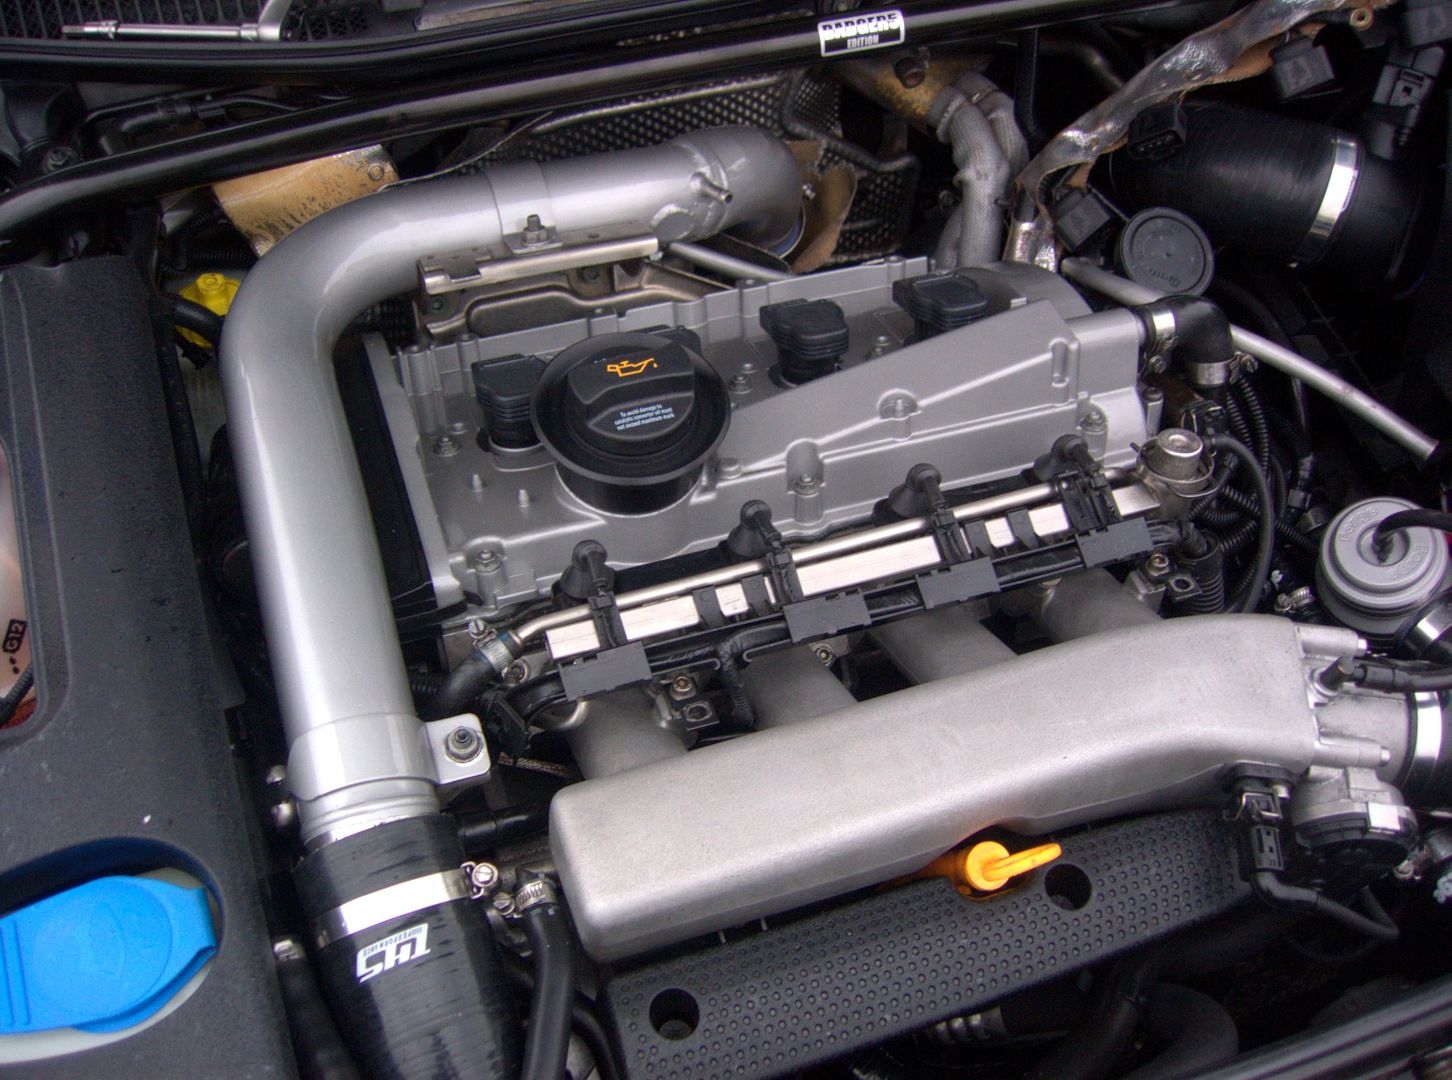
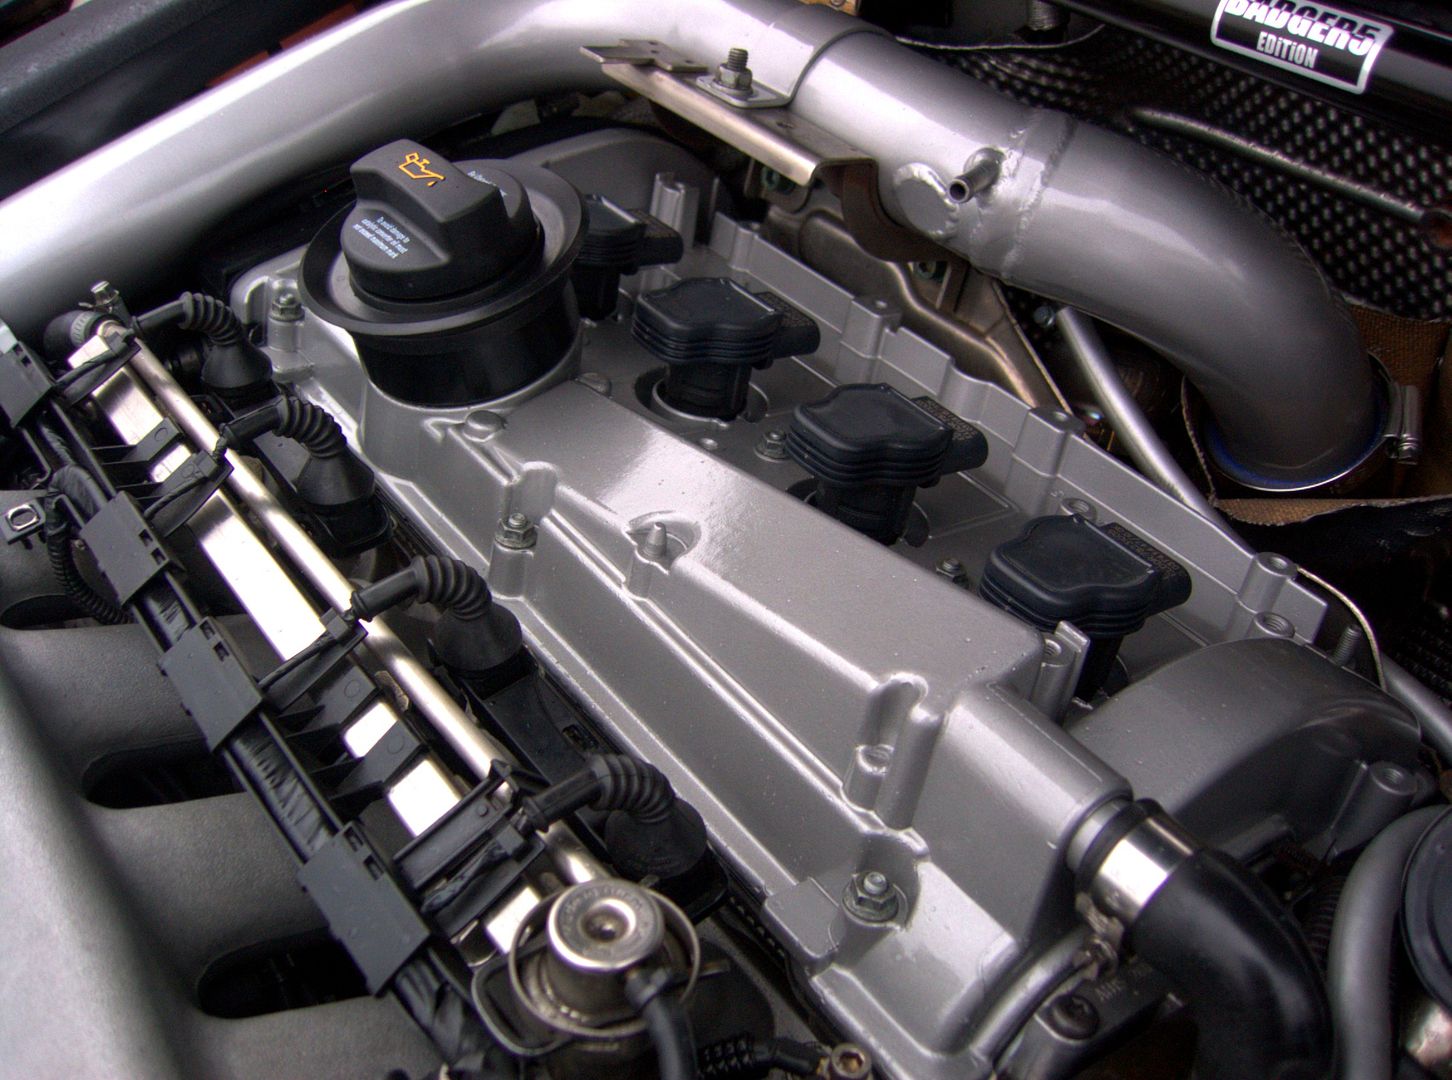
OEM++ and clean looking...
<tuffty/>


OEM++ and clean looking...
<tuffty/>
Got up early in between showers... finished putting the engine bay back together and well pleased with the results so far...
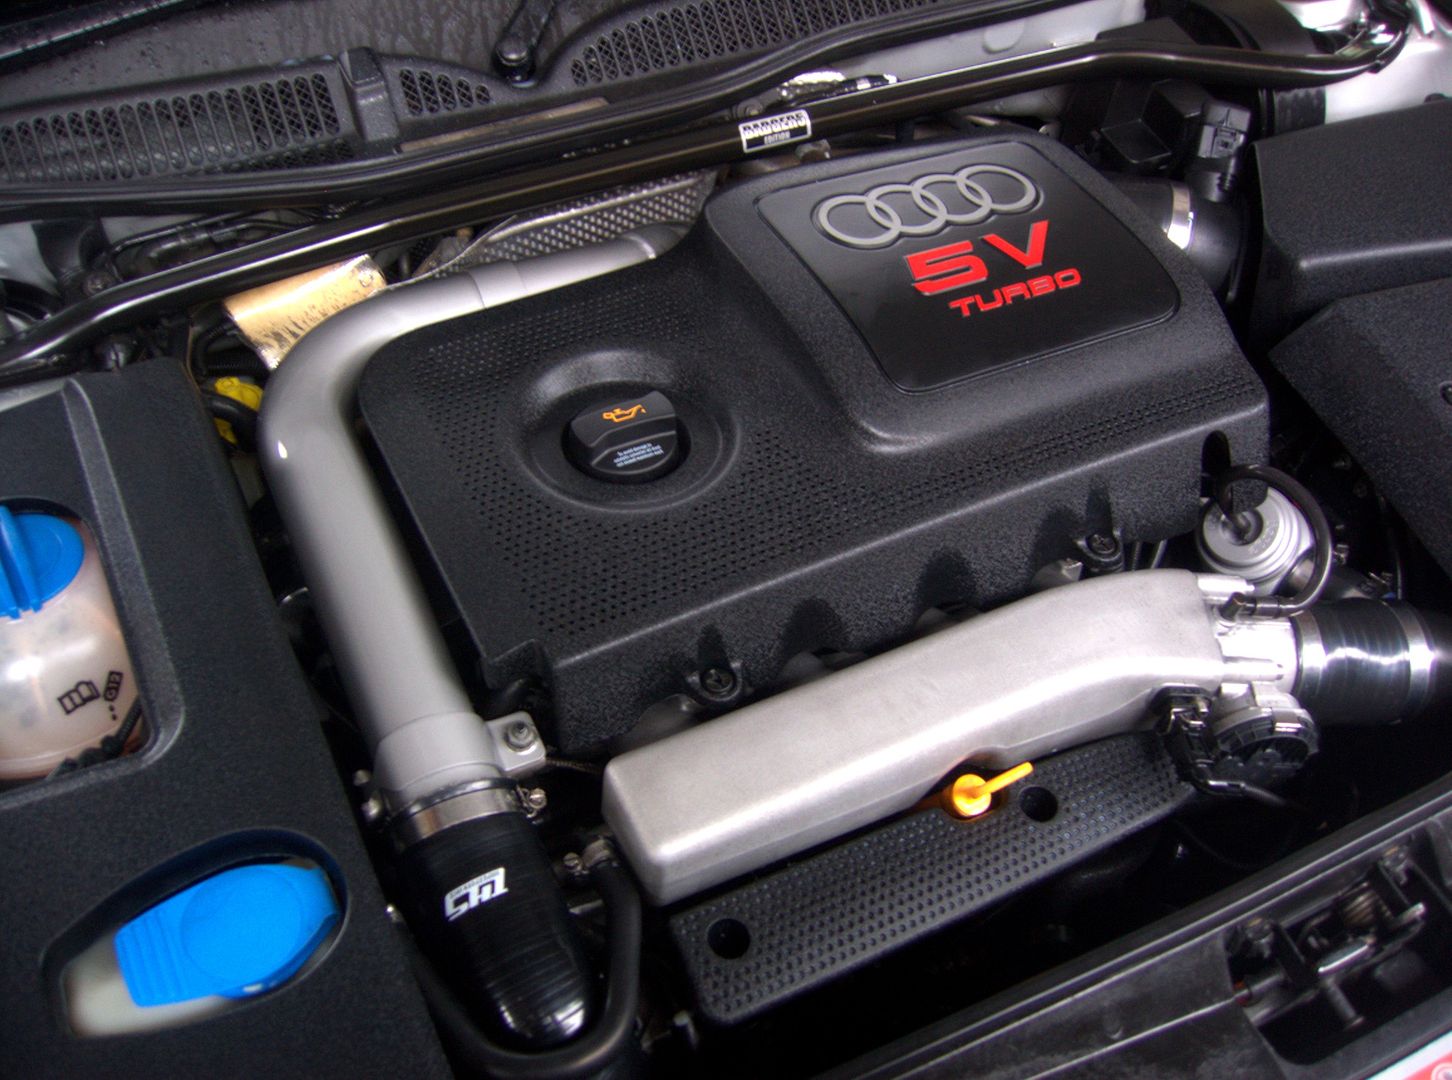
Happy that the colour of the charge pipe doesn't make the bay look too modified
Started the car up after nearly 3 weeks off the road... warmed her up and topped up the coolant... all good so far so decided to take her to Bills and get some fuel on the way as the warning was on...
Got about 2 miles down the road and the low coolant warning came on again... bugger... probably needs topping up a bit more as I did drain quite a bit when doing the hoses..
Opening the bonnet I was shocked to see that there was coolant everywhere!!! arse!!! I had some coolant on me so topped up and decide to drive home carefully... 200 yards down the road and on it came again!!! arse++ must be a big leak
Managed to nurse the car home and washed down the bay to stop the G12 from staining everything... little bit of an investigating later and discovered that the plastic housing leading to the top of the rad had broken...
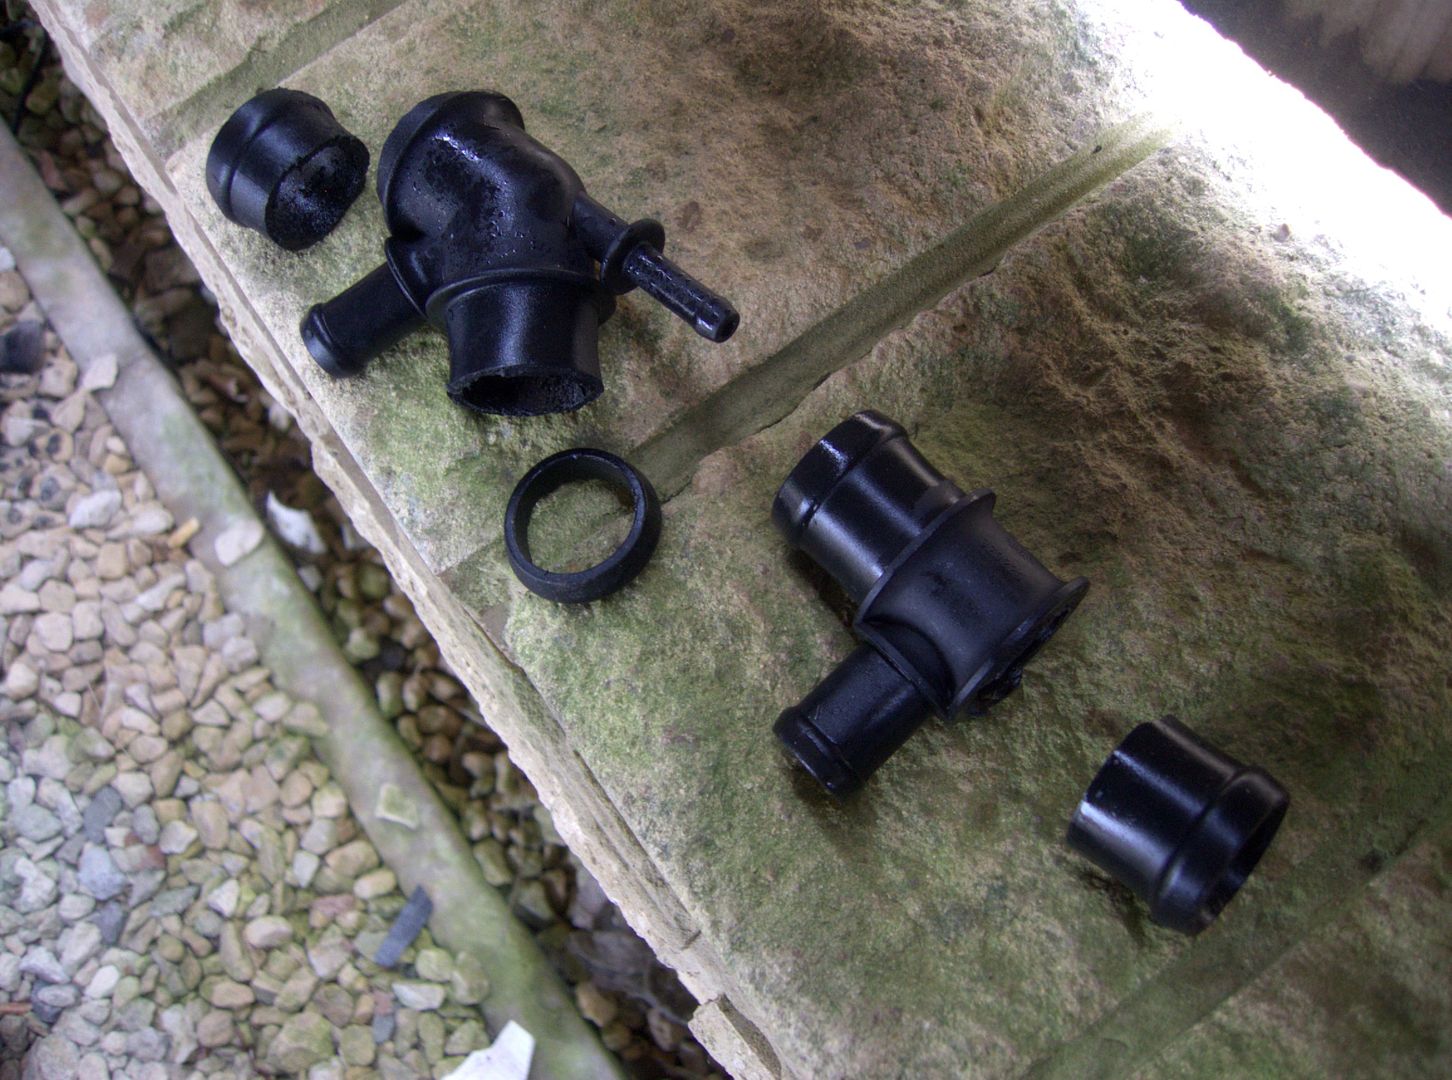
Aged brittle plastic + brute force and ignorance = fail!
Looking at the one housing revealed that it may well have been a pattern part and changed in a previous life as Bill had one kicking about (like he does) which had VAG part number on it but mine didn't and the shape of the thing is a little different...
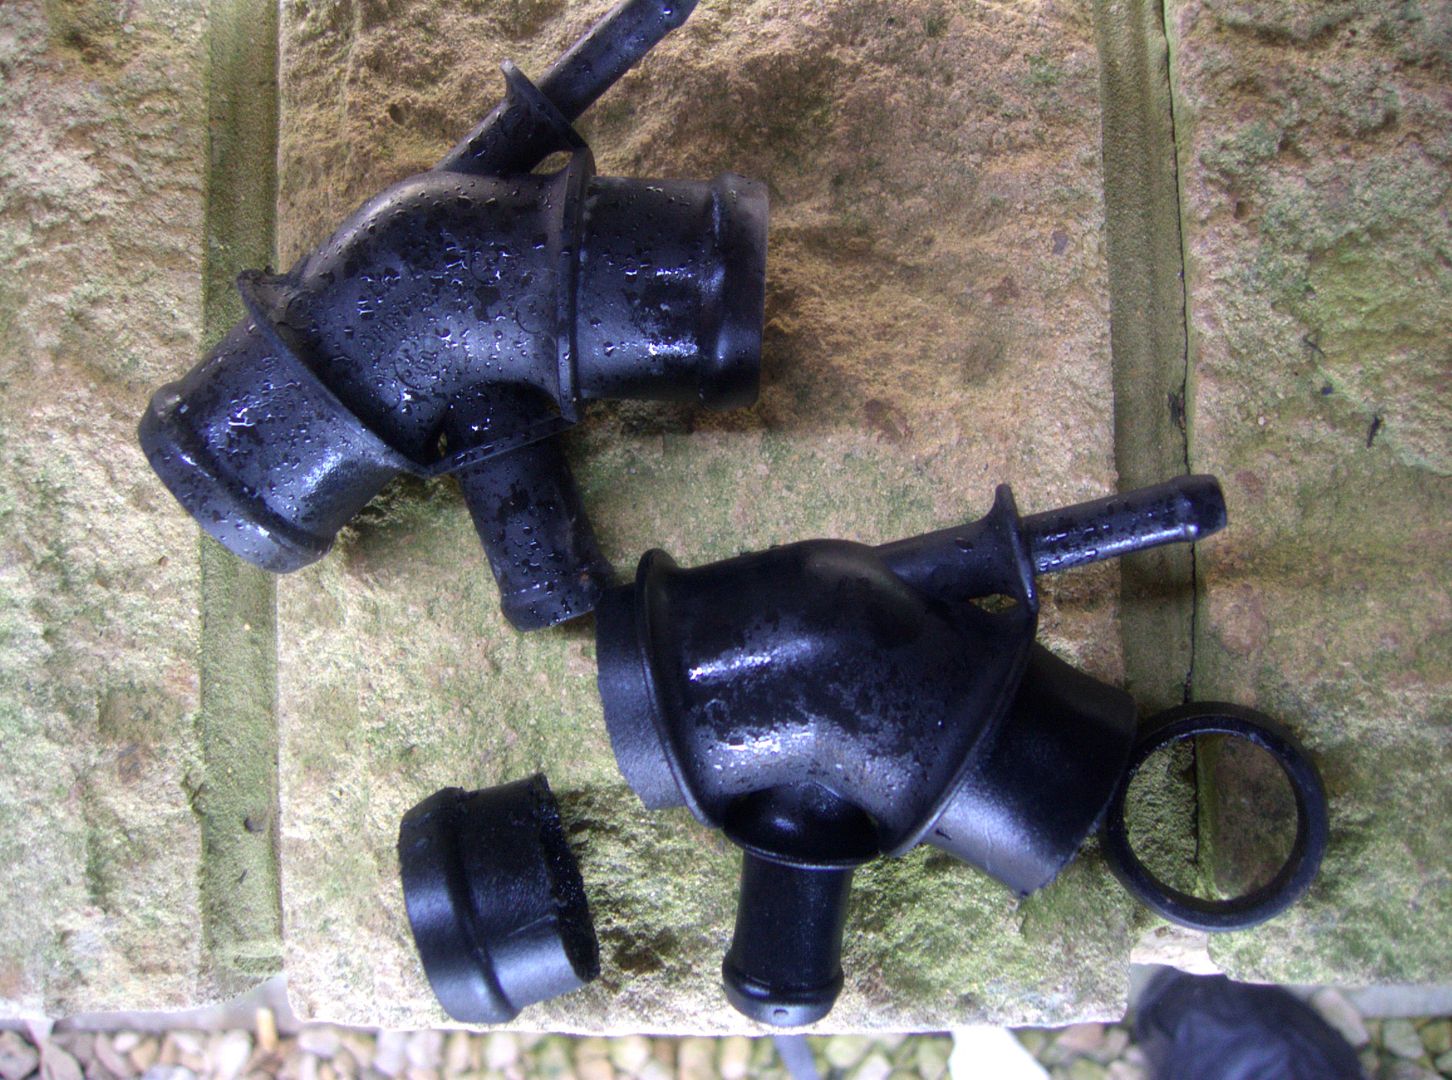
Ah well... I will order some from TPS Wednesday although this has stalled my plans somewhat this week... cars... gotta love um
<tuffty/>

Happy that the colour of the charge pipe doesn't make the bay look too modified
Started the car up after nearly 3 weeks off the road... warmed her up and topped up the coolant... all good so far so decided to take her to Bills and get some fuel on the way as the warning was on...
Got about 2 miles down the road and the low coolant warning came on again... bugger... probably needs topping up a bit more as I did drain quite a bit when doing the hoses..
Opening the bonnet I was shocked to see that there was coolant everywhere!!! arse!!! I had some coolant on me so topped up and decide to drive home carefully... 200 yards down the road and on it came again!!! arse++ must be a big leak
Managed to nurse the car home and washed down the bay to stop the G12 from staining everything... little bit of an investigating later and discovered that the plastic housing leading to the top of the rad had broken...

Aged brittle plastic + brute force and ignorance = fail!
Looking at the one housing revealed that it may well have been a pattern part and changed in a previous life as Bill had one kicking about (like he does) which had VAG part number on it but mine didn't and the shape of the thing is a little different...

Ah well... I will order some from TPS Wednesday although this has stalled my plans somewhat this week... cars... gotta love um
<tuffty/>
Parts turned up from TPS today...
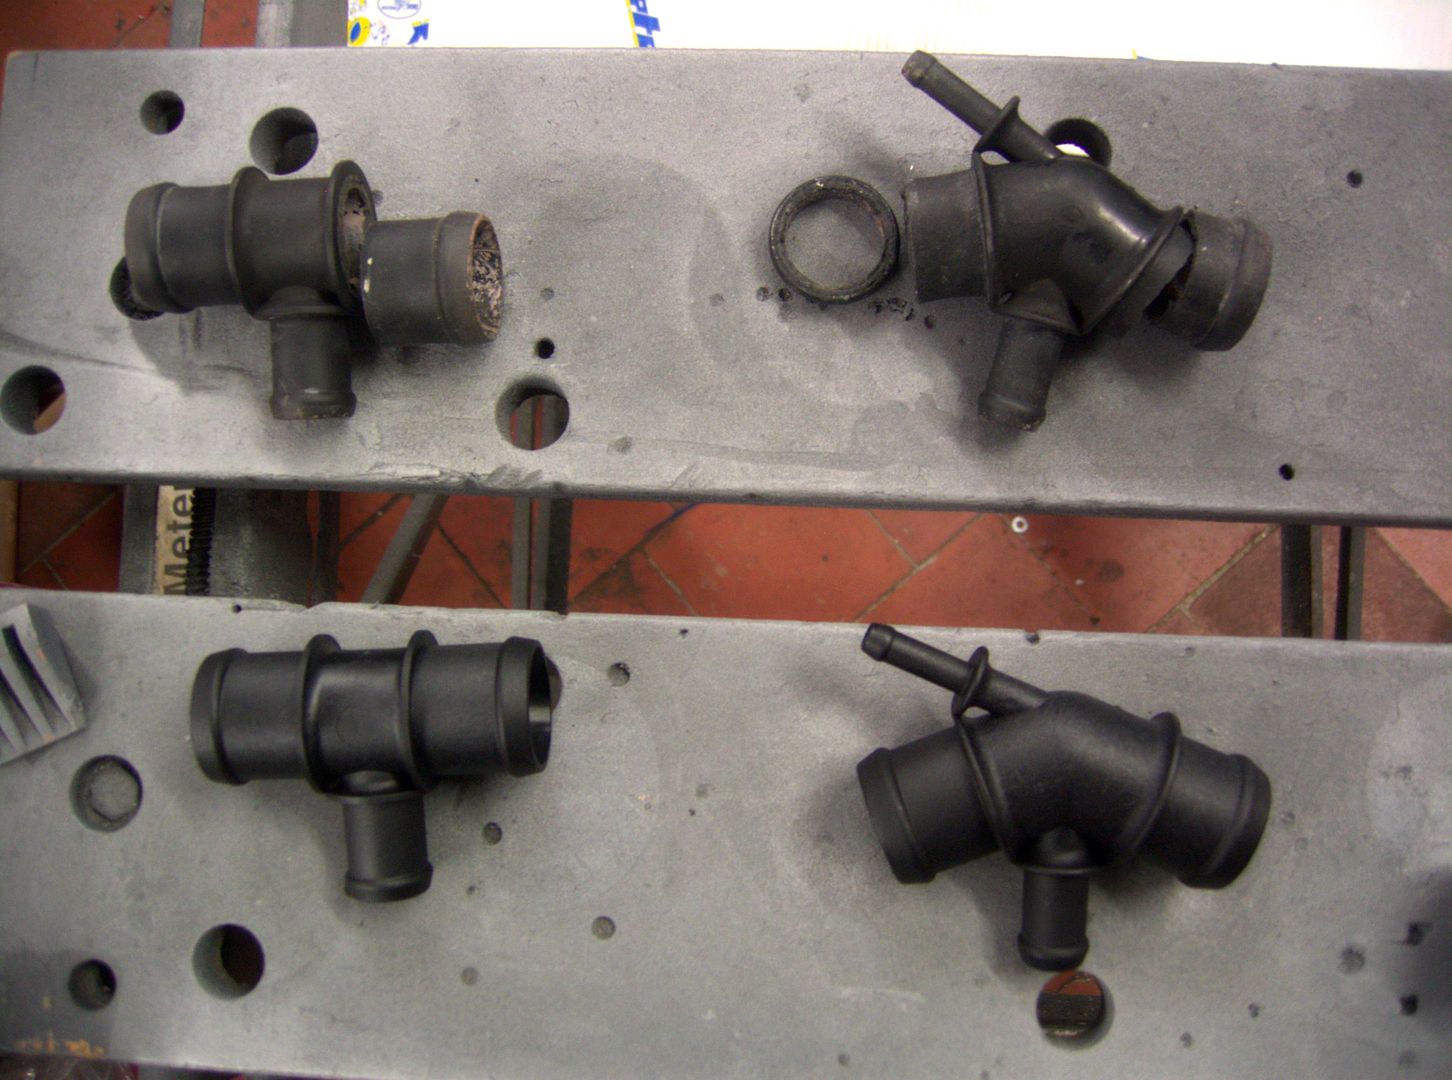
Part numbers are 1J0 121 087 C for the 45 deg elbow with the top and bottom outlets and N 906 929 01 for the t-piece one...
Fitted them and ran the car up to 90 degs... took the car for a drive round the block and all is good with the world again... yay!
Hopefully tomorrow I will be able to finally fit the battery tray in the boot and will be bleeding the brakes as its time I did
<tuffty/>
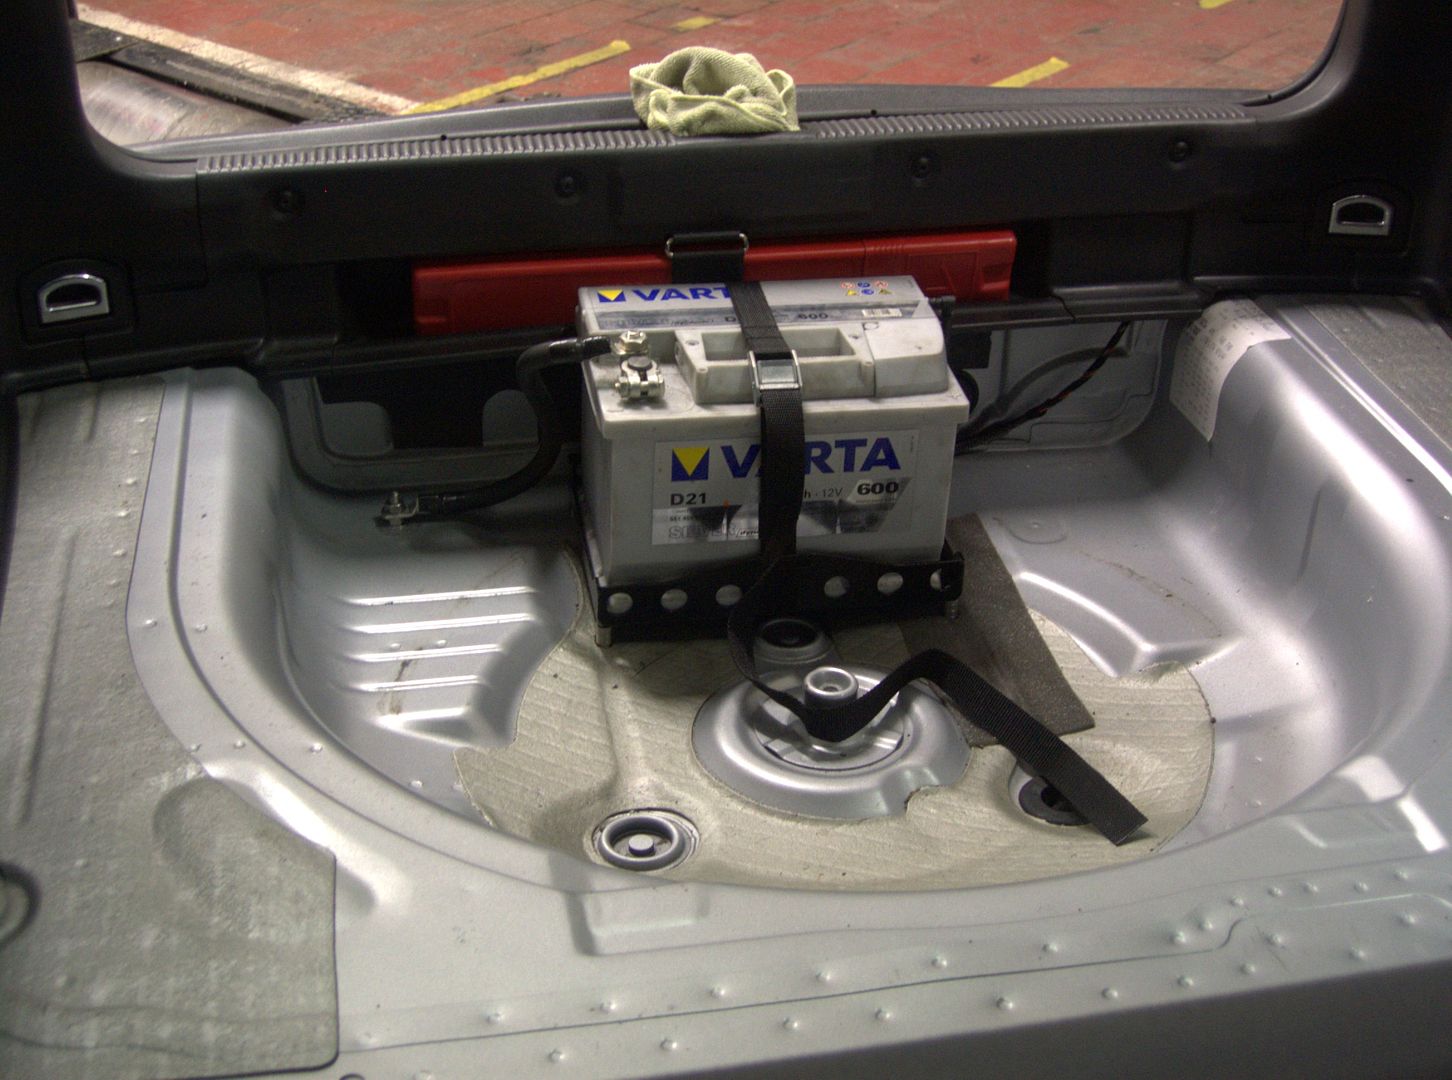
Productive day.... while Bill was having a much deserved day off I cracked on with fitting the tray for the battery relocation...
Removed the back box and heat shield so I could access underneath for bolting stuff in...
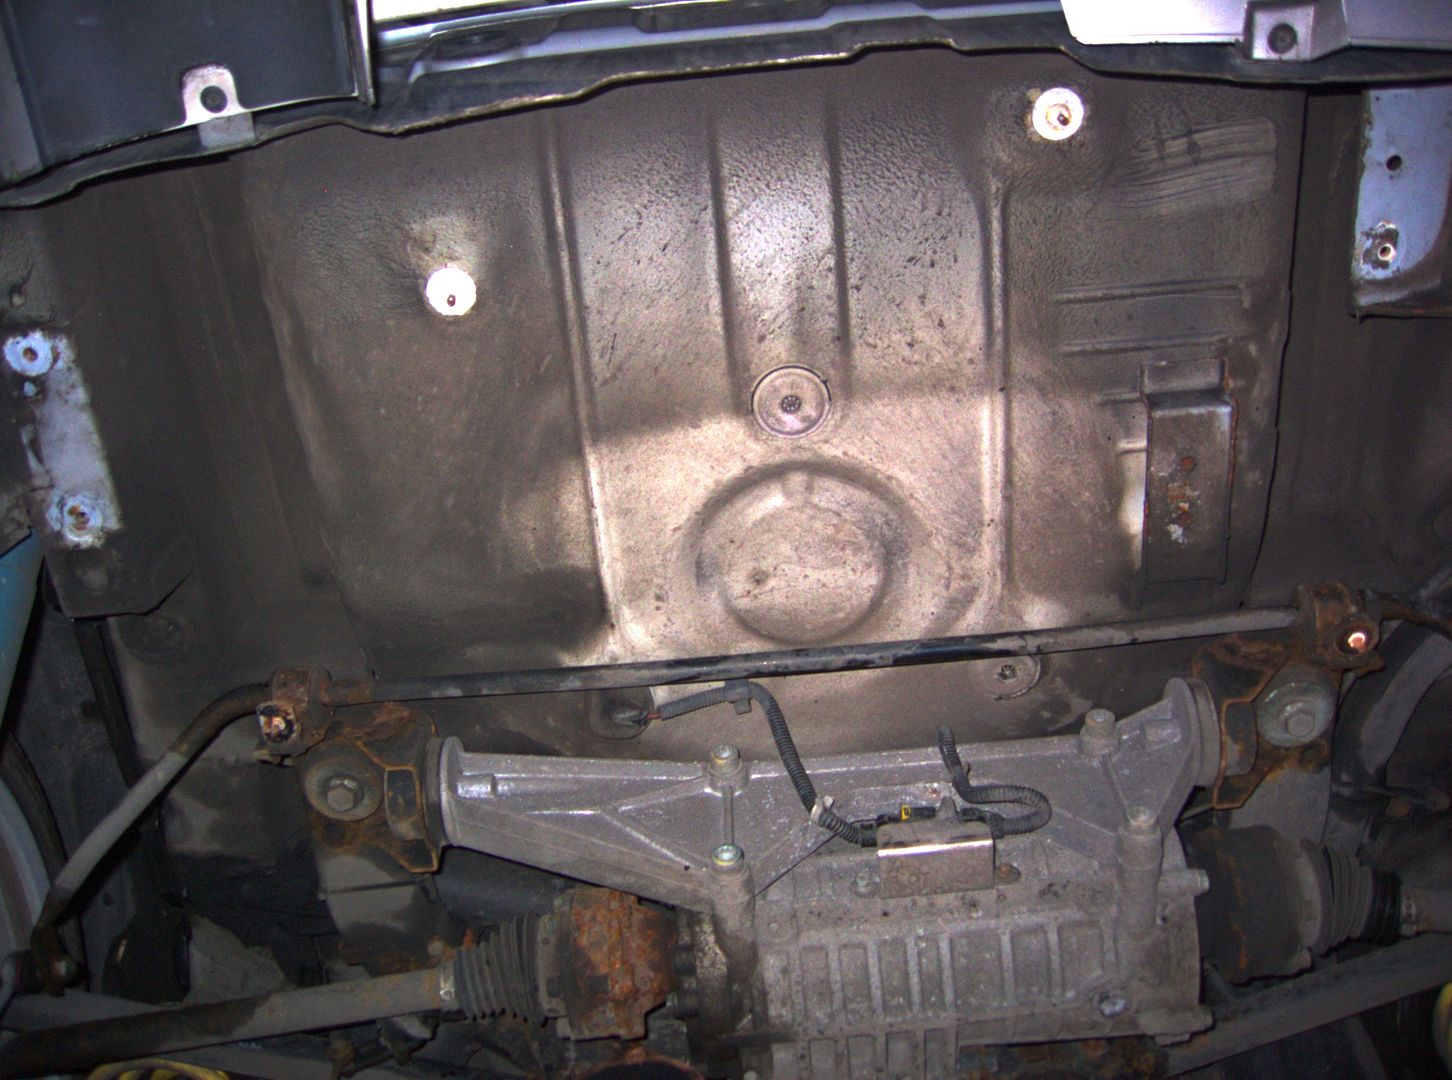
Worked out where the tray was going to go... up against the back of the boot...
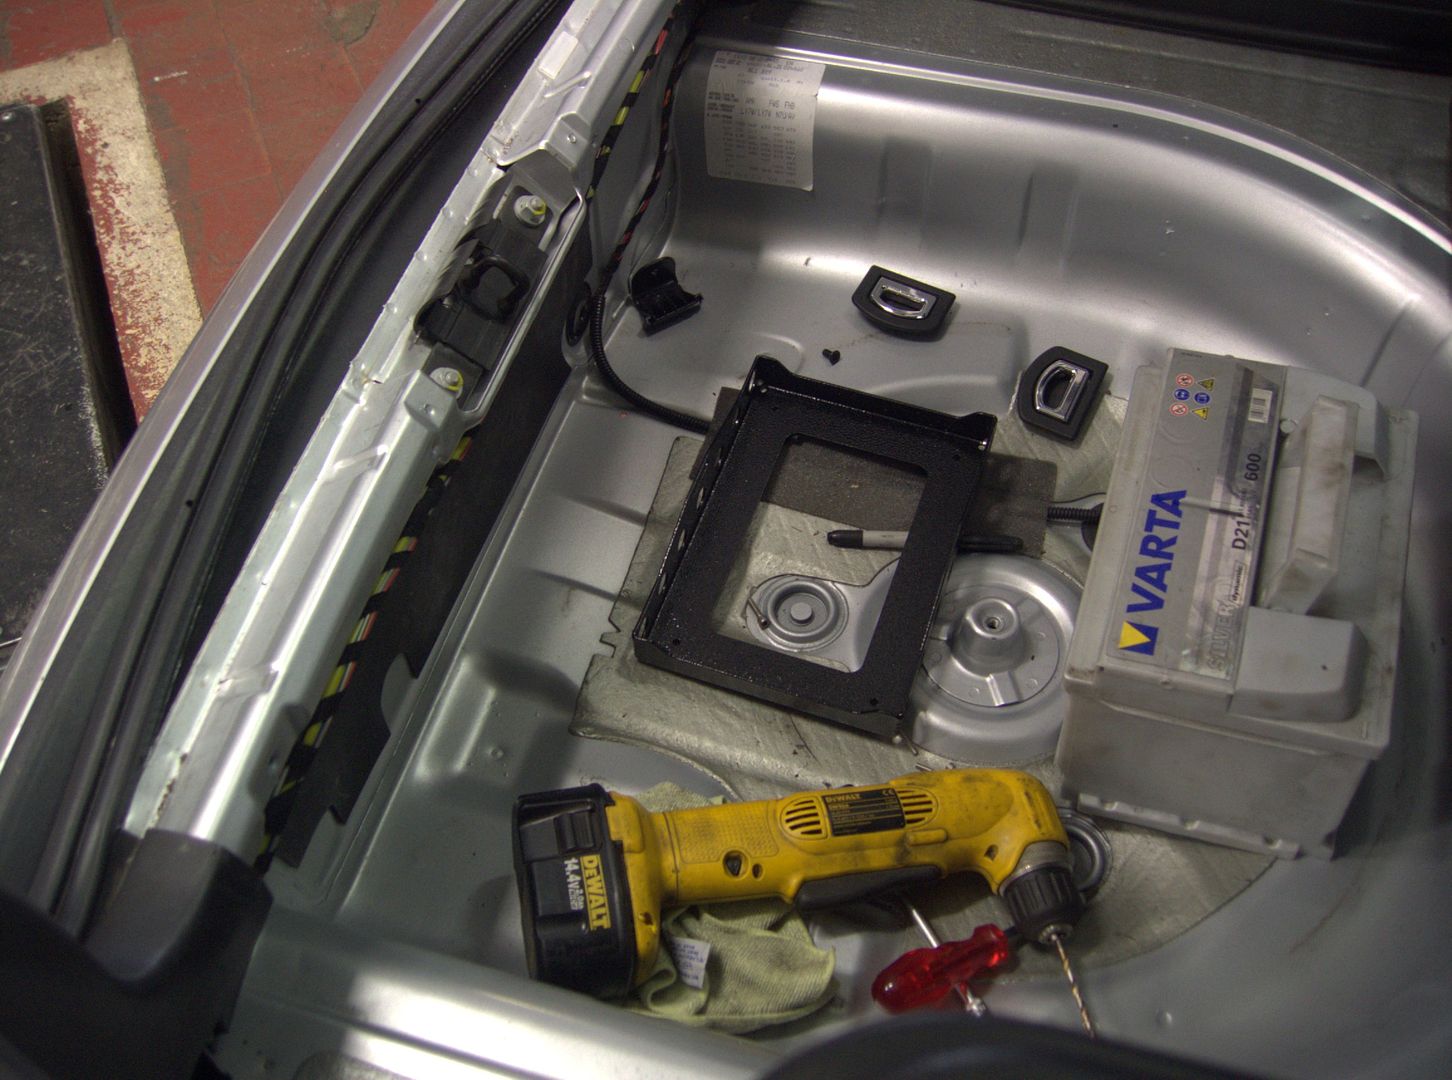
Marked it all up and made spacers as the boot floor isn't flat... bolted it all down, looking good so far...
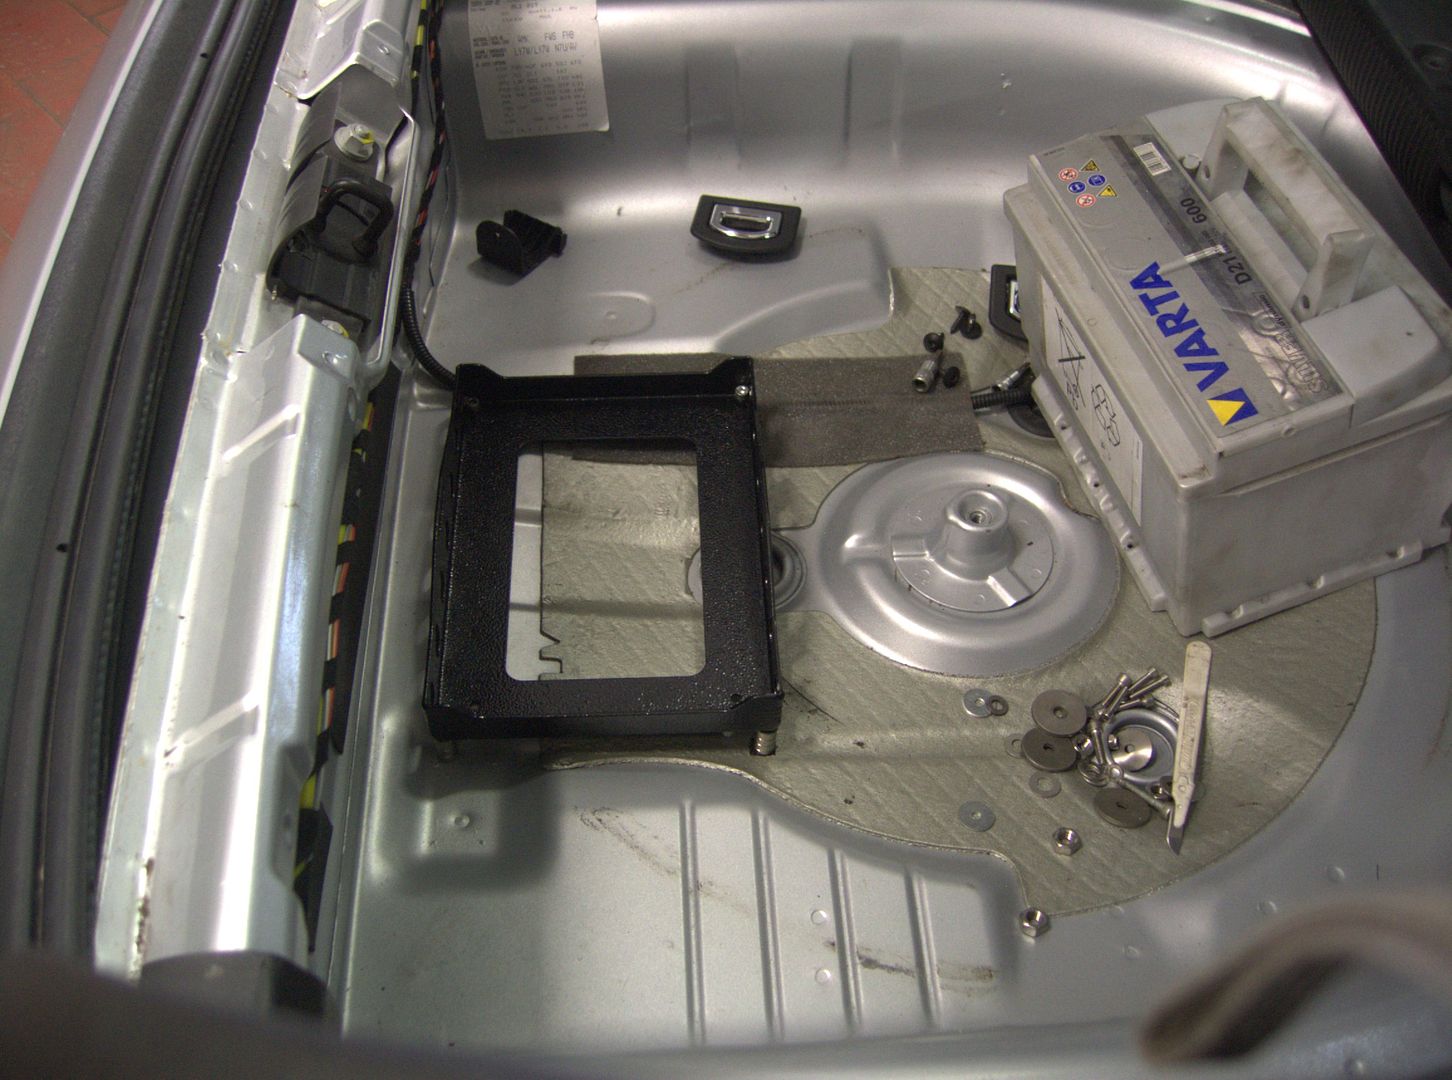
As I am using a lead/acid battery inside the car (albeit in the boot) you need to vent it externally... batterys usually come with two breather holes, one each side and a little plug to plug one up if needed...
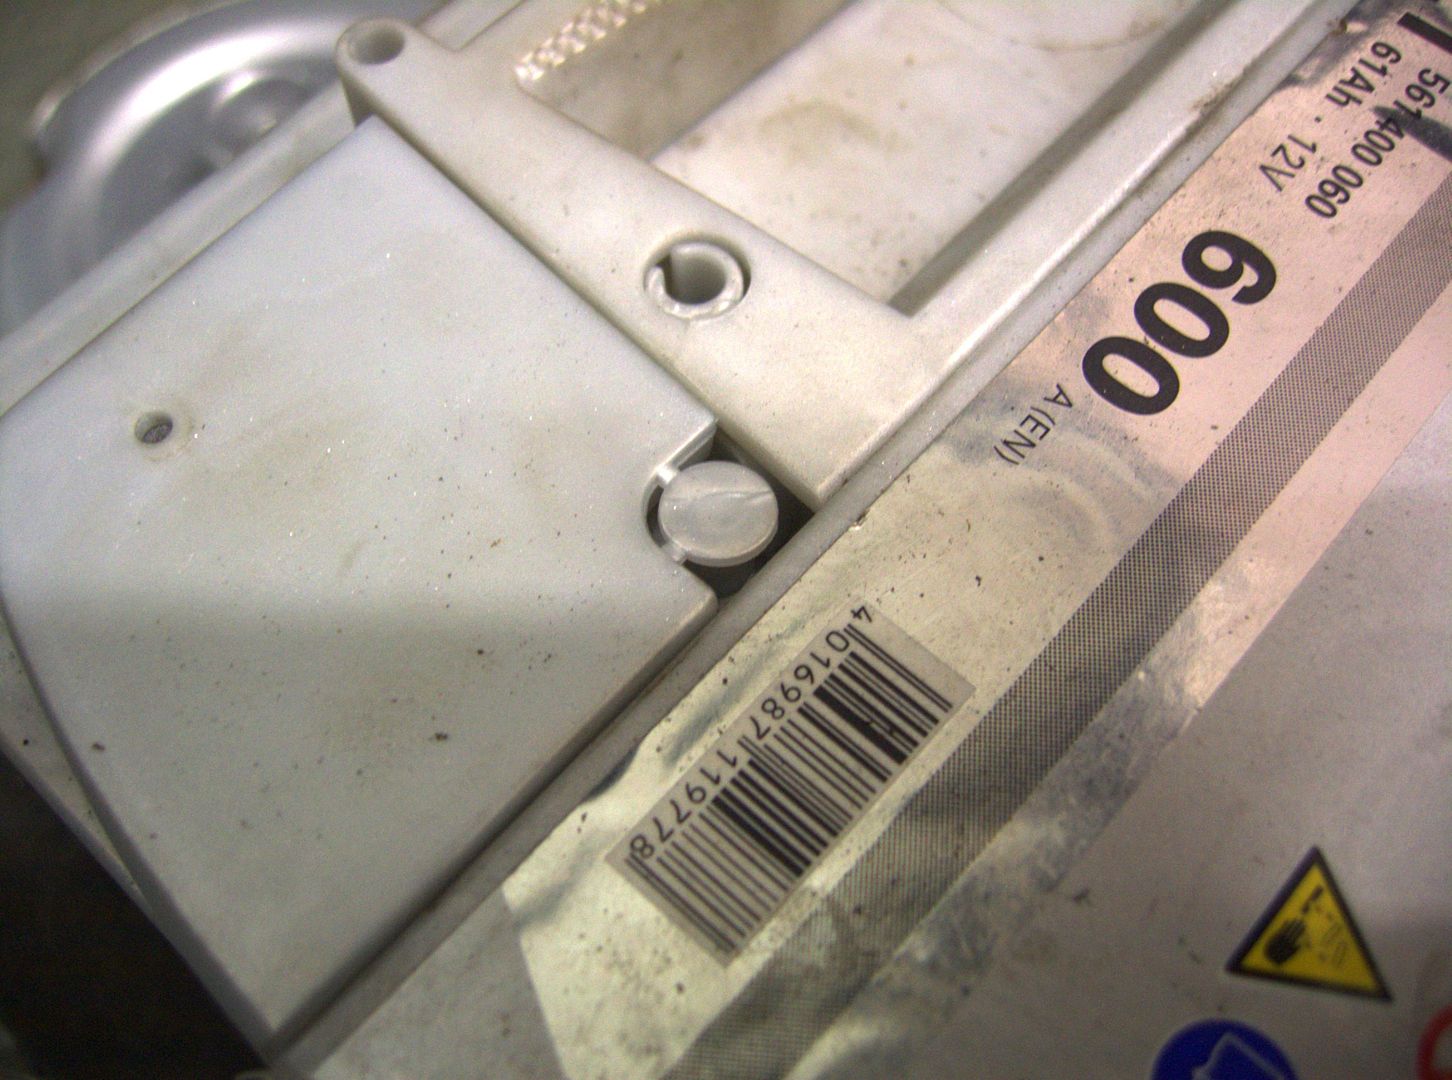
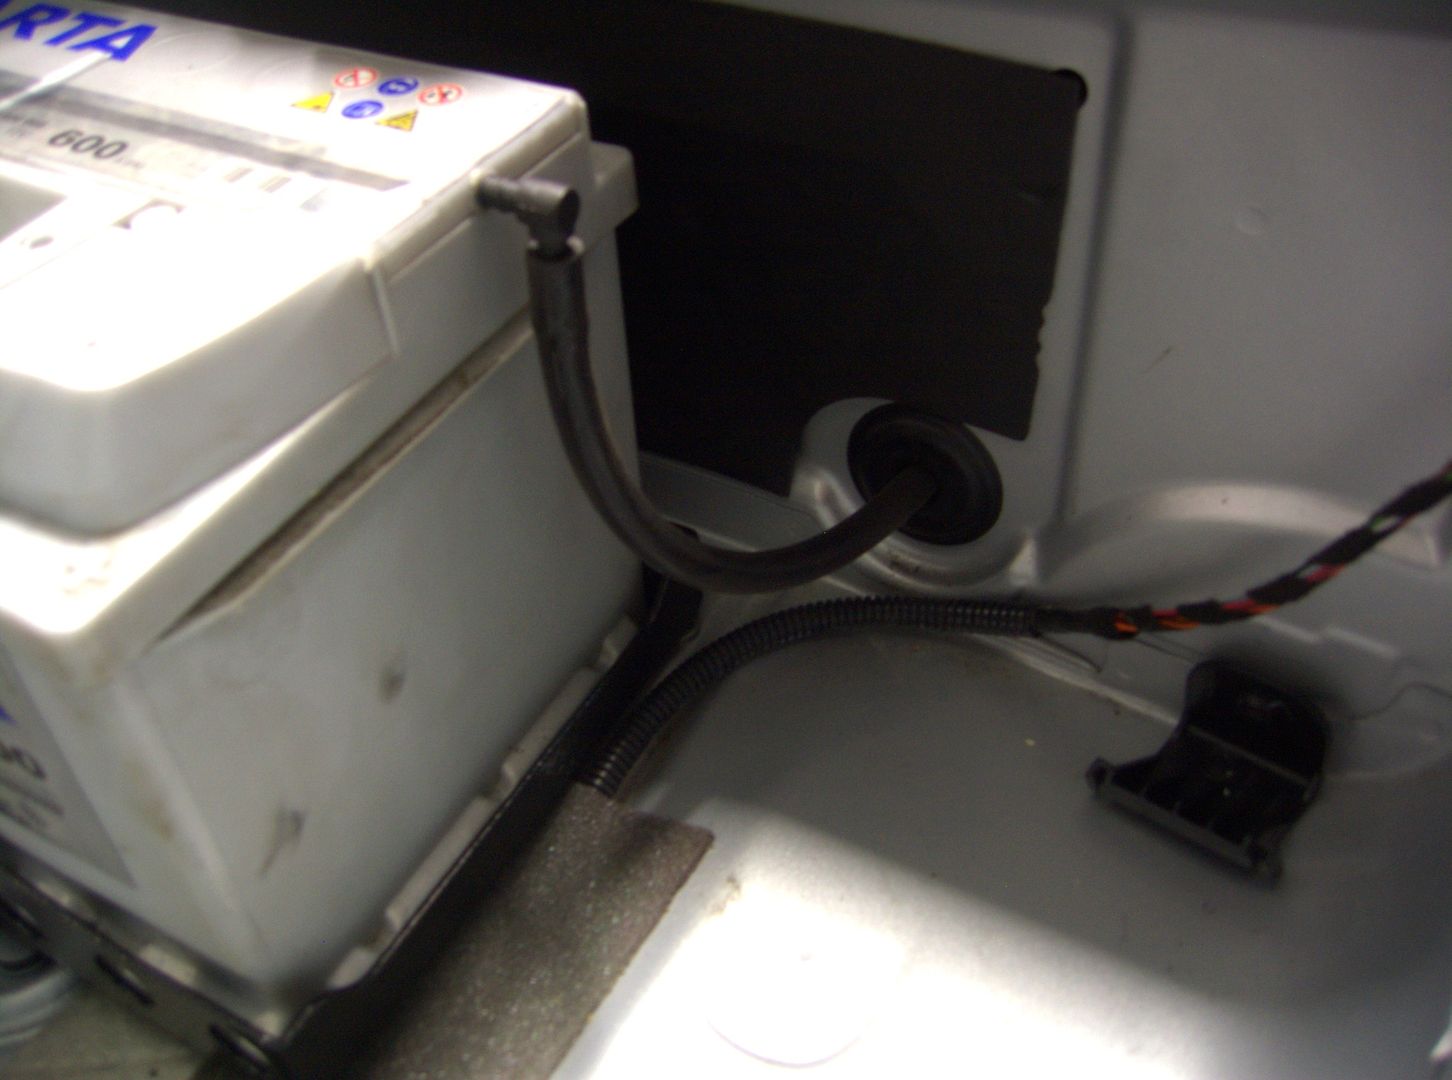
I then modded a 90 deg pipe joiner (6mm one IIRC... its one I had kicking about..) and there is a handy grommet next to the battery for running the vent pipe outside...
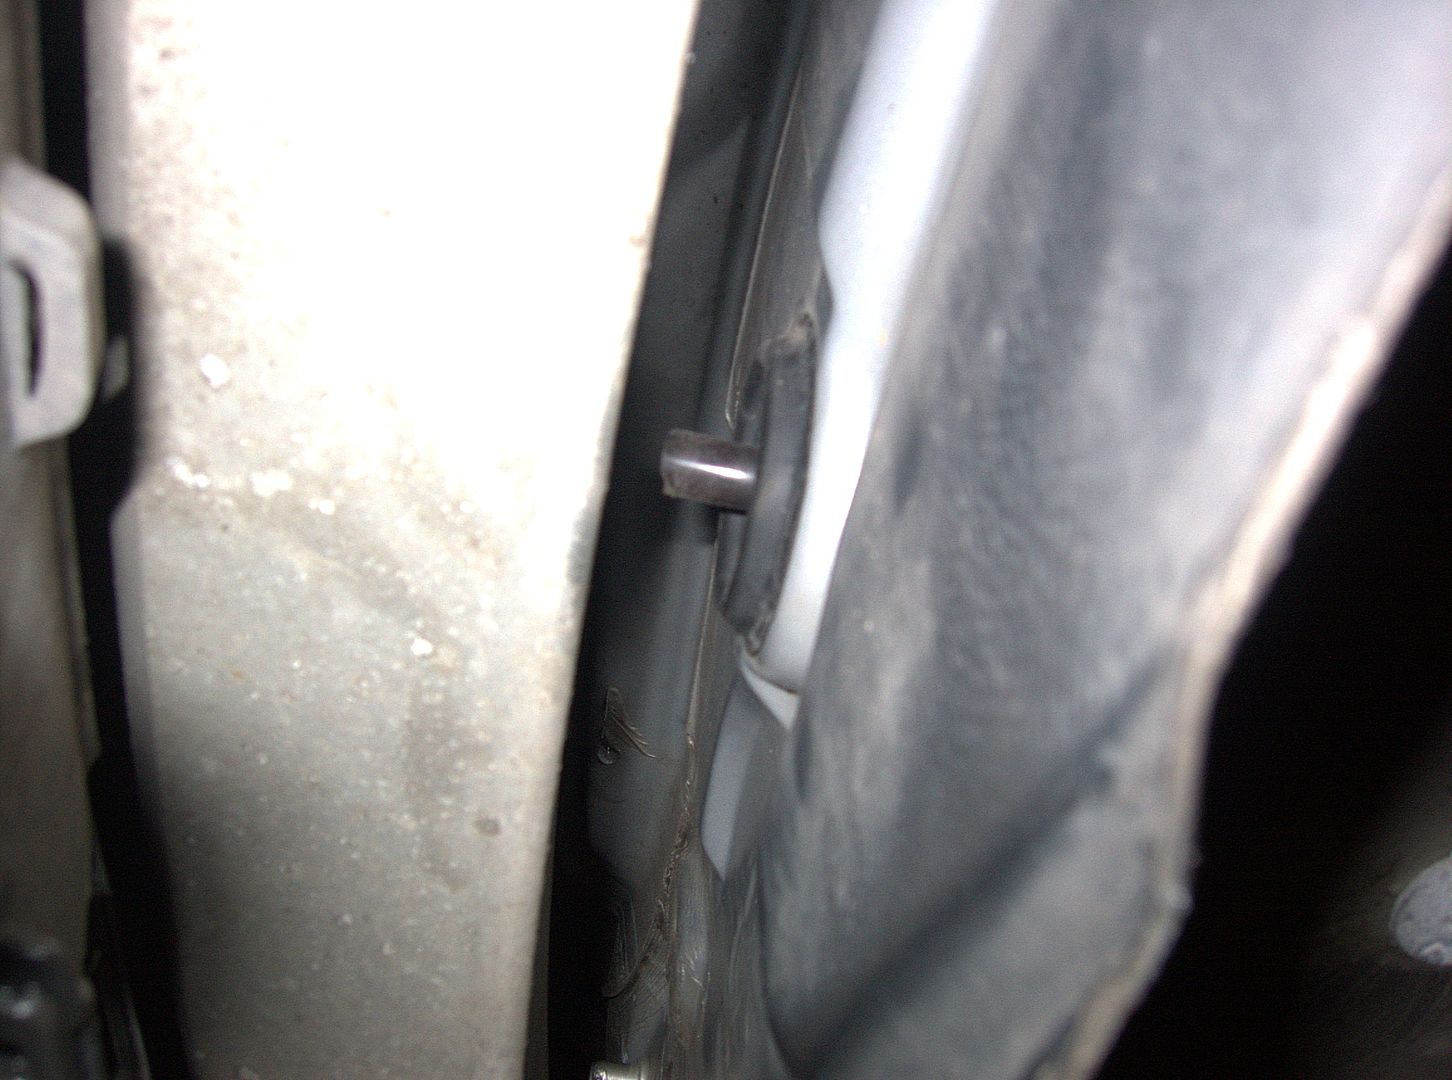
Drilled the hole for the earth lead and cleaned off the paint to get a good connection...
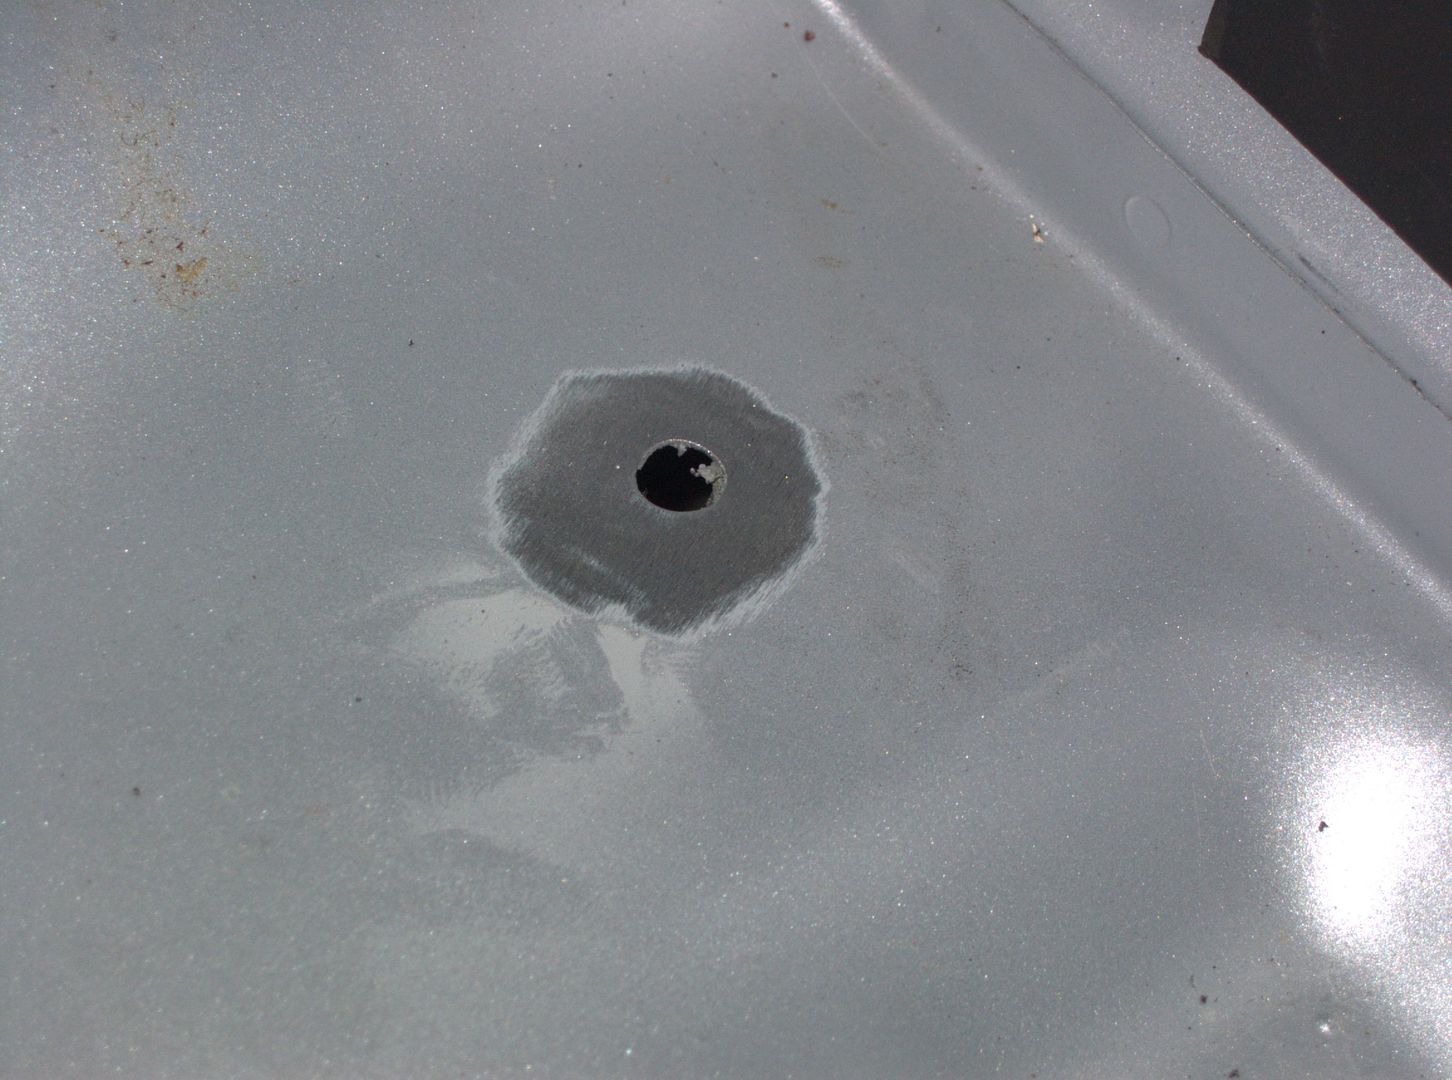
Used an M8 SS bolt and made a stud for the earth lead to connect too... made an earth lead from 50mm sq welding cable... crimped the terminals on for a solid connection...
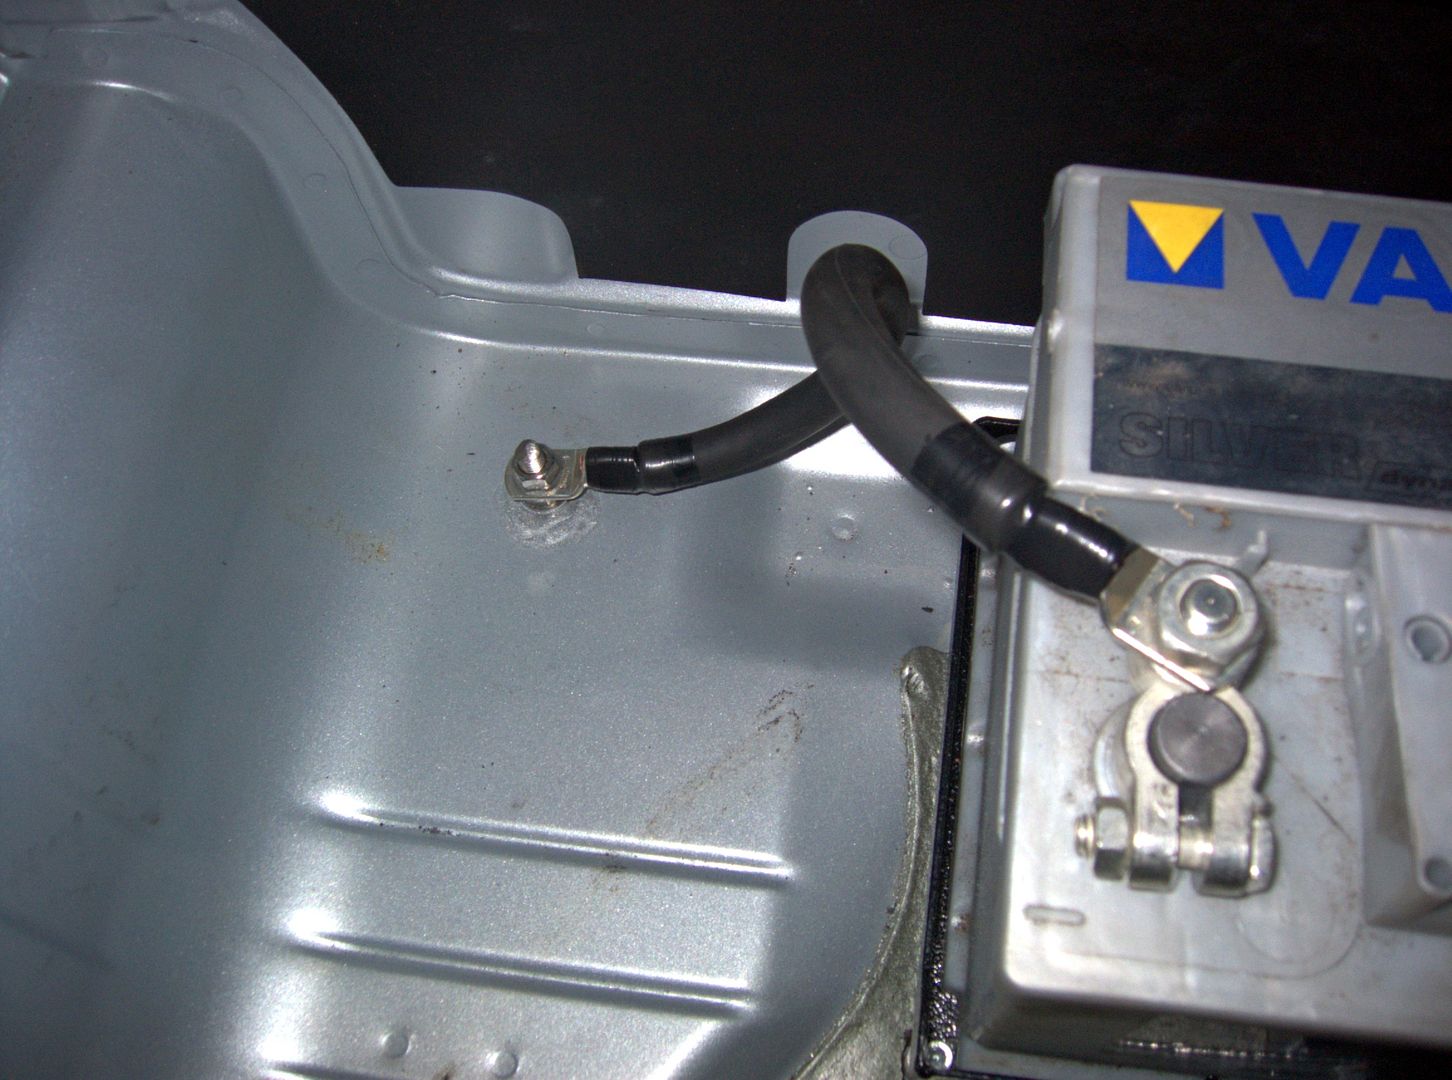
That all done I sealed all the bolts and holes underneath with high temp sealant... seam sealer would have worked just as well but didn't have any to hand...
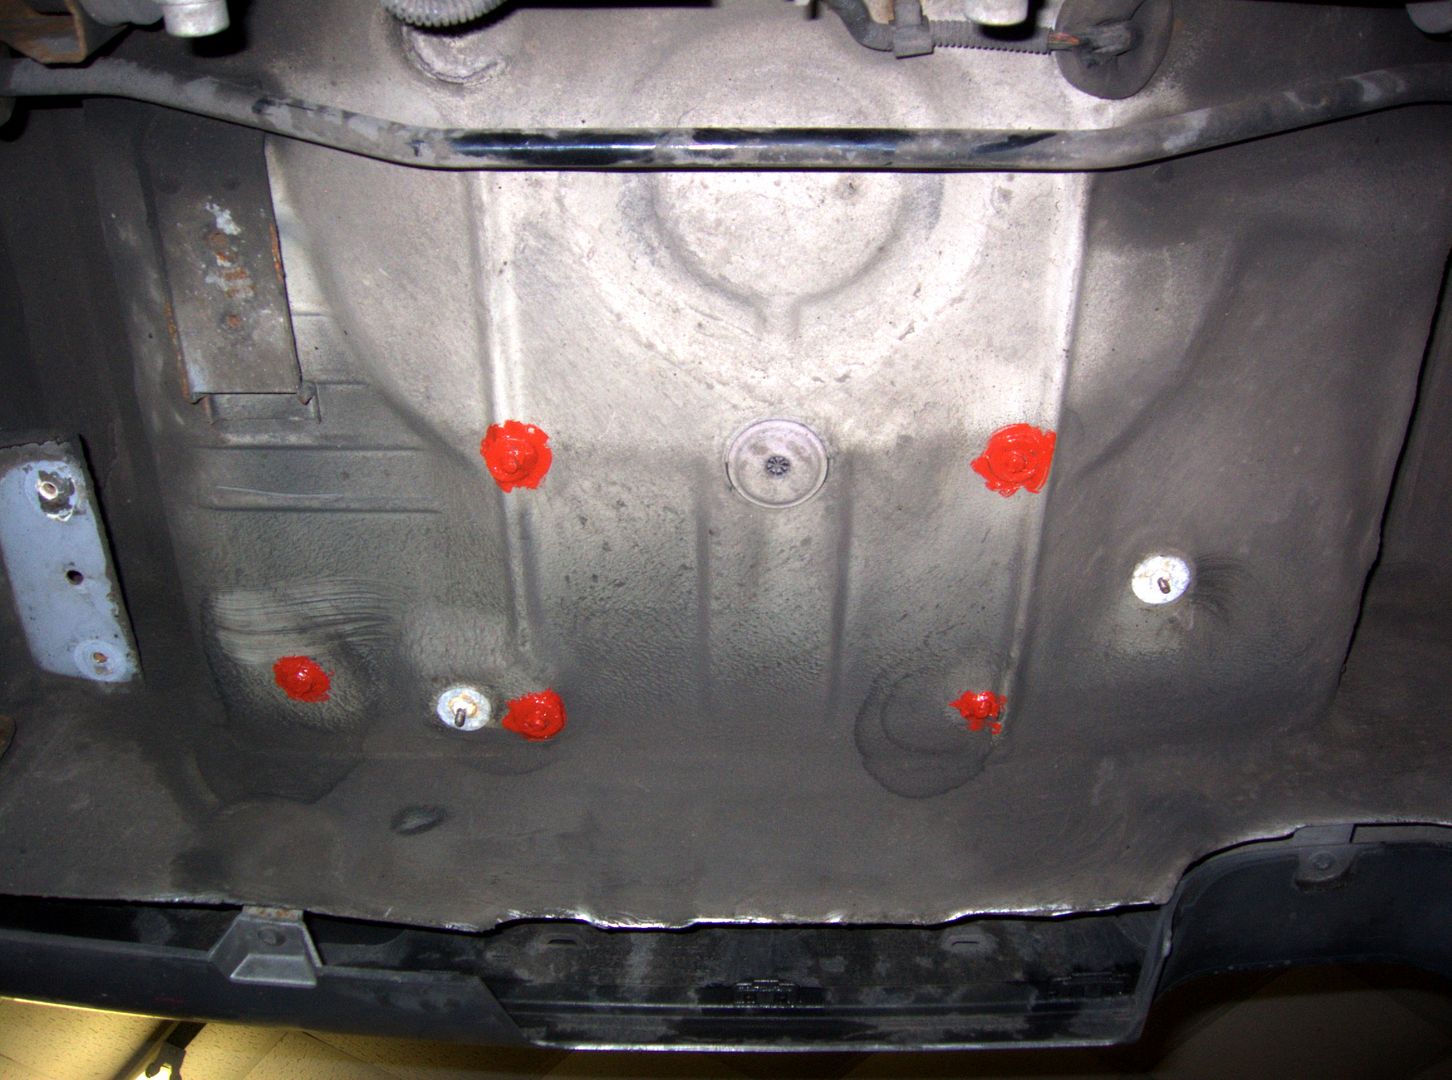
Thats the tray in... need to pull out some of the interior now so I can run the cable to the engine bay (I already have my 4 gauge amp cable run so will need to replace that and re-route to the back)... also need to trim around the boot carpet and make a trim panel to fit over the top of the battery as it will stick up a bit... I have another S3 boot carpet to use to trim the panel... job done...
With that done I got on with a full brake fluid replacement as when I tested it the other week it was over the limit moisture wise... I used ATE Blue fluid this time rather than Motul RBF660 this time mainly because Bill had it on the shelf...
Cut myself a little funnel out of a water bottle and bled away... all four corners, clutch and master cylinder...
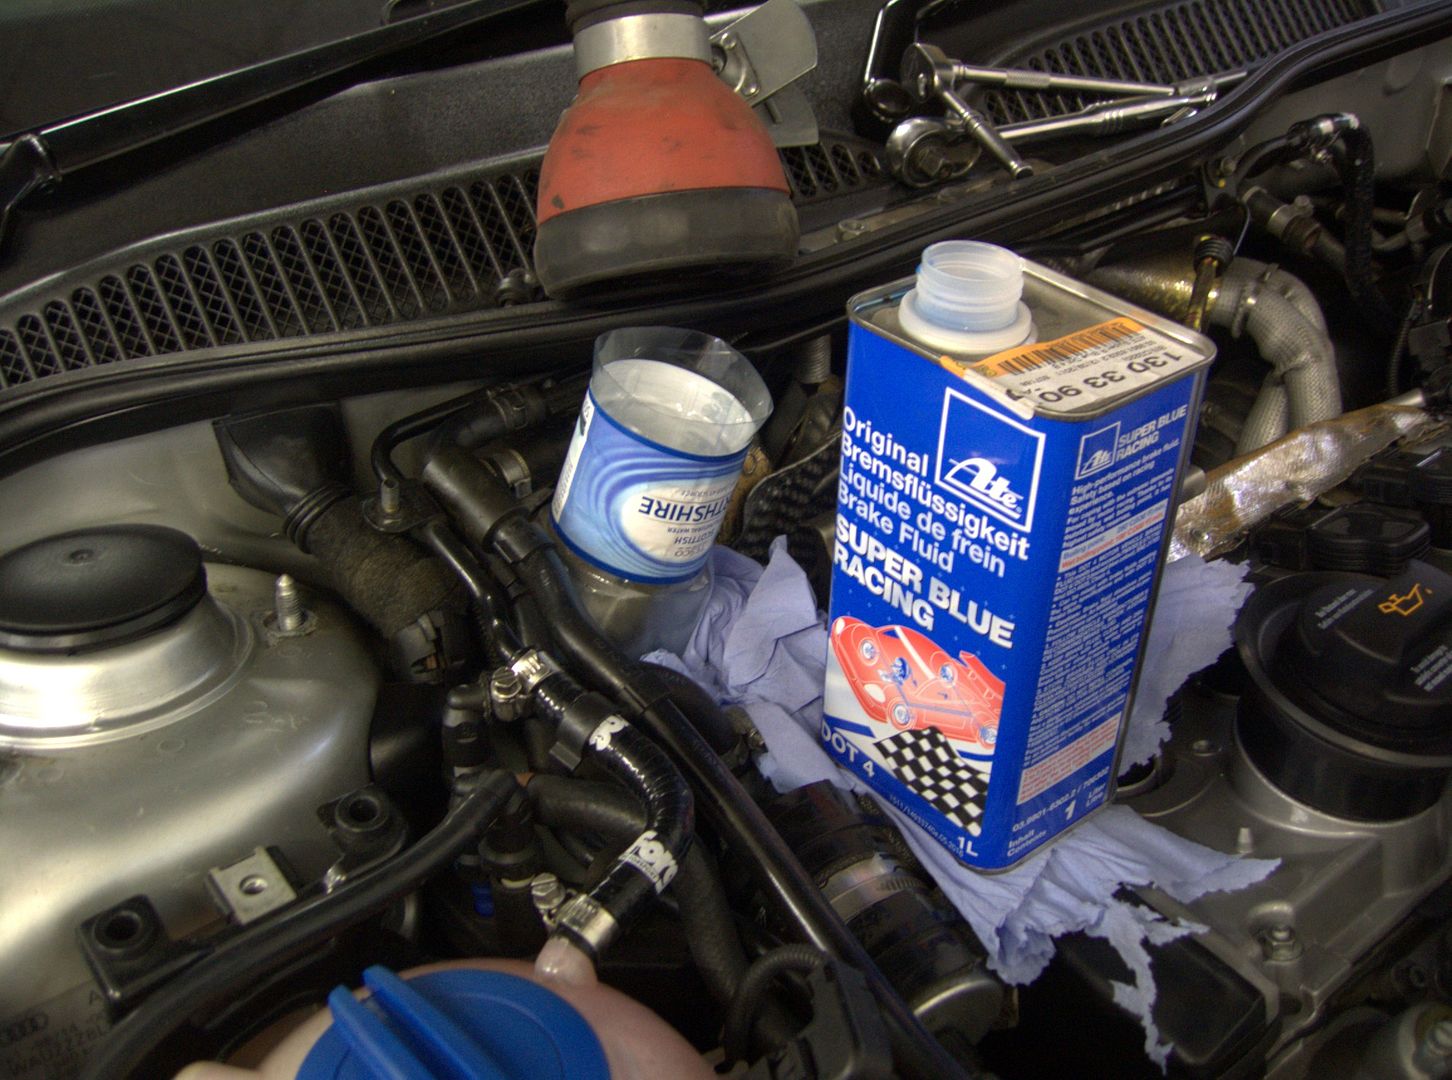
Good thing about the ATE Blue is I could easily tell when the old fluid had bled through as the tube went blue...
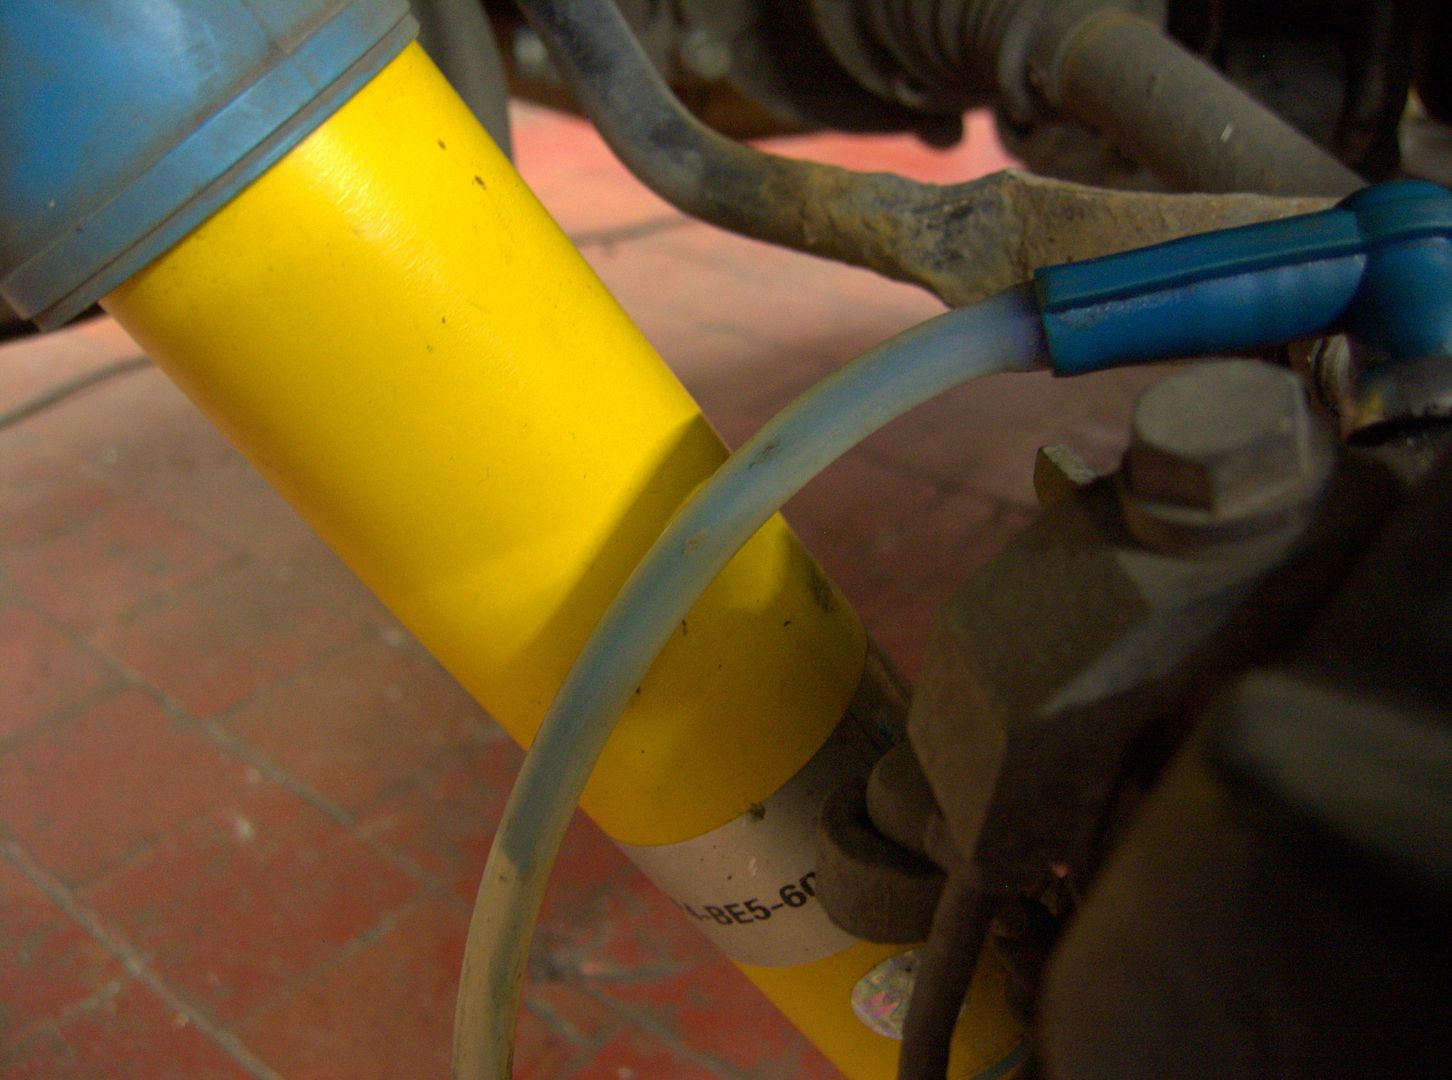
Once that was done I did a quick check over the coolant hose clips and as expected they felt loose again... this is fairly typical of silicon hoses... boost pipes are the same... usually have to go around the clips again after a day on the dyno after the initial build...
Happy days
<tuffty/>
Removed the back box and heat shield so I could access underneath for bolting stuff in...

Worked out where the tray was going to go... up against the back of the boot...

Marked it all up and made spacers as the boot floor isn't flat... bolted it all down, looking good so far...

As I am using a lead/acid battery inside the car (albeit in the boot) you need to vent it externally... batterys usually come with two breather holes, one each side and a little plug to plug one up if needed...

I then modded a 90 deg pipe joiner (6mm one IIRC... its one I had kicking about..) and there is a handy grommet next to the battery for running the vent pipe outside...


Drilled the hole for the earth lead and cleaned off the paint to get a good connection...

Used an M8 SS bolt and made a stud for the earth lead to connect too... made an earth lead from 50mm sq welding cable... crimped the terminals on for a solid connection...

That all done I sealed all the bolts and holes underneath with high temp sealant... seam sealer would have worked just as well but didn't have any to hand...

Thats the tray in... need to pull out some of the interior now so I can run the cable to the engine bay (I already have my 4 gauge amp cable run so will need to replace that and re-route to the back)... also need to trim around the boot carpet and make a trim panel to fit over the top of the battery as it will stick up a bit... I have another S3 boot carpet to use to trim the panel... job done...

With that done I got on with a full brake fluid replacement as when I tested it the other week it was over the limit moisture wise... I used ATE Blue fluid this time rather than Motul RBF660 this time mainly because Bill had it on the shelf...
Cut myself a little funnel out of a water bottle and bled away... all four corners, clutch and master cylinder...

Good thing about the ATE Blue is I could easily tell when the old fluid had bled through as the tube went blue...

Once that was done I did a quick check over the coolant hose clips and as expected they felt loose again... this is fairly typical of silicon hoses... boost pipes are the same... usually have to go around the clips again after a day on the dyno after the initial build...
Happy days
<tuffty/>
Spent the past 2 days giving the car a bit of a clean ready for GTI International...
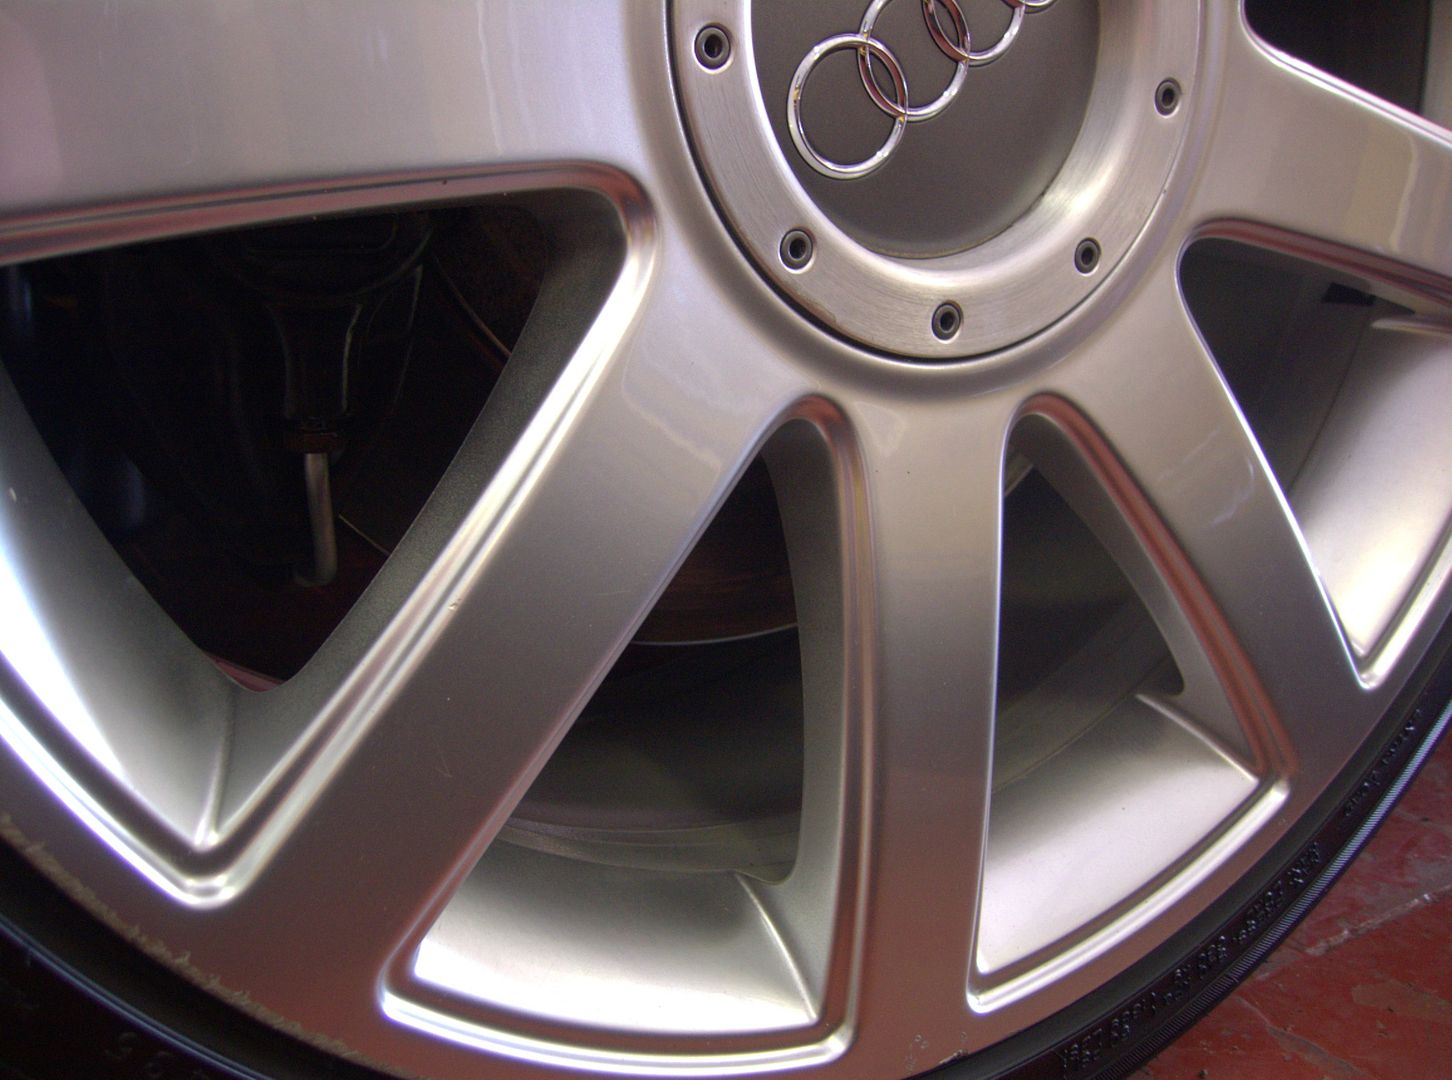
Wheels off to clean and seal (Meg wheel brightner and Poorboys wheel sealant)... and yes I did clean and detail (303 Aerospace protectant) under the arches
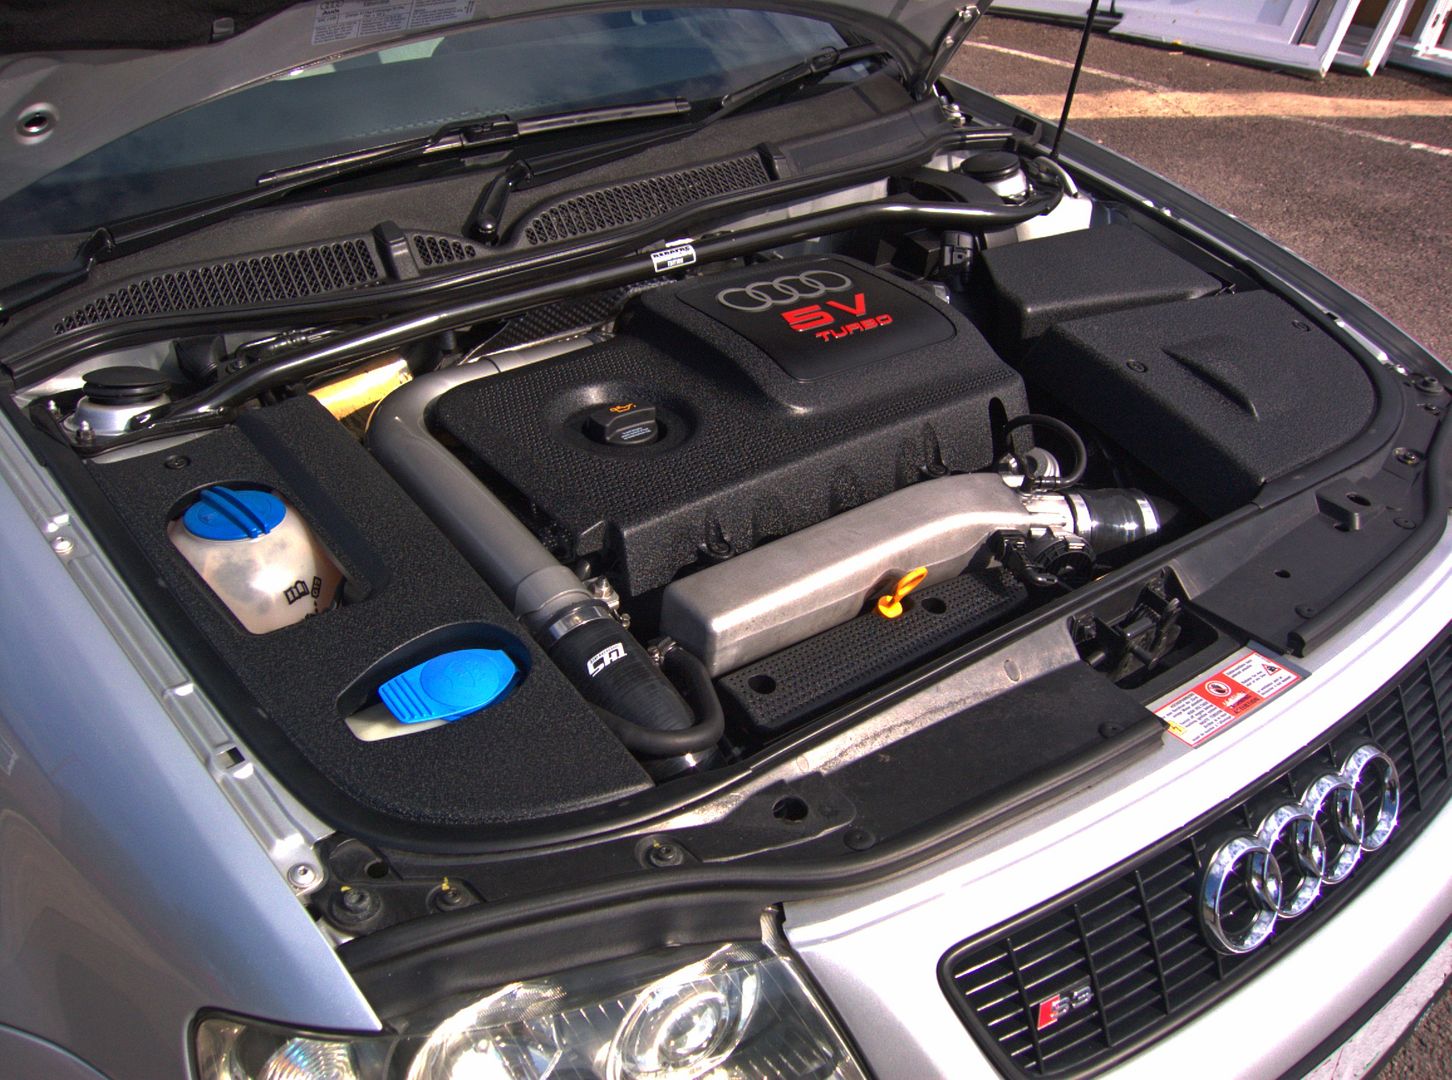
Engine bay (303 Aerospace protectant)...
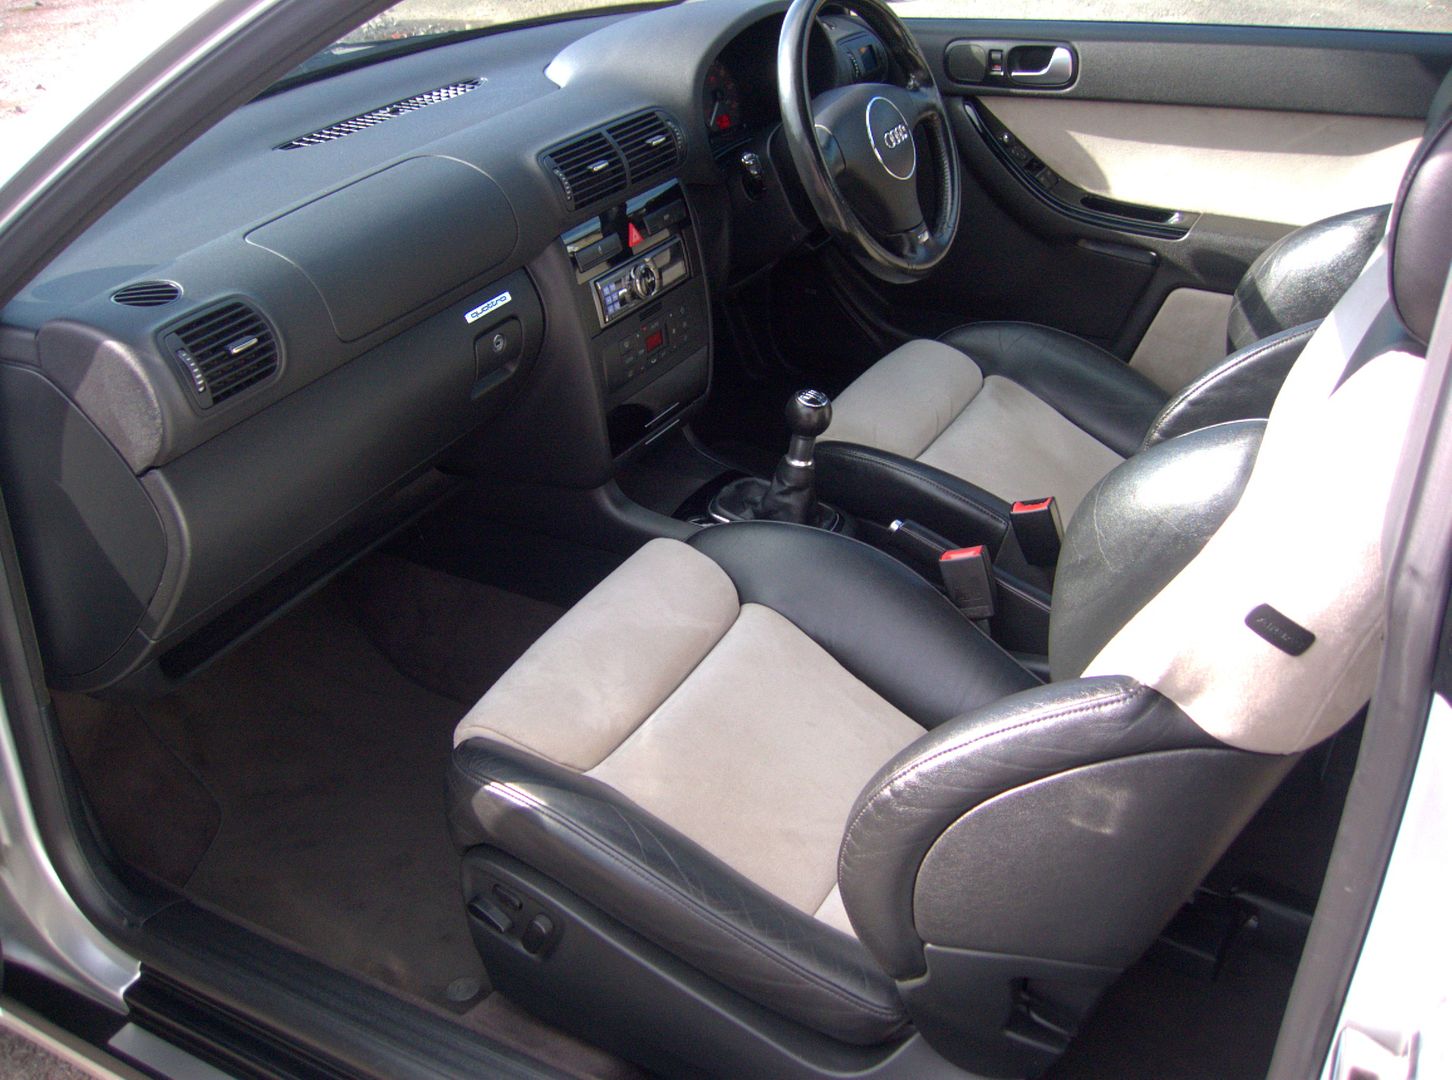
Interior... (Poorboys natural looking dressing, Race Glaze leather balm and Race Glaze Alcantara cleaner)
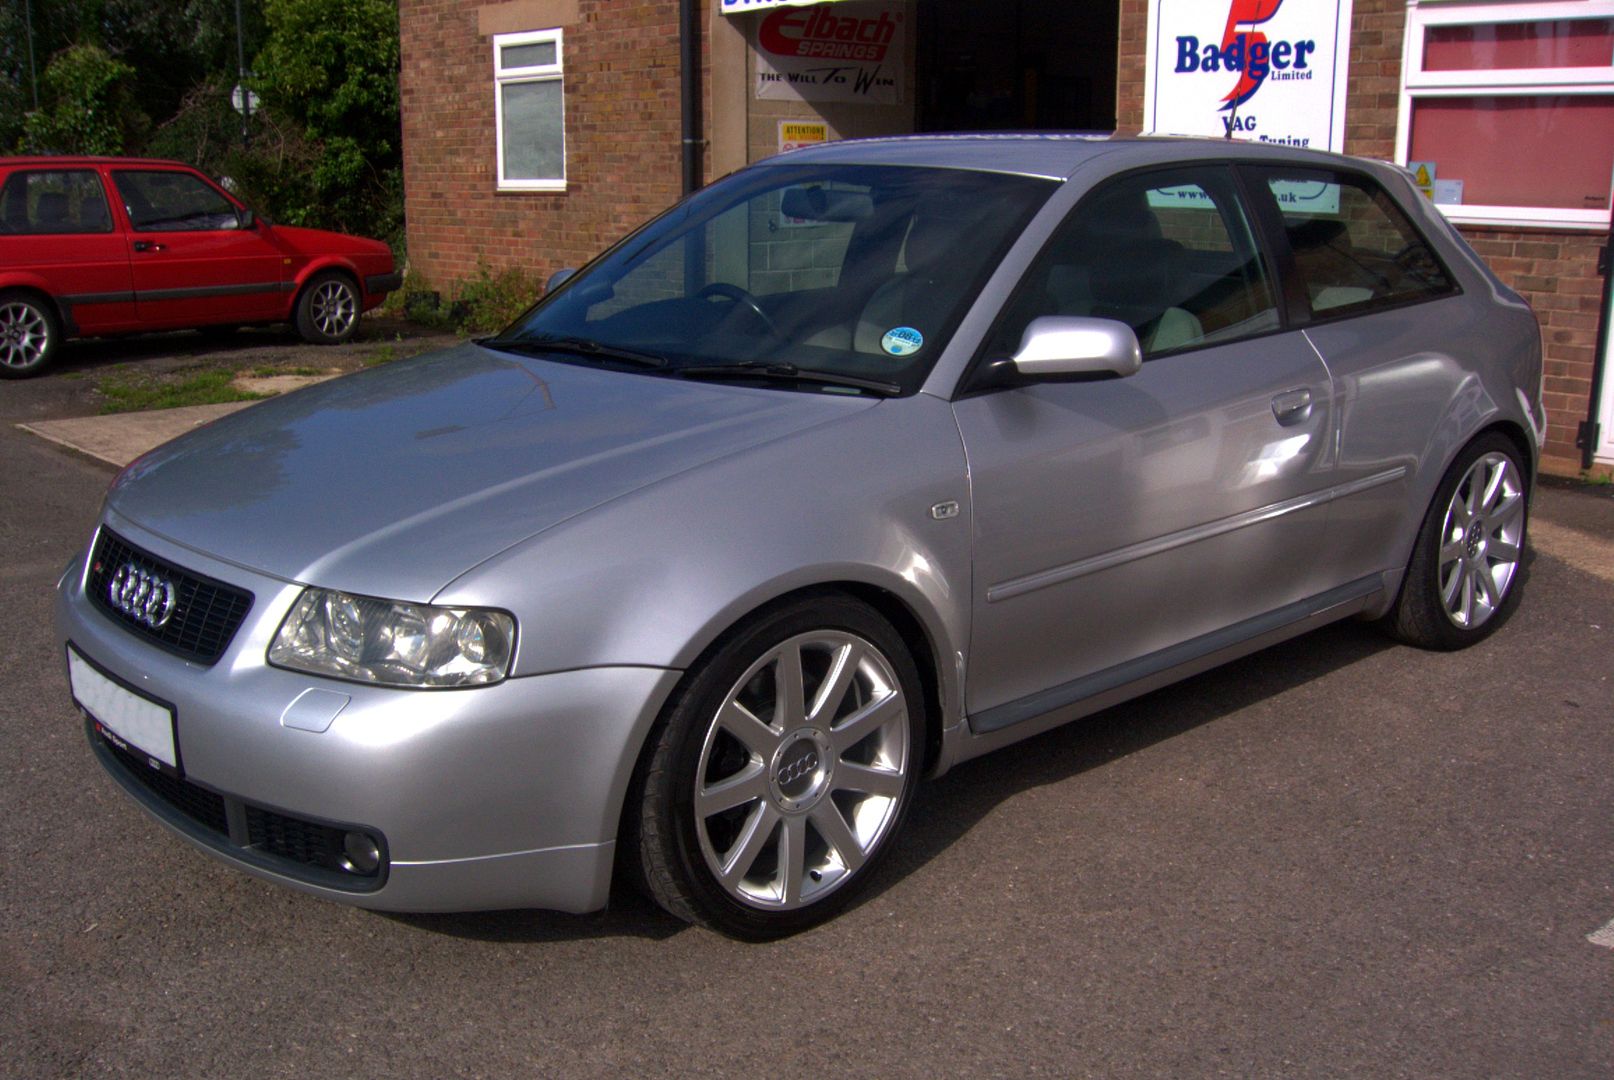
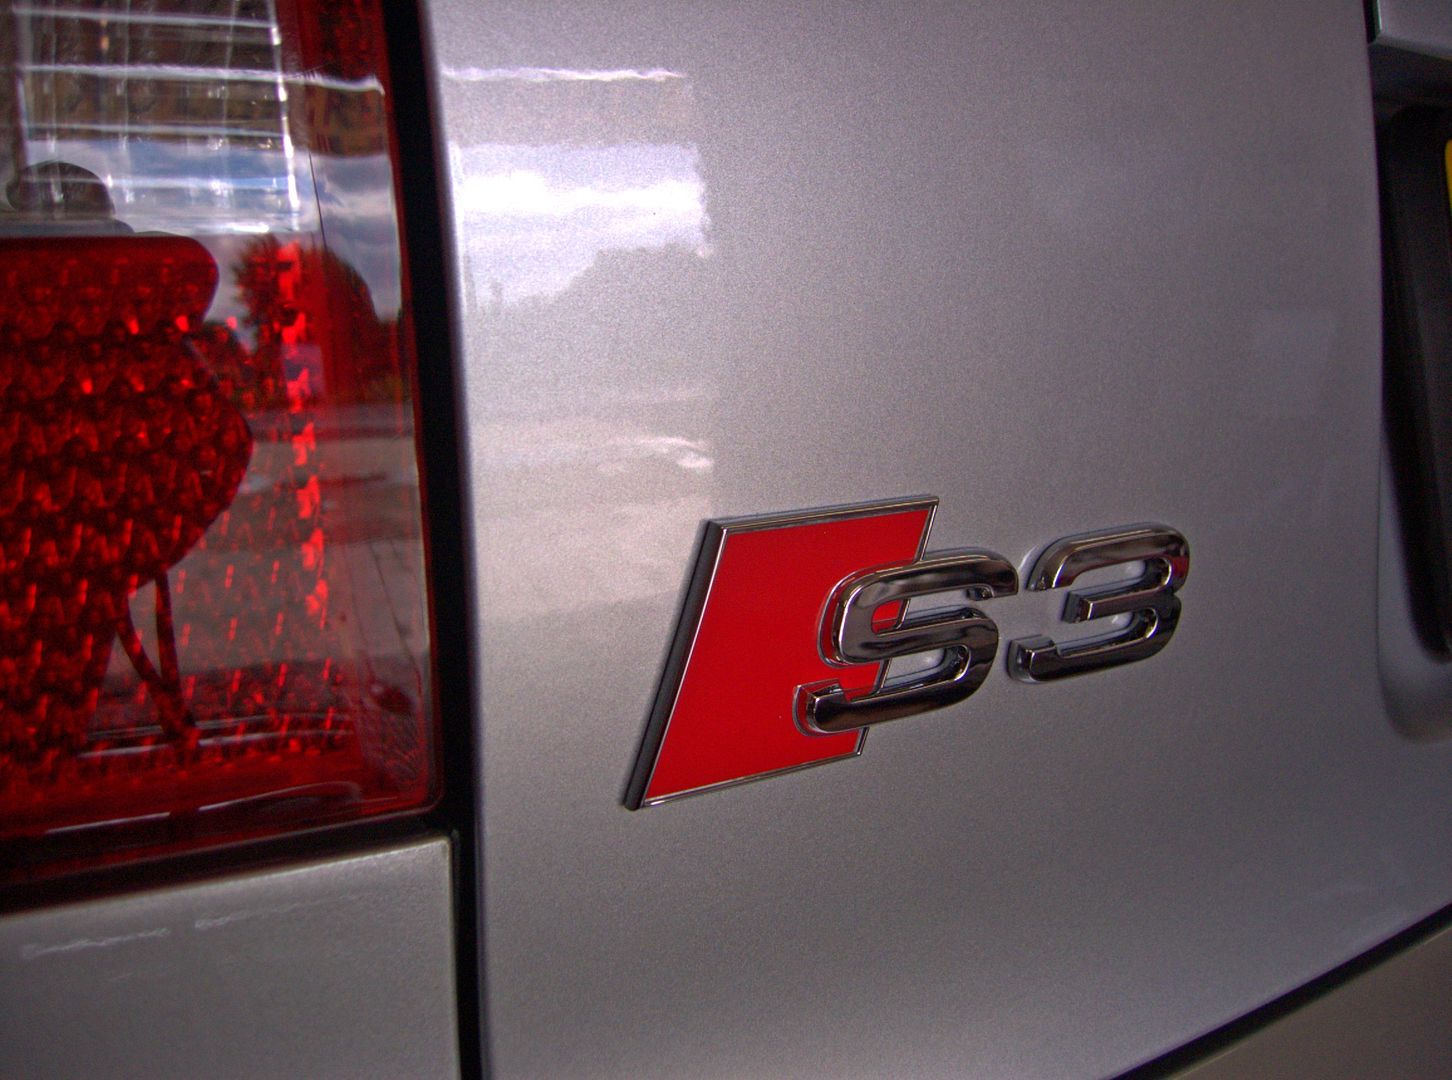
...and after a snow foam and wash, a full machine polish using 3M Ultrafina SE and 3M blue waffle pads... topped off with Jeffs Werkstat Acrylic...
I ache all over now
<tuffty/>
Wheels off to clean and seal (Meg wheel brightner and Poorboys wheel sealant)... and yes I did clean and detail (303 Aerospace protectant) under the arches

Engine bay (303 Aerospace protectant)...

Interior... (Poorboys natural looking dressing, Race Glaze leather balm and Race Glaze Alcantara cleaner)

...and after a snow foam and wash, a full machine polish using 3M Ultrafina SE and 3M blue waffle pads... topped off with Jeffs Werkstat Acrylic...


I ache all over now
<tuffty/>
Found an hour or so this afternoon to make a start on getting the next bit of the battery relocation done... started by removing the rear trim panel and sill trim... then removed the trim panel in the boot and moved the sub out the way...
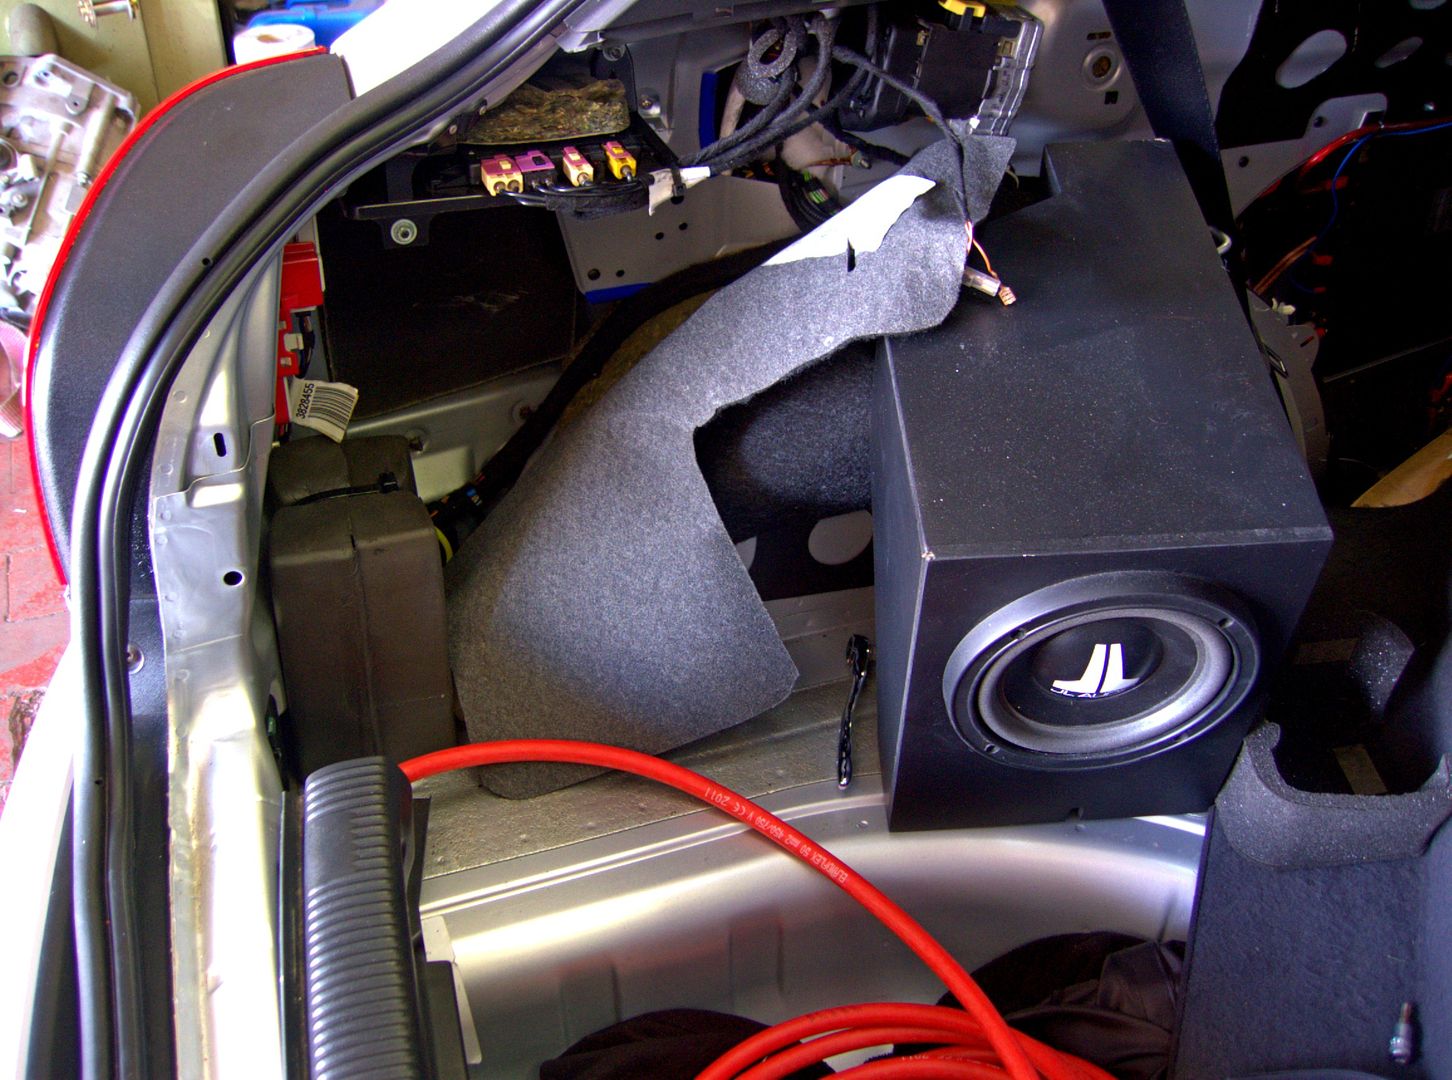
Removed this bracket to get the cable tucked in nicely... will have to mod it though as the cable won't fit nicely behind it... thats ok though as its for the luggage handles which I don't really use...
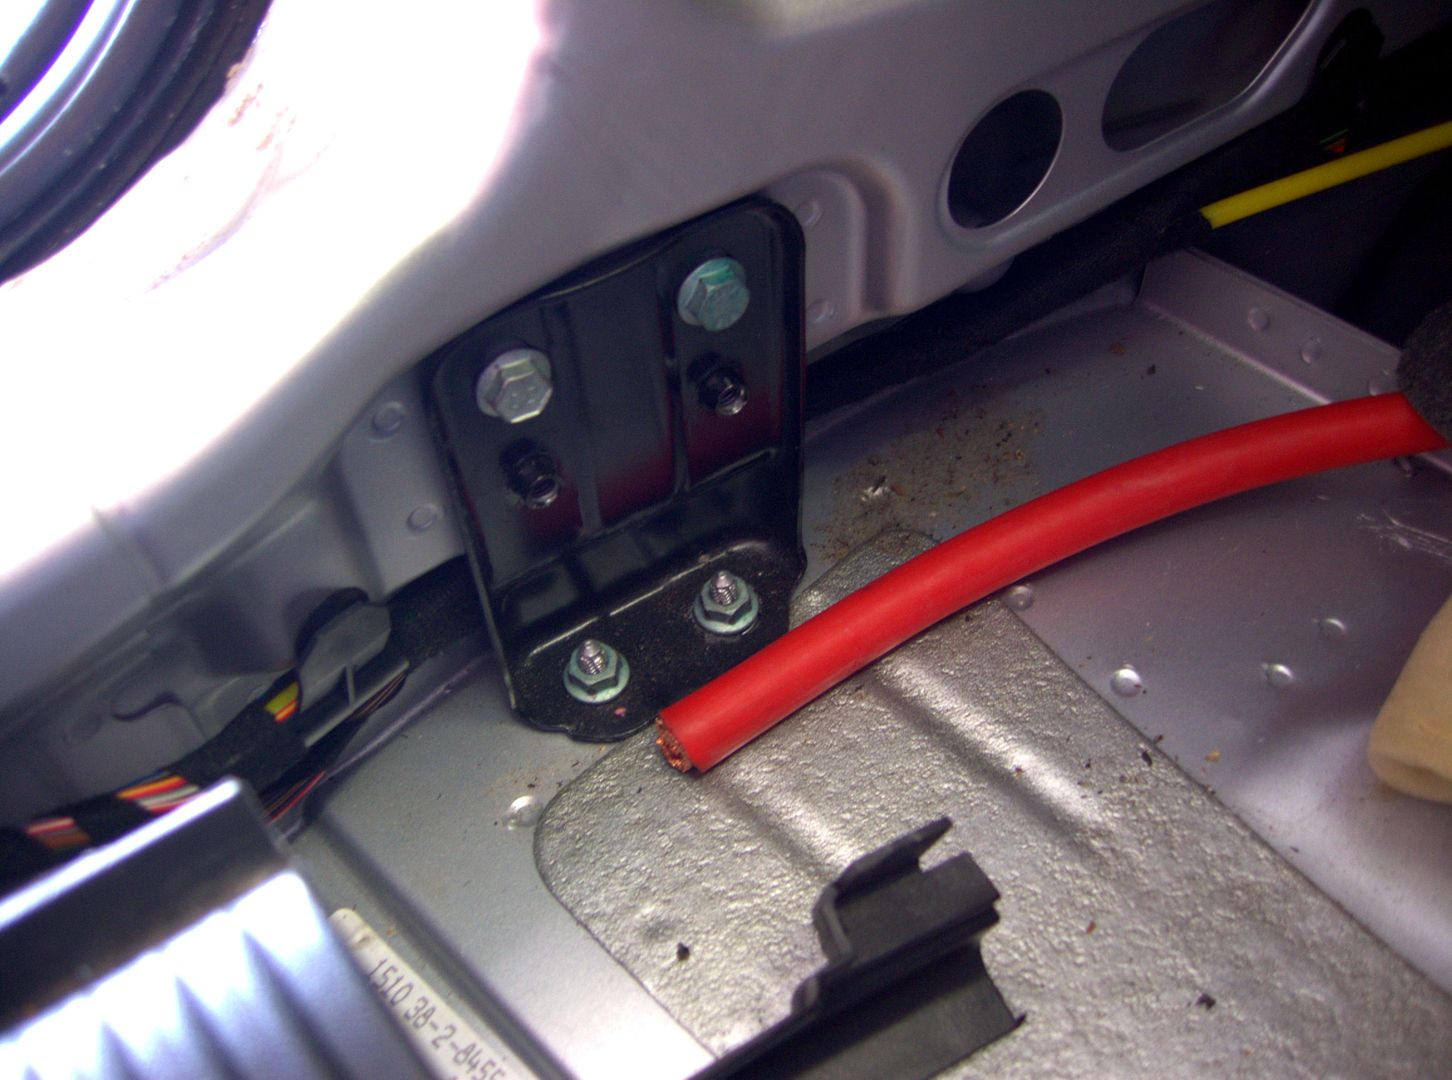
Routed the cable out the way securing it often with cable ties to prevent it from rattling...
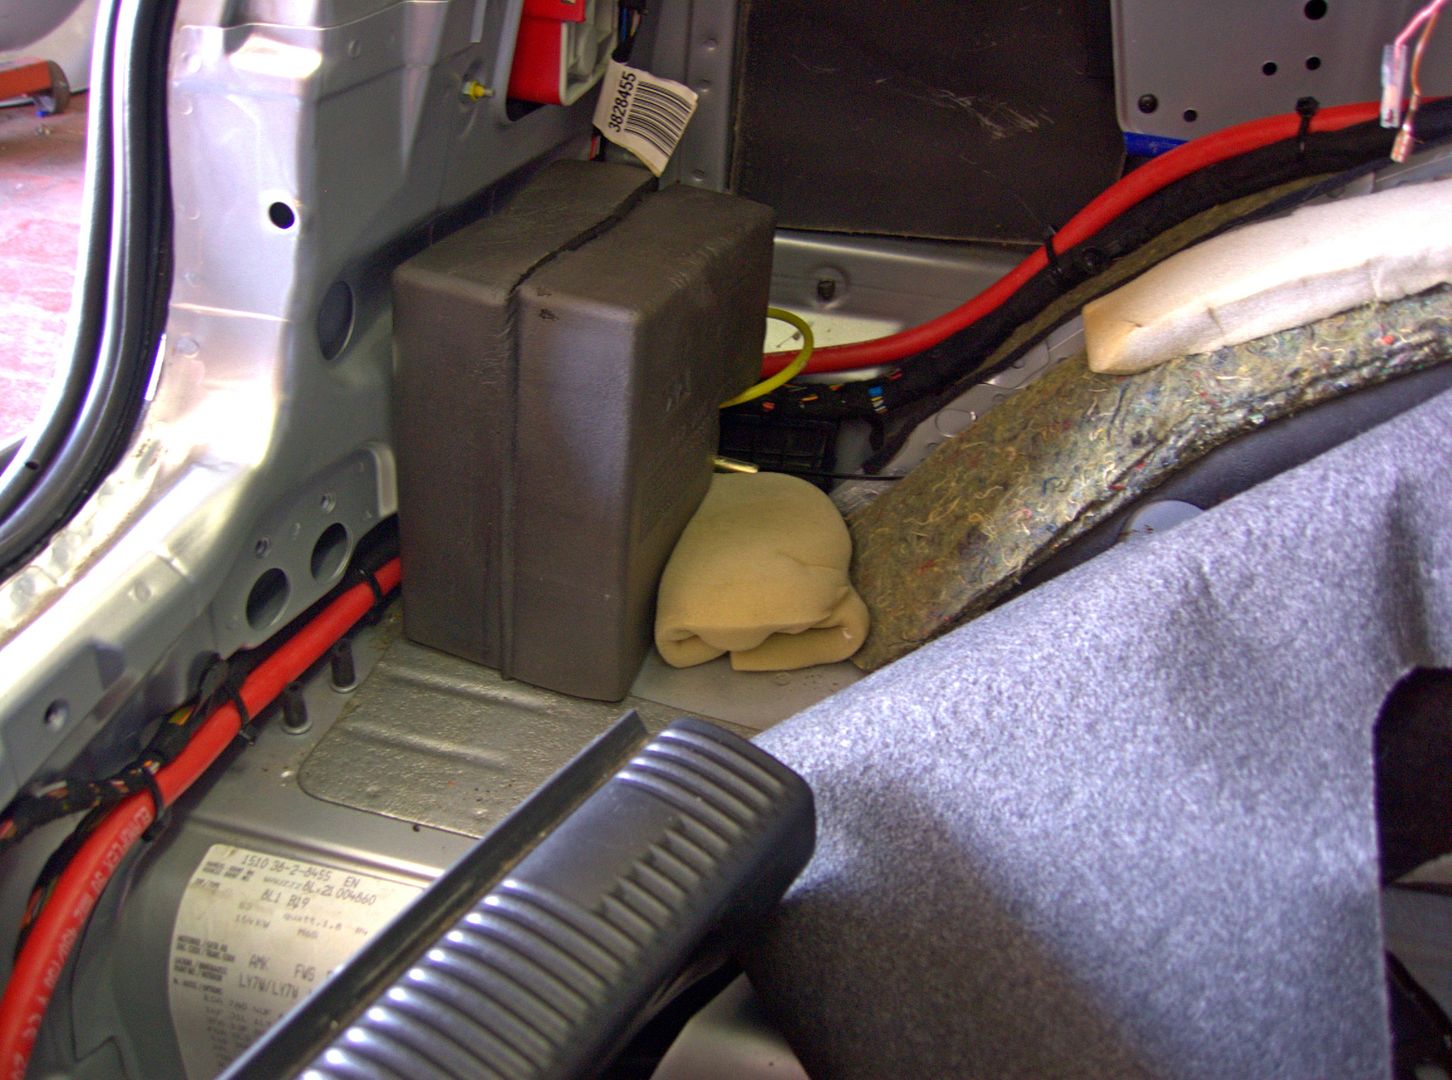
I didn't want to run the amp cable back the battery doubling up the amount of cabling so I used a junction box in the cavity behind the rear panel where my amp is and will take the feed from there directly...
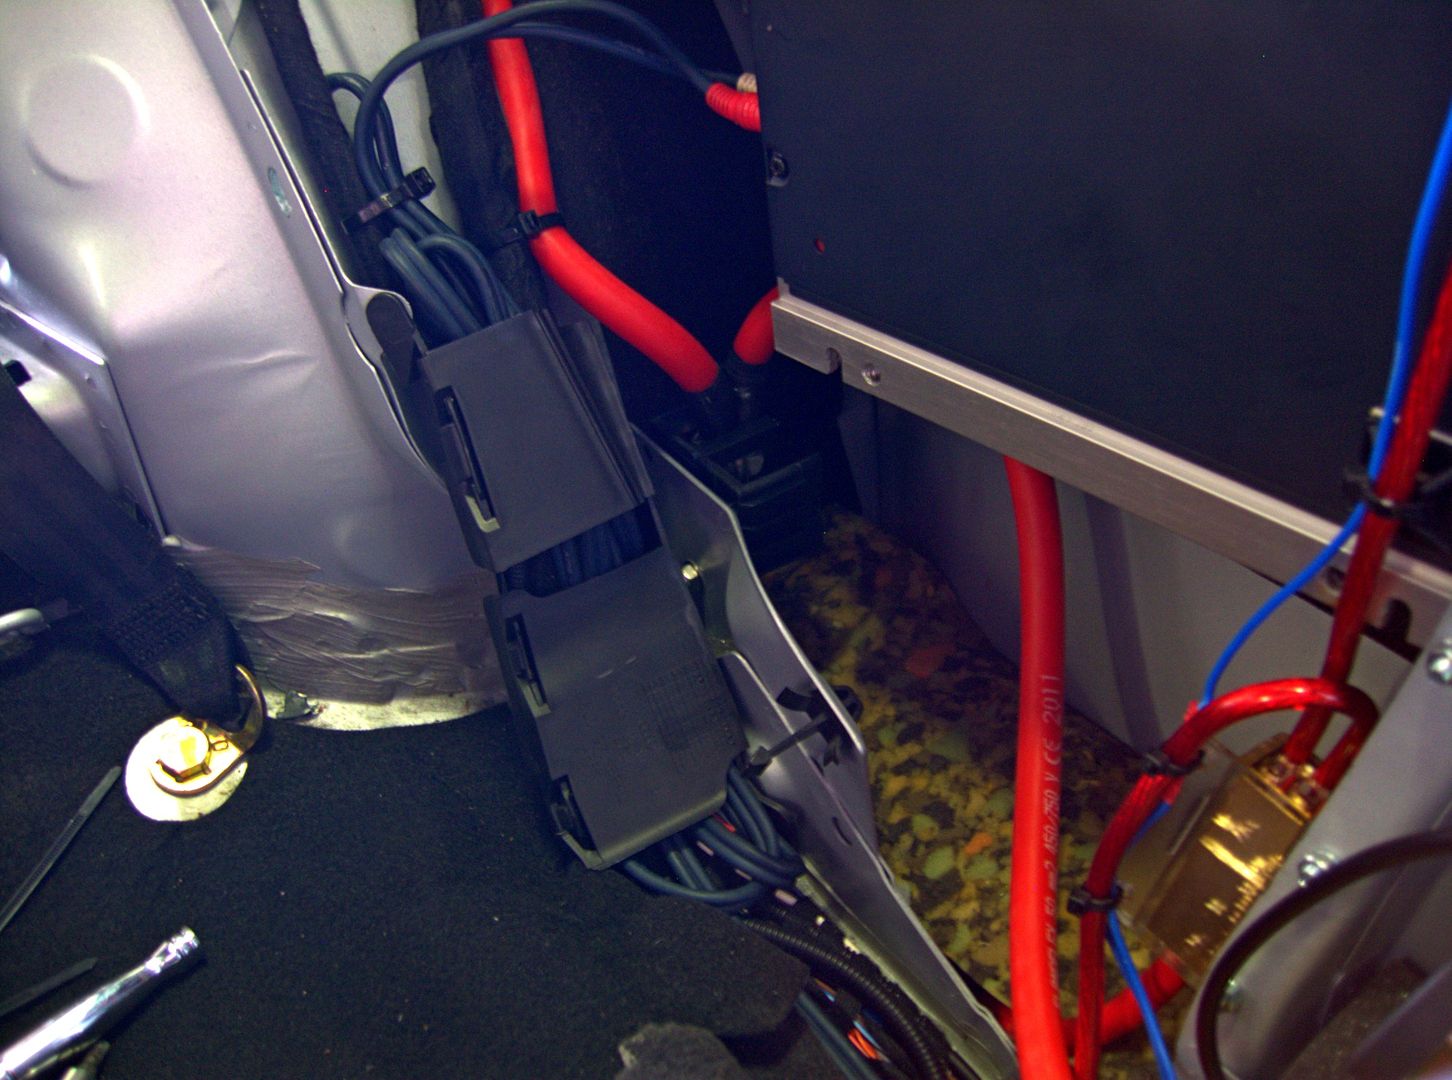
...a closer look...
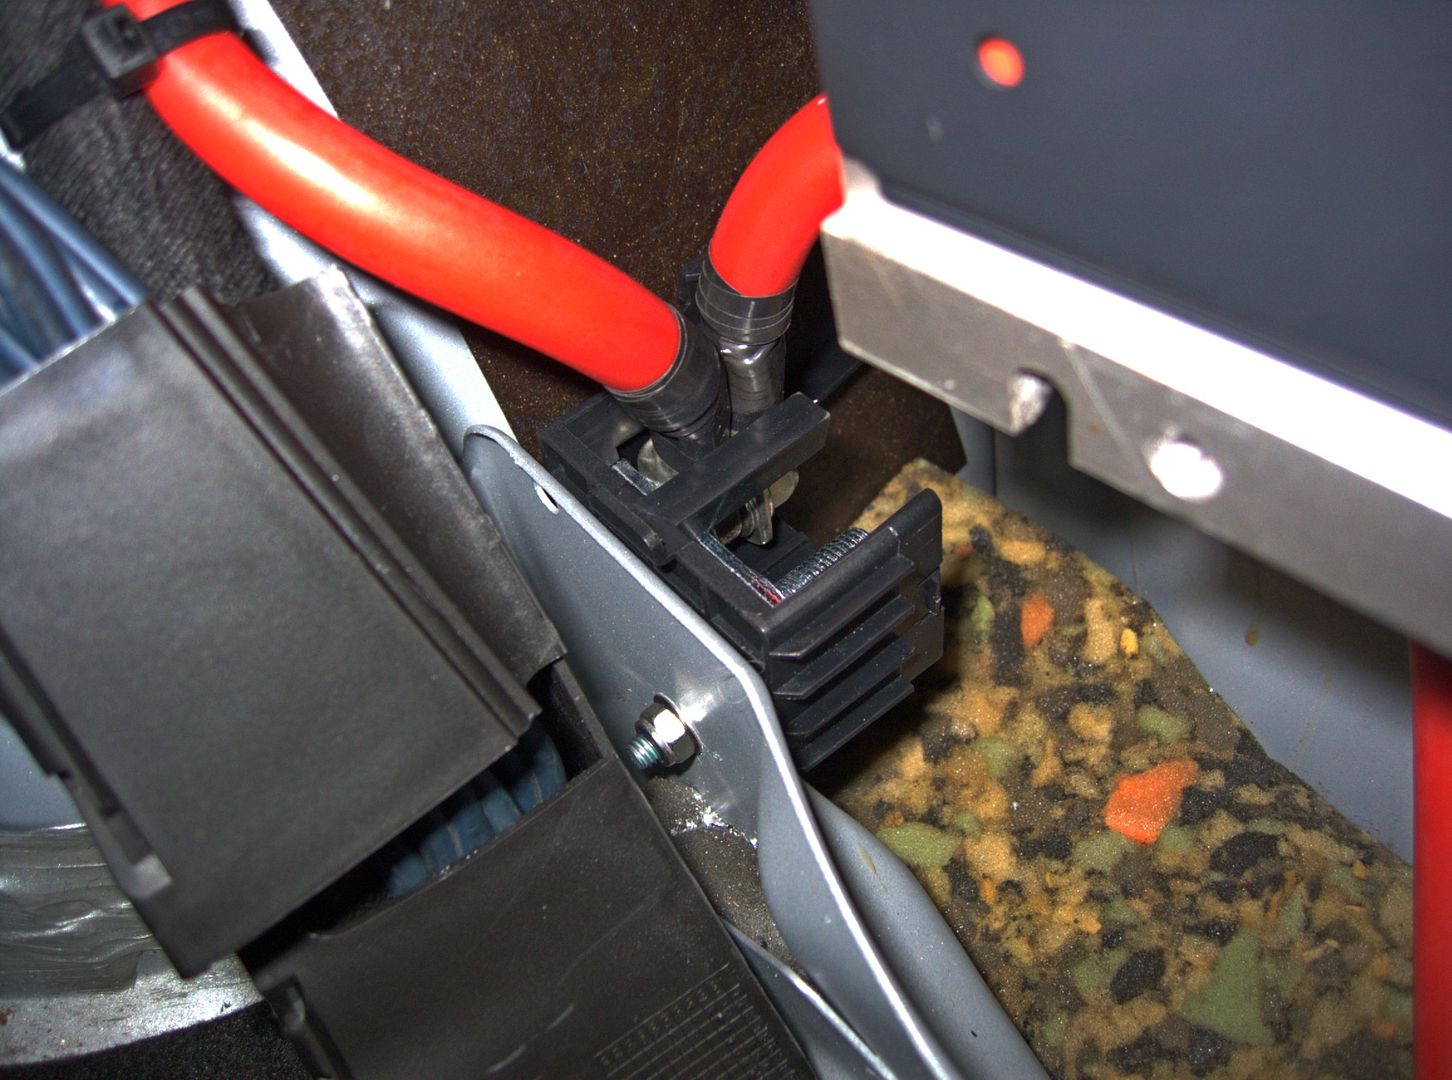
That was how I left it for now... need to disconnect the amp cable from the battery and run the battery cable along the sill while pulling up the amp cable... if I have a spare 5 mins tomorrow I may do that although the weather is looking ok for the latter half of the week so will have some evenings to be able to play...
One last thing for now... I started to get the dreaded 4 beeps from the boot indicating the alarm battery is on its way out... I will have a look at that at some point this week...
Hopefully get to finish it all this week..
<tuffty/>

Removed this bracket to get the cable tucked in nicely... will have to mod it though as the cable won't fit nicely behind it... thats ok though as its for the luggage handles which I don't really use...

Routed the cable out the way securing it often with cable ties to prevent it from rattling...

I didn't want to run the amp cable back the battery doubling up the amount of cabling so I used a junction box in the cavity behind the rear panel where my amp is and will take the feed from there directly...

...a closer look...

That was how I left it for now... need to disconnect the amp cable from the battery and run the battery cable along the sill while pulling up the amp cable... if I have a spare 5 mins tomorrow I may do that although the weather is looking ok for the latter half of the week so will have some evenings to be able to play...
One last thing for now... I started to get the dreaded 4 beeps from the boot indicating the alarm battery is on its way out... I will have a look at that at some point this week...
Hopefully get to finish it all this week..
<tuffty/>
Last edited:
Took advantage of the break in the crappy weather and cracked on getting some more done on the car...
Fitted the modded bracket....
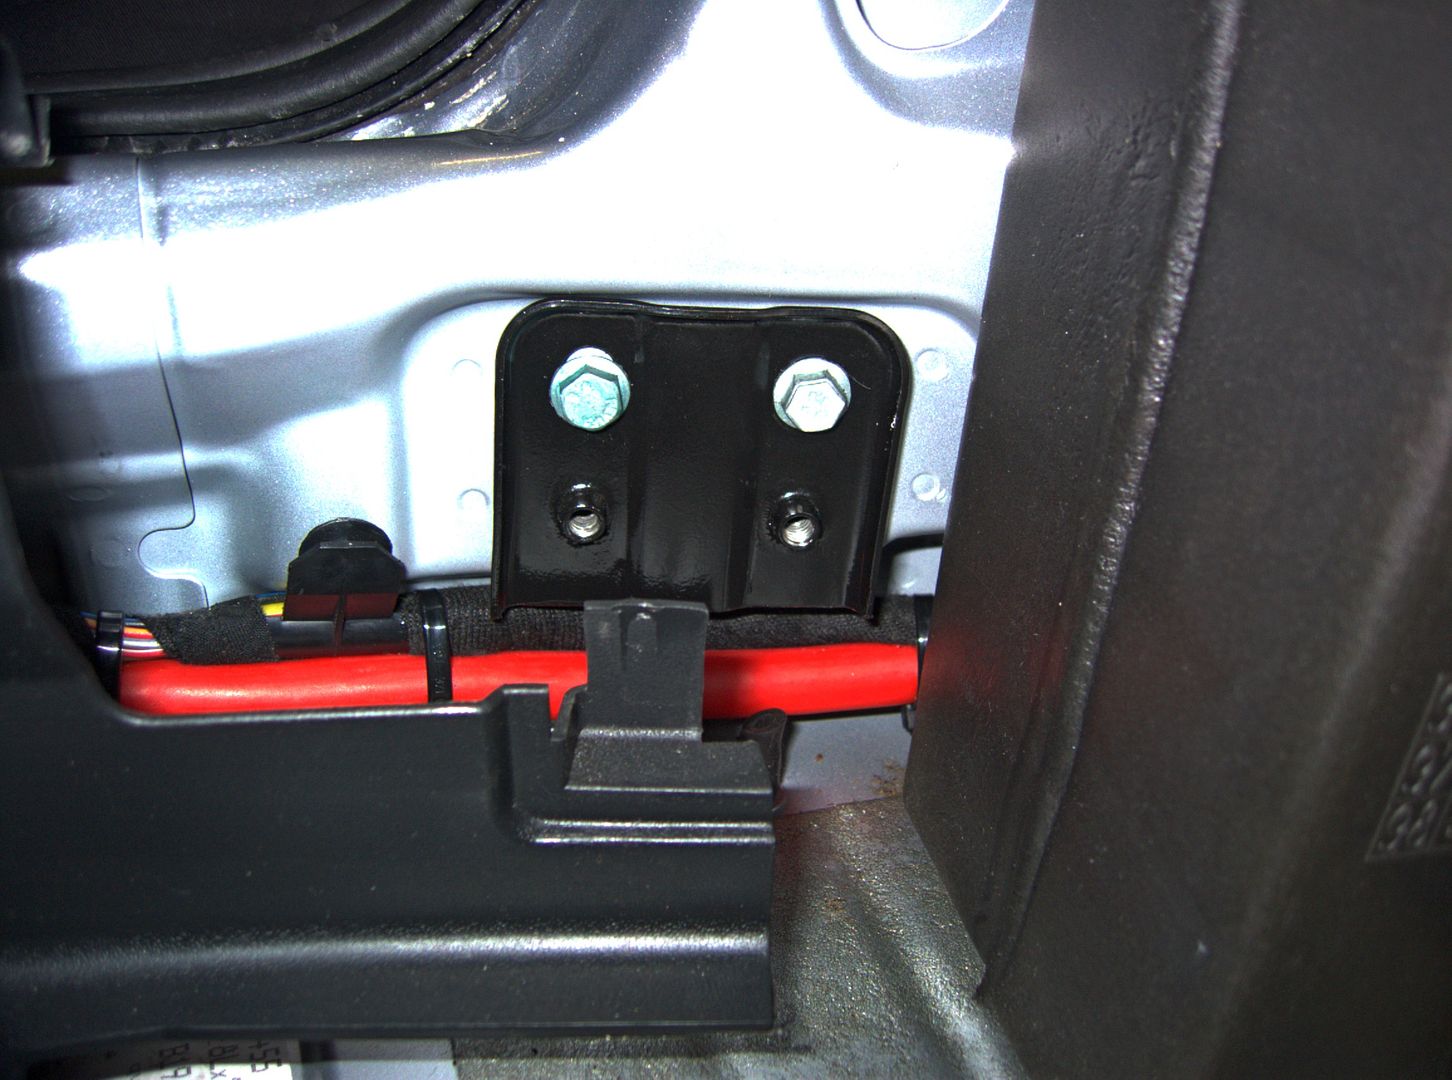
Removed the glove box to make it easier to see what I was doing...
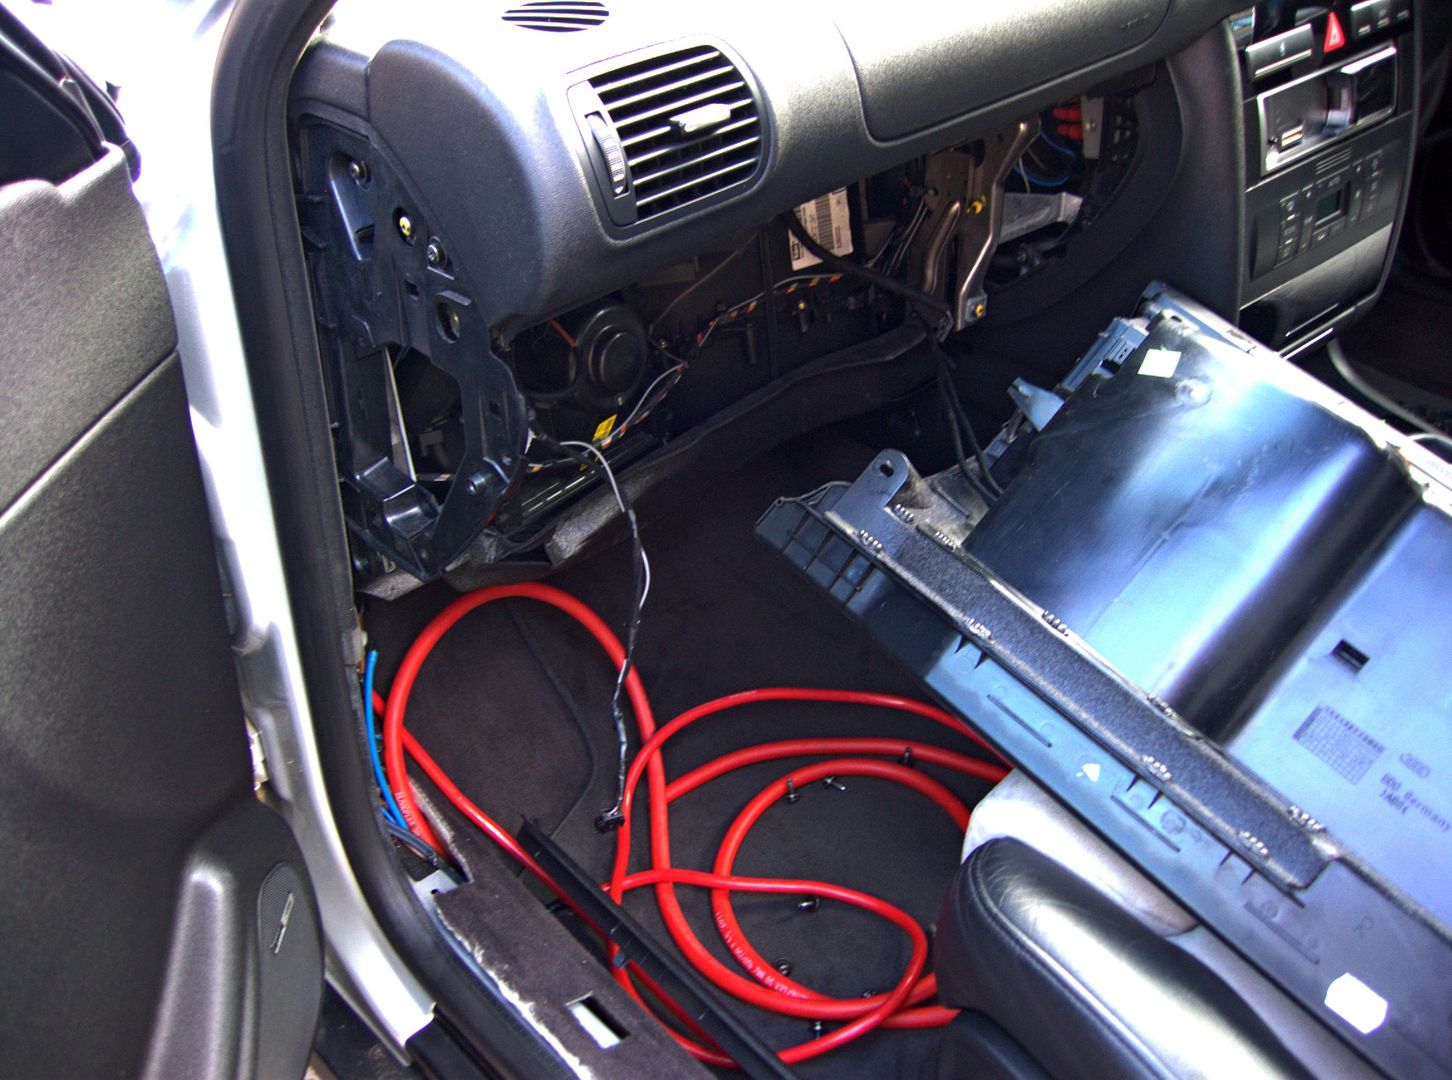
Taped the 50mm cable to the 4 gauge to make it easier to pull through...
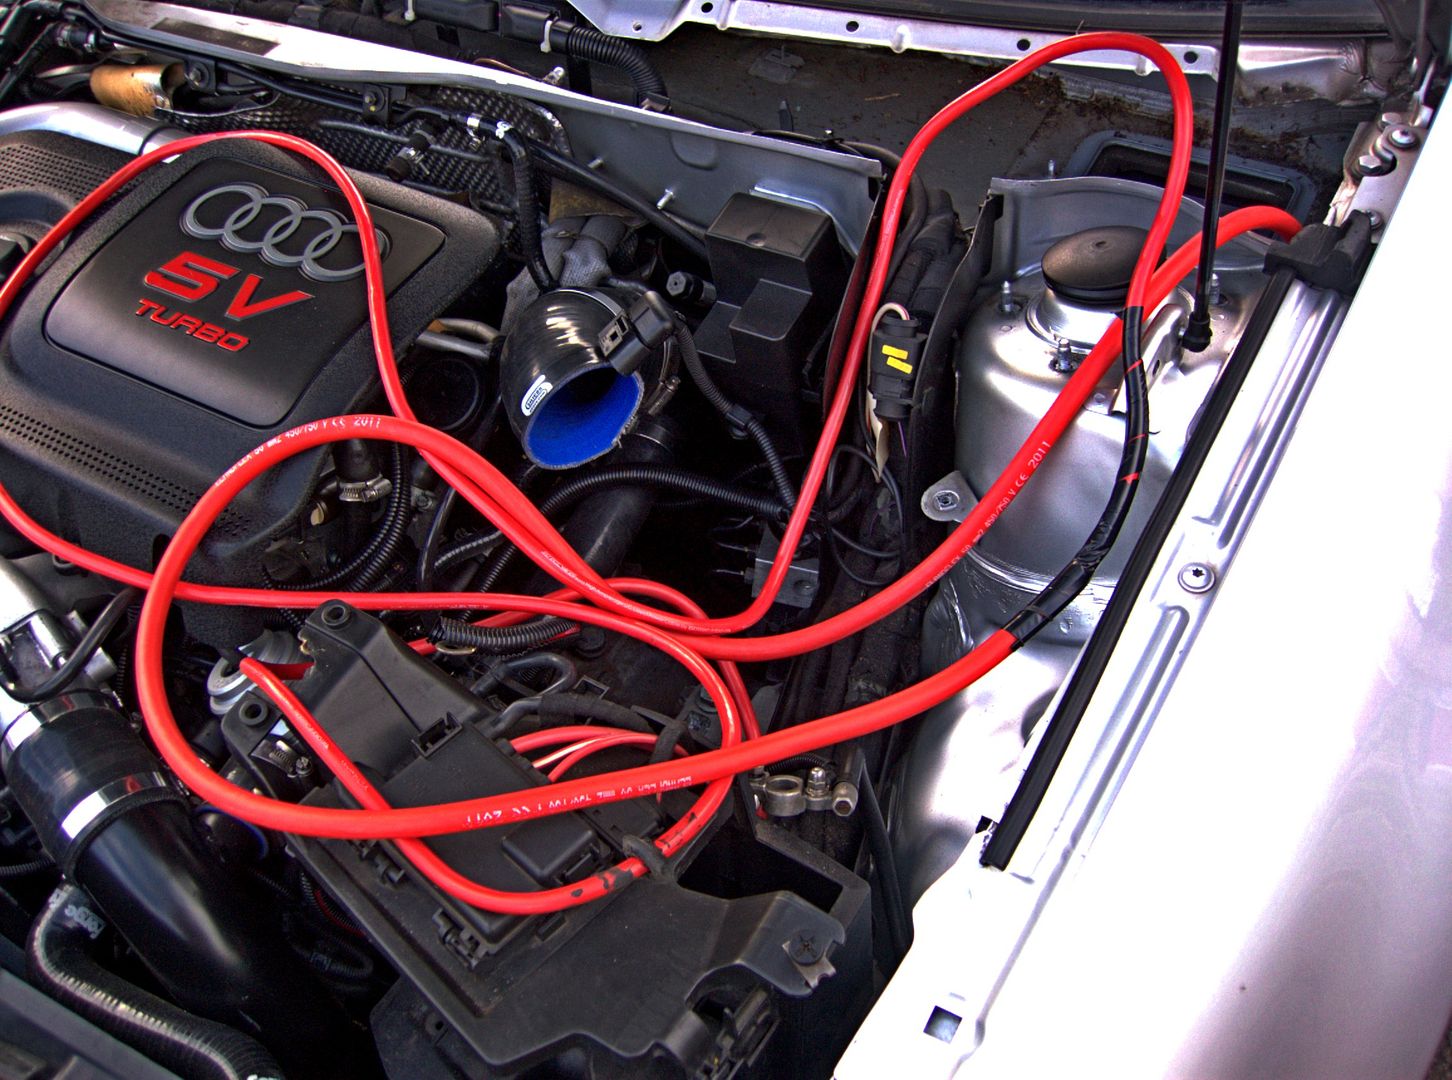
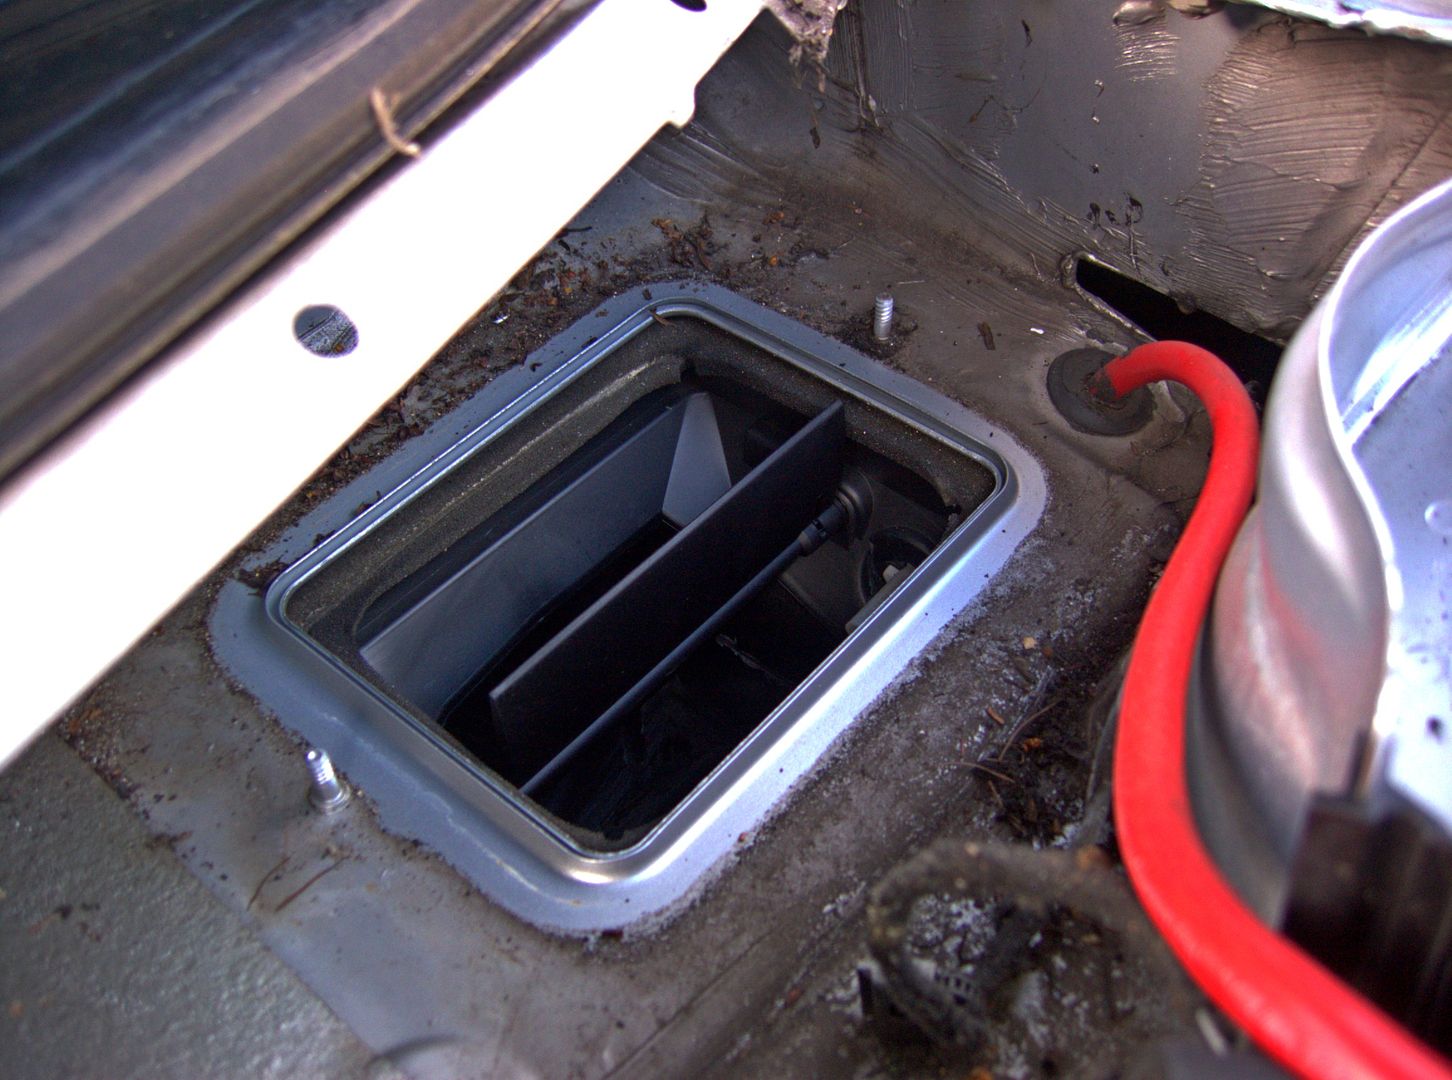
..and removed the pollen filter housing for better access to get teh grommet fitted and sealant applied...
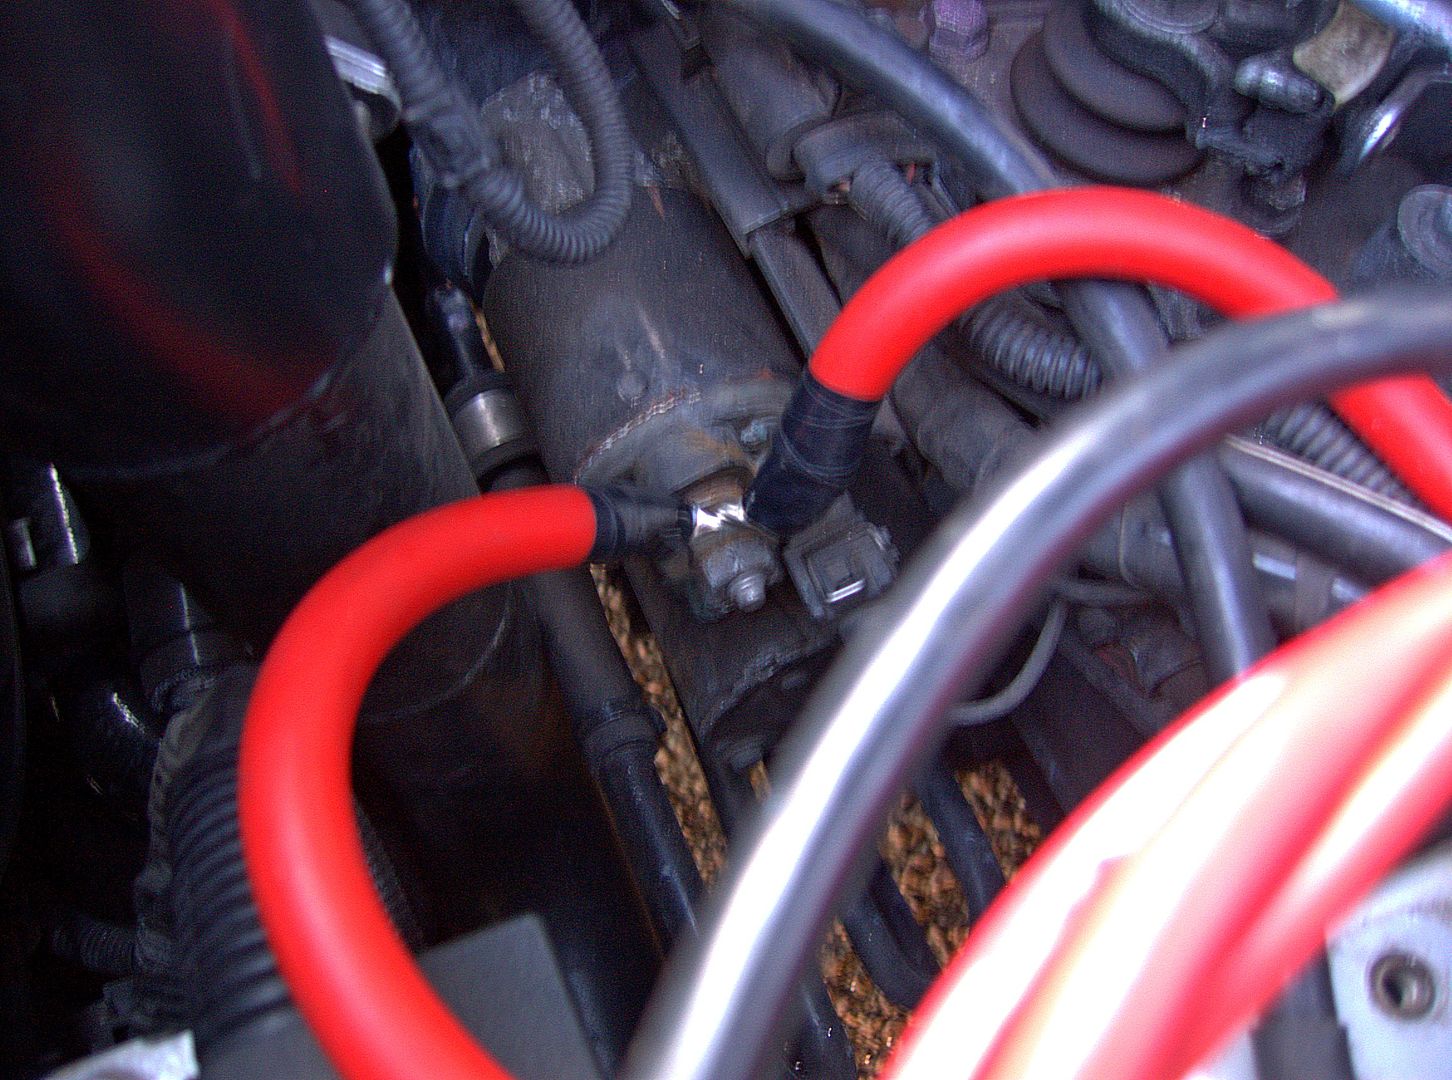
Terminated the end to the starter motor...
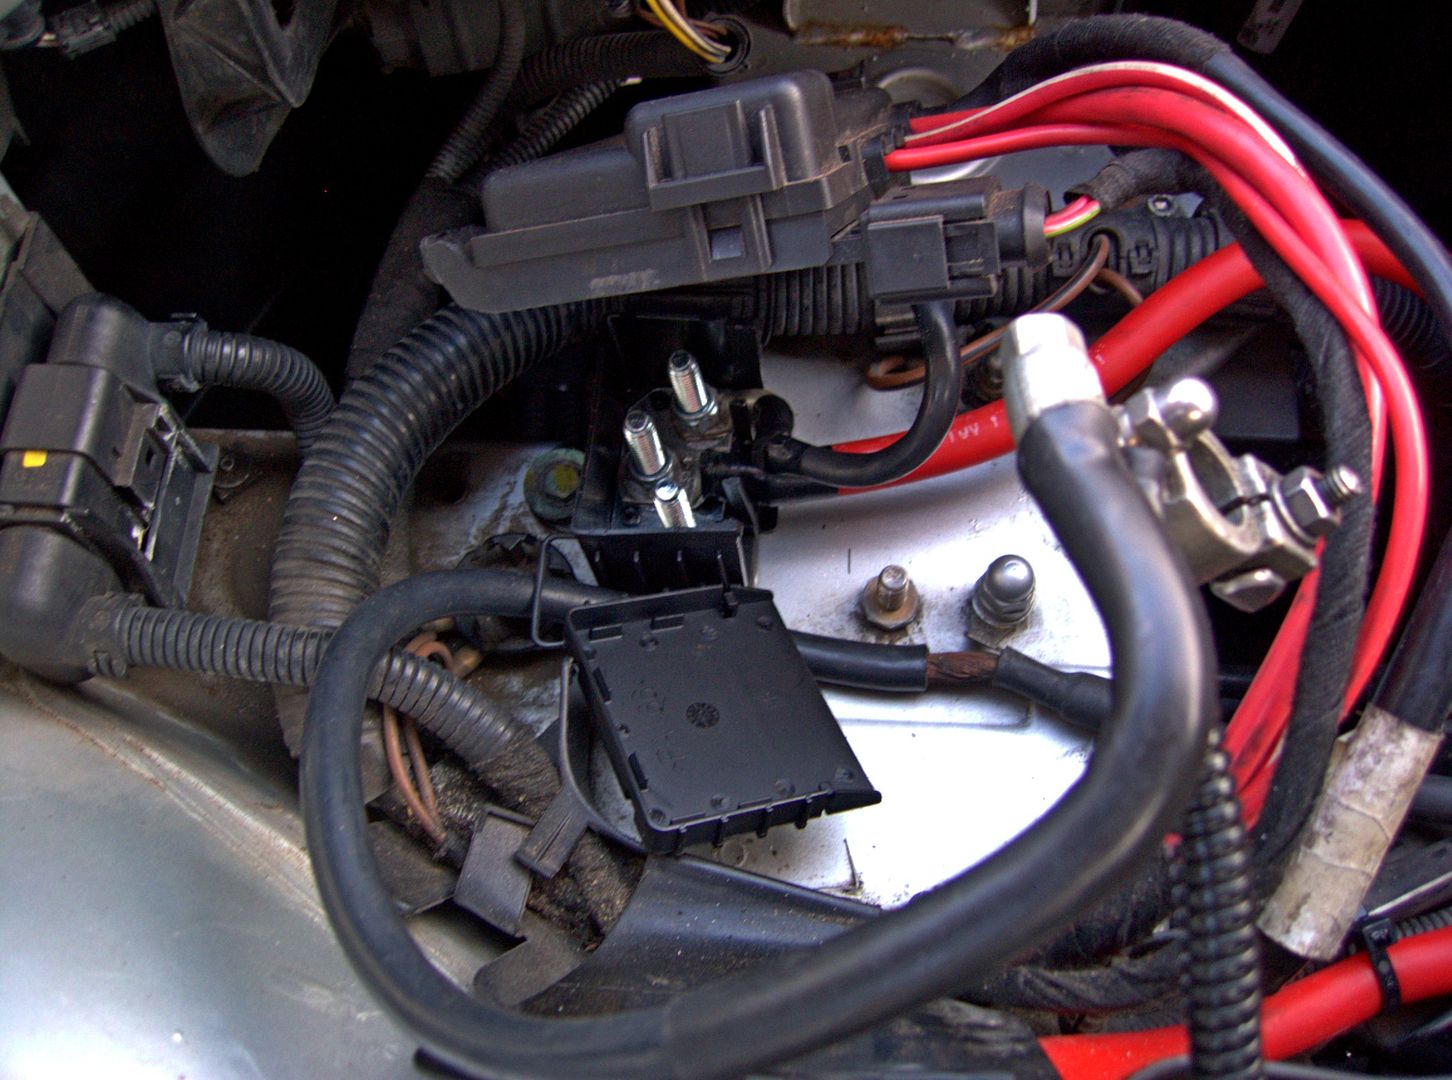
...and connected it and the fuse box that was on top of the battery to the terminal block...
Connected the battery and started the car...
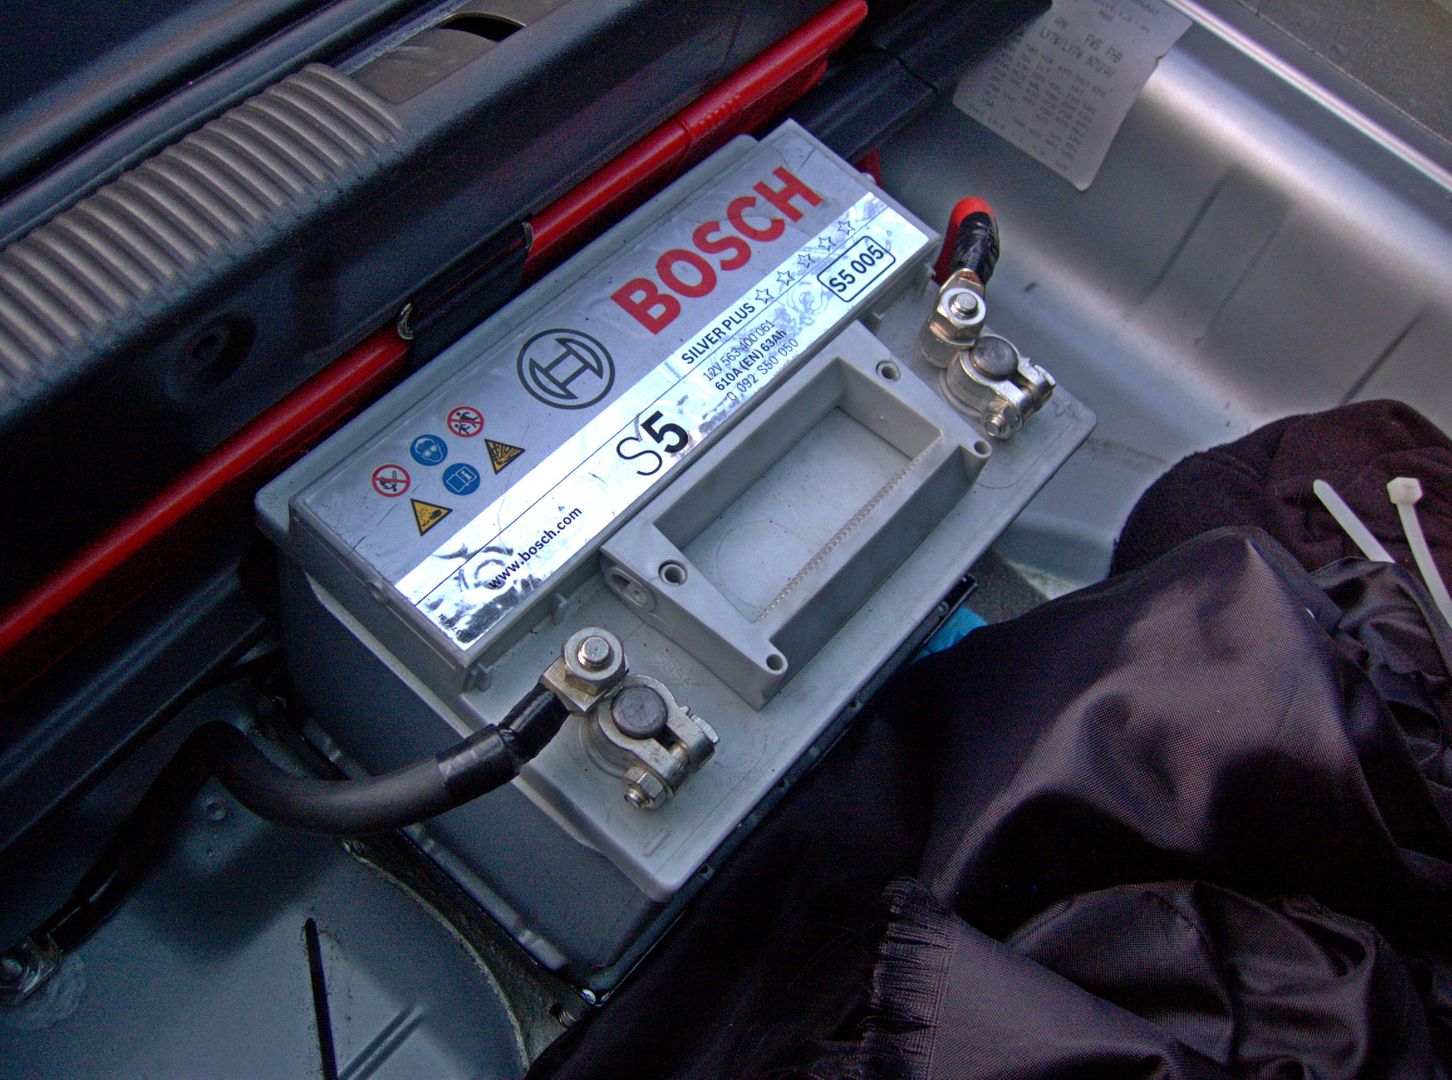
All good.. car starts and all seems well... and of course the engine bay still looks standard (ish) ;P
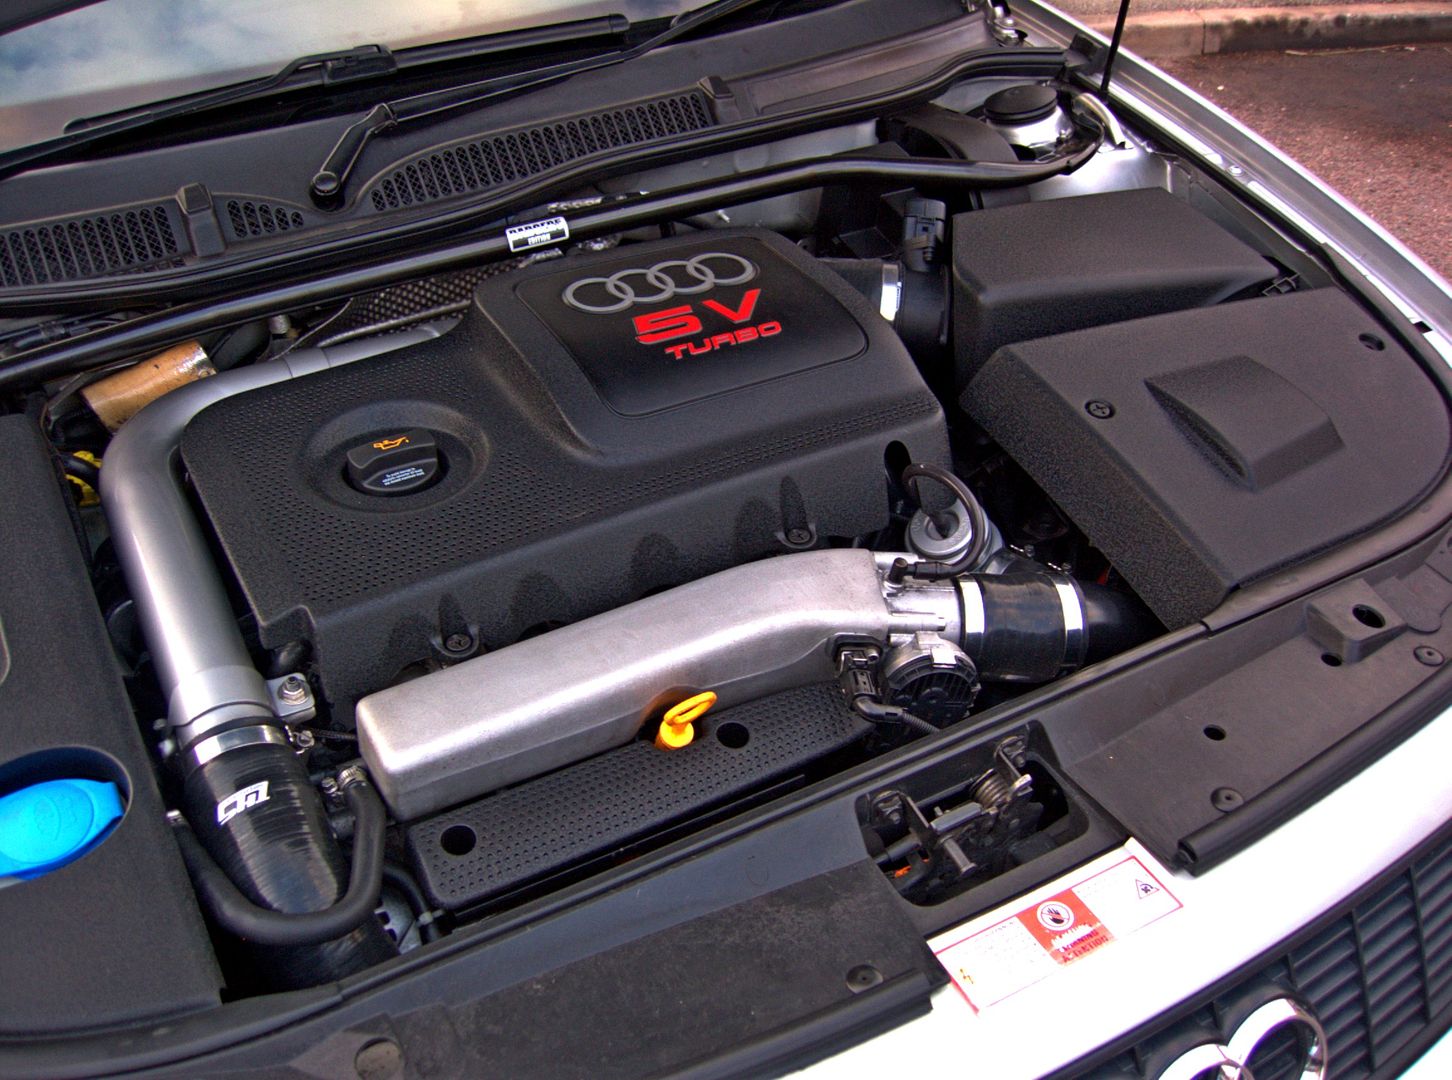
Things left to do include.... a new earth cable from the chassis to the top of the gearbox to replace the std one.. this will be made from 50mm cable too... tidy up of the fuse box and fix it in properly.... brackets to support the battery cover and the air box now I have removed the battery tray... and a short cable run to get power to the amps again
I have also ordered the batteries needed to sort the alarm unit so will be removing that sorting it out...
Happy days
<tuffty/>
Fitted the modded bracket....

Removed the glove box to make it easier to see what I was doing...

Taped the 50mm cable to the 4 gauge to make it easier to pull through...

..and removed the pollen filter housing for better access to get teh grommet fitted and sealant applied...

Terminated the end to the starter motor...

...and connected it and the fuse box that was on top of the battery to the terminal block...

Connected the battery and started the car...

All good.. car starts and all seems well... and of course the engine bay still looks standard (ish) ;P

Things left to do include.... a new earth cable from the chassis to the top of the gearbox to replace the std one.. this will be made from 50mm cable too... tidy up of the fuse box and fix it in properly.... brackets to support the battery cover and the air box now I have removed the battery tray... and a short cable run to get power to the amps again
I have also ordered the batteries needed to sort the alarm unit so will be removing that sorting it out...
Happy days
<tuffty/>
Nice and neat Tuffty as always.
Would that be the route you would run your wmi hose into the engine bay from the boot if you went for a boot wmi install.
Would that be the route you would run your wmi hose into the engine bay from the boot if you went for a boot wmi install.
Nice and neat Tuffty as always.
Would that be the route you would run your wmi hose into the engine bay from the boot if you went for a boot wmi install.
Thanks dude

Yeah, its the same route I have used on customer cars... however I plan to have mine up front now as I should have room under the battery cover for a small tank which will be enough for my requirements
<tuffty/>
Looking forward to seeing the gains on this once shes up and running. 25bhp xtra maybe.Thanks dude
Yeah, its the same route I have used on customer cars... however I plan to have mine up front now as I should have room under the battery cover for a small tank which will be enough for my requirements
<tuffty/>
I ran the cabling the same route for my battery relocation and went through the same grommet too
Just keep an eye on it leaking though as i thought mine was sealed but it was letting a small amount run down the cable and straight under the carpet
I also didnt vent to battery outside but never even had a whiff of anything even running no seats
Just keep an eye on it leaking though as i thought mine was sealed but it was letting a small amount run down the cable and straight under the carpet
I also didnt vent to battery outside but never even had a whiff of anything even running no seats
Used plenty of sealant in and around the grommet so hopefully should be ok... did the same when it was the 4 gauge for the amps and never had an issue so fingers crossed... should find out soon enough in this sodding weather though 
<tuffty/>
<tuffty/>
Bit more done tonight seeing as the weather is ok...
The amount of free space now the battery is gone is quite impressive...
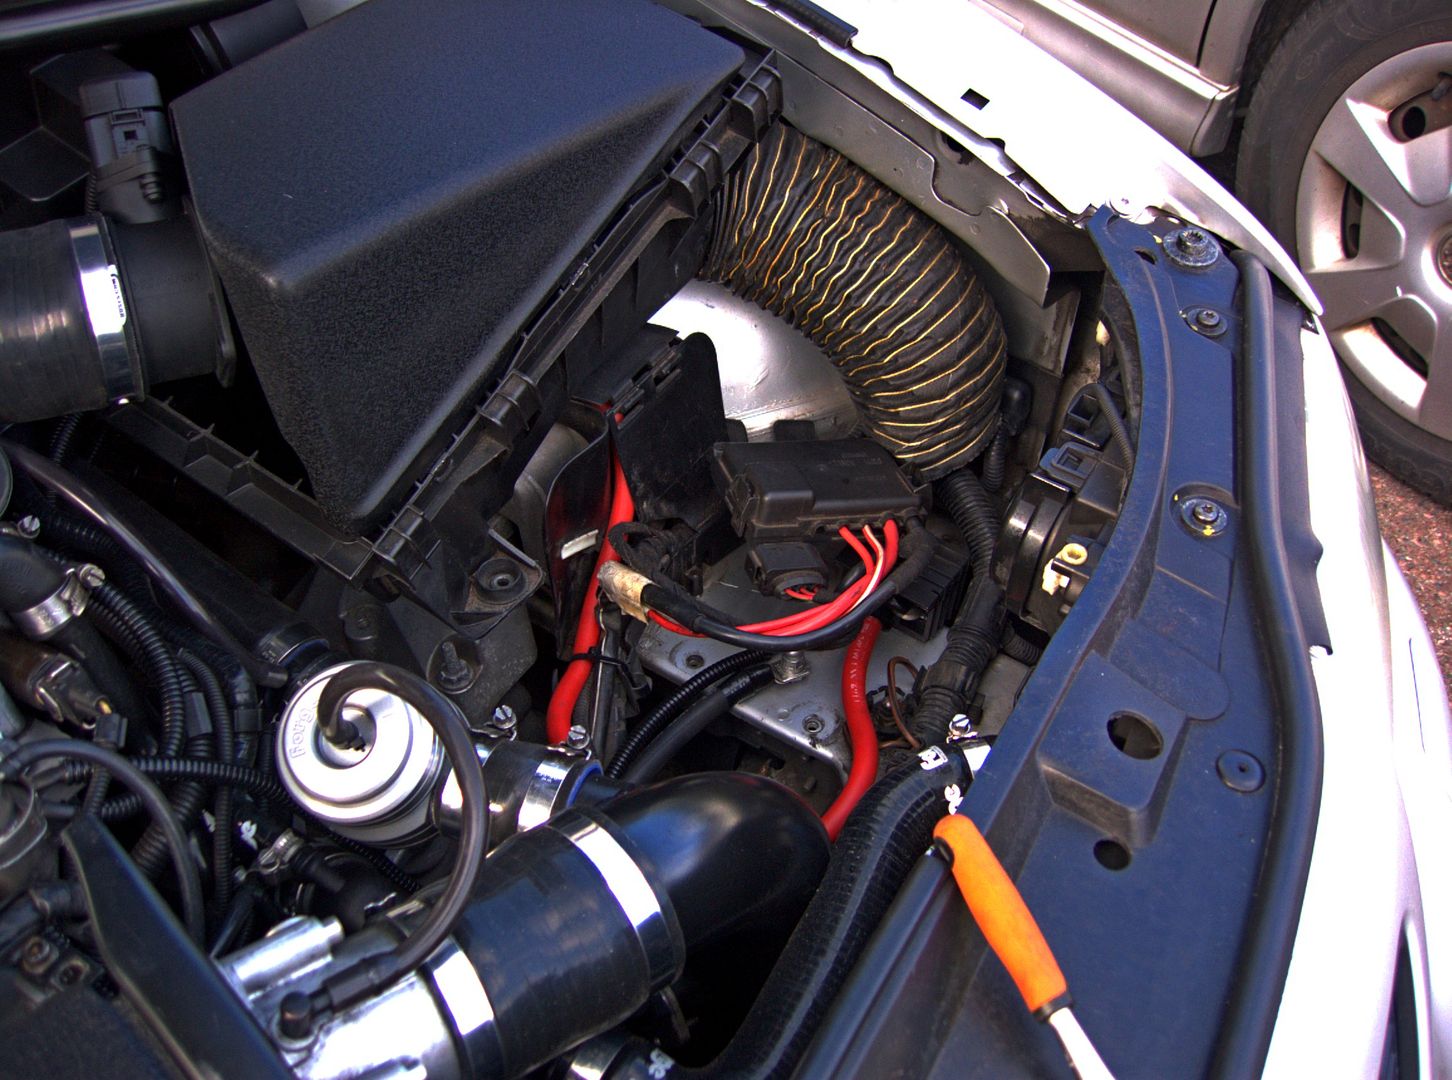
Just need to pull my finger out I guess and get the inlet manifold sorted so I can make use of the space for new pipes and other stuff
I got hold of a new loom for the coil packs as I had 'repaired' mine ages ago and was looking sorry for itself with broken plugs and dodgy insulation...
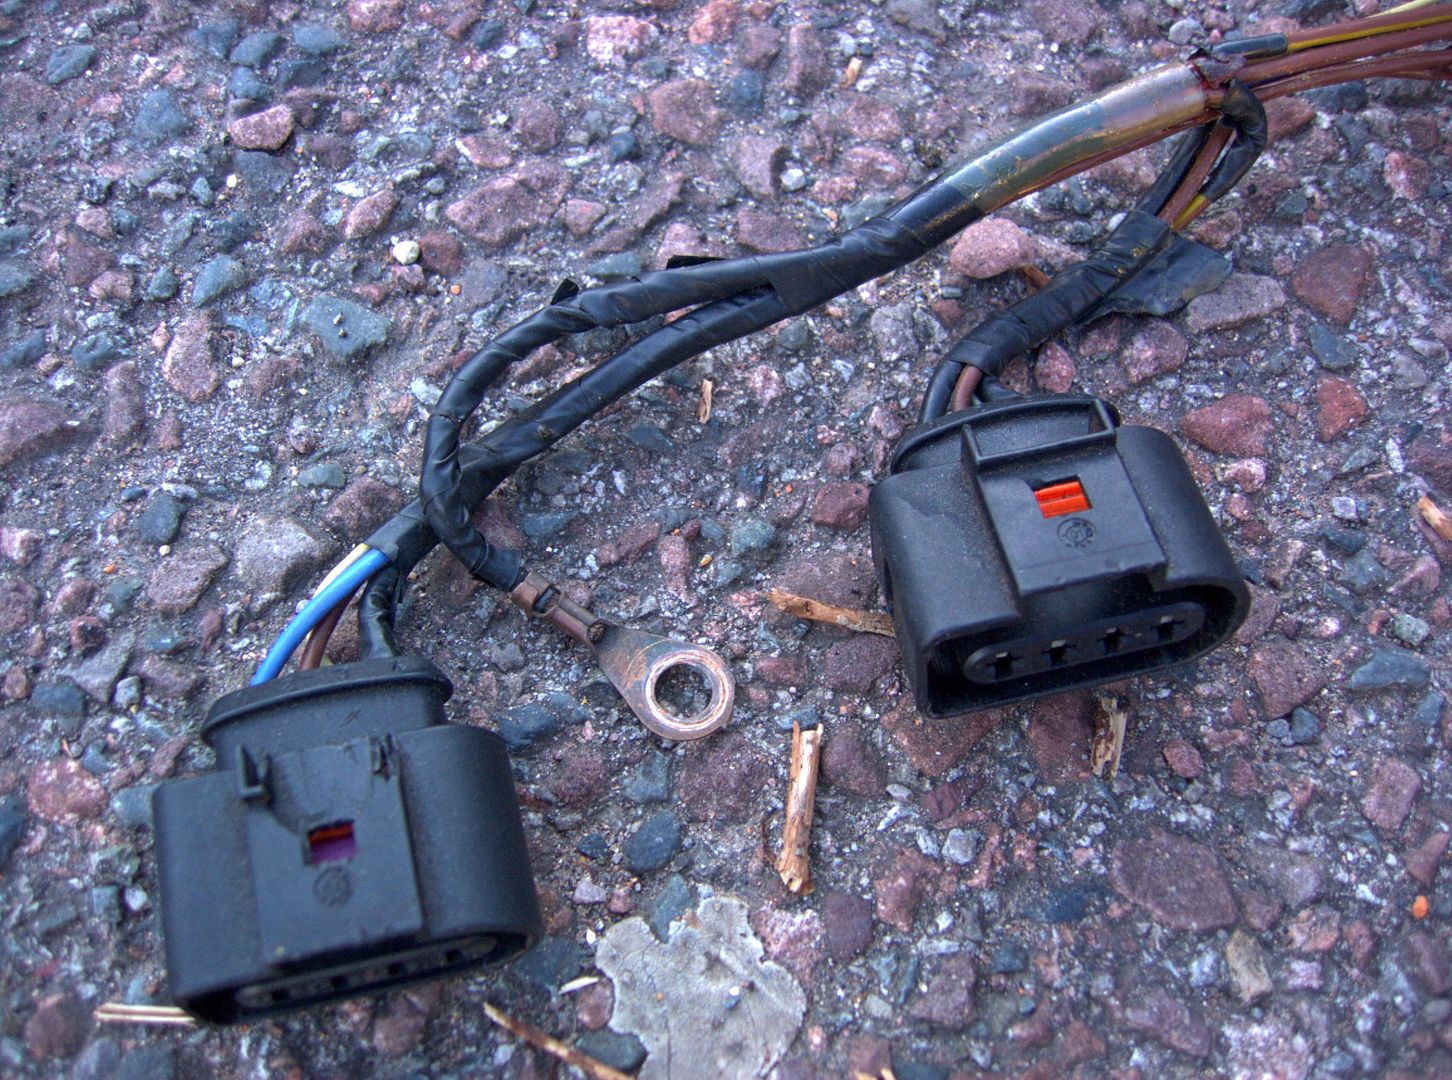
Cut the new loom in and soldered the wires rather than try and run it back to the ECU etc... mainly due to the replacement being a generic loom rather than one specific for the S3... the S3 loom has 3 earth wires that connect to the main earth of the loom where the replacement didn't so had to make sure that was all joined up... just something to consider when doing this..
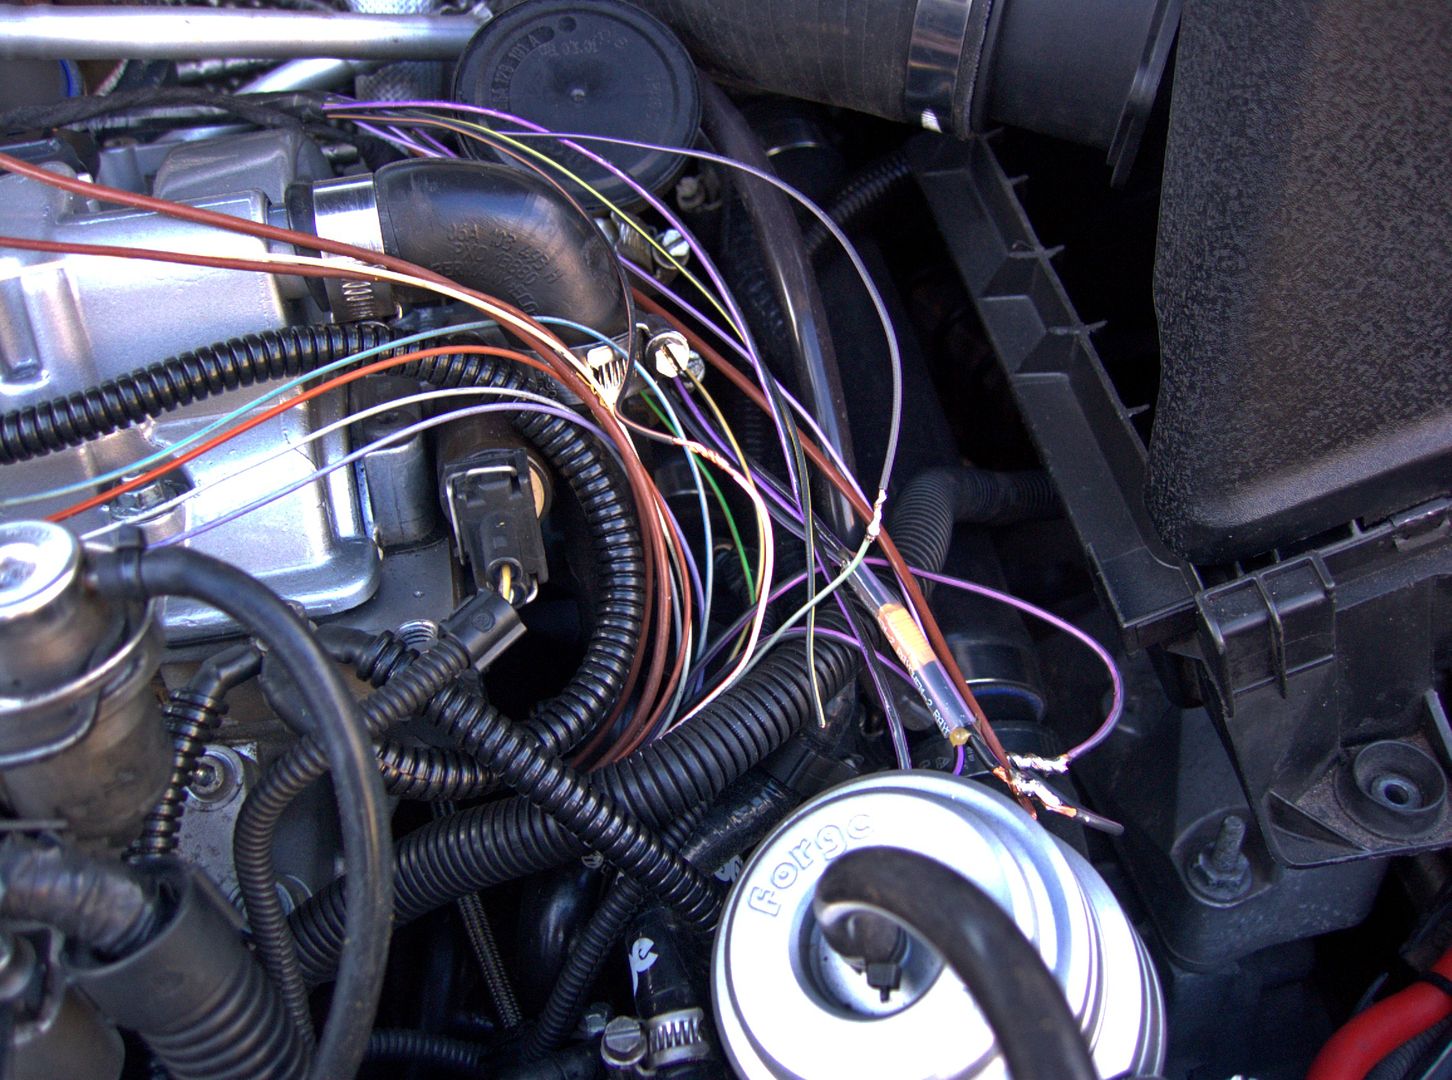
All done, need to tidy the wiring a bit and replace some of the convoluted sheathing but its another job done
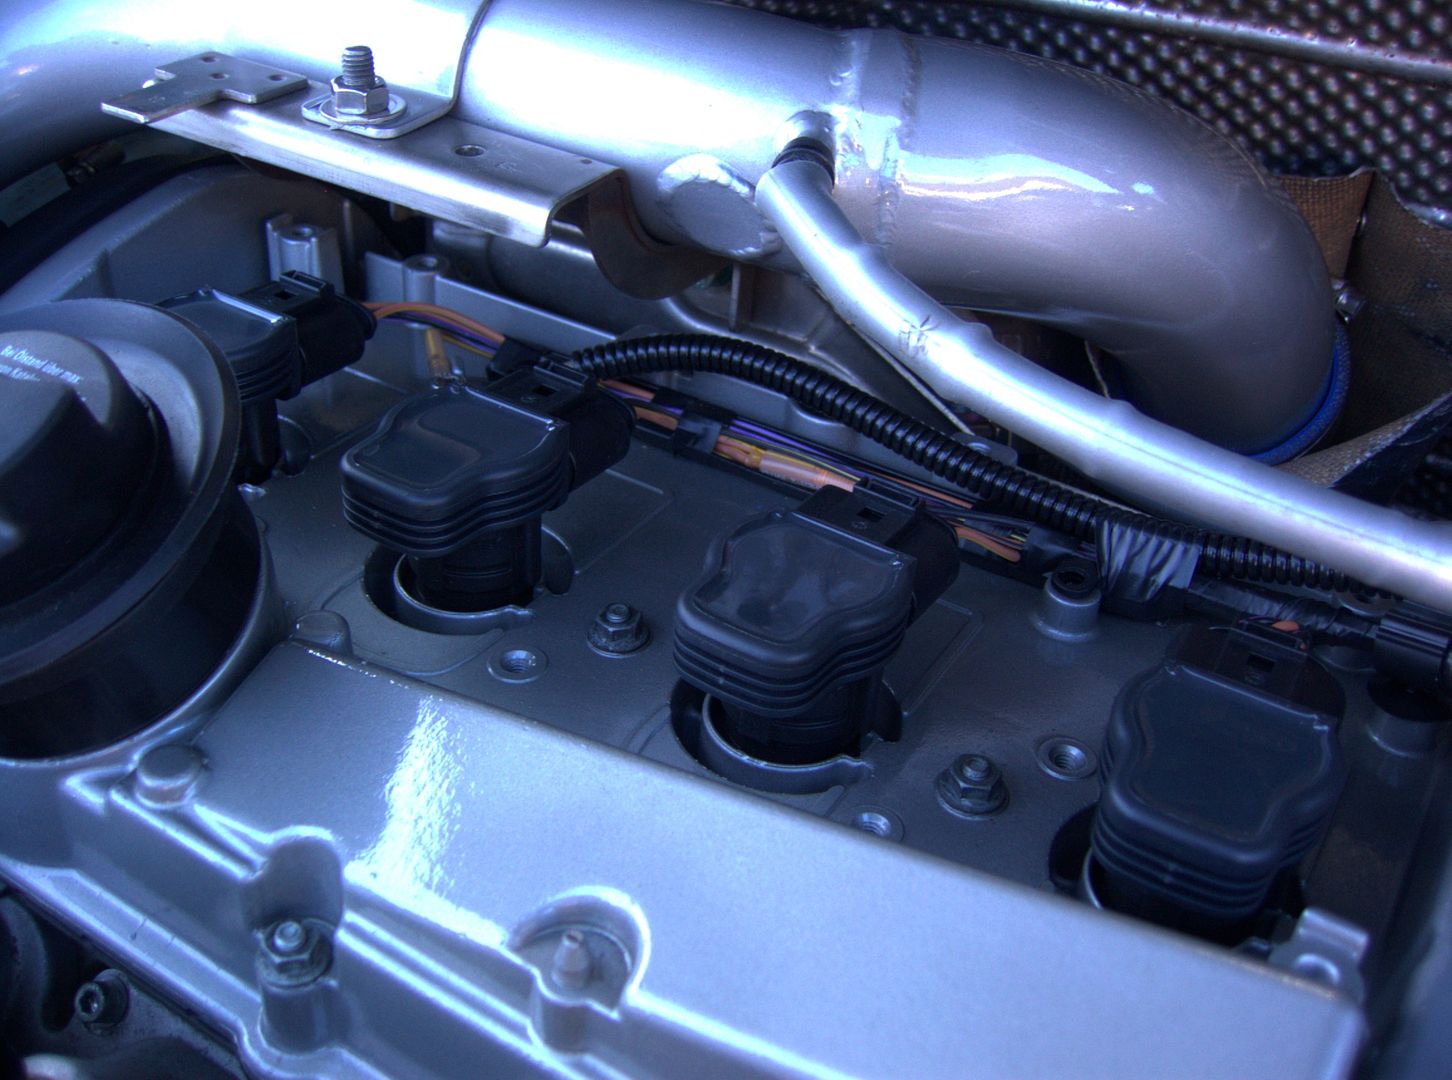
Still waiting on the batteries for the alarm but they are in stock now so hopefully not too long to wait now... once I get that finished and the power cable terminated for the amps I can put the interior back together... yay!
<tuffty/>
The amount of free space now the battery is gone is quite impressive...

Just need to pull my finger out I guess and get the inlet manifold sorted so I can make use of the space for new pipes and other stuff
I got hold of a new loom for the coil packs as I had 'repaired' mine ages ago and was looking sorry for itself with broken plugs and dodgy insulation...

Cut the new loom in and soldered the wires rather than try and run it back to the ECU etc... mainly due to the replacement being a generic loom rather than one specific for the S3... the S3 loom has 3 earth wires that connect to the main earth of the loom where the replacement didn't so had to make sure that was all joined up... just something to consider when doing this..

All done, need to tidy the wiring a bit and replace some of the convoluted sheathing but its another job done

Still waiting on the batteries for the alarm but they are in stock now so hopefully not too long to wait now... once I get that finished and the power cable terminated for the amps I can put the interior back together... yay!
<tuffty/>
Bill found some time in his busy schedule to weld up my runners (thanks dude )...
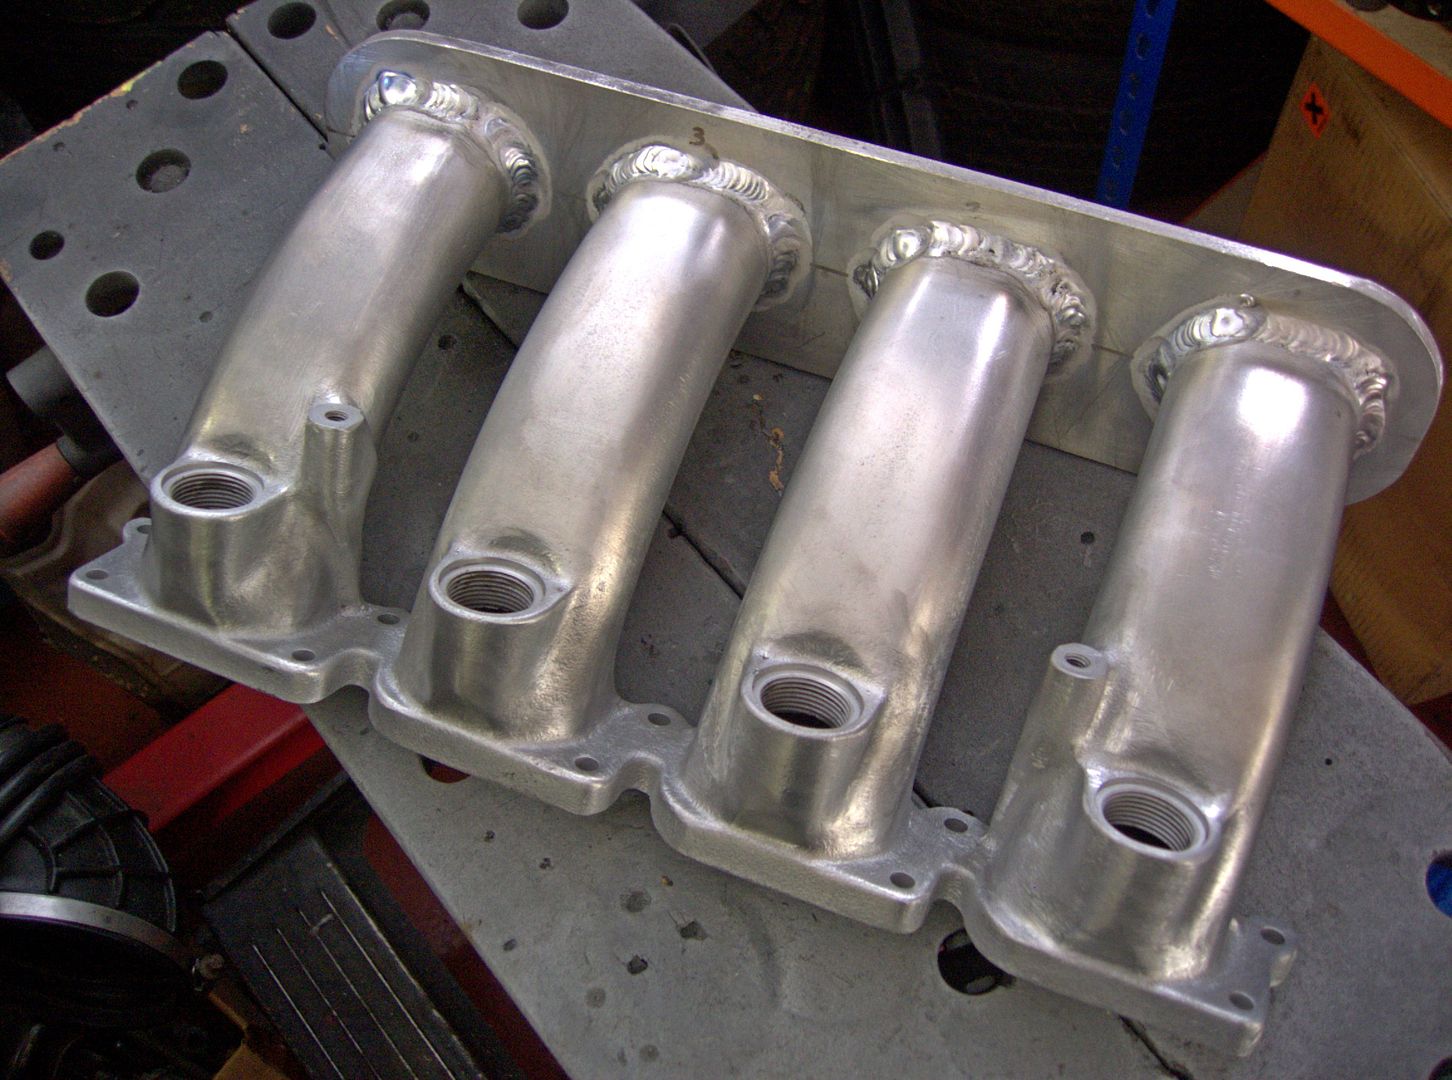
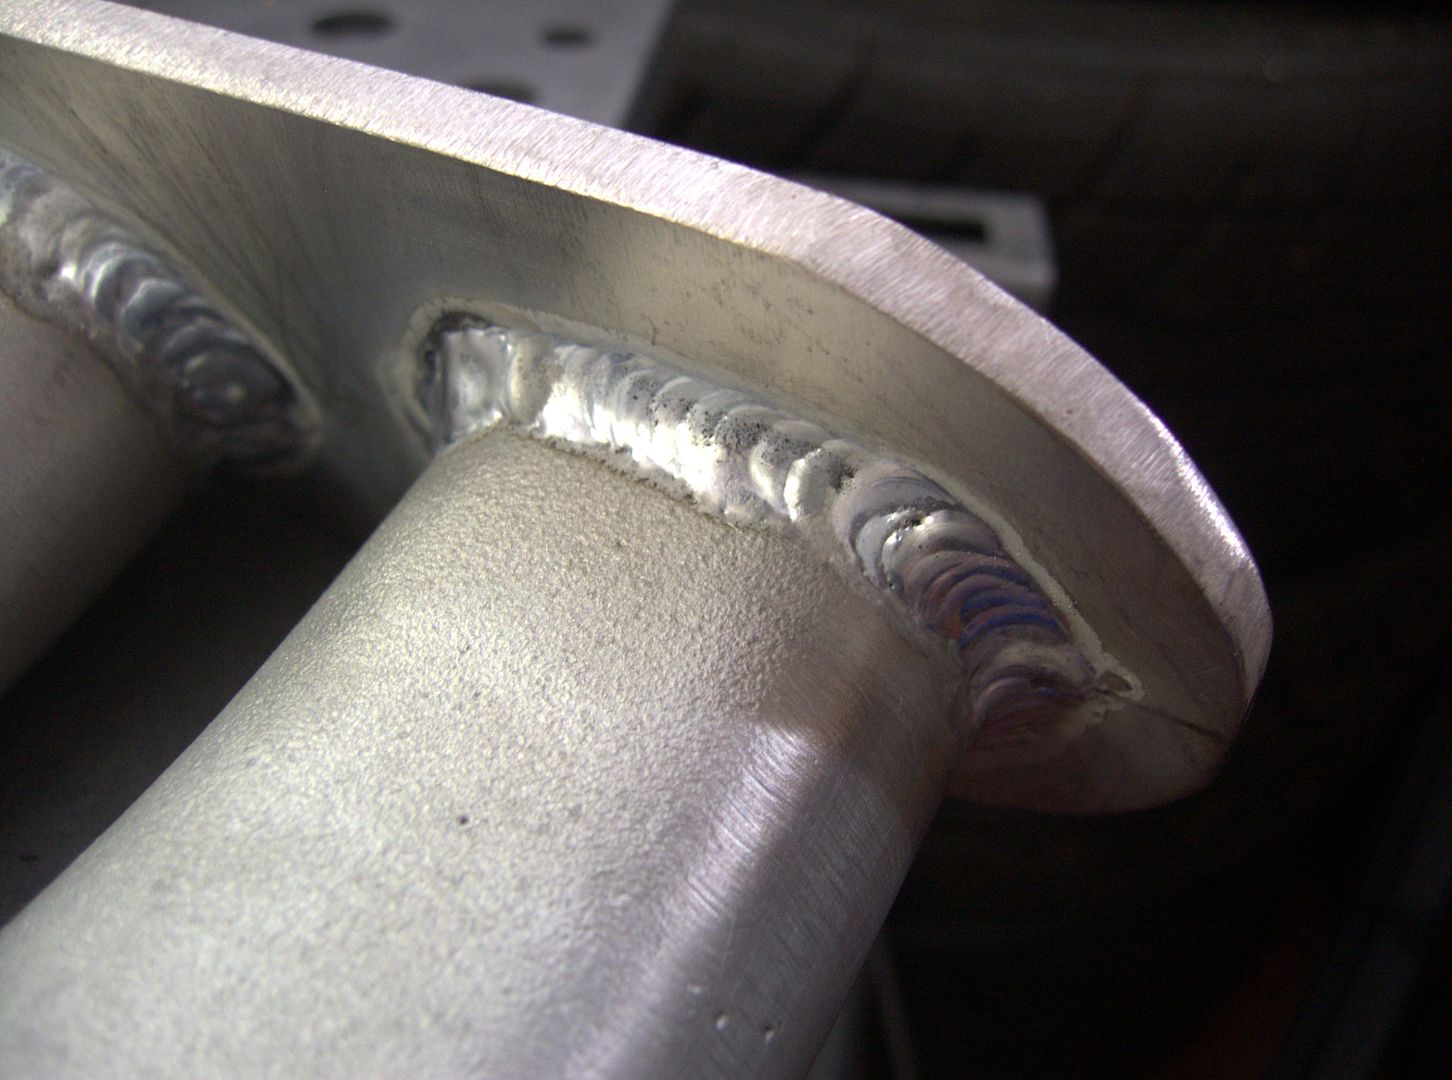
Then went about porting (only a little) and shaping the top of the runners to smooth the flow a bit...
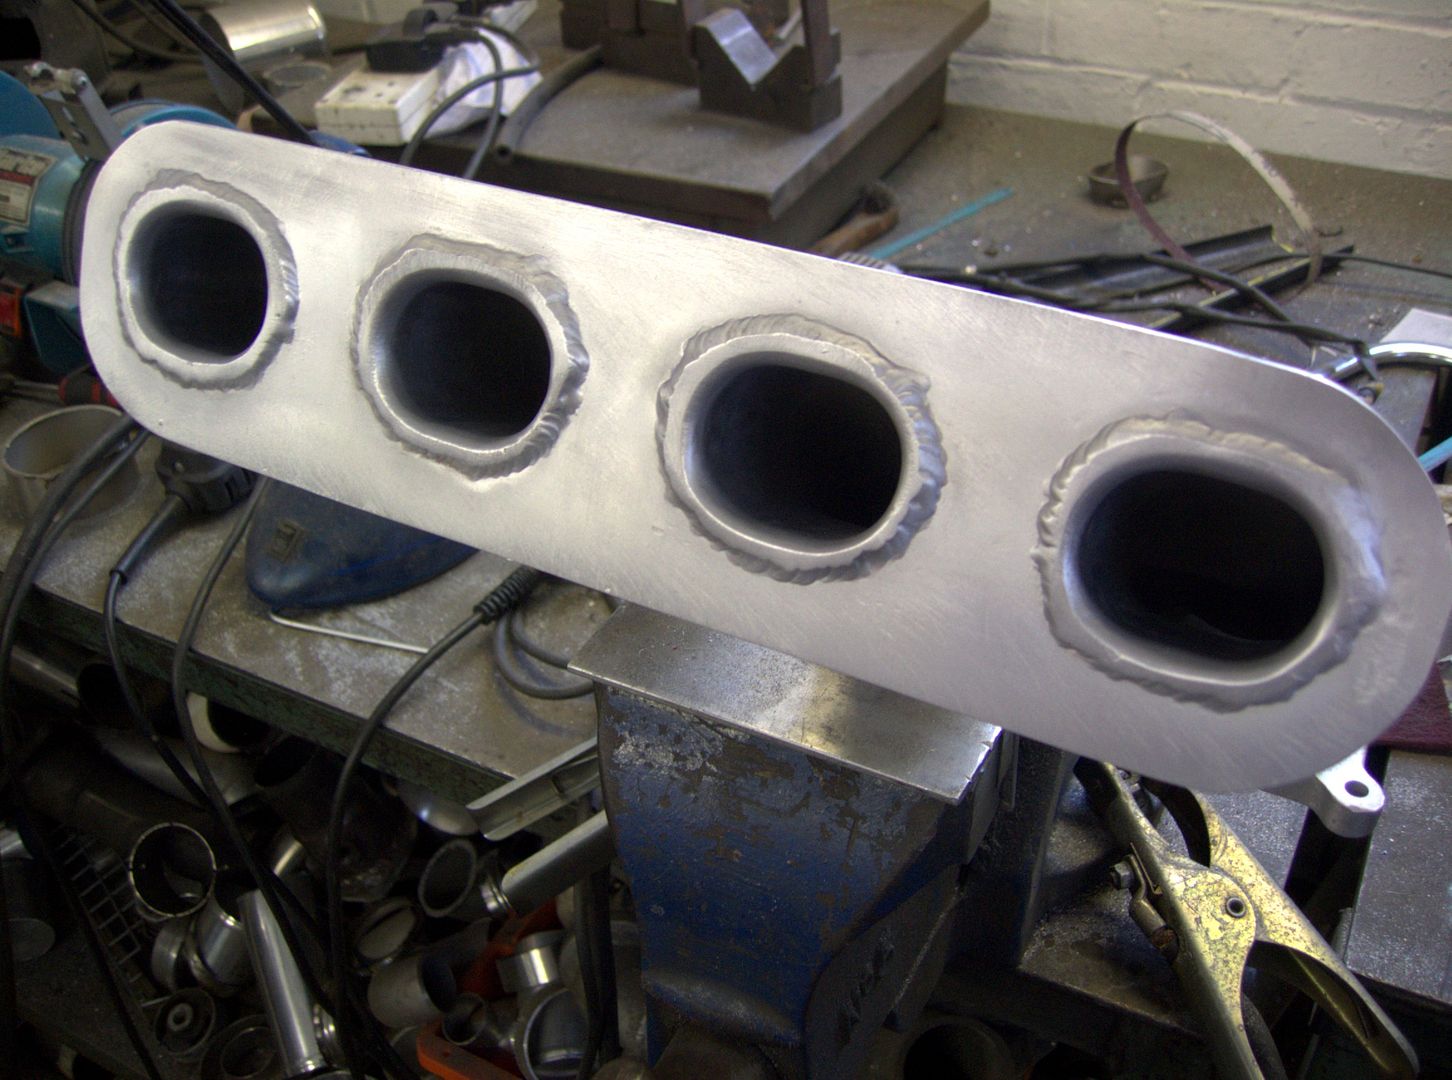
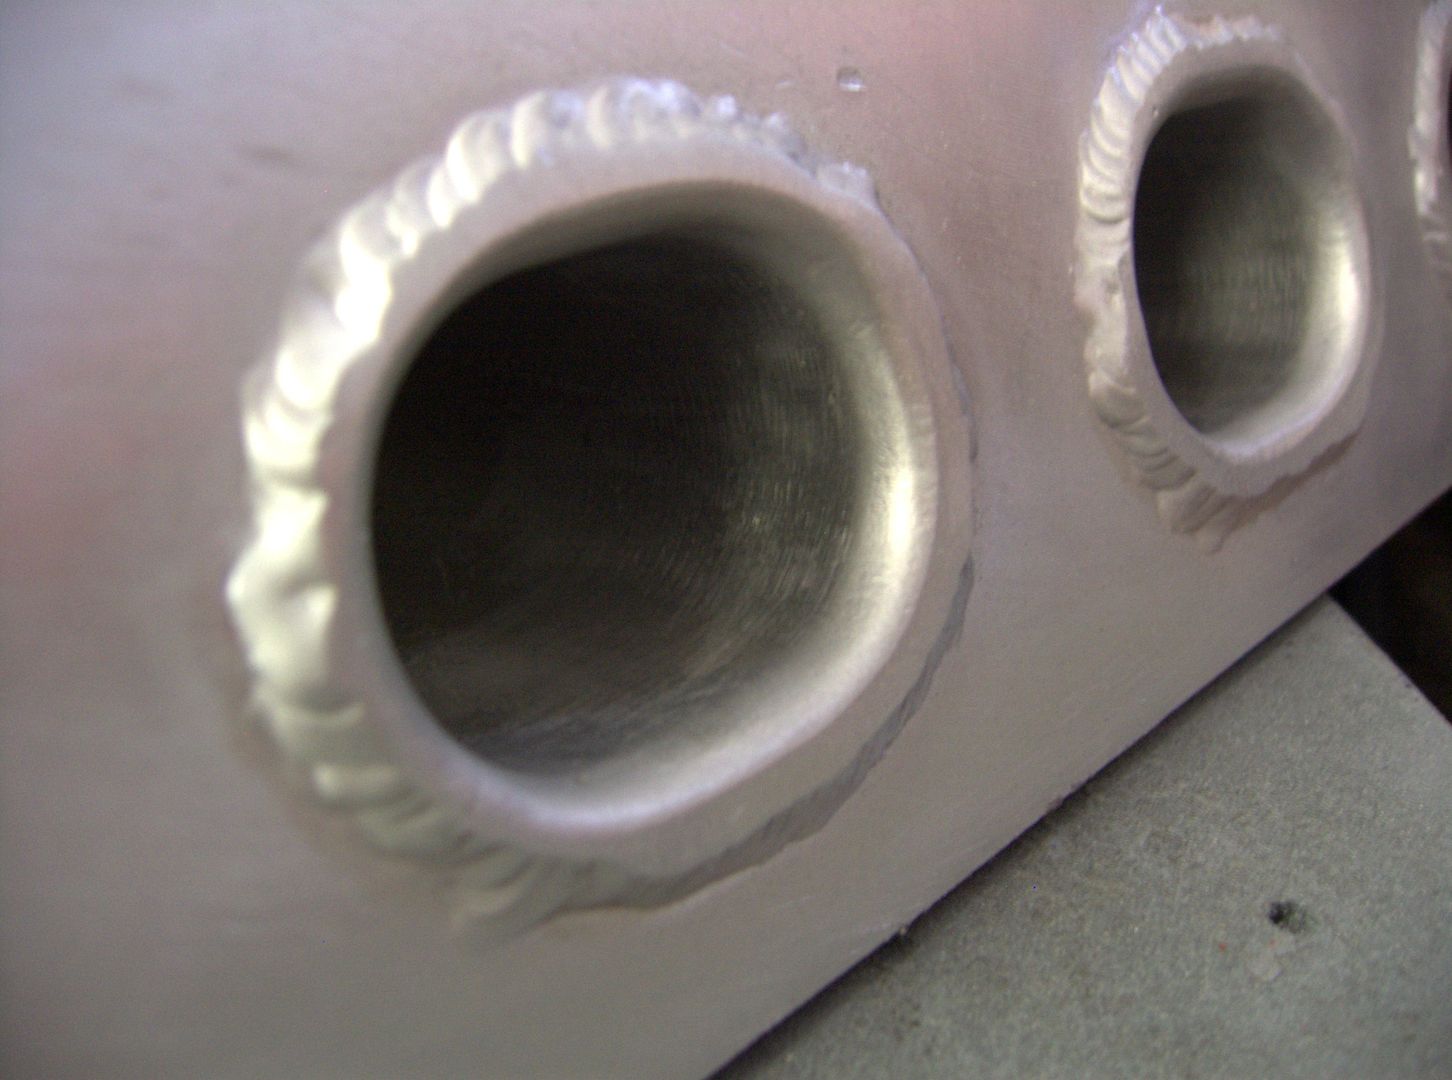
...and opened the runners at the head a tad...
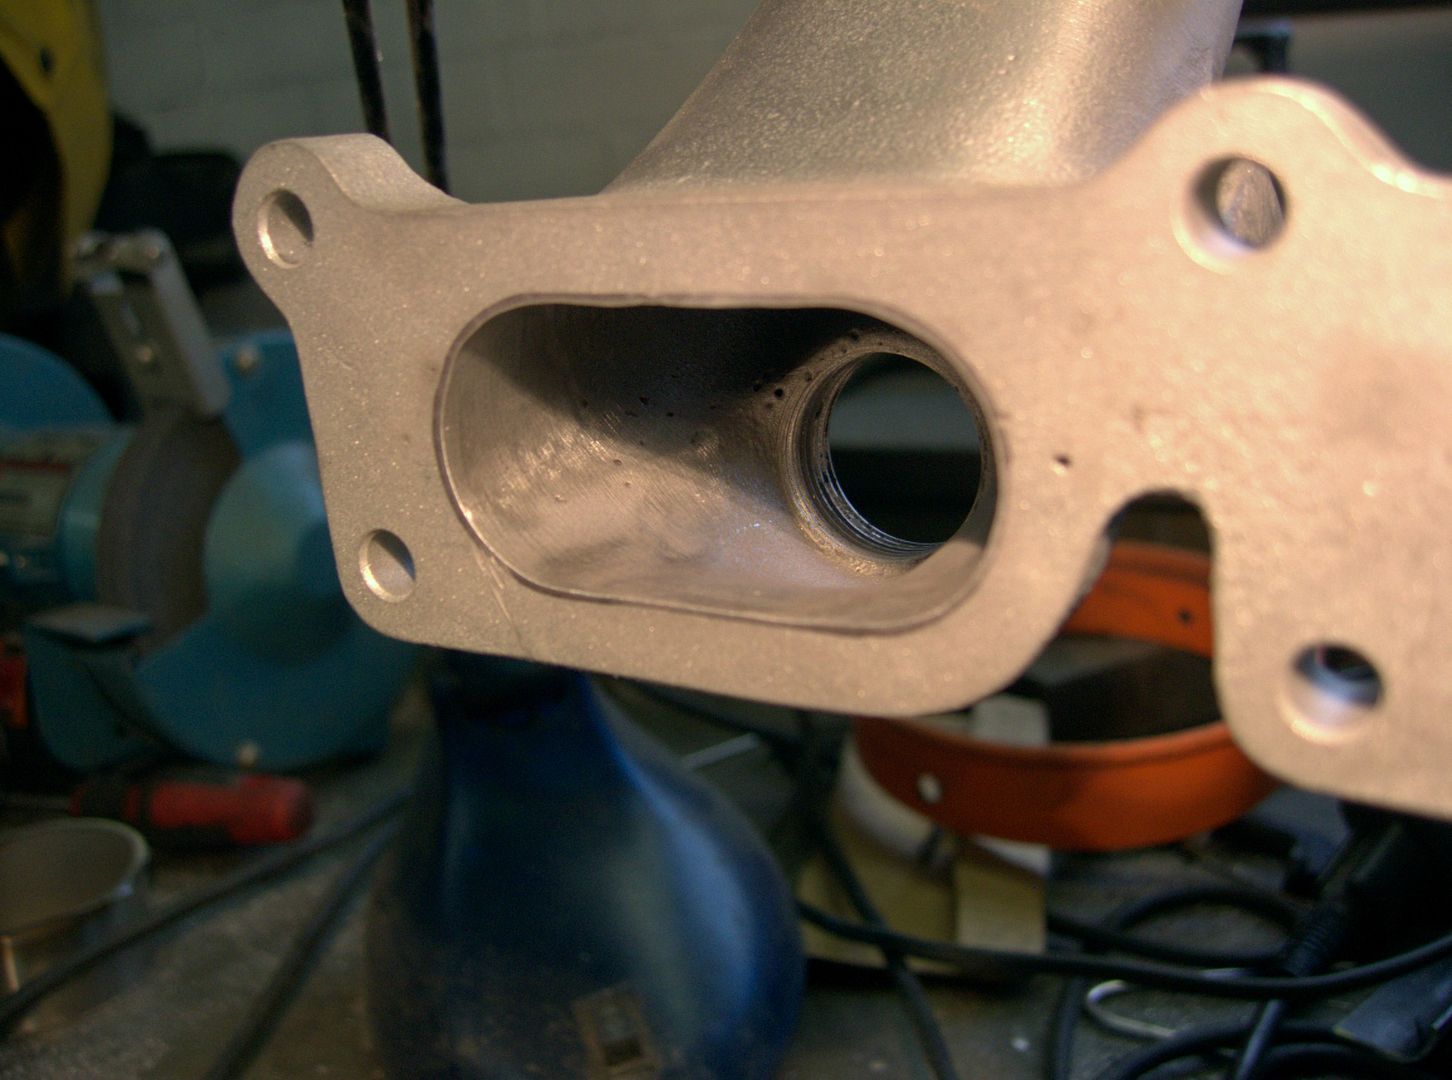
I have a TB adaptor coming for the std TB (60mm) as I am sticking with that for now and some other bits to do before painting and fitting... a plate for the vac outlets and a boss for the air temp sensor is next along with posts for the cover mounts and some way of fixing the dipstick in place...
Then moved onto replacing MAF plug as mine has been in a dire state for a while...
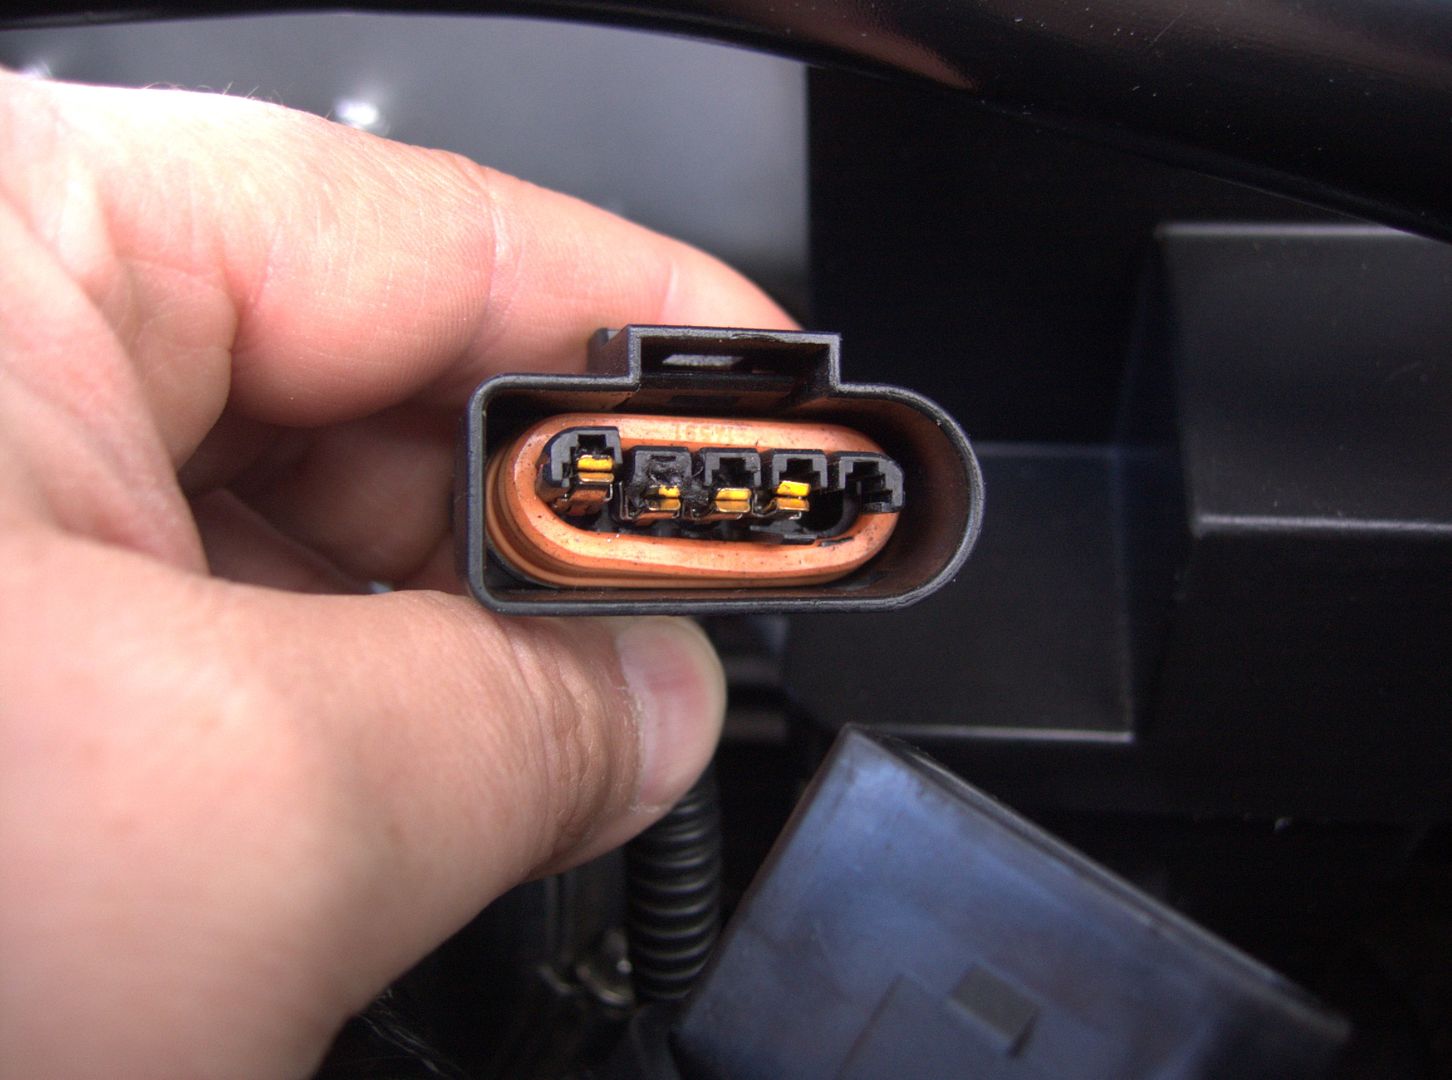
Held in with a bit of 'gorilla snot' (as its affectionately known) its not the best really... so... order a new plug from TPS (thanks to Jason.s for help with the part number, '1J0 973 775 A')
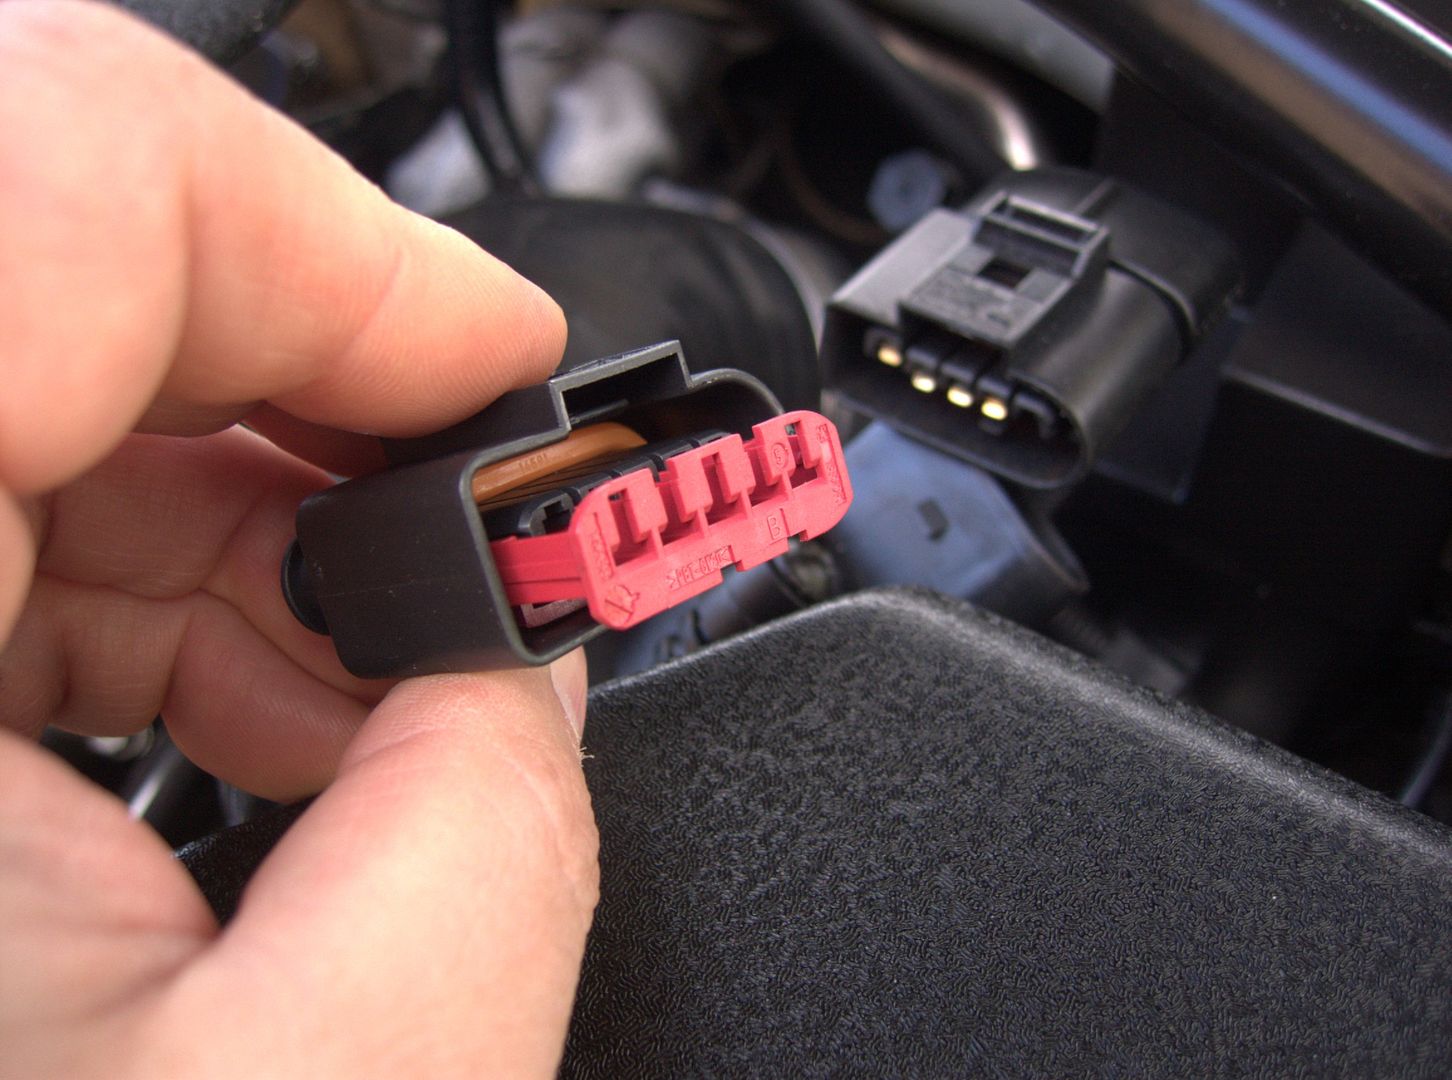
My red bit had disintegrated a long time ok... removing the wiring terminals normally requires a tool for popping the little tangs that hold them in the plug but as mine was mostly in bits they just pulled out easily... I did take a pic of the wires for reference before taking them out...
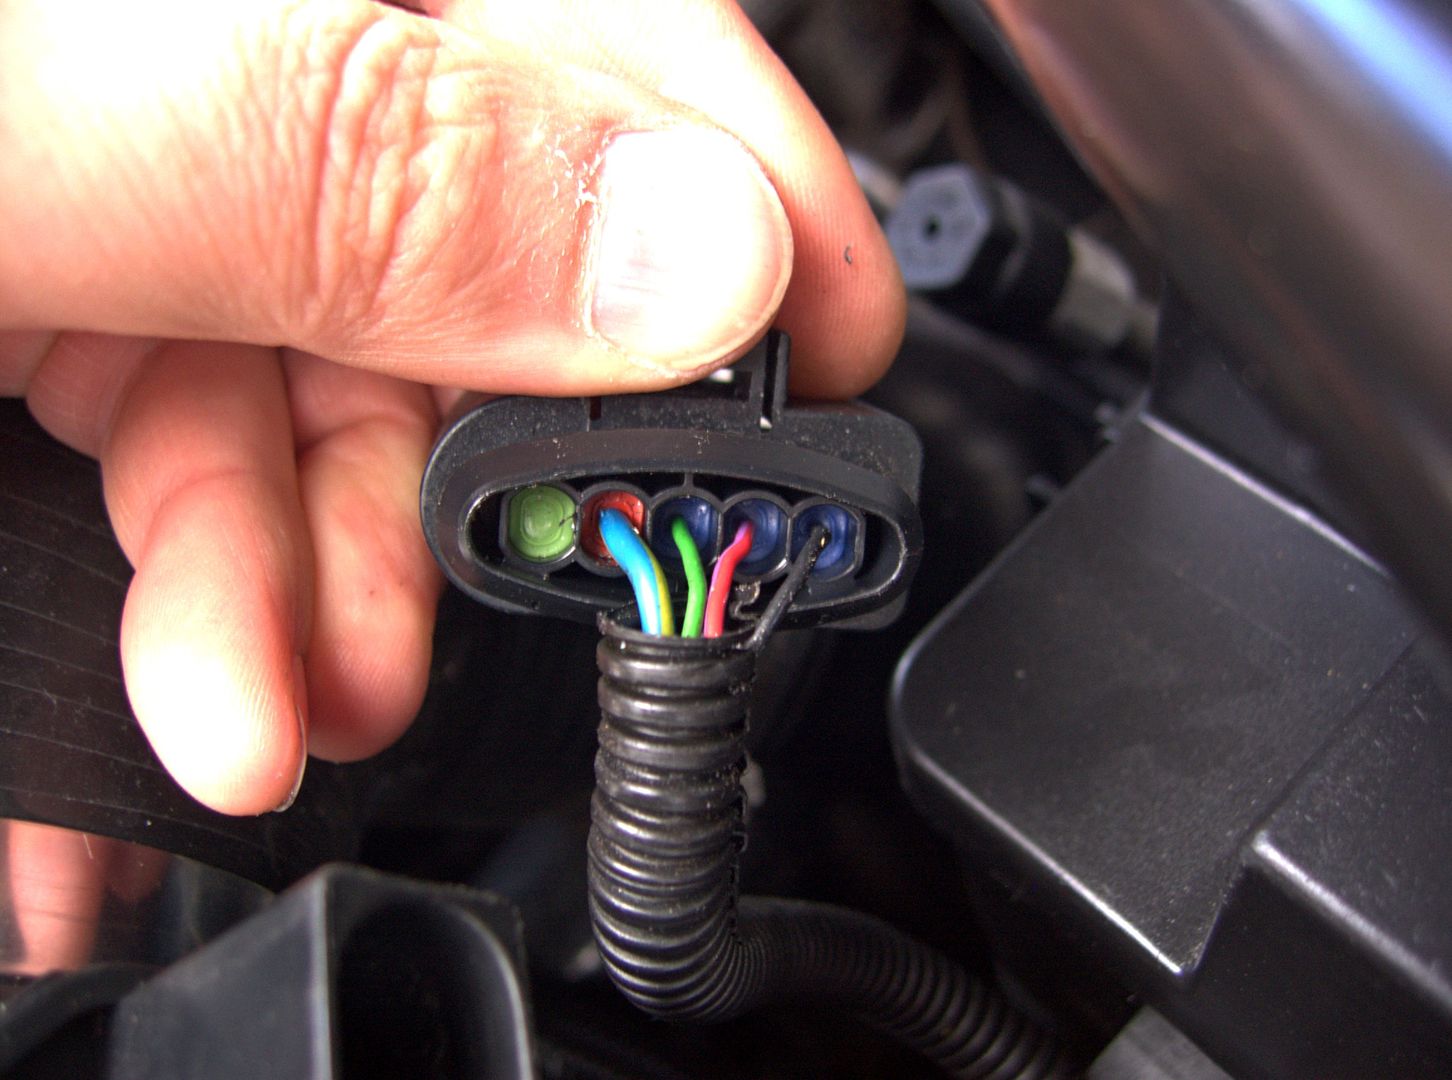
Wires out and you can see the little tangs that hold the pins in...
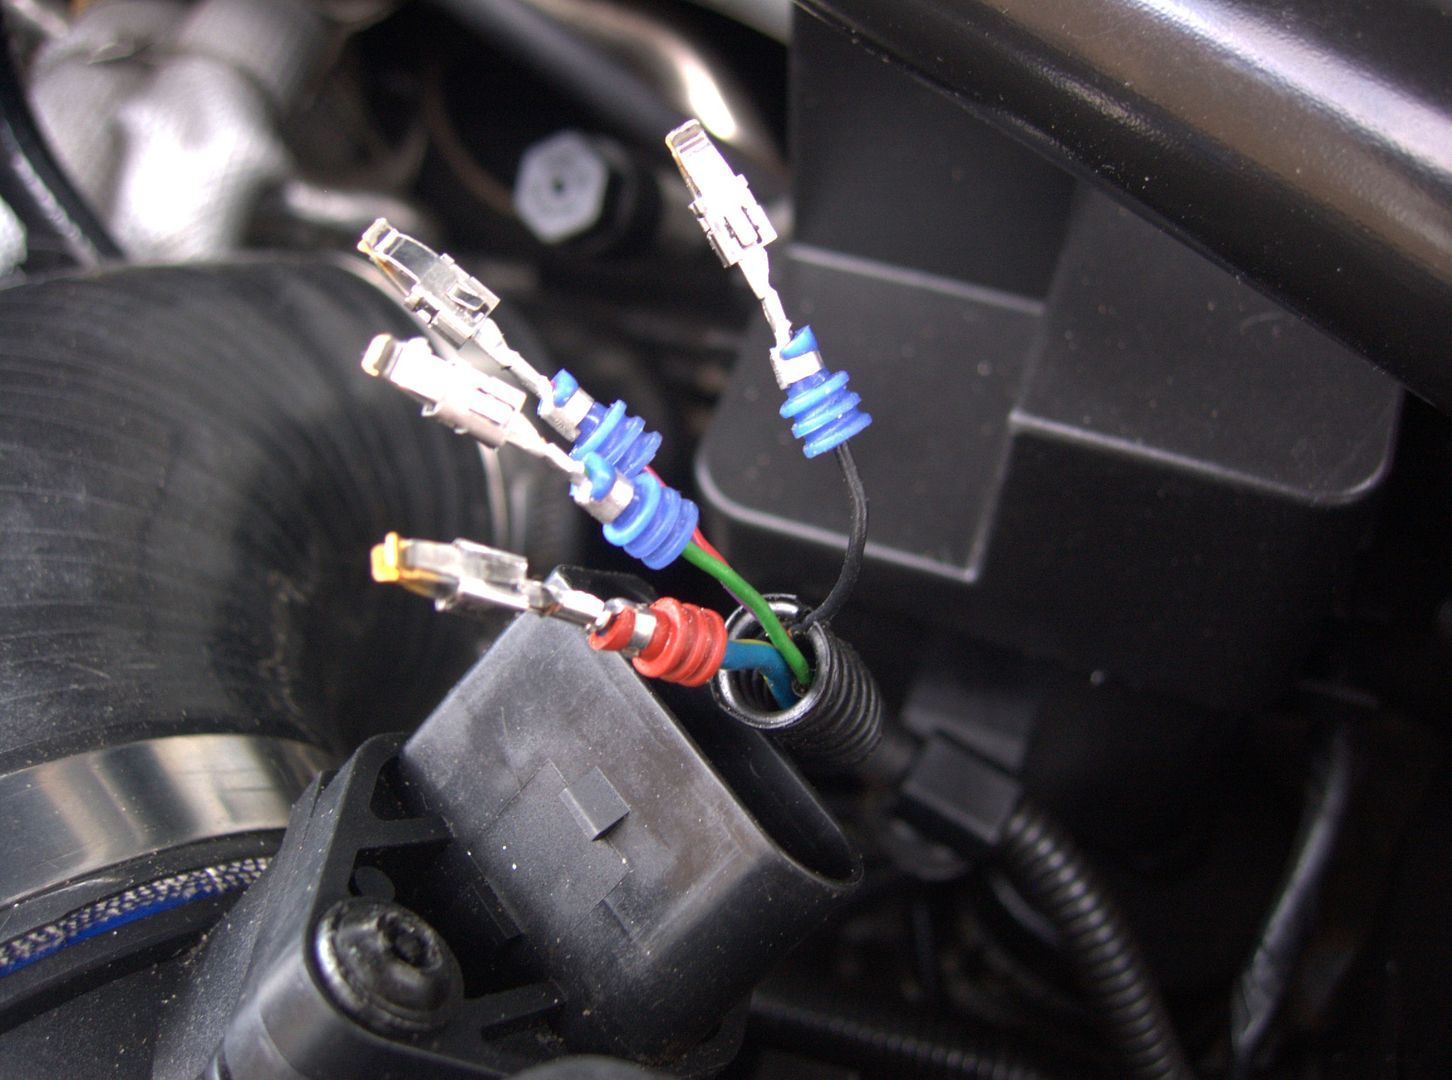
Wires popped back in...
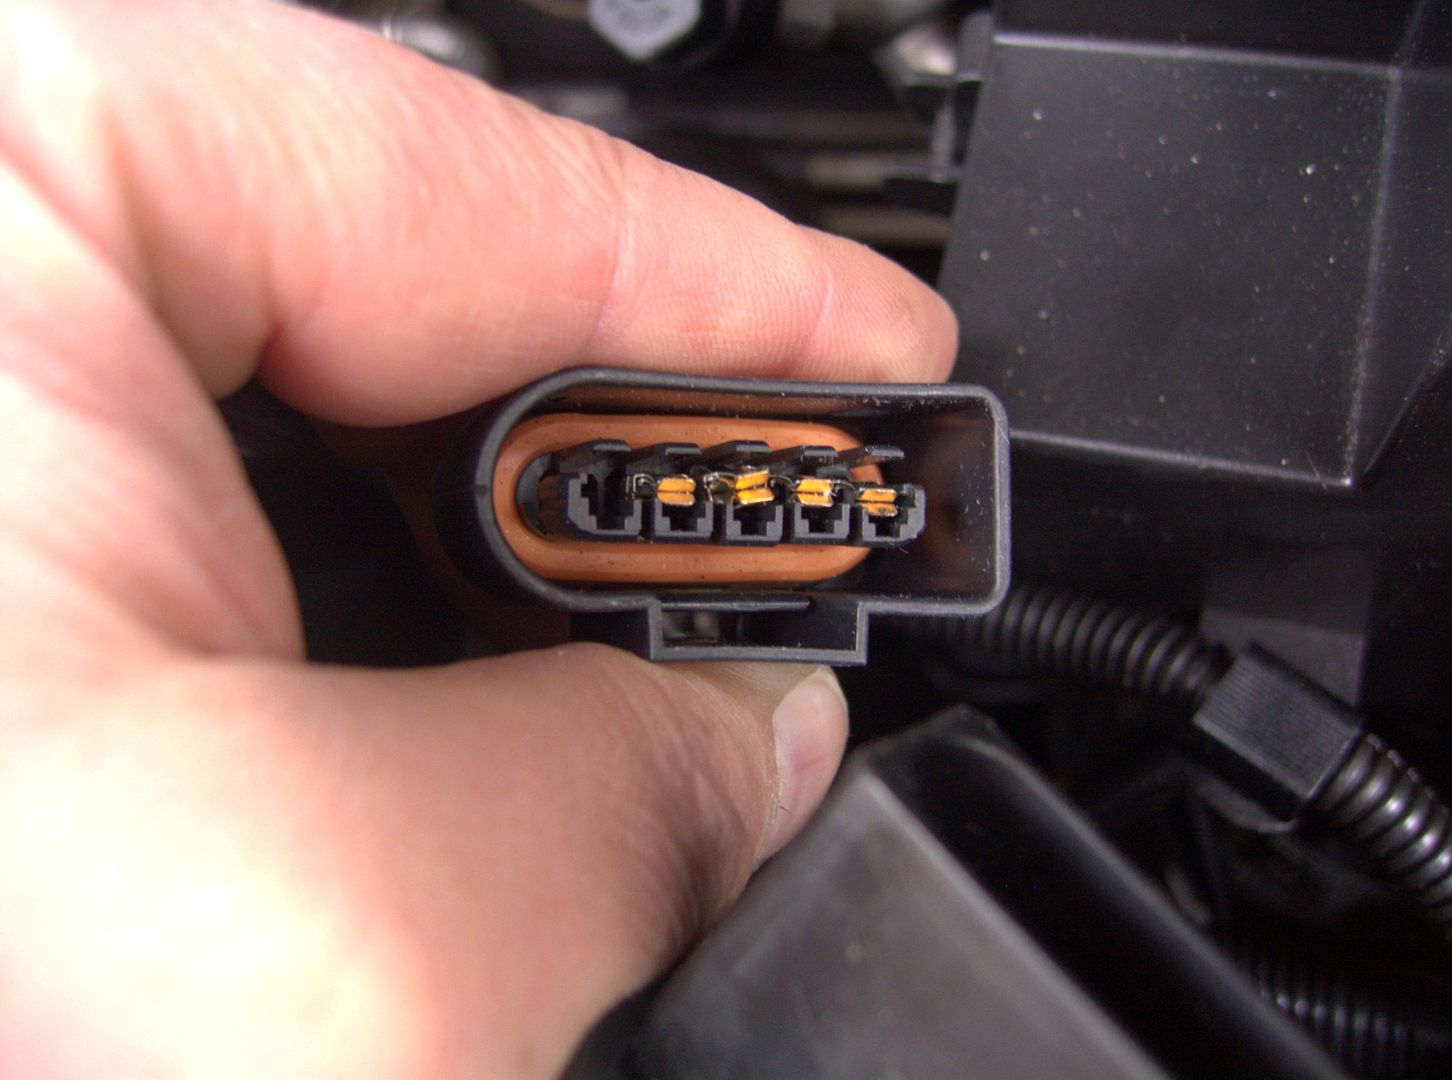
...and the red locking piece in place..
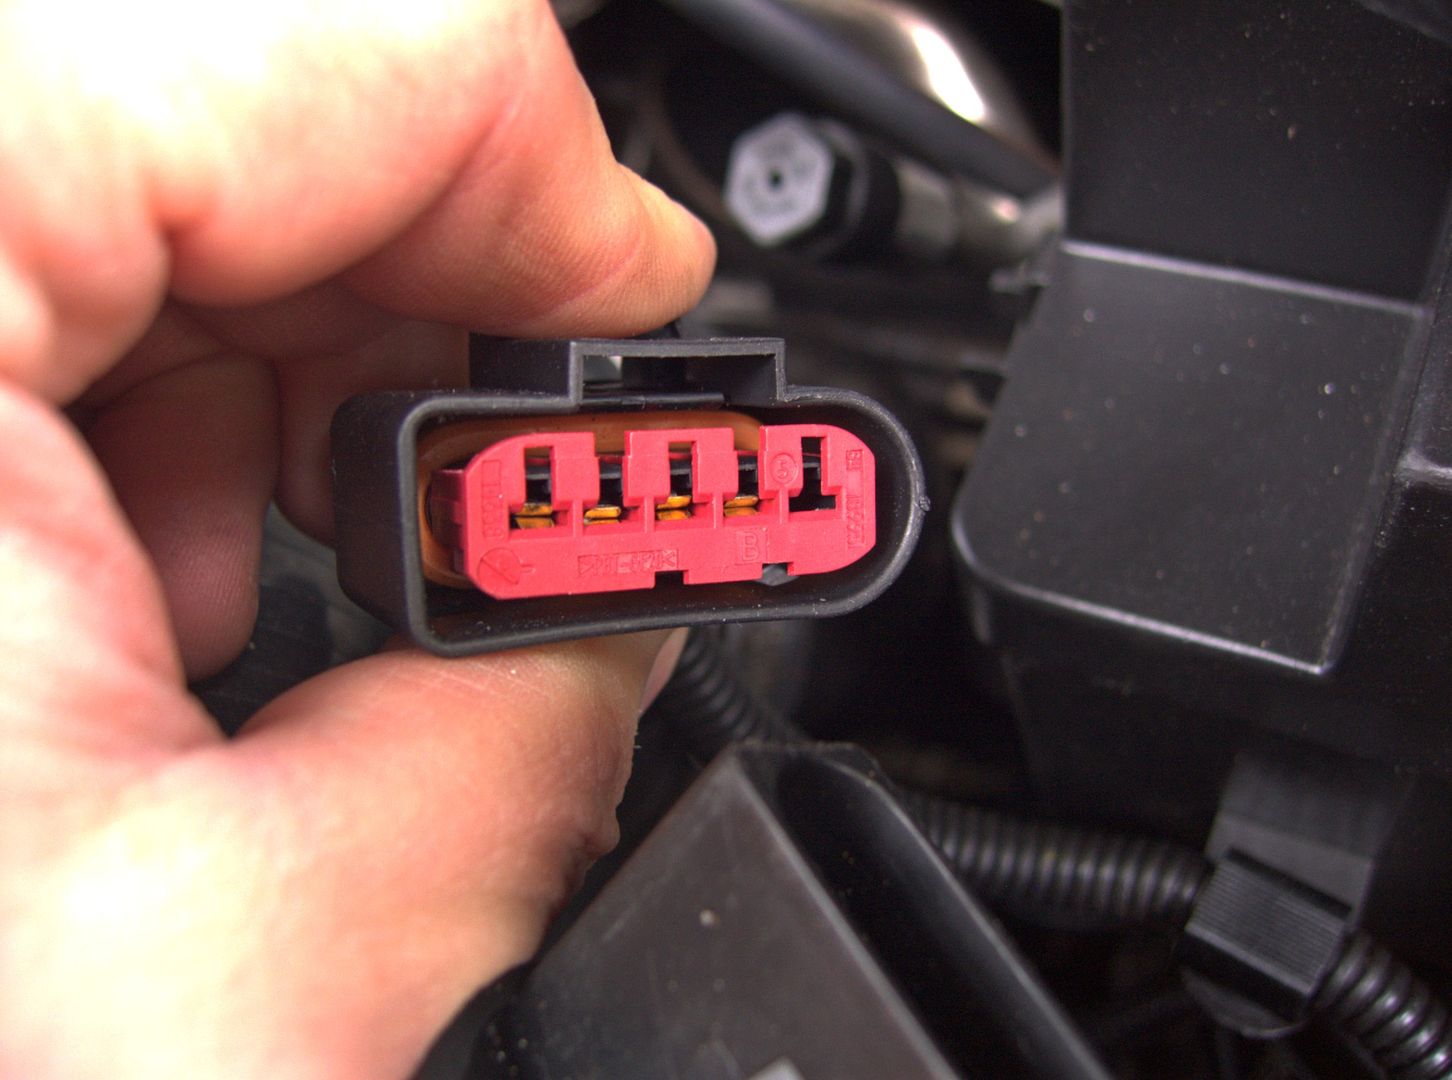
Thats a couple more little jobs off the list... will see how things go tomorrow and make a start on prepping the plenum..
<tuffty/>


Then went about porting (only a little) and shaping the top of the runners to smooth the flow a bit...


...and opened the runners at the head a tad...

I have a TB adaptor coming for the std TB (60mm) as I am sticking with that for now and some other bits to do before painting and fitting... a plate for the vac outlets and a boss for the air temp sensor is next along with posts for the cover mounts and some way of fixing the dipstick in place...
Then moved onto replacing MAF plug as mine has been in a dire state for a while...

Held in with a bit of 'gorilla snot' (as its affectionately known) its not the best really... so... order a new plug from TPS (thanks to Jason.s for help with the part number, '1J0 973 775 A')

My red bit had disintegrated a long time ok... removing the wiring terminals normally requires a tool for popping the little tangs that hold them in the plug but as mine was mostly in bits they just pulled out easily... I did take a pic of the wires for reference before taking them out...

Wires out and you can see the little tangs that hold the pins in...

Wires popped back in...

...and the red locking piece in place..

Thats a couple more little jobs off the list... will see how things go tomorrow and make a start on prepping the plenum..
<tuffty/>
Similar threads
Model Year 20/21
Creak from steering at low speed / stationary
- Replies
- 10
- Views
- 428
- Replies
- 3
- Views
- 569


