My LCR Since '05 with Static+ Front Air Lift - Project Gone to a New Home.

Oct 21, 2006
1,226
1
Norfolk
Not a huge update, but things appear to be moving forward in the right direction…

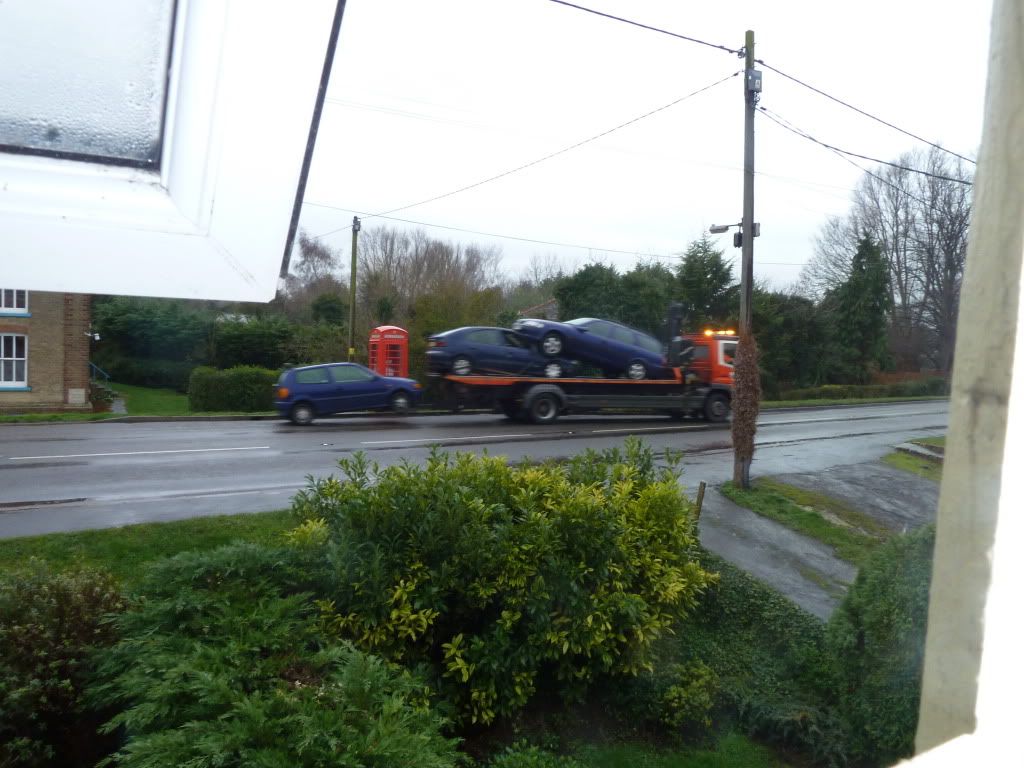
The daily is no more…
P1020701.jpg


We’ll be moving house very soon and this means that I have no need for my daily driver. I’d bought the Polo in 2009 for a couple of hundred quid as I’d planned to take my car off the road to complete some engine work. In the 2 1/2 years that I’ve owned the polo, it has never put a foot wrong, passed MOTs etc. and covered 40,000 miles in the end. Wasn’t particularly safe and was very noisy; I didn’t feel comfortable with someone else driving it knowing this, so it was taken away today for scrap. I got £150 for it, which I was more than happy with!

Awesome little motor! The Fens had nothing on her…Good news is I’ll be able to drive the Leon more :D

Suspension

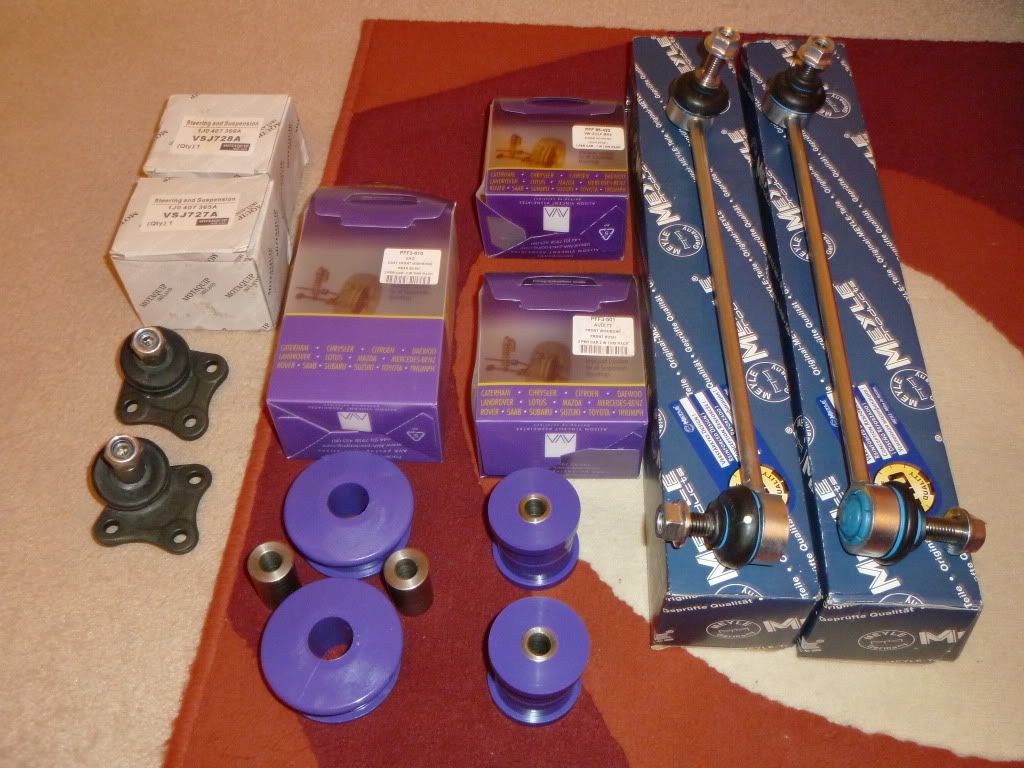
I’ve been saying this for ages, and people must be fed up with the stalling; I know I am! I bought donor wishbones from an S3 yesterday. Got them for £48 posted... Result! I’ll wire brush them down, paint them with Black Hammerite and fit the bushes, so that when the garage has it, there’s less labour cost involved. We move in early March so I want this to be done in Feb. It’s a must as the car isn’t feeling as refined as it used to.

S3 wishbones…

S3wishbone.jpg


The Audi part No for these are 8NO 407 165 CPD 05 & 09.

Waiting to be fitted…
P1020154.jpg


More to follow...
 
Oct 21, 2006
1,226
1
Norfolk
Continued...

Interior

Last year, my passenger window mechanism failed. I bought a repair kit, but I couldn’t get the feed right and it has given up again, so I thought it’d be best to buy a replacement. Got one off eBay for £20.

WindowMechanism.jpg


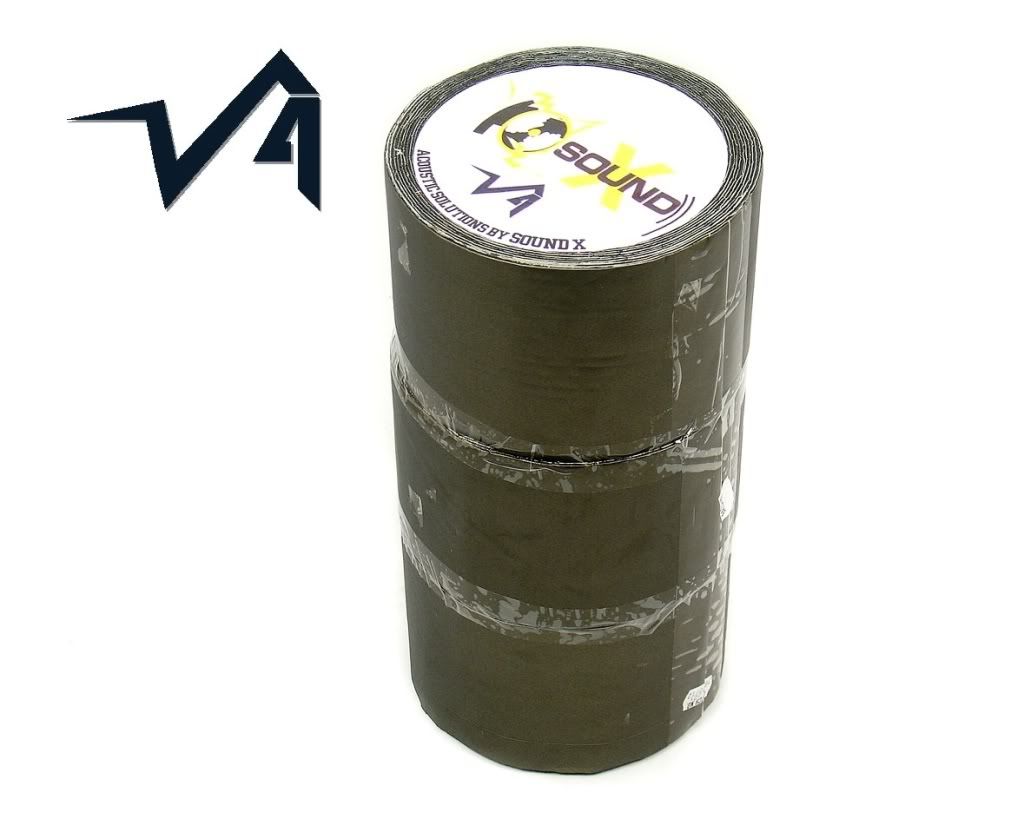
With it being cold, the car’s rattles seem to have appeared/got worse. I’ve decided to sound deaden the doors, floor and boot; the dash has already been scene to. Hopefully it’ll stop the rattles and vibrations especially when the sub is on, etc. It should give a nicer drive with less road noise. So I purchased some sound deadening the other day. It wasn’t cheap but it has good reviews, so fingers crossed it’s worth the effort. It’s called Thompson Sound X.

ThompsonSoundX.jpg


As the door cards were off and that there is a need to transfer the speakers over to the new window mech, to future proof things, I’ve also managed to buy a set of Bose 6” speakers and Bose 1.5” tweeters. Got them really cheaply so happy days! It also gave me a reason to go to the tool shop and buy a riveter.

The Audi part No is 8EO O35 411B.

BoseSpeakers.jpg


Everything should be here in the next few days, but it’ll probably be a couple of weeks until I can get round to it as I’m gonna be away with work for a bit.

Engine bay

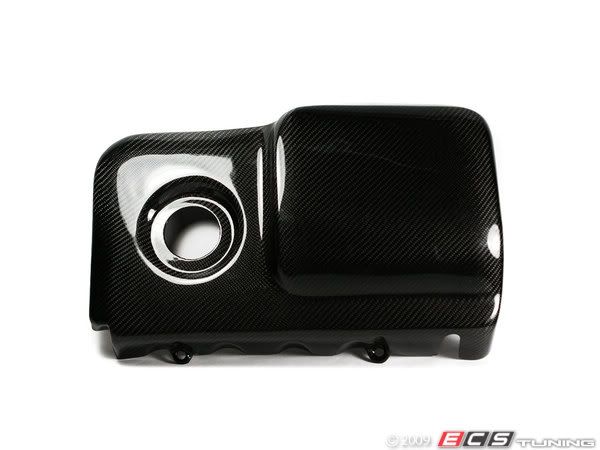
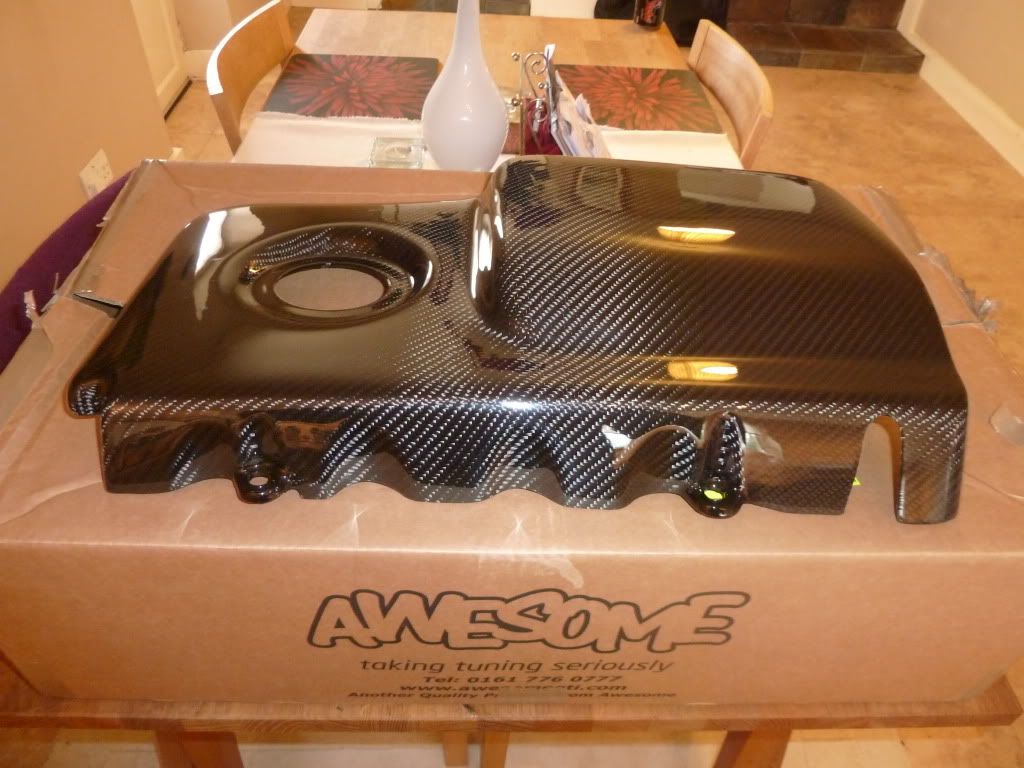
I got £100 in Awesome vouchers for Christmas, which was nice, so I’ve ordered an ECS Carbon Engine Cover, as I’m fed up with having to freshen up the present engine cover every year; the temps seem to be too great for soluble-based paint. 2K would be better, and I would go down this route if I were keeping them. I chose the ECS cover over the Forge one as it is absolutely free of any branding/markings, so is in keeping with the theme of the bay.

ECSEnginecover.jpg


I’d recently smoothed my manifold cover, and it came up great.

P1020565.jpg


Trouble is, with a CF engine cover, it doesn’t match. I was gonna just buy the ECS Manifold Cover, but the CF weave is in the opposite direction to the engine cover. D.K. (Darren) and others have used Carbon Mods’ kits with excellent results, so as my manifold is completely smooth, I’ll key that up and cover it in CF. With other slight touches of CF in the bay, they won’t look out of place, and will marry with the painted stuff nicely.

Here’s a link of the Carbon Mods Kit that I’m thinking of getting, for anyone who hasn’t seen it before: www.carbdonmods.com (Carbon Fibre Skinning starter Kit)

I still need to polish my throttle body and fit the cover, but then the bay should all be done :) To get everything done, I've given myself until April as a cut off point. I'm in talks with StanceSolutions and I'd like the car rolled off to them by that point. I'll enjiy the car for a few months then, before having the car resprayed :D

Alot going on but I need to give myself a kick up the backside now... Any input welcome. Words of encouragement will light the flame...

James :)
 

RDS

OEM+
Aug 11, 2010
2,276
11
Newcastle upon Tyne
Nice update mate, love the attention to detail on your motor. Cant believe your still modding the bay, its awesome as it is. Looking forward to future updates as you carry out the work :D

Did you get your badger 5 TIP mate?
 
Last edited:
Oct 21, 2006
1,226
1
Norfolk
Thanks Richard! I just want to make the engine bay durable and minimal in maintenance. Getting these last couple of bits should hopefully achieve that. Tbh, I just want to get it done now. There are so many nice cars about; massive amount of motivation gained from forum members.

I haven't got the TIP yet. I was gonna get one from Awesome when on the phone yesterday, but I need to get the other bits done. I really want to get all the rolling bits done now, as it's been on my 'to do' list for the last year or so. Feb will be the month when a lot of this is finished. It has to be done before we pack up and move house...

Wheels will be done then it'll be off to StanceSolutions to have the front coilies mated with 50mm bags to give an airlift system; best way of maintaining drivability and charactoristics of coilovers. Awesome bit of kit :)

I'll keep it nice and clean, enjoy travelling to shows, then it will get resprayed. The engine is running sweet as a nut atm on a standard map. Never been one for power but the KO4s are pulling impressive numbers. However, the engine would need strengthening before that could be achieved, so maybe that will happen in the future... My wife wants babies so who knows...lol
 
Last edited:
Oct 21, 2006
1,226
1
Norfolk
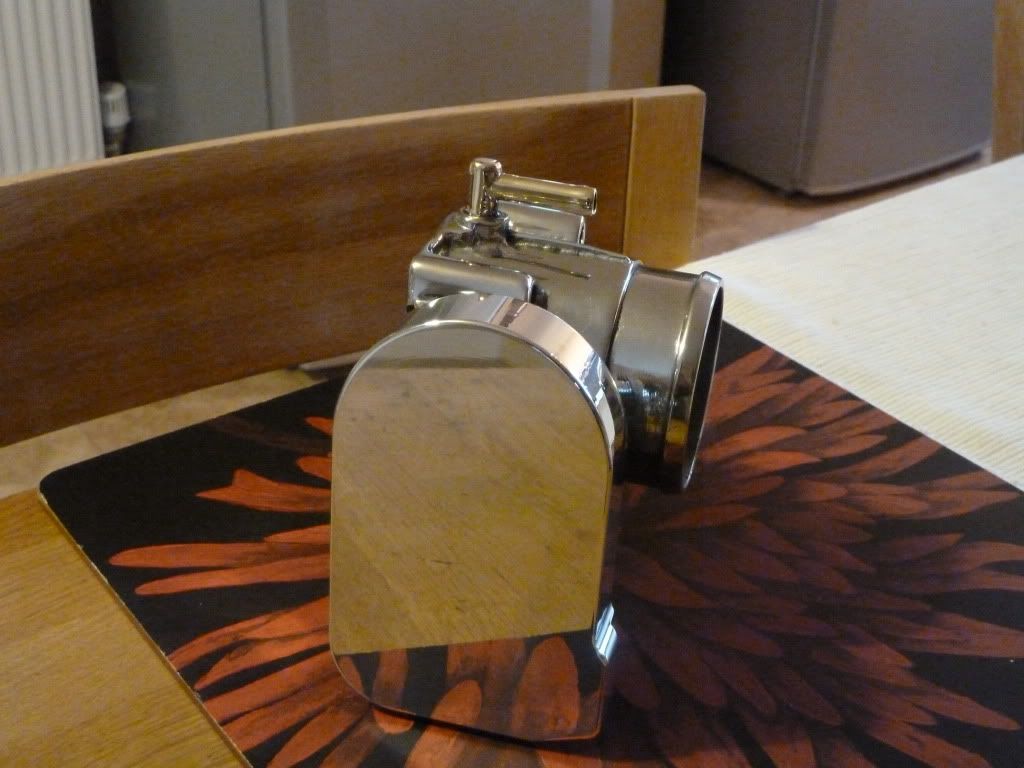
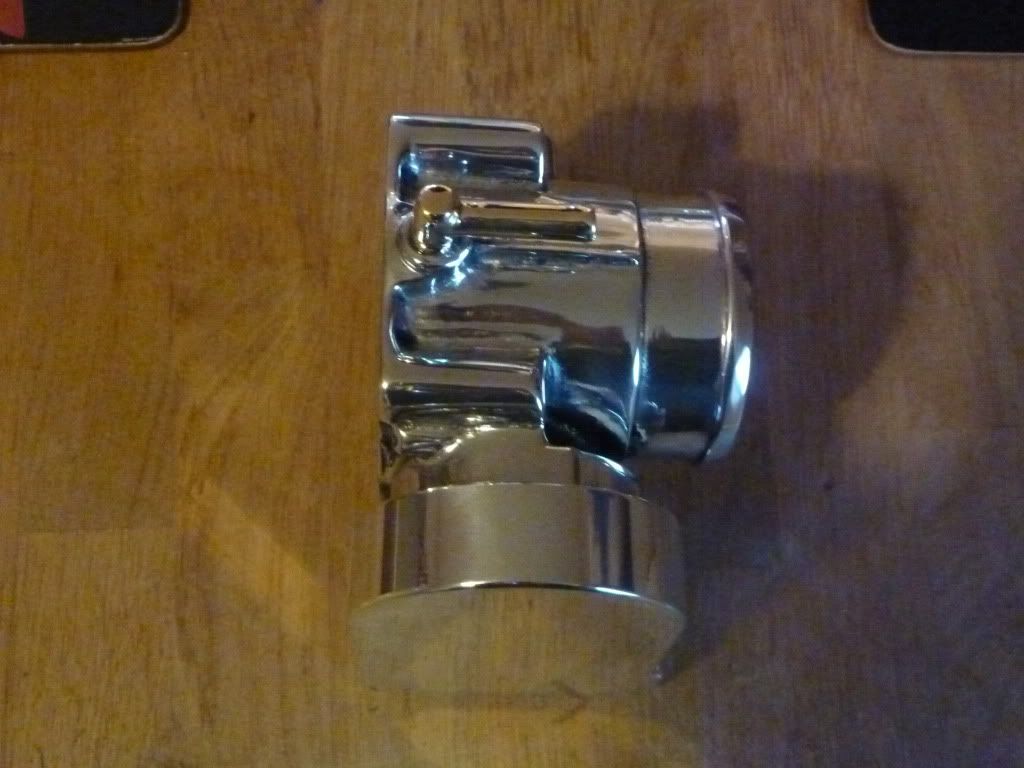
Polished Throttle Body

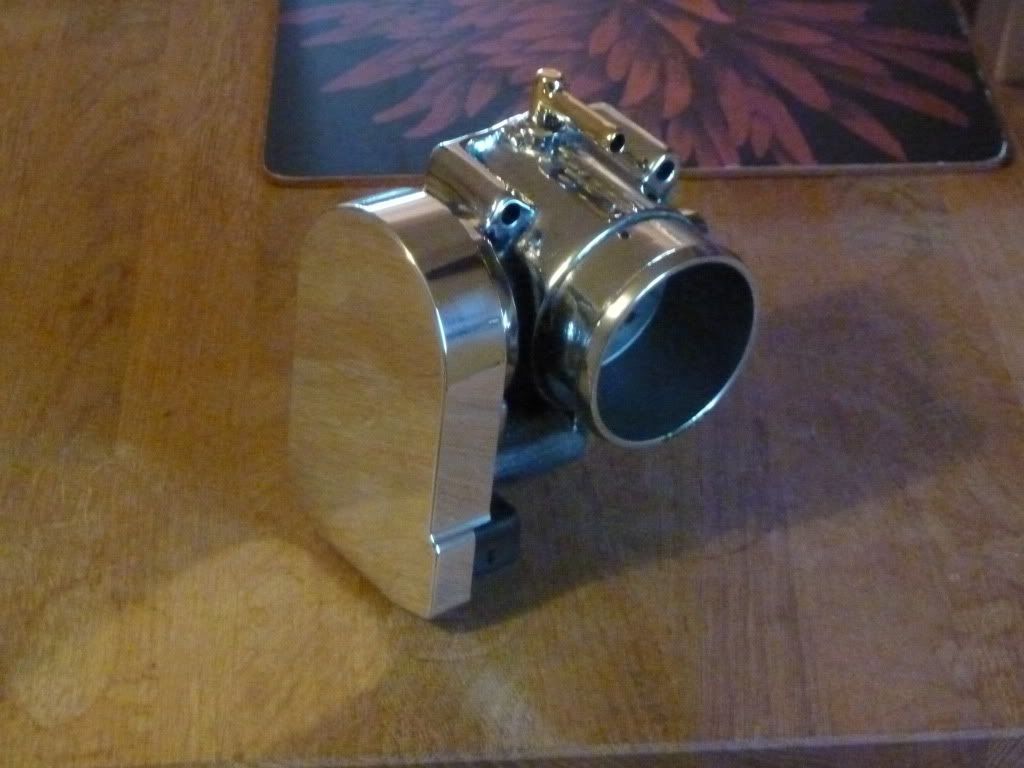
With the list written out, number one was to sort to the TB out. I had painted it black last year and it has stood up pretty well. However, I’m kind of in a polishing phase at the moment, so when I bought a Whannab TB cover, I thought the cover would look nice against a polished throttle body and inlet manifold.

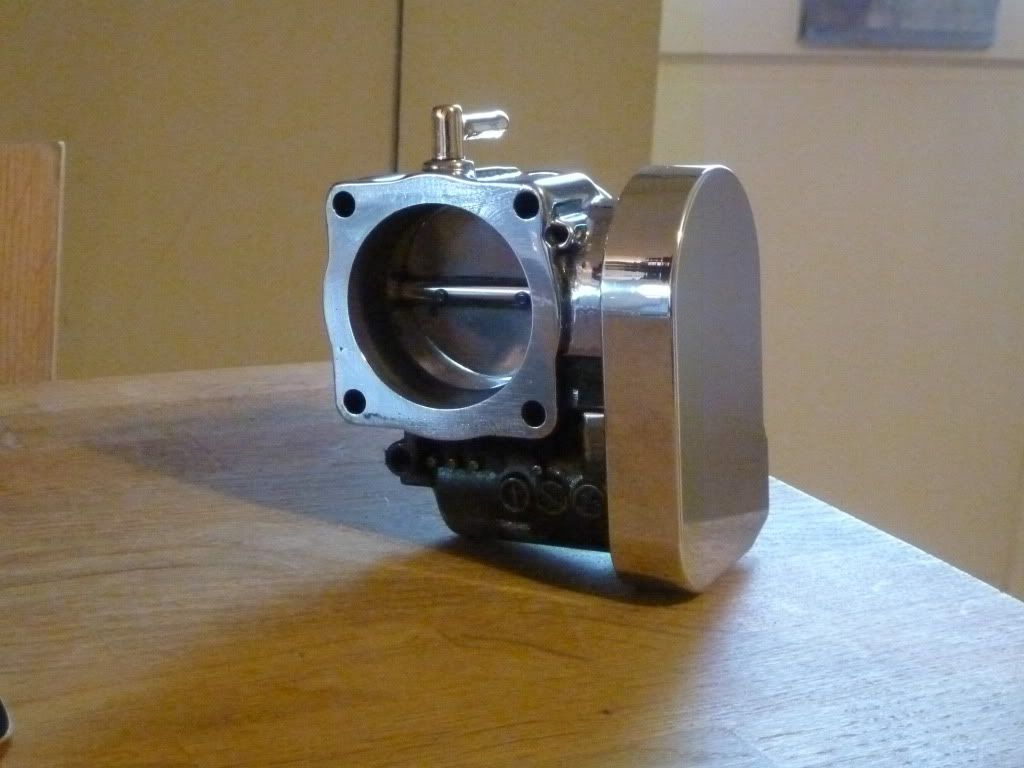
So this morning I removed the TB from the car and started stripping the paint with the new Dremel that I got for Christmas. What a pain it was to remove the paint; it kept melting to the sanding wheels, so this took a while. I chose the sanding pads rather than a wire wheel as I didn’t want to create any deep marks. It came up pretty well without any dramas. I kept the paint on the bottom half of the TB as once fitted, it would be difficult to maintain the polished finish; avoids the possibility of corrosion.

I then used the polishing mops and compounds that I’d used previously on the charge pipe/ inlet manifold. Really simple process with great results. The TB was tricky in places but a polishing wheel on the Dremel sorted that.

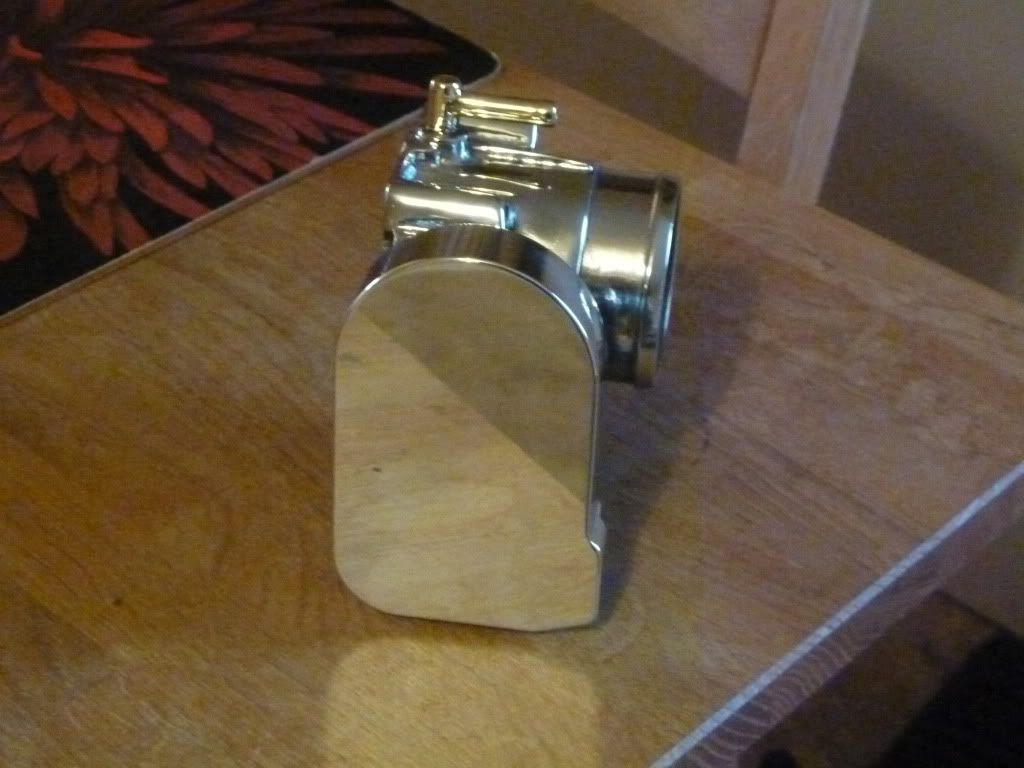
A nice surprise was the vac pipe at the top of the TB. It must be a copper based metal, as it polished up in a light bonze, and gives a nice contrast to the mirror finish of the rest of the TB. The CNCd cover was also polished up to match.

Enough chat… Pic time… What do you think?

P1020711.jpg


P1020717.jpg


P1020720.jpg


You can see where the paint meets the polished finish. I've managed to get a nice join, although you can't see any painted parts where it's fitted...

P1020704.jpg


The Whannab TB cover came up great...

P1020710.jpg


I'm well chuffed! I'm going to order some hoses to replace the OEM ones that are situated at the top of the TB (I think this is called the Brake Servo Vaccum hose) and the horse shoe that goes from the Inlet Manifold and wraps around the hotside charge pipe. I just need to confirm the sizes and thenI'll order them from Forge.

I think the one on the top of the TB is 8mm... Not sure about the other one. Will look but If anyone can help, that would be greatly appreciated :)

Next is the sound deadening and fitting then new window mech and Bose speakers. Booked friday off to get this done, as the weekend is written off with friends etc and then away with work for a week. It's nice to feel motivated and positive about it all :)
 
Oct 21, 2006
1,226
1
Norfolk
Sound deadening started

The other half isn’t feeling so well today so scuppered plans to go out :ill: So I made use of the free time and started the sound deadening. I can’t really glam this up as it’s not at all exciting, but hopefully this should get rid of the rattles/vibrations whilst quietening road noise down a little.
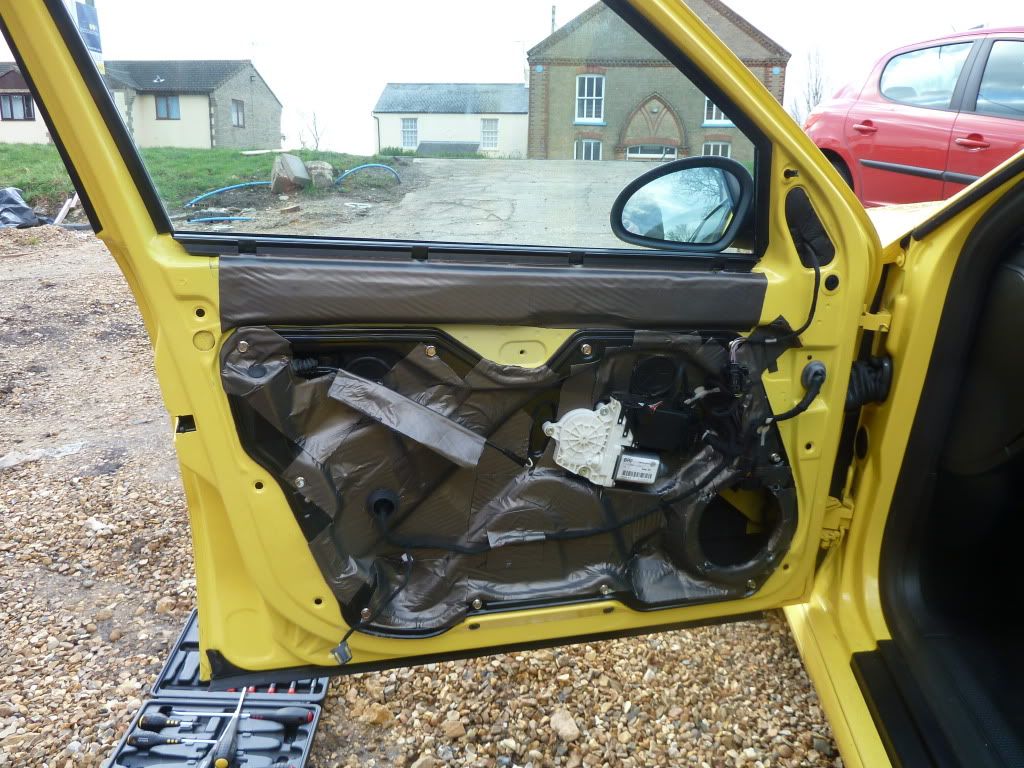
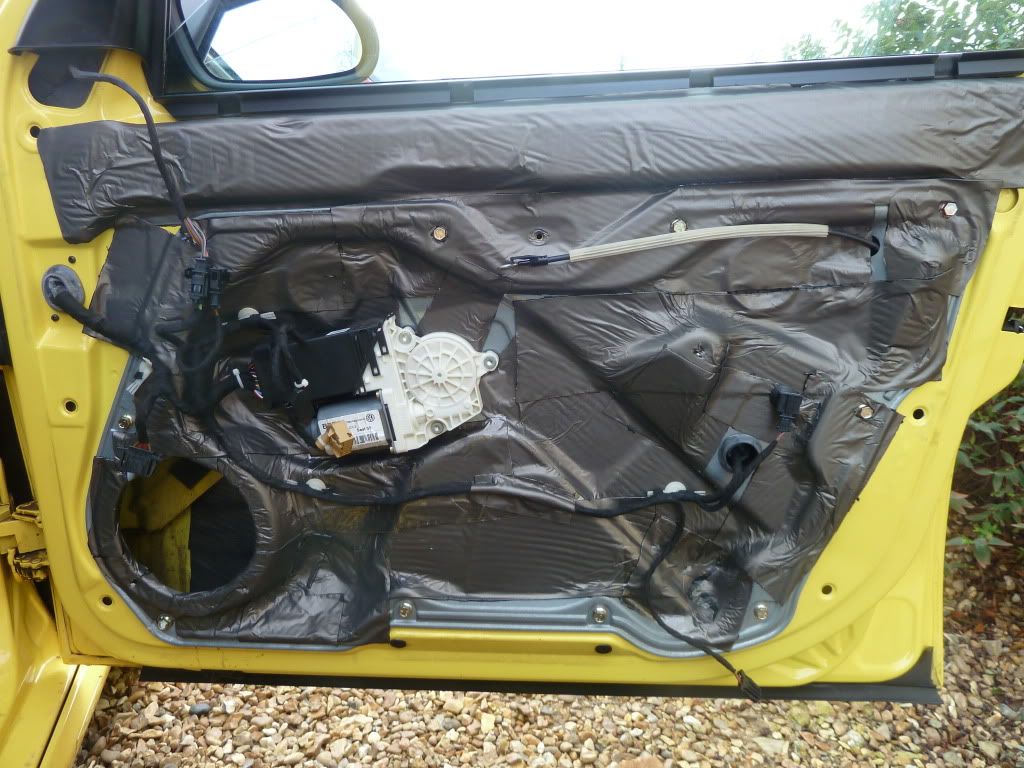
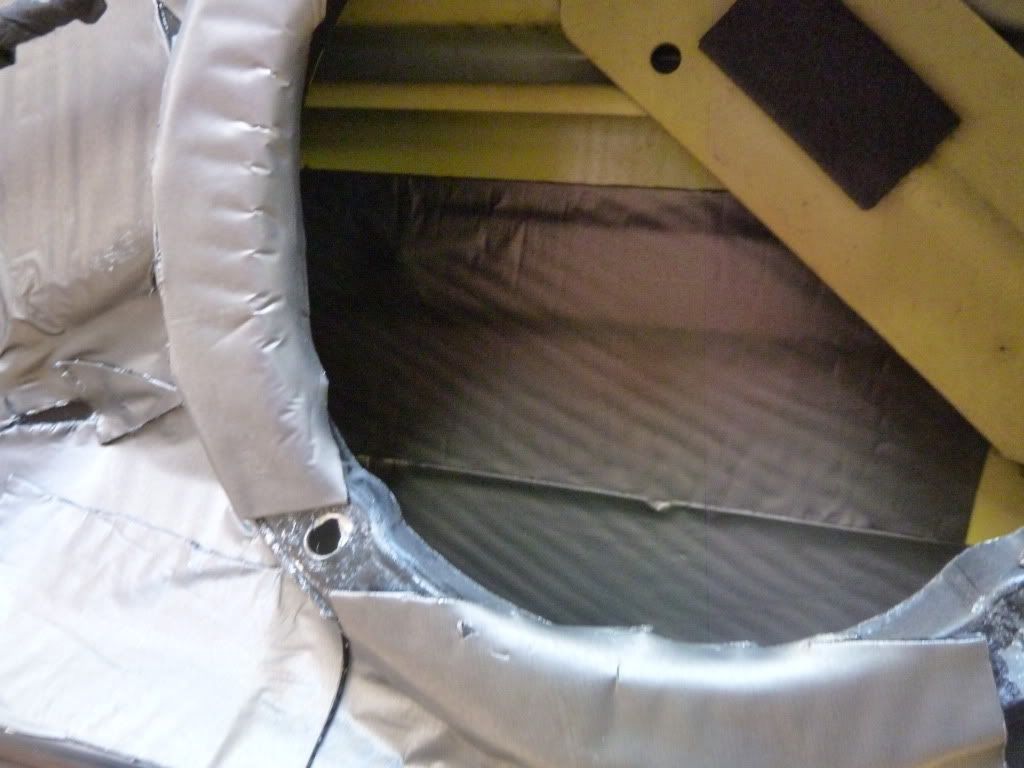
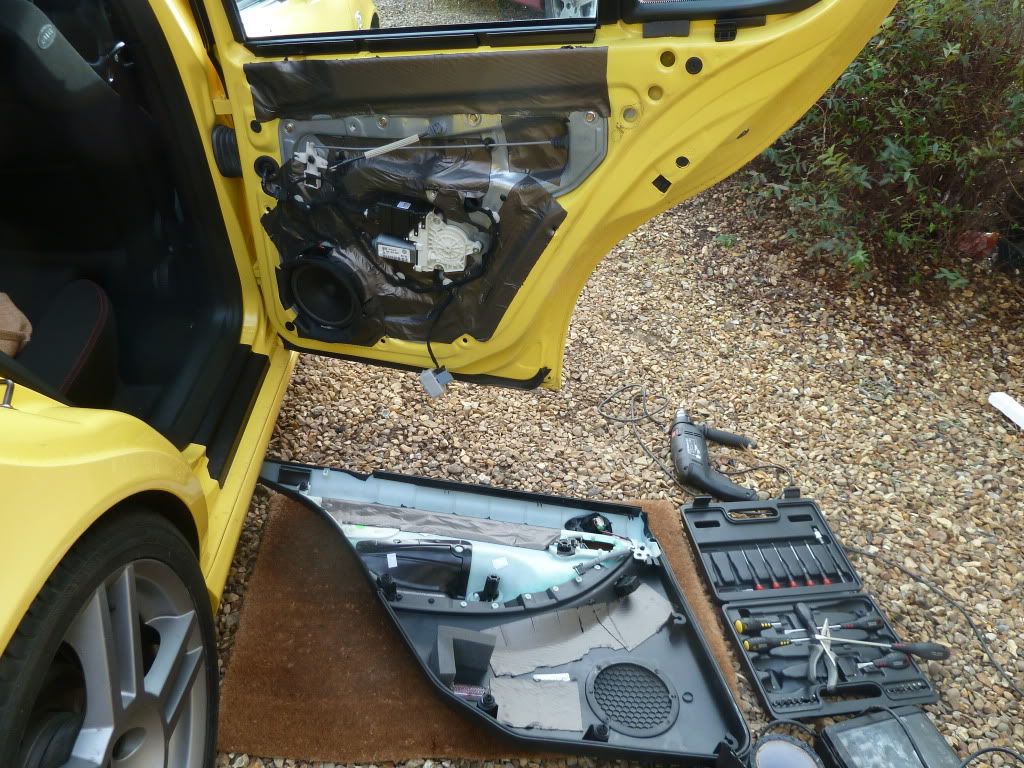
I’ve managed to deaden all the doors today. The wind got up towards the end, which sucked. I’ve deadened the door skins, the door inserts that have all the window mechanism stuff on and a few bits on the door cards where the plastic looked/felt a little flimsy. All the wires have been secured, etc…

On the fronts I also drilled out the rivets holding the speakers in placed. This is in prep for when the Bose speakers arrive in the post; I’ll just pop rivet them in (should be like for like). The tweeters are held in by plastic male/female clips so hopefully they will be like for like too.

Front passenger’s door… Window mech replaced at the same time. Now have a working window :)

P1020722.jpg


Front driver’s door…

P1020724.jpg


Pic of the door skin with the deadening on, to give you an idea.

P1020723.jpg


Rear driver’s door…

P1020725.jpg


The rain came just as I finished the passenger’s rear door so I didn’t manage to get a pic, but you get the idea…

Like I said, not edge of the pants stuff… On Friday I’ll do the boot and back bench. I'll also fit the front speakers, then that’ll be done… Then on to reconditioning the S3 wishbones and fitting the Powerflex bush kit :)
 
Last edited:

tyrer

OEM
Jun 6, 2010
1,991
1
Nice additions James, the Bose speakers/tweeters are a great idea and something I am now wanting to investigate further.

Bushes are a great addition again something I want in the future.

To keep the engine cover completely OEM you could get the SEAT sport logo on it.

What's the deal on the coilover/bag combo mate? Do they still need management and what's the difference between full static or full air?

Lovely motor as always.
 
Oct 21, 2006
1,226
1
Norfolk
Thanks mate. I'm really looking forward to getting all the little jobs done. I want to really enjoy the car over the summer months; feeling pretty motivated at the moment. I'll definitely feel the benefits of the the Powerflex bushes. The Neuspeed RARB that I fitted a couple of months ago really has made a difference to the way the car turns in.

Stance Solutions are a company in Whitney that produces coilover bags for the front only. They're air bags that give a 50mm lift/drop. I'll Be using a 480cc Viar compressor with a one gallon tank. It doesn't need a management system. It runs on a solenoid switch that can be located anywhere. It gives a front lift when it's needed. With already owning coilovers, I didn't want a full air ride setup (although I'd love it), but with living in the sticks I've not been able to run the front as low as I want to, so this is the ideal for me. I'll be able maintain the coilover charactoristics as well. Should be buying the bits in the next month or two :D
 

tyrer

OEM
Jun 6, 2010
1,991
1
Sounds great! Be a great modification as if a bag split it won't be undrivable like full air.
 
Oct 21, 2006
1,226
1
Norfolk
car looks great mate! How much sound proofing did you buy?

Thanks. I ordered 32 mSq in 6 inch width roles, as this is easier to use for the more intricate bits. 25 mSq was used for all ther doors. The remainder of this roled sound deadening has been used for the sides of the boot space, the boot lid and wheel well. I bought 10 50cm x25cm sheets to do the boot floor and rear bench. I'm not well practiced at this and so I have perhaps used more than I should have. No rattles or vibrations though and it's definitly a little quieter :D Bass is a little more punchy too :rock:

The donor S3 wishbones arrived today so i'll make a start on refurbing those and fit the new Powerflex bushes over the next few days.
 
Oct 21, 2006
1,226
1
Norfolk
If you struggle with the wishbones i did a rough guide on rebushing them
Liking the shiny bits in here too

Thanks Ronin! I've actually had your guide on my favourites bar for a few months:D It's very helpful. The only thing I'm gonna do differently is to follow the Powerflex method to remove the rubber and to blow torch them out. I have to say the guide you did is the most complete and easy to follow guide out there, and really has been useful so thanks :thumbup:

I'm looking forward to seeing your engine build come together. Hope the last few bits arrive from over the pond so you can get started. There's a few to watch :)
 

Ronin225

Active Member
Jan 17, 2008
4,652
22
Worcester
Only thing to watch with burning them out is there is quite a lot of rubber so i will expect you to be billowing out black smoke everywhere
I did the guide as a rough out line when i rebushed mine, just easier in picture form as everyone can see what your talking about
Hopefully next weekish stuff should be here:D
 
Last edited:
Oct 21, 2006
1,226
1
Norfolk
Right... These shiney bits...

I've had a few people ask how I go about my metal polishing. It's something I've only picked up in the last couple of years, having done the charge pipe, brackets and manifold. Most my recent victim was with the throttle body as seen here and above.

P1020710.jpg


I know that there are a few methods out there and really it's down to what you feel comfortable with. Some hand sand through the Grits from dry 80 to wet 1500 grit, and then use a metal polish such as Autosol with a cloth, and this gives great results.

For me, I didn't fancy the 'manual labour’ and the thought of multiple hours using the same wrist action put me off... There’s a pun in there somewhere… I personally start off with a 120 grit pad on my DA. I’ve found that this pad/grit isn’t too abrasive. In any case, you must avoid causing any nasty gouges or deep scratches, as this would still show in the final mirror finish. The sanding process is used to achieve a matt even sanded finish, without any obvious marks/bumps, in preparation for the polishing process. It's quite daunting the first time you do this...

I use this: http://www.ebay.co.uk/itm/Metal-Polishing-Kit-General-Purpose-6-x-1-GPK0-6002-/300337650406?pt=UK_Motorcycle_Parts&hash=item45ed84dae6

It’s a three mop kit. I prefer the 6 inch mops, as it’s not too big or small. Mop one is a very abrasive and solid wheel and you use a black coloured compound with this. I usually spend a good amount of time at this stage, so that best results are achieved. Fullers Earth is then used to remove the residual compound. Then wheel two, which is slightly less abrasive, is used with a green polishing compound. The third and final wheel is a finishing wheel and blue compound is used for this.

The mops are made out of leather/fabric and are durable. They all attach to your drill by a spindle that is supplied within the kit. It’s advised that you use a circular motion to avoid markings, etc. The top tip is to take you time with it and give each mop stage more than enough time to allow the magic to happen. Autosol is my choice of metal polish to use a maintenance product.

The above kit costs in the region of £25 and caters for all metals. It includes everything, is really really easy to use and it/you can produce amazing results with it. The mirrored finish is just immense.

This isn’t a guide as such but it’s an easy process, and for anyone who is thinking of going down the chroming route then this is a costly alternative IMO.

Feel free to ask questions if you need to :)
 
Oct 21, 2006
1,226
1
Norfolk
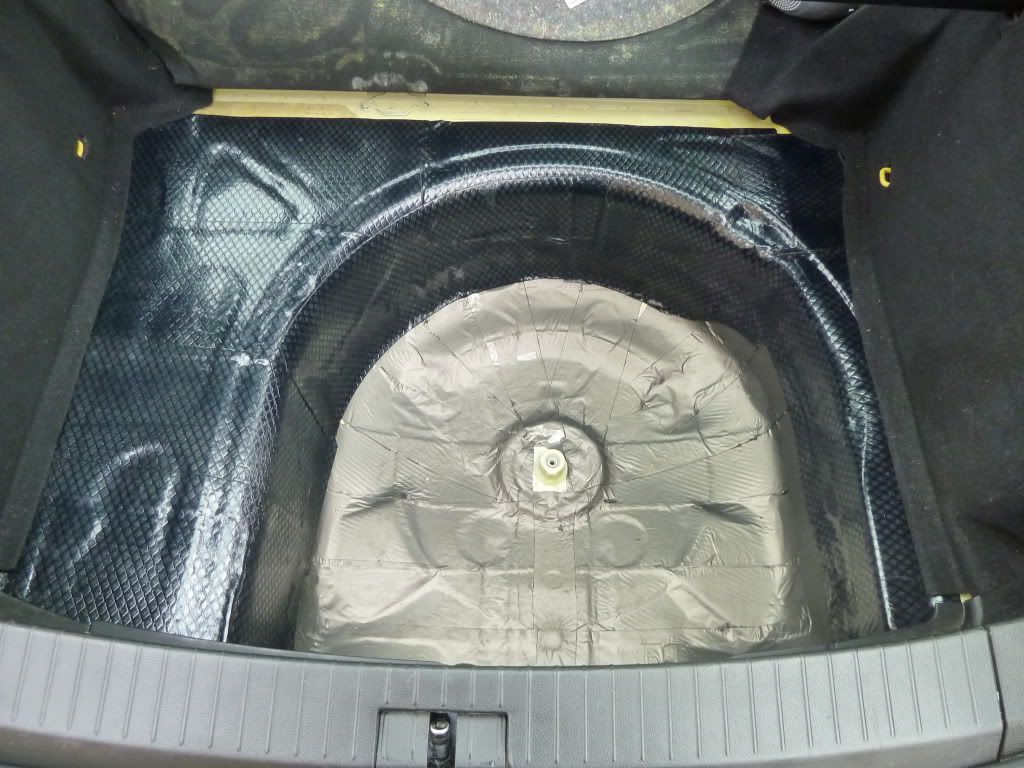
Sound deadening finished...

Following on from a previous post, I finally got round to deadening the rear of the car today; the weather has been pants recently and we’re moving house in 10 or so days, so have had little time to do much on the car.

P1020730.jpg


The boot floor, side panels, rear bench and boot lid were all done. I used the same deadening stuff as I did on the doors. For the boot lid, I used yarn to pack it out, to completely cut out any vibrations. The car is definitely quieter, but crucially for me, there are no annoying rattles or squeaks. Result :funk:

About three weeks ago, I managed to fit the Bose front speakers that had been donated from an A3. I went for the A3 ones, because I thought I could use the plastic base cast that they sit in to aid fitment. I had to chop bits to achieve a snug fit, but they’re in and sound great. If anyone was looking to do this, I would recommend getting the speakers without the plastic bits, as found in the A4/A6. The clarity is great! Sorry that I didn’t get chance to take a picture, but I can always take off a door card if anyone wants to see them fitted.
 
Oct 21, 2006
1,226
1
Norfolk
ECS carbon fibre engine cover

This arrived today. It took three weeks to make its way over from the U.S.

It will replace my smoothed cover. I wanted something that was durable and maintenance free. I chose the ECS cover over the Forge one simply because it’s free of markings/logos and although it’s not OEM at all, it keeps it as close to OEM+ as possible.

It’s lovely…

P1020742.jpg


Thanks to my folks and wife who got me Awesome vouchers for Christmas :D
 
Last edited:
Progressive Parts, performance parts and tuning specialists