• Guest would you be interested in CUPRA or SEAT valve caps? let us know in the poll

  • Welcome to our new sponsor Lecatona, a brand dedicated to enhancing performance for VAG group sports cars, including SEAT, Audi, Volkswagen and Škoda. Specializing in High Pressure Fuel Pump (HPFP) upgrades.

My LCR Since '05 with Static+ Front Air Lift - Project Gone to a New Home.

Oct 21, 2006
1,226
1
Norfolk
Car looks great. The silver alloys really work. You were right not to go black.

Thanks Filbro. If I didn't have black wing mirror covers, I think I would have gone with the anthracite shade like yours as I really like the look of the wheel. In my opinion the LCR wheel loses its definition in black when against an Ovni colour. Black on Platinum or Grey I love. Wanting the car to follow OEM+ influence, the Silver works. Just need to get them refurbished but it wouldn't make much sense before the winter months I suppose.

Hope all's dandy with yours?

James :)
 
Oct 21, 2006
1,226
1
Norfolk
Rear Anti Roll Bar Fitting

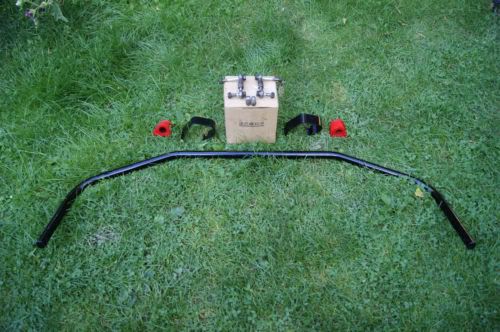
As you will know, I managed to buy a Neuspeed 25mm RARB recently. With good reviews, and an upper rear strut brace/coilovers already fitted to my car, I took advantage of the opportunity to buy one. With the weather being nice today, I spent an hour this morning fitting it.

KGrHqNlkE5YNr1S-bBOWVTEtqCg60_12.jpg


Tools: It was relatively simple to fit, only needing 16mm/12mm sockets and 16mm/12mm ring spanners to fit the RARB. I intended on raising the whole of the rear of the car on axel stands, as you would when fitting the suspension, but a jack (one side at time) allowed enough room to get under the car comfortably, so I didn’t bother using the axel stands.

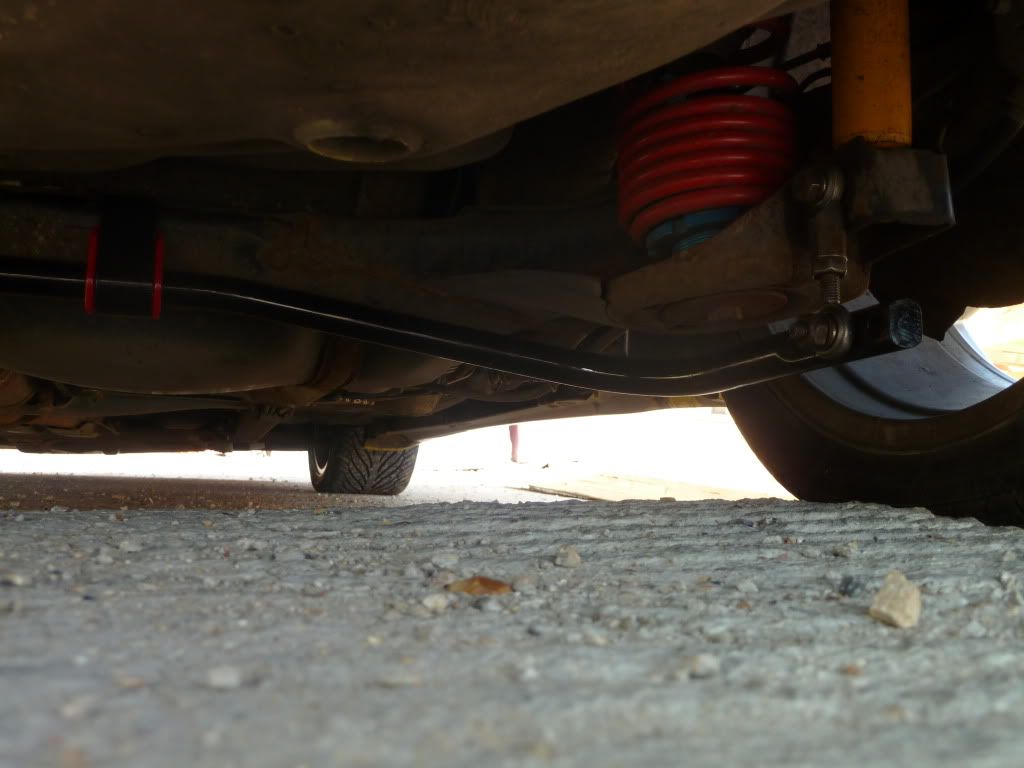
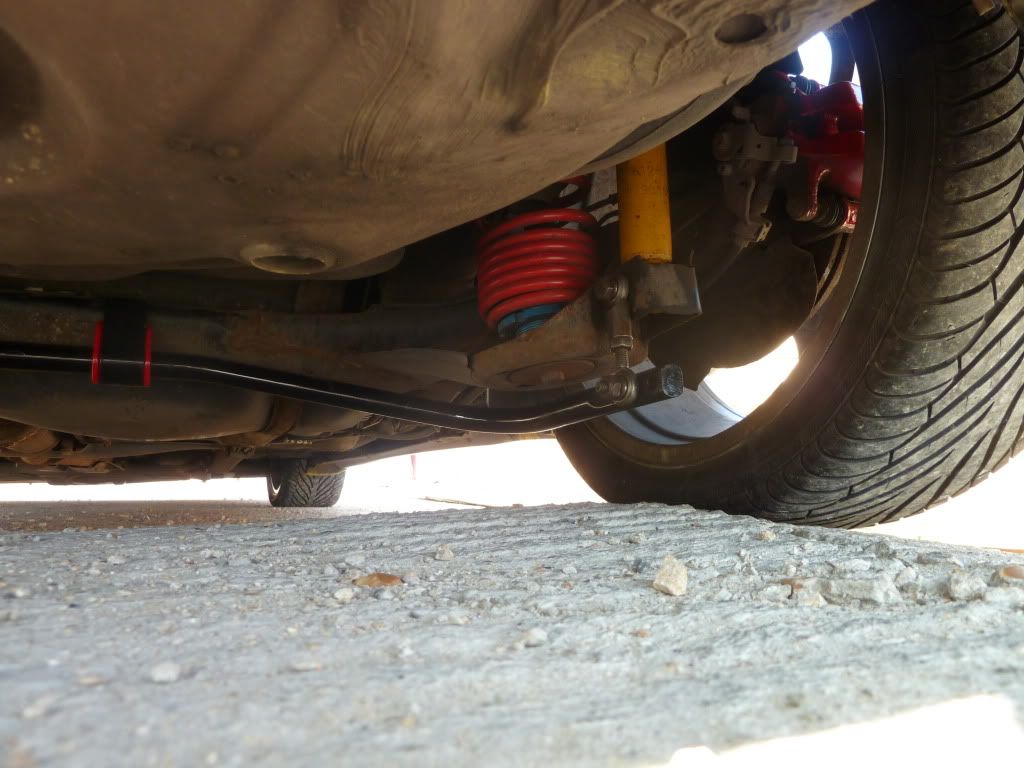
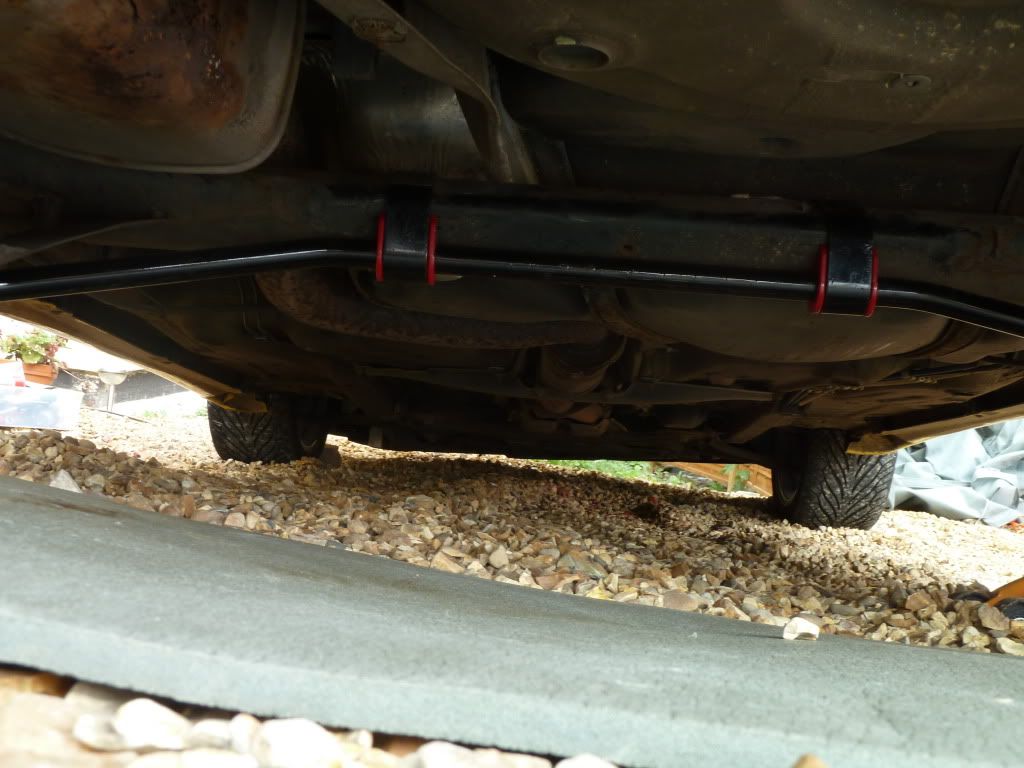
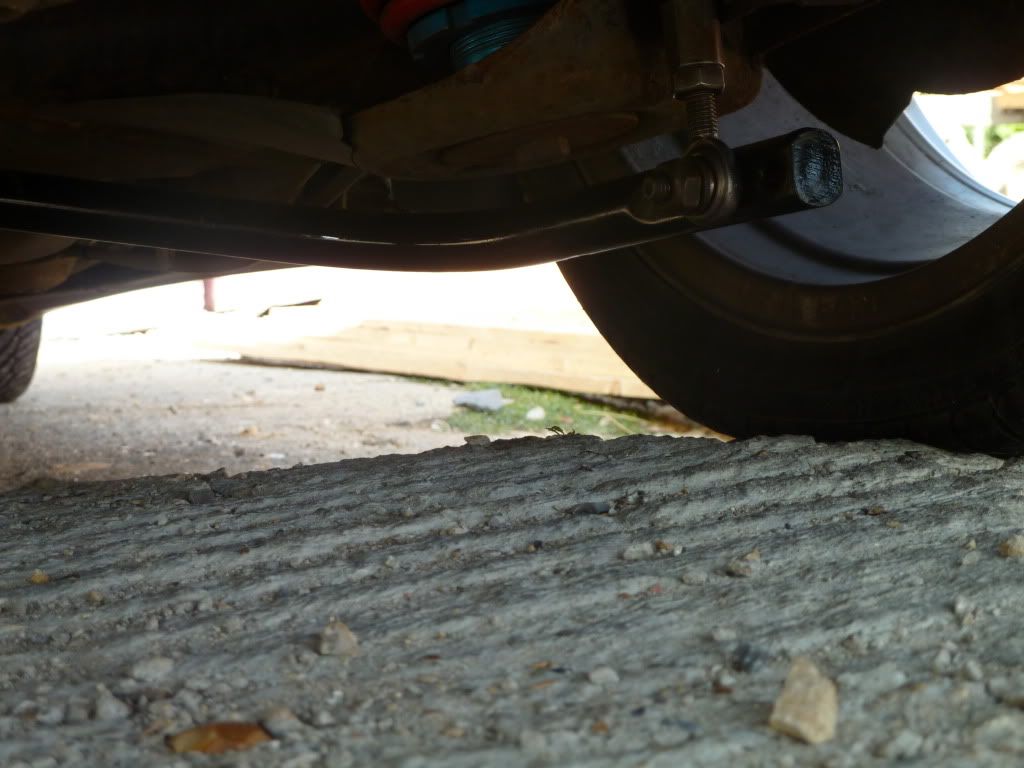
Fitting: I started out by removing the large bolt (16mm) that attaches the bottom of the shock absorber to the mounting point and replacing it with the new bolt which is attached the drop link. With this fitted on either side, the RARB could be attached to the drop links. With them secured, it was time to fit the RARB to the rear beam itself, using the brackets and bushes provided, fixed by 12mm nuts and bolts using a clamping system. This took a little persuading as it’s a tight fit but I didn’t need any specialist tools or anything, just persistence.

Shock to drop link to RARB

P1020459.jpg


P1020458.jpg


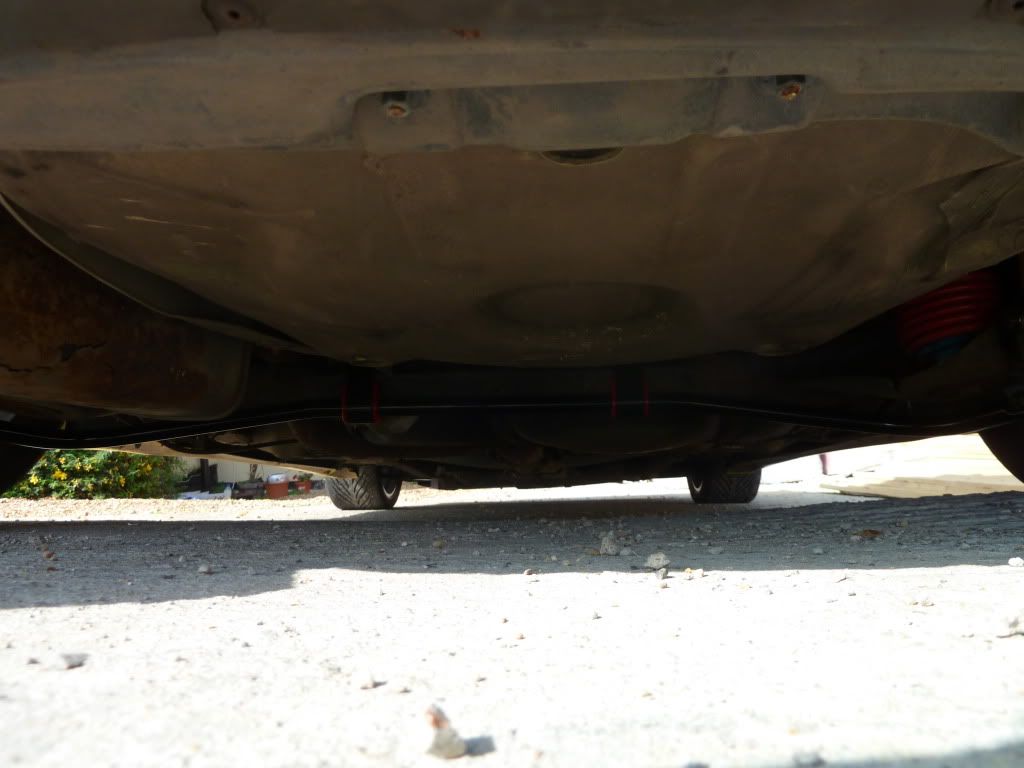
Attached to the rear beam

P1020452.jpg


Settings: The RARB comes with three settings, which alter the stiffness of the rear. Closest to the end of the RARB is soft, middle is medium and closest to the bend is the hard setting. As I have the standard LCR Front ARB, it was advised to go with the medium setting, so I did.

P1020460.jpg


Overall pic as it sits on the ground

P1020457.jpg


I can’t find the confidence to replace the front bushes and coilovers so it’ll go into the garage to have that done; it’s an old car and first time round everything was seized to buggery, although in theory it seems simple enough...

James.
 
Last edited:
Oct 21, 2006
1,226
1
Norfolk
Back to the bay…

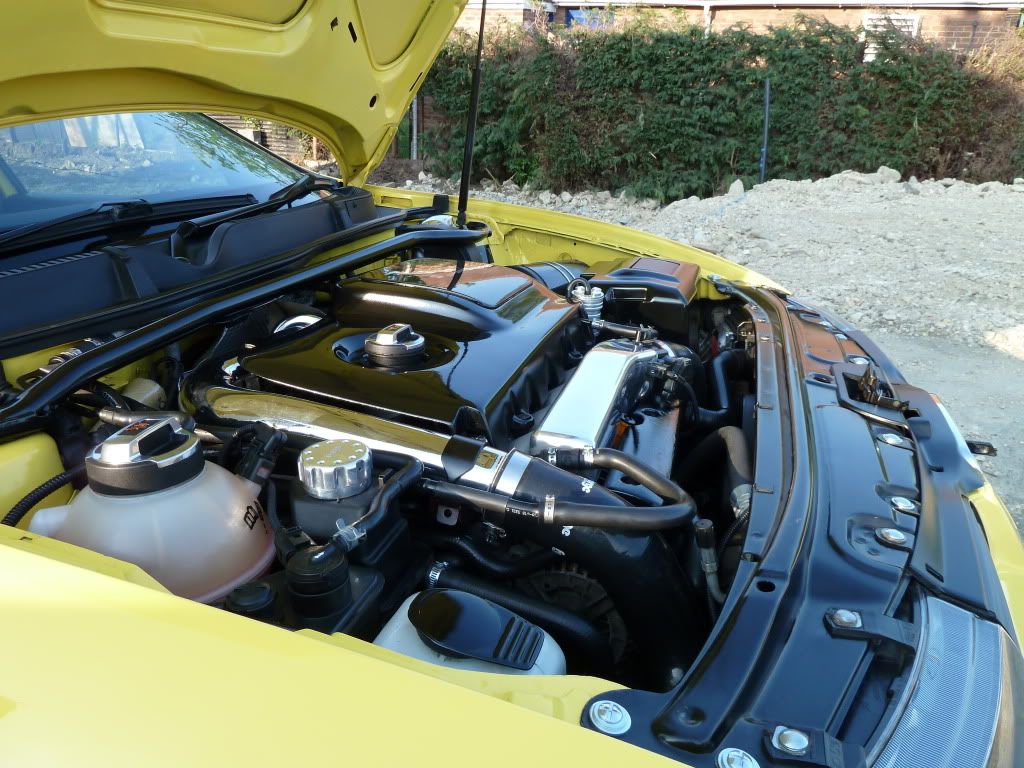
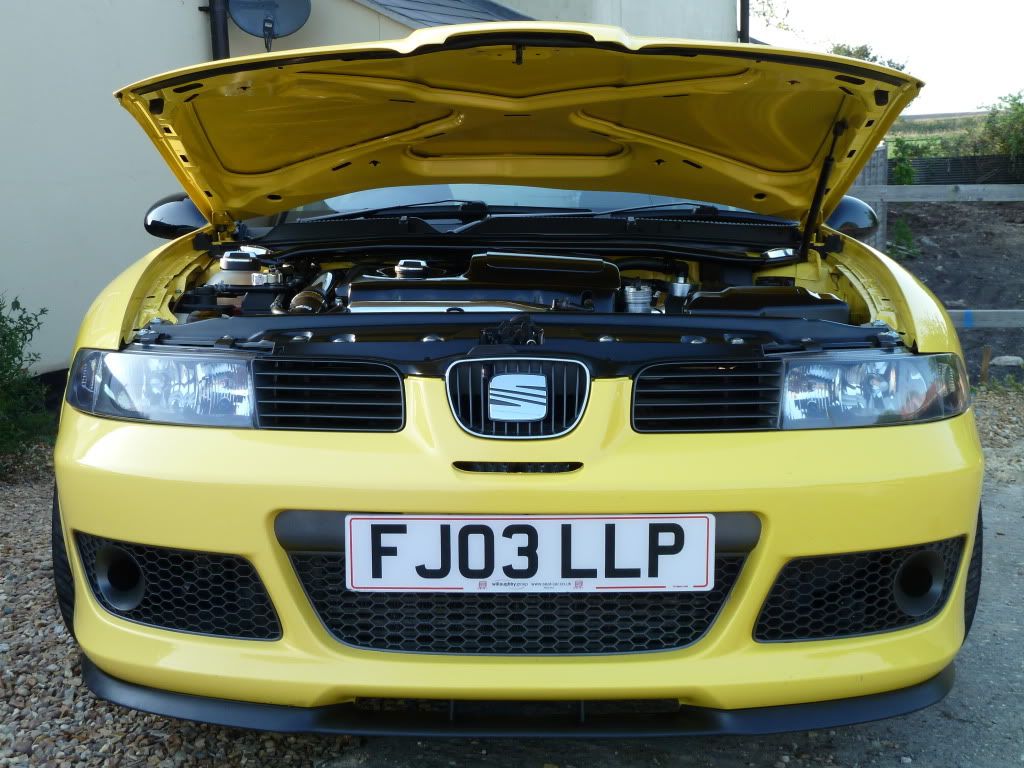
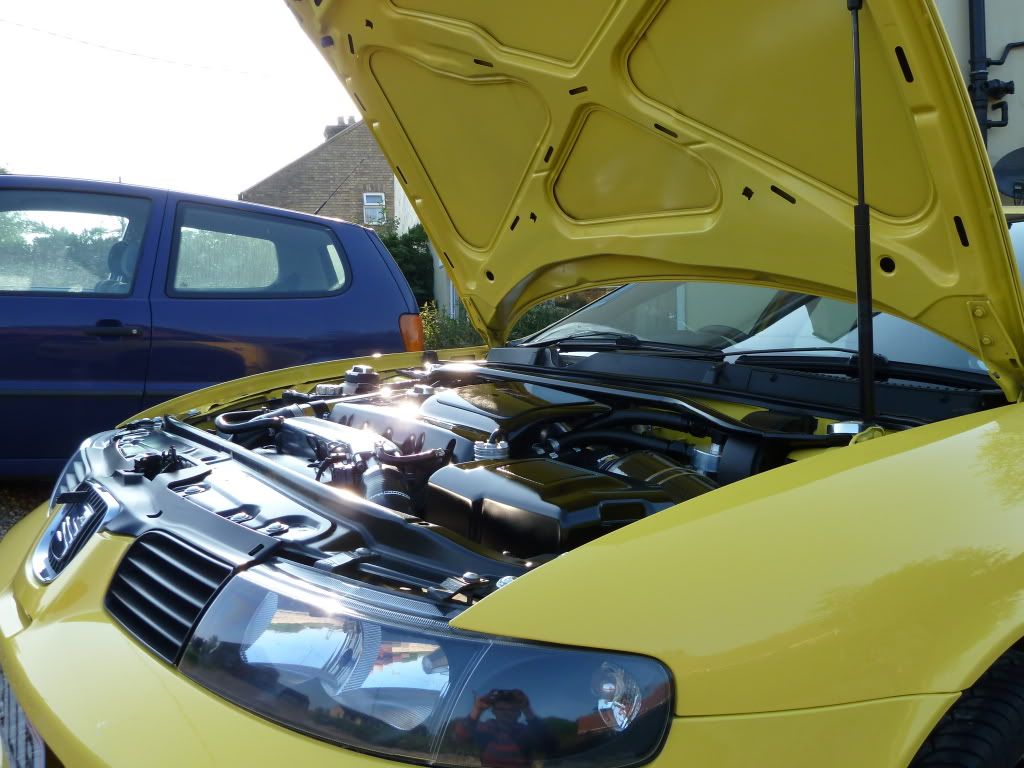
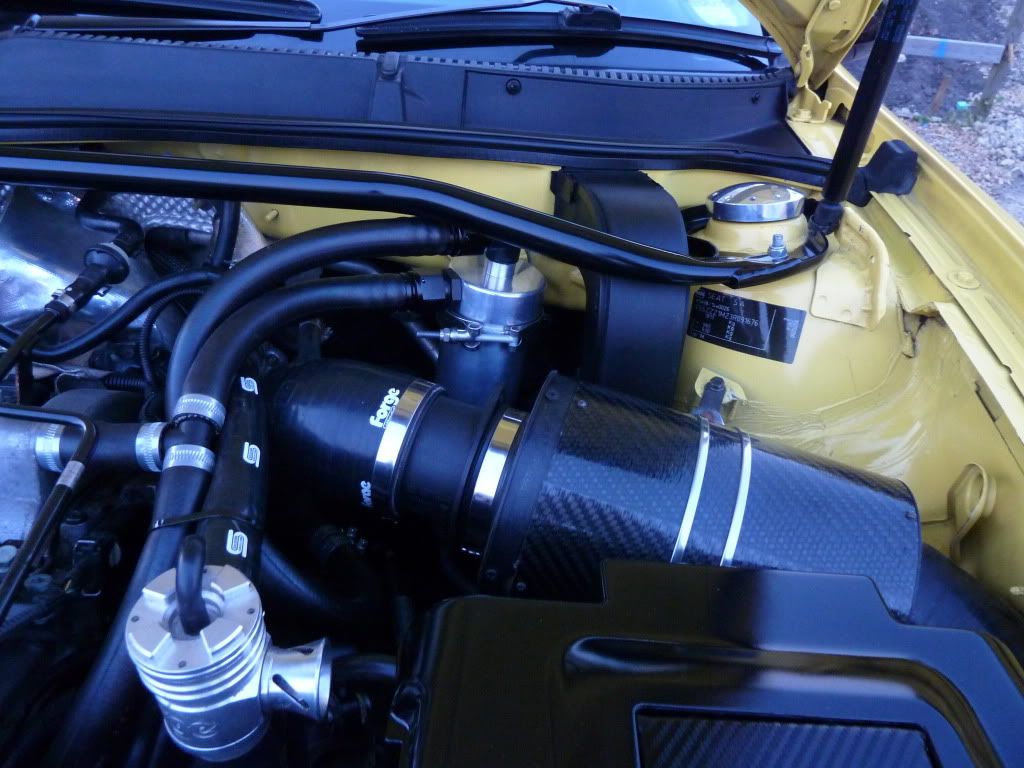
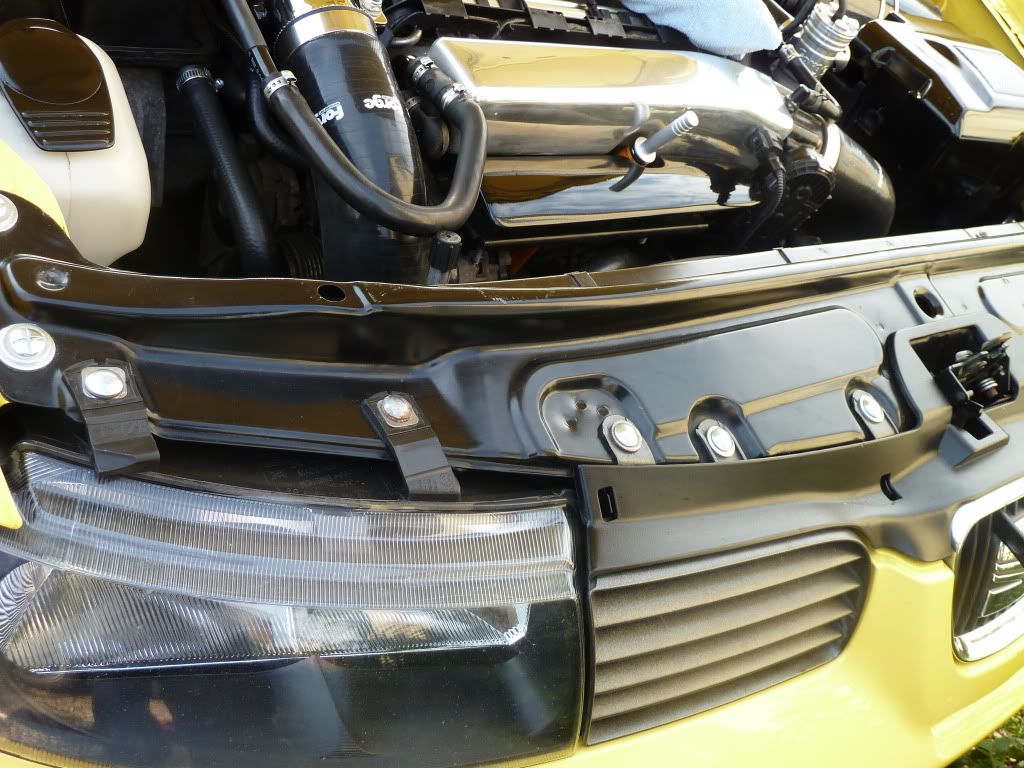
I didn’t think it would take long for me to return my focus on to the engine bay! As you may remember, over the winter months, I smoothed and repainted the engine cover, battery cover and manifold cover. Also finally fitting the 034 Motorsport catch tank, freshening up the S3 strut brace, replacing nuts and bolts and other odds and sods, I was really happy with the finished OEMish look, and hoped that would be that…

Here’s how it stands: Just to give you an idea where I'm at at present...

P1020163.jpg


P1020174.jpg


P1020166.jpg


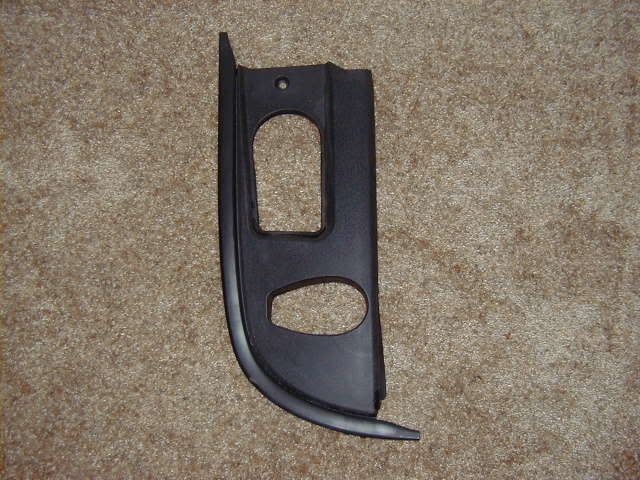
I’ve always had an itch over the S3/TT expansion coolant cover, but not so much the S3/TT battery cover. The itch has always stayed as just an itch because of the way it marries up to the Leon engine bay (with a curved gap that is quite noticeable). Also, I’ve never been keen on the size of the access opening for the expansion point itself, as it has a gap at the front for observation of coolant in the tank; purposeful but not aesthetically pleasing, IMO.

Here’s a picture of an OEM part to give you an idea, if you haven’t seen one before:

P1010103-2.jpg


Recently, I was really impressed with Darren’s (D.K.) work on his cover, where he expanded out to fit flush to the edges of the Leon engine bay. He also covered the windscreen washer cover point too. It looks really good but I’m still not keen on the observation/access point for the expansion tank.

Time to scratch the itch…

I’ve been looking for a second hand S3/TT expansion tank cover for some time, but without success. A new part is roughly 80 squids and that’s a little too much for a part that I would be butchering, IMO.

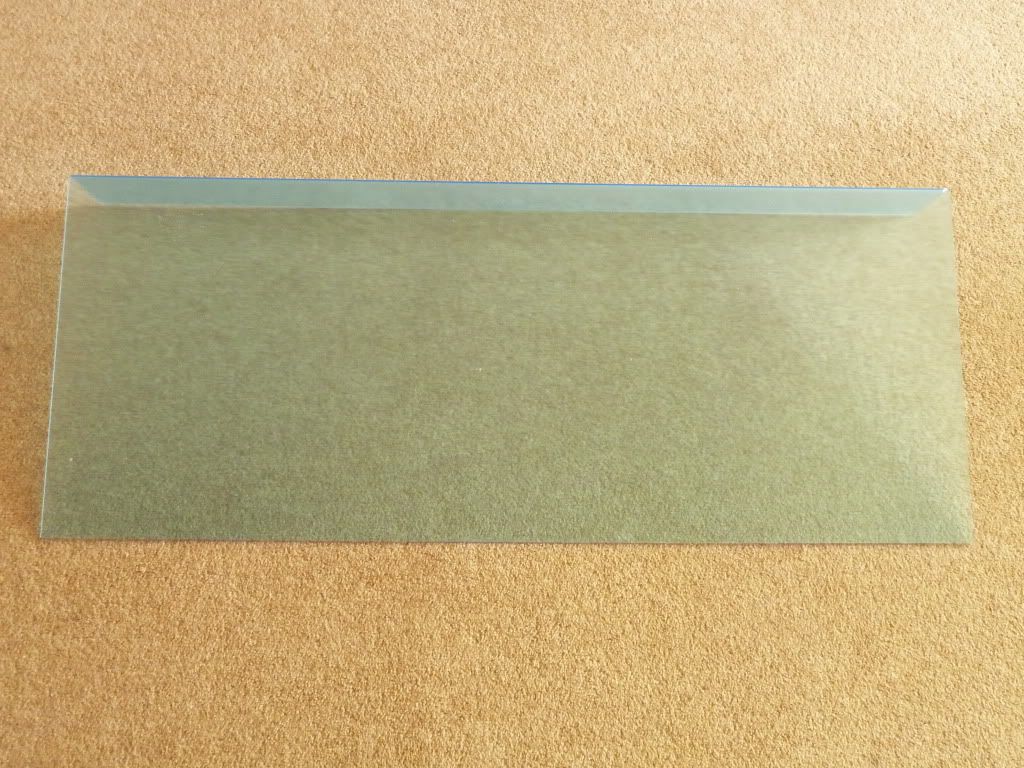
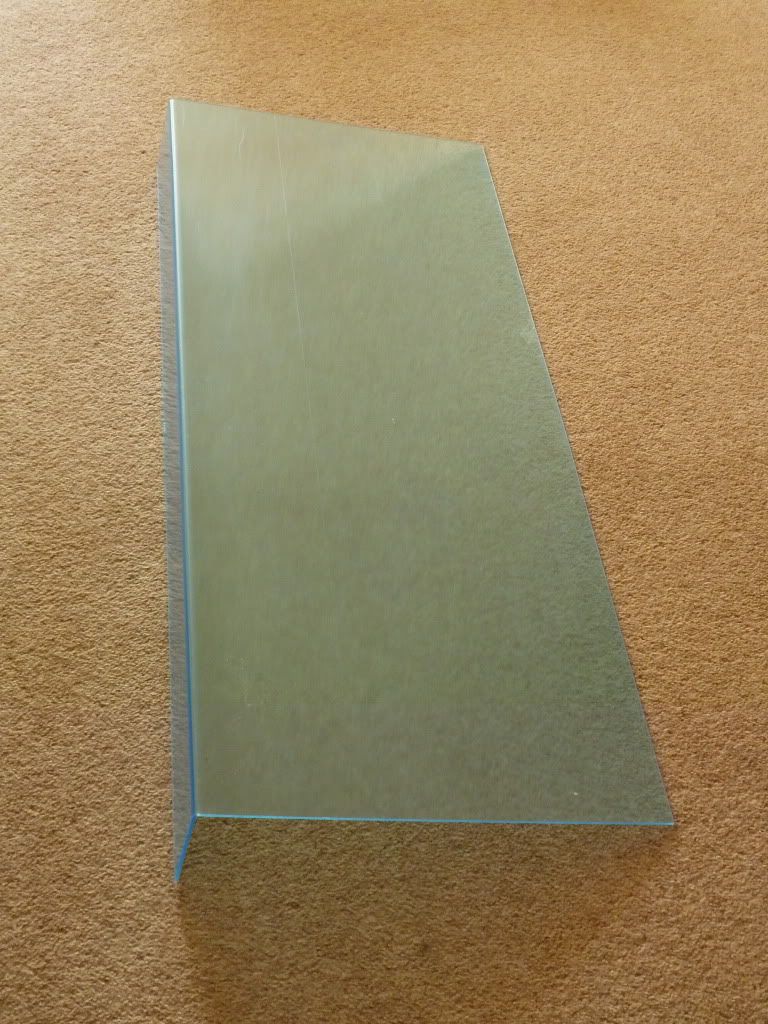
So… I know a guy named Rob who does loads of work with acrylic Perspex. He’s making me a piece of Perspex sized 1000mm by 400m with a 100mm internal upstand; basically a 90 degree bend creating a 100mm lip. I should have this by midweek.

I plan to cut this down to size, following the edges of the engine bay, to make a cover for the expansion tank, power steering tank, carbon canister and washer tank (mimiking all the good points of the S3/TT cover). Working with Perspex, I’ll be able to use heat to create inverted bumps leading to circular holes for the R8 expansion cap and Forge power steering cap. I won’t be making an access point for the washer bottle, as the larger washer bottle used on the S3/TT doesn’t fit the Leon’s set up so easily, and so the standard washer bottle would sit quite a lot lower than the level of the cover.

Once fitting perfectly, it’ll be sprayed the same as the other engine covers, hopefully achieving the appearance of an OEMish cover that has always been there… We’ll see. Not seen it done before and I like the ‘trial and error’ approach. Another fingers crossed moment... :blink:

Off to Edition 38 tomorrow, where I'm gonna try a buy some pressed plates, if I still like the look of them in person. Hoping that the sun will be with us [B)] Really looking forward to it.

Thanks for reading.
 
Last edited:
Oct 21, 2006
1,226
1
Norfolk
sweet looking bay, any chance of pics of the catch can fitted :)

Thanks Sam. I have a full installation write-up for the 034 Motorsport Catch Can on Pg7 of my thread (entry no126), which gives you all the information you might need, including lots of pictures of the install process. Hopefully you'll find it useful. By far, the best fitting can that I've had; previosly Forge Motorsport and Toyo Sport cans.

This is the link for the webpage:

http://www.034motorsport.com/engine-components-catch-can-breather-can-band-p-613.html

Here's a picture of the can fitted, but like I said, there's more on pg7.

P1020128.jpg


Hope this helps Sam? Feel free to ask any further questions.

James :)
 

sambryant

RoadRunner meep meep
Mar 26, 2009
4,848
2
Bristol
Thanks james that pic above was all i needed, i have a few plans for my bay and the pic just confirms what i needed to know :) again your car is stunning so well done.
 
Oct 21, 2006
1,226
1
Norfolk
James do you want a template for the cover ?

That's very kind of you Darren, but I made one yesterday, but thank you!

Went to Edition 38 today. It was quite wet but was brilliant all the same. The cars were just staggering. The attention to detail and standard of work was mind blowing; amazing paintwork, markless chrome and lovely wheels. Oh, and loads of cars were on air.... :whistle:

Finally managed to get some pressed plates. I also bought a couple of new DA pads from Meguiars (yellow and black) along with some Ultimate Liquid Wax. My wife was with me, who got talking to the chap and she/I (she) was given a free Megs Clay Kit and and Megs Umbrella. Amazing what a pretty smile will get :D Referring to the misses of course :D

Going to the show has further renewed my love for the car/hobby. Perhaps fatally, I've been left with lots of ideas. Definitely, over the winter, the car will have a full respray and its wheels refurbed. The bay will be finished soonish. It runs sweet as a nut and the rolling bits including brakes/bushes and suspension is near completion. Hopefully I'll achieve a nice standard, but within a budget. I hope to drive it loads next year and will get to a few more shows.

Top day! James.
 

Murdered LCR

Wide mouthed mofo
Sep 9, 2006
6,646
8
Murder Inc.
Cars looking great , I was at ed38 all weekend weather was crap today but still a good day , I was a little worse for wear haha , I was in the black mk4 golf on yellow style 5s
 

jonjay

50 Years of 911
Jun 27, 2005
5,843
1
Essex
Nice work James.

Side note: you want to get rid of the BMC as that is restricting power massively for you. Seen it time and time again on LCRs.
 
Oct 21, 2006
1,226
1
Norfolk
Nice work James.

Side note: you want to get rid of the BMC as that is restricting power massively for you. Seen it time and time again on LCRs.

Remember Maz, the BMC doesn't have the BMC internals. It has a massive Green Cotton Filter in it now (cylindrical) with a twin 100mm neoprene air feed. There is a build guide on page five or six if anyone wanted to refer to it. Thanks for another 'BMC' pointer...

Since Monday, I've been in Calgary, Canada, with work. It was very last minute but has been great fun. Just sat in the Marriott lobby waiting to be collected to head home. The weather is so nice here! The seven hours behind isn't so much fun though :(

James.
 
Oct 21, 2006
1,226
1
Norfolk
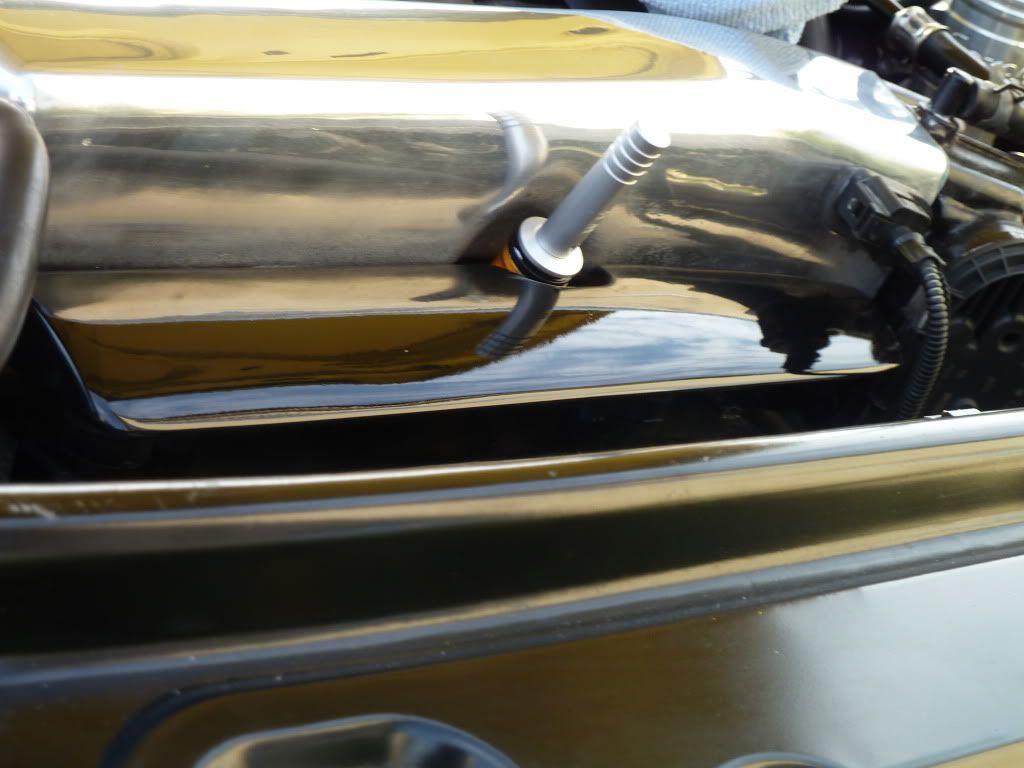
Dipstick Cap

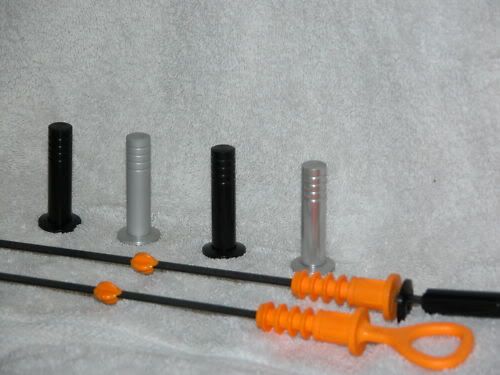
Always wanted one but never wanted to pay 25 pounds for one, as found on Awesome, etc. Always thought that was too much to pay for a little piece of machined CNC...

Managed to find one today for a whopping $9.99. That equates to 6 pounds 33 pence. $5.00 postage. All in, it was 9 pounds 46 pence. Result... hopefully! I've gone for the semi-polished version.

Here's a picture as advertised on the Seller's webpage.

KGrHqQOKkQE3ucs0ELBN8-3YJzFg_12.jpg


Here's the eBay link:

http://www.ebay.co.uk/itm/AUDI-VW-DIPSTICK-HANDLE-BLING-TT-JETTA-GLI-GOLF-IV-A4-/260576278754?pt=Motors_Car_Truck_Parts_Accessories&hash=item3cab8e78e2

I'll feed back on what the quality and fitment is like once I've received it. Just thought others might fancy one, considering the price.

James :)

P.S. My Pound Sign key doesn't work :blink:
 
Oct 21, 2006
1,226
1
Norfolk
Expansion Tank Cover... No Cigar...

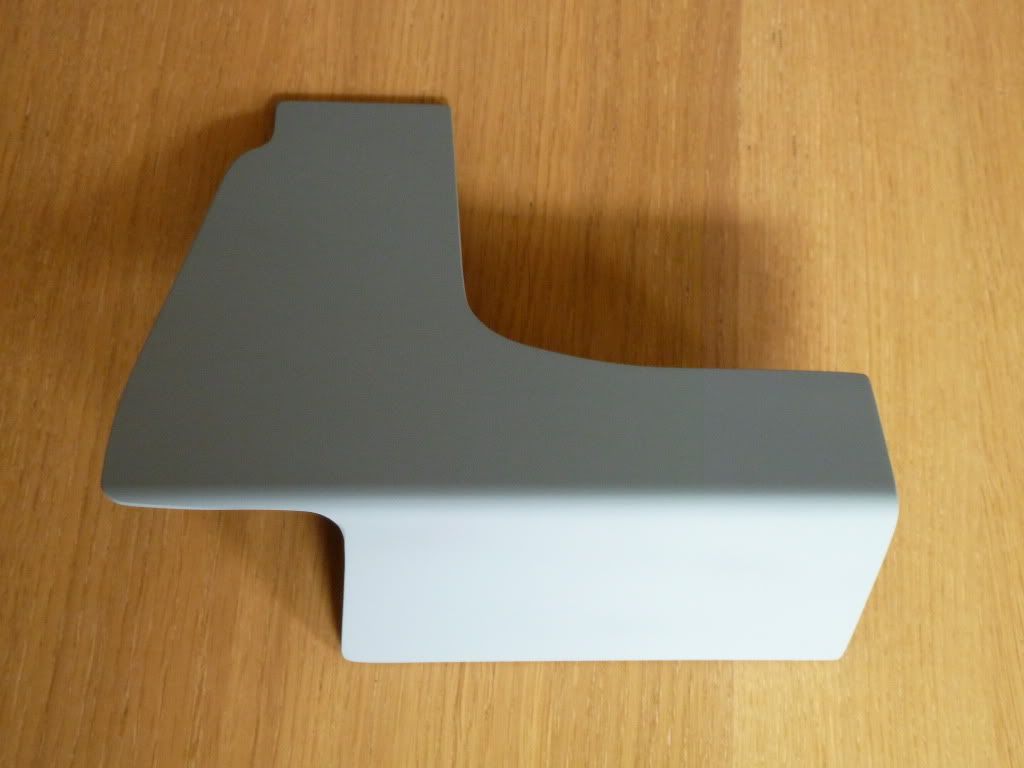
From a few posts above, I ordered some 3mm Perspex with a 90 degree bend in it. This arrived last weekend.

P1020498.jpg


P1020499.jpg


The idea had been to make an expansion tank cover, as found on the Audi TT/S3. I wanted to achieve a flush fitting single piece that would have access for the Audi R8 expansion tank cap and Forge power steering cap, but not for the windscreen washer bottle. A template was made and the Perspex was cut to its required size. Long story short, the varying heights didn’t make for a comfortable fit, and I didn’t think it would end up looking OEM, so I scrapped that idea.

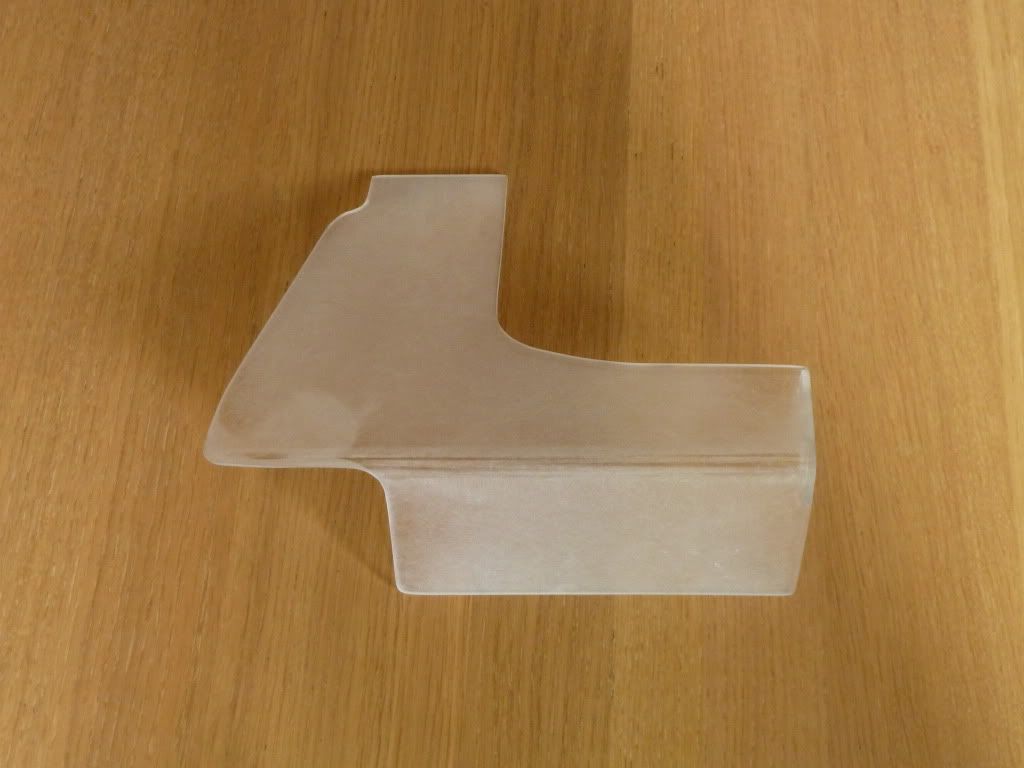
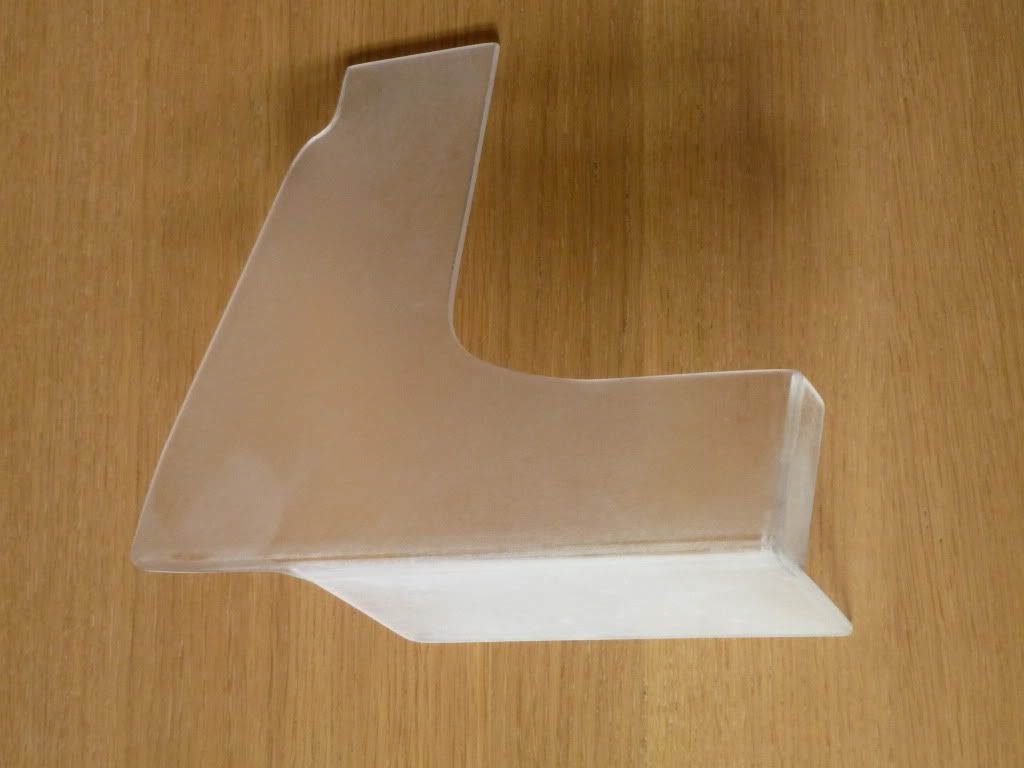
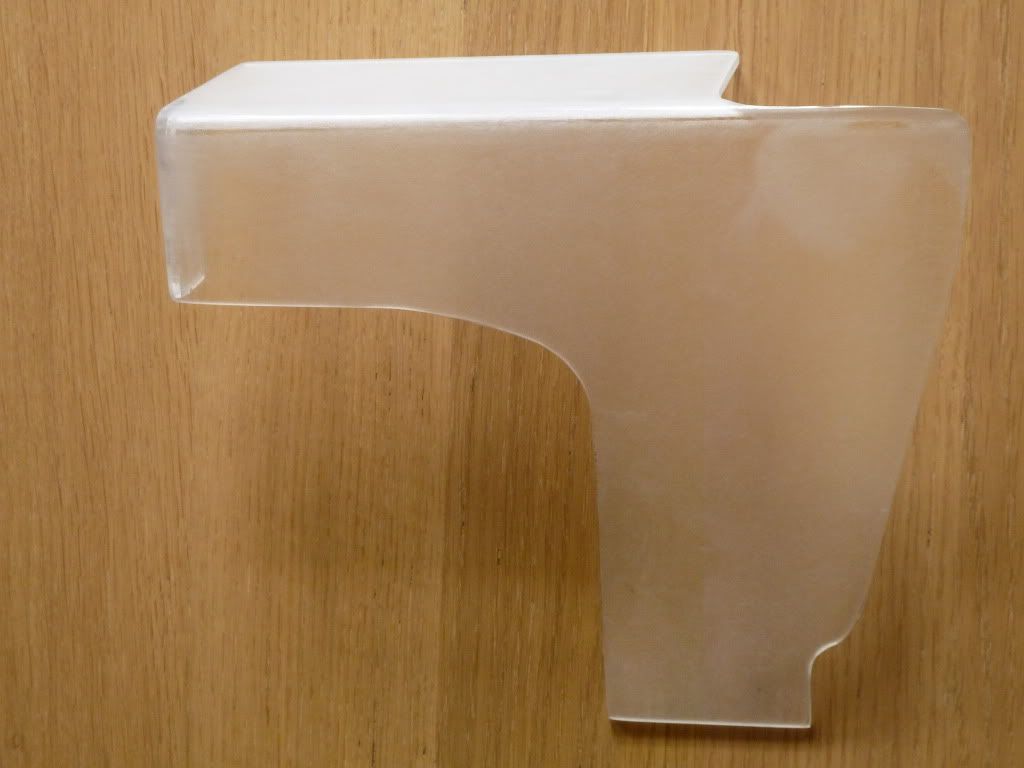
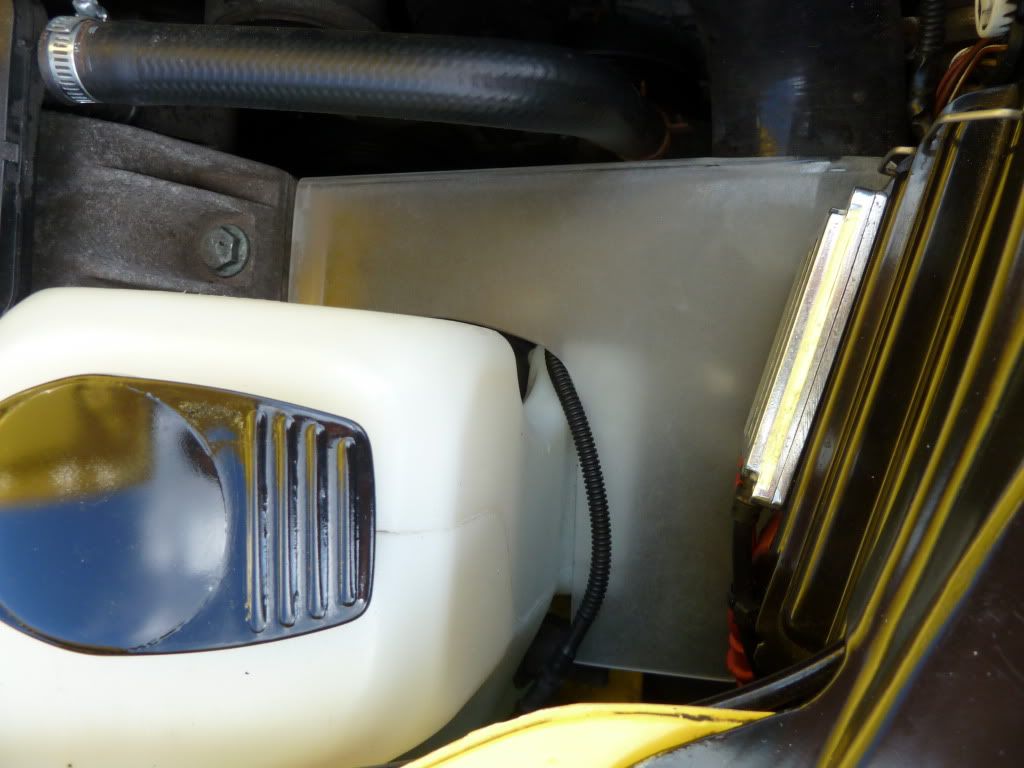
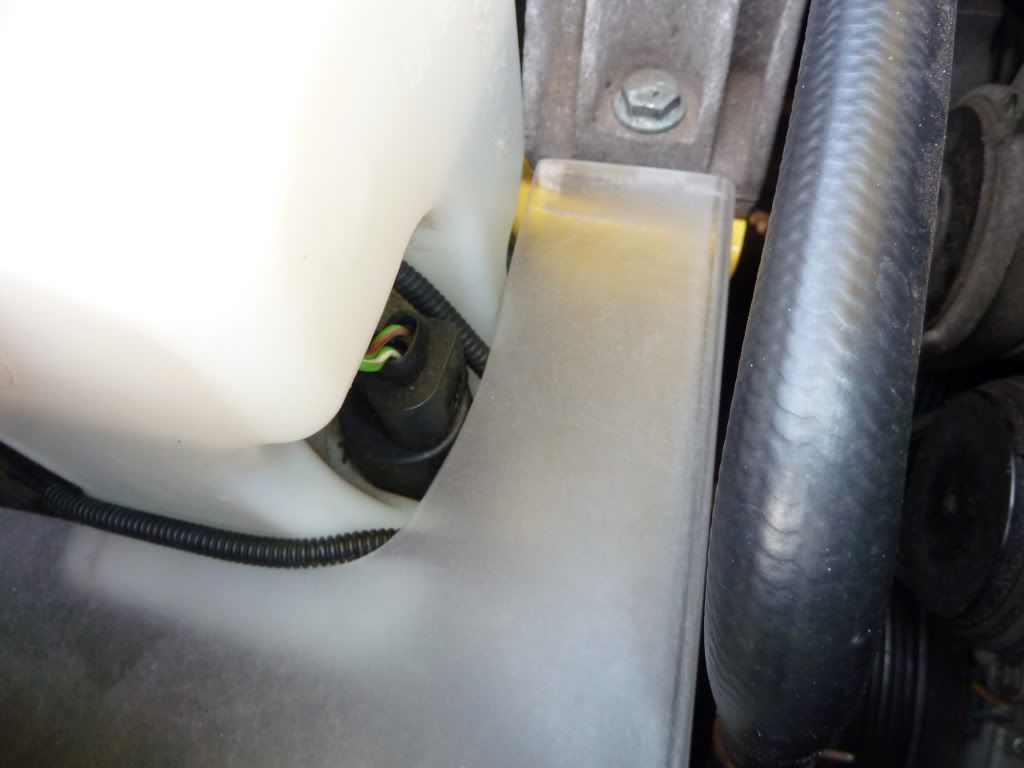
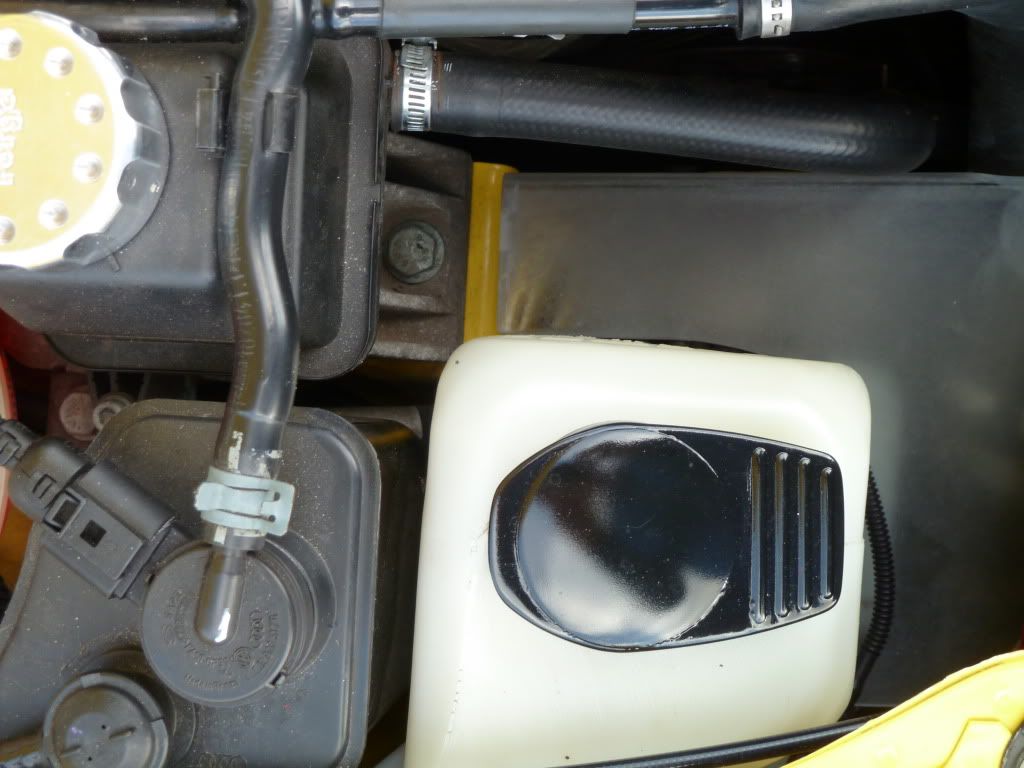
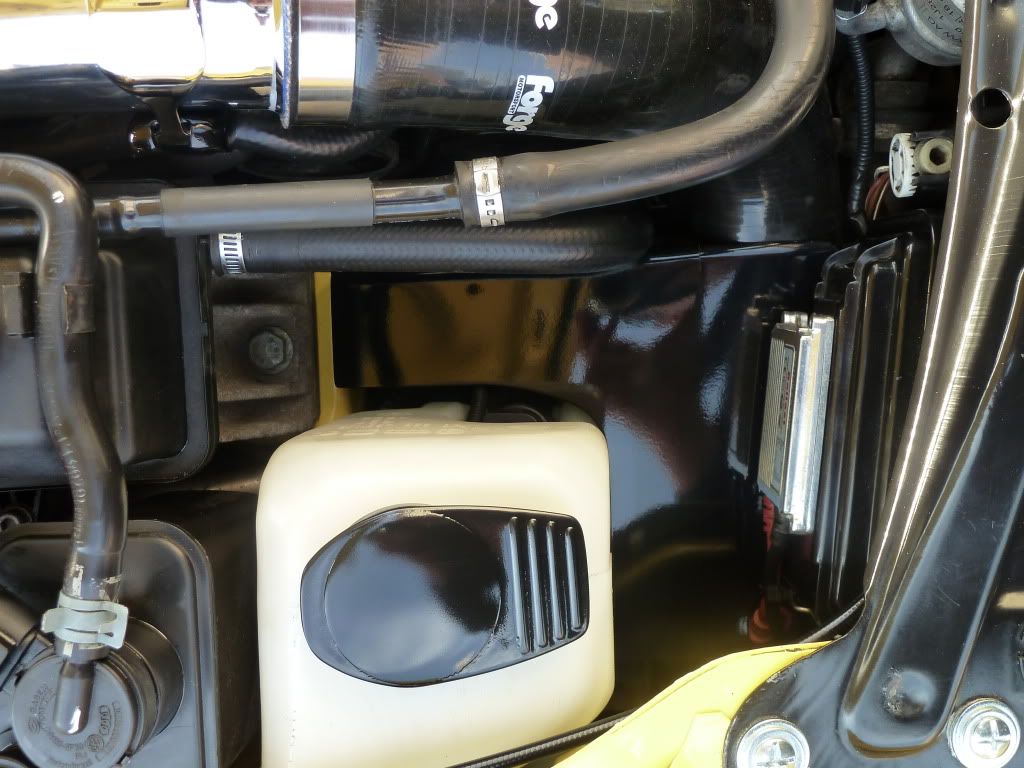
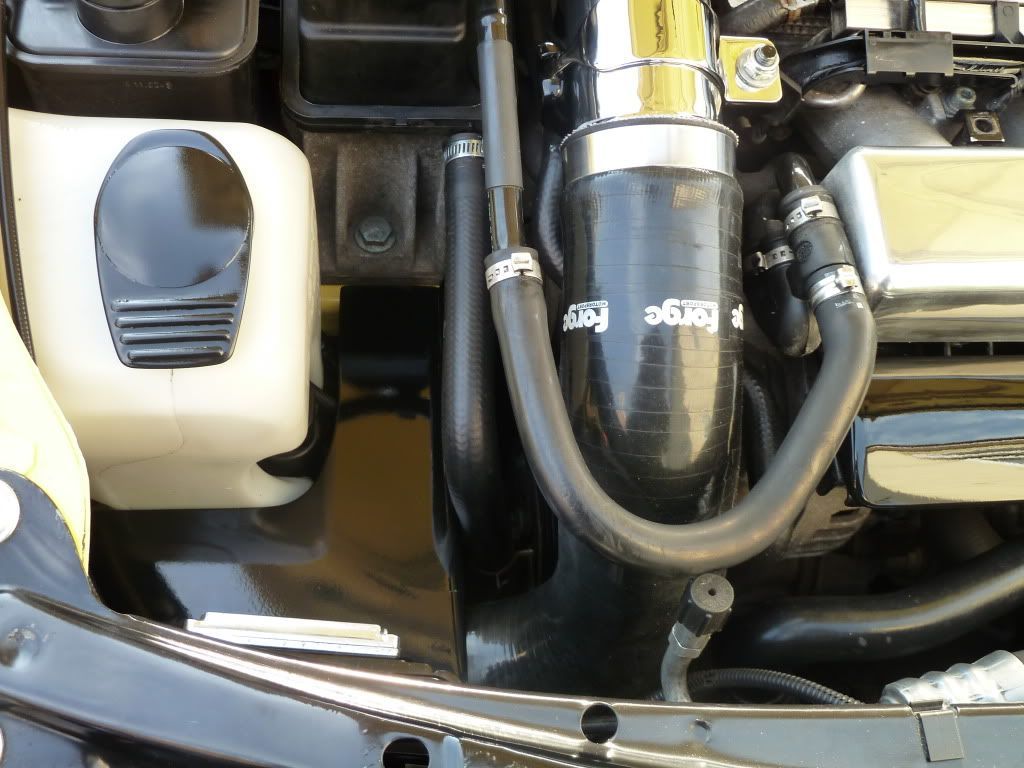
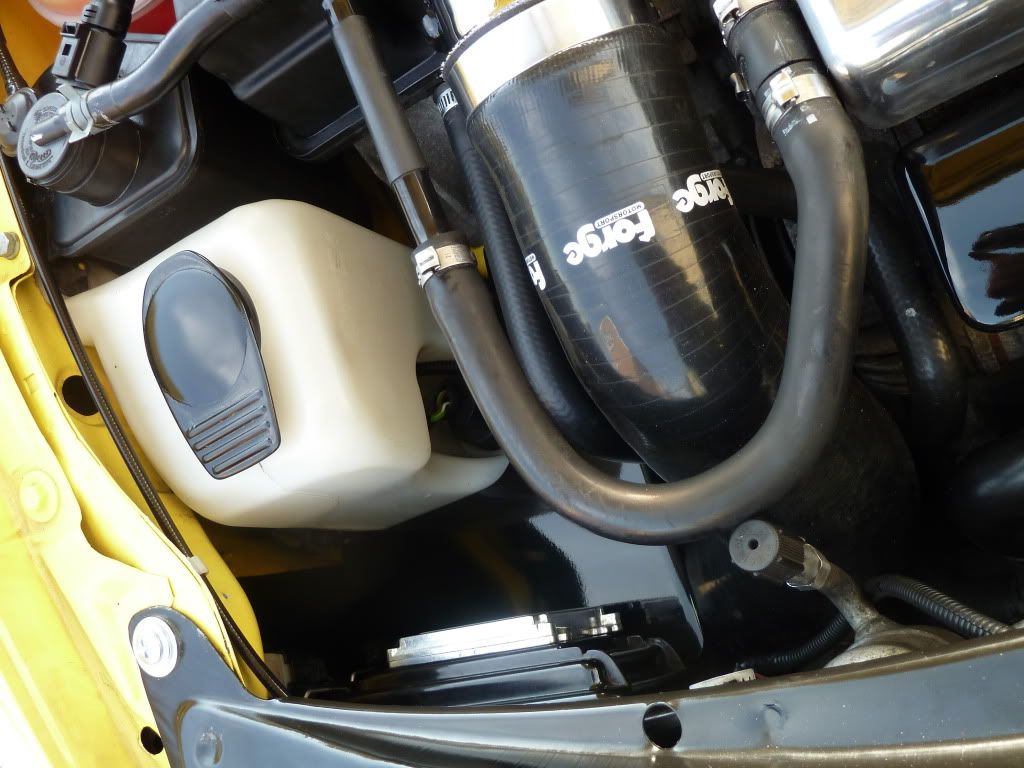
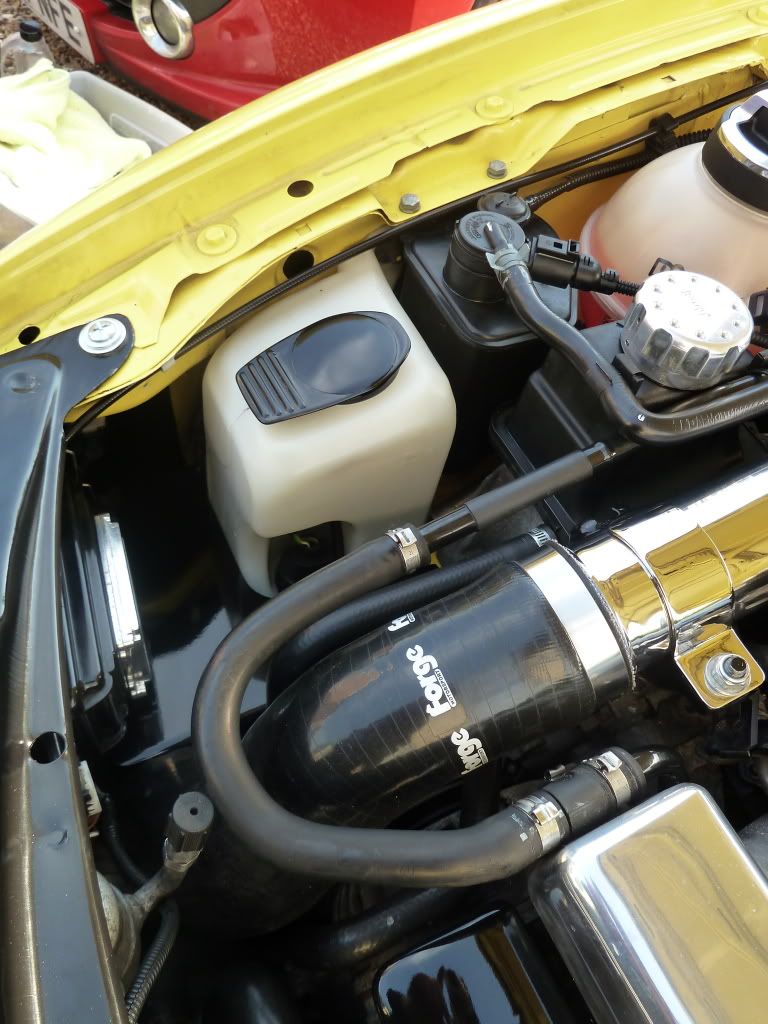
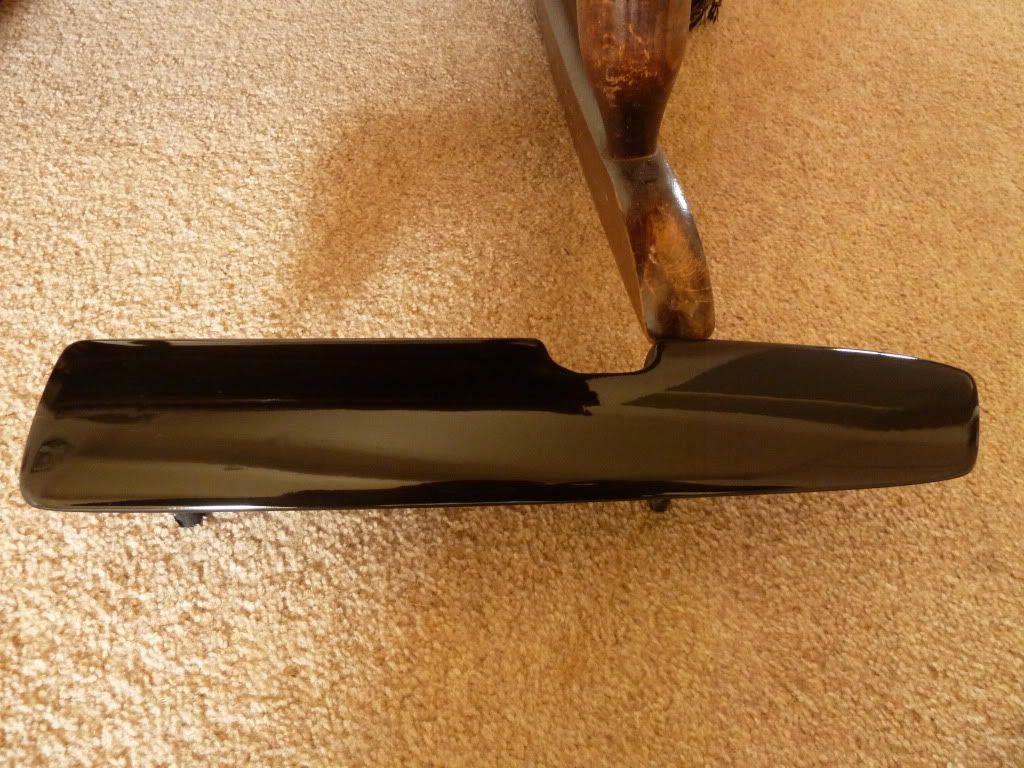
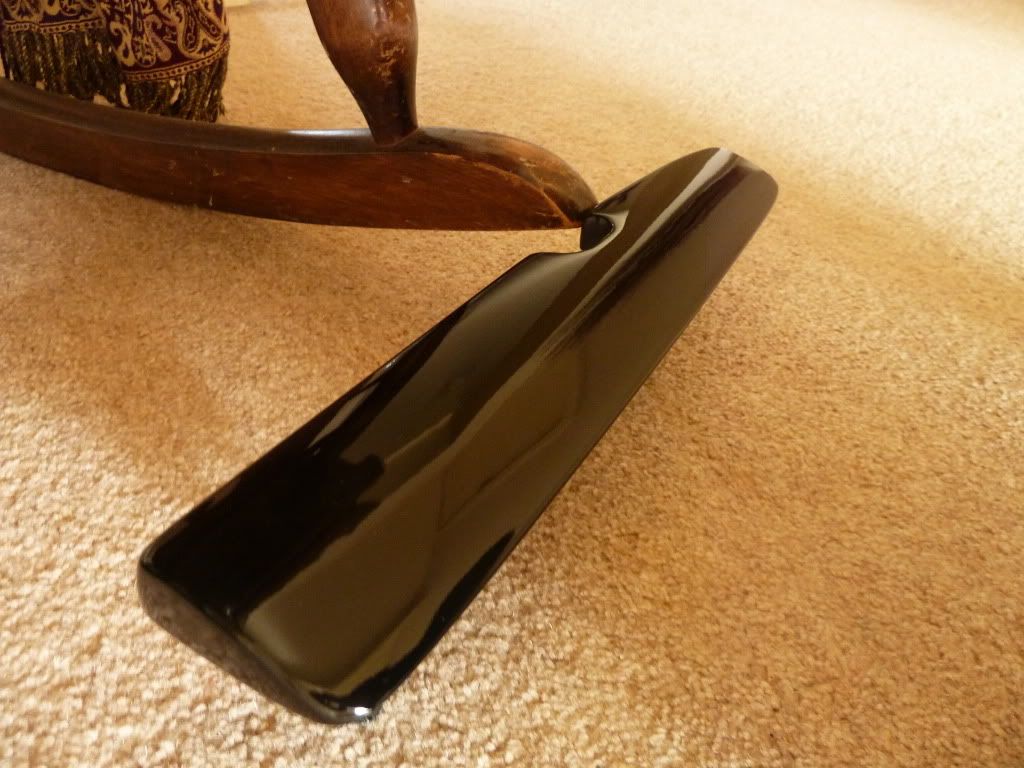
With a metres worth or Perspex doing nothing, I’ve developed a compromise, and something I haven’t seen before. It’s a cover to surround the lower part of the washer bottle, to tidy things up a little. A template was made and then, using a Dremel, the Perspex was cut to size. The bend was used as the straight edge, and only one small piece required gluing into place.

This probably doesn’t make a lot of sense so I’ll let the pictures do the talking…

P1020513.jpg


P1020515.jpg


P1020516.jpg


To give you an idea of where it will sit... Excuse the dirt...

P1020507.jpg


P1020508.jpg


P1020509.jpg


I keyed up the surface using 120 grit on an orbital sander before priming it.

P1020519.jpg


It needs flattening before it’s painted. I did toy with the idea of using the Carbon Mods CF, but I’ve decided to stick with the finish of the rest of the bay. I’ll finish it in matt black with a lacquer finish, but I think I’ll re-prep all the plastics in the bay and get them professionally painted with 2K paint, to give a lasting durable finish; with aerosols, I’m really happy with the finish once done but the lacquer just doesn’t cut it with durability.

I’m really happy with the cover. Solid and with no flaws, I hope it will subtly tidy up that corner of the bay.

All comments and suggestions welcome. Thanks for reading!

James :)
 
Oct 21, 2006
1,226
1
Norfolk
Hi everyone,

It’s been a little while since I last updated. Not sure whether this would be considered to be edge of your pants stuff… But got a lot of cosmetic engine bay work done recently and I have to say I am really pleased with how it’s all turning out... Of course I would say that :whistle:

P1020557.jpg


Washer Cover

Following on from an earlier post, the plan to make an expansion tank cover didn’t go to plan, as I couldn’t account for the change in height whilst achieving an OEM look. So I made this.

P1020515.jpg


P1020519.jpg


I forgot to take a pic of it finished but here are a few of it fitted. Using U-Pol Matt Black and U-Pol Lacquer, I left it in the laundry cupboard for a few weeks to cure properly before mopping it today with DA, using Megs Ultimate Compound (yellow pad) and Ultimate Liquid Wax (black pad); the finish came out really nice.

P1020573.jpg


P1020574.jpg


P1020570.jpg


P1020569.jpg


Continued...
 
Oct 21, 2006
1,226
1
Norfolk
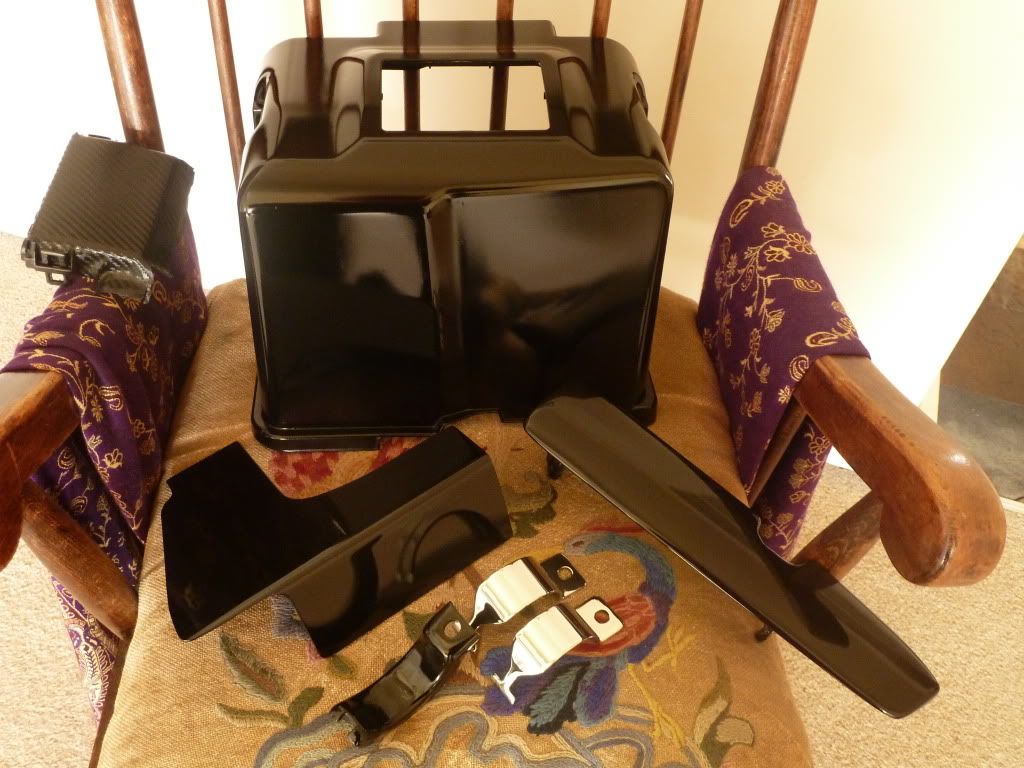
Manifold Cover

I’d previously smoothed the dimples last year, but having gone to a few car shows this year, I really was taken aback by the quality of finishes, and whilst I’d never want my car to become a show car, I have a sometimes frustrating attention for detail and I couldn’t help myself. I planned on doing the prep and then sending it away to be professionally sprayed, but I again used U-Pol, gave it a few weeks to cure before mopping it. As you can see I’ve filled the screw holes with plastic filler to achieve a completely smooth finish.

P1020564.jpg


P1020565.jpg


And fitted… You can see the new Dipstick handle in situ also… great quality for a few squids…

P1020571.jpg


P1020572.jpg


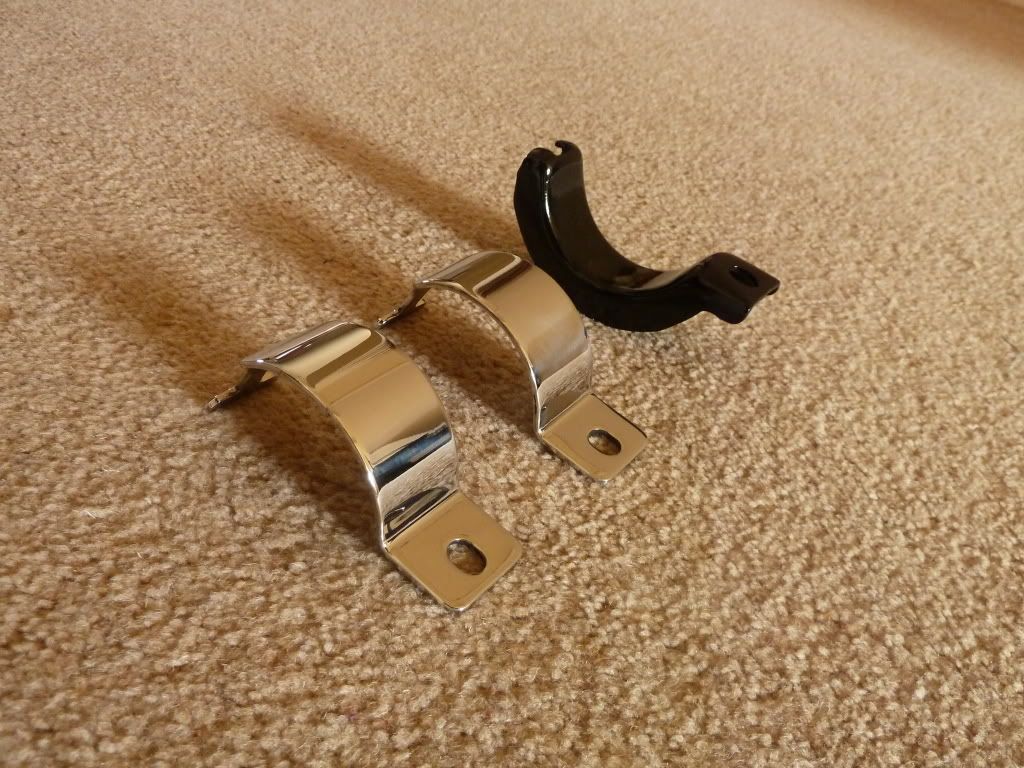
Charge Pipe Brackets

The brackets used to be painted black, but I decided to sand them down and polish them to match the finish of the pipe itself. Again, with seeing chromed examples, I was tempted to send the pipe, manifold and brackets off to be chromed, but to be honest, they come up really well if done thoroughly; only downer is that they take a little more upkeep, but I can live with that… pennies saved…

P1020562.jpg


They have been fitted, and the charge pipe has also received another going over. Very happy. Cough cough… the inlet manifold needs redoing…

Continued...
 
Oct 21, 2006
1,226
1
Norfolk
Washer Bottle Cover

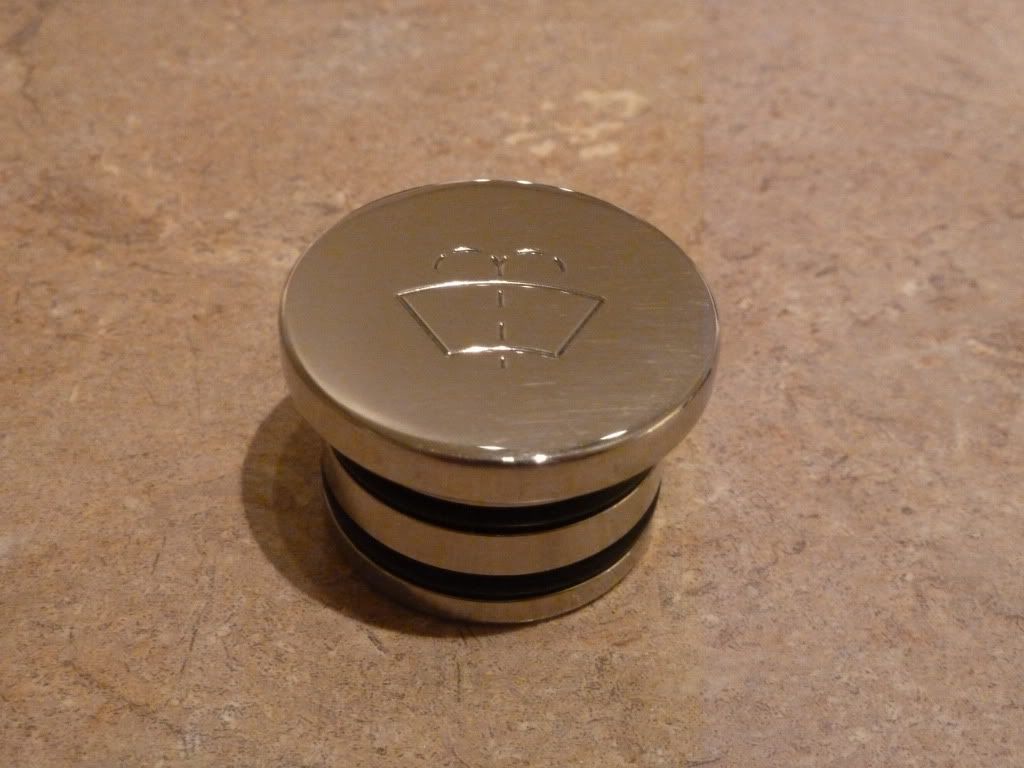
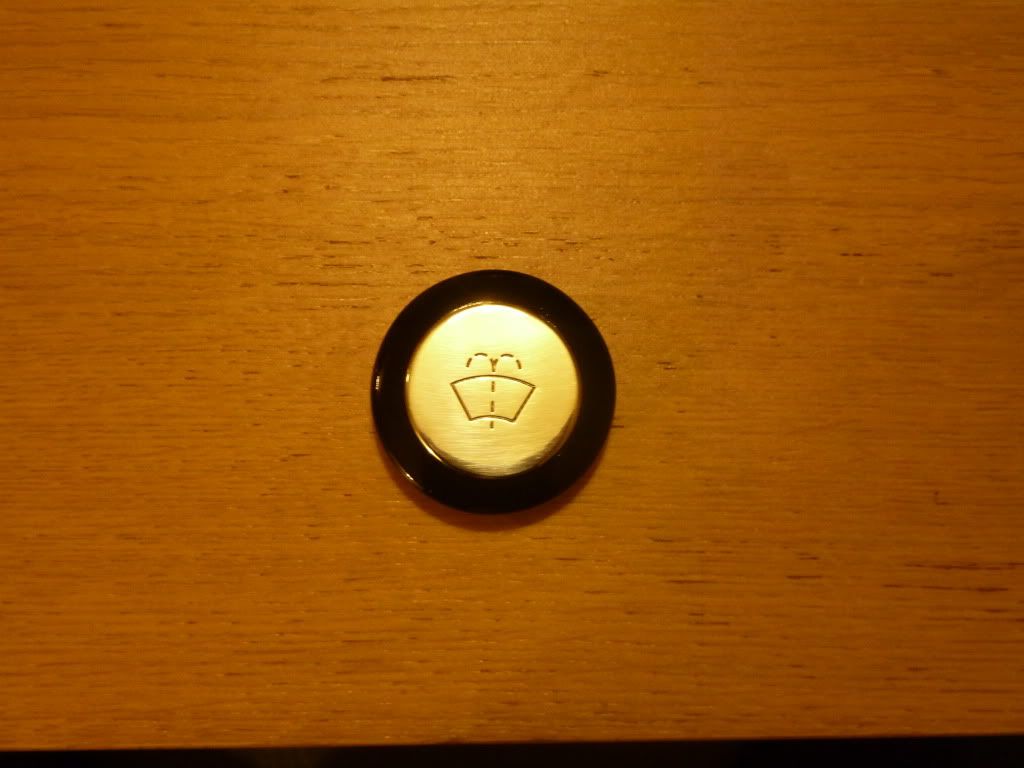
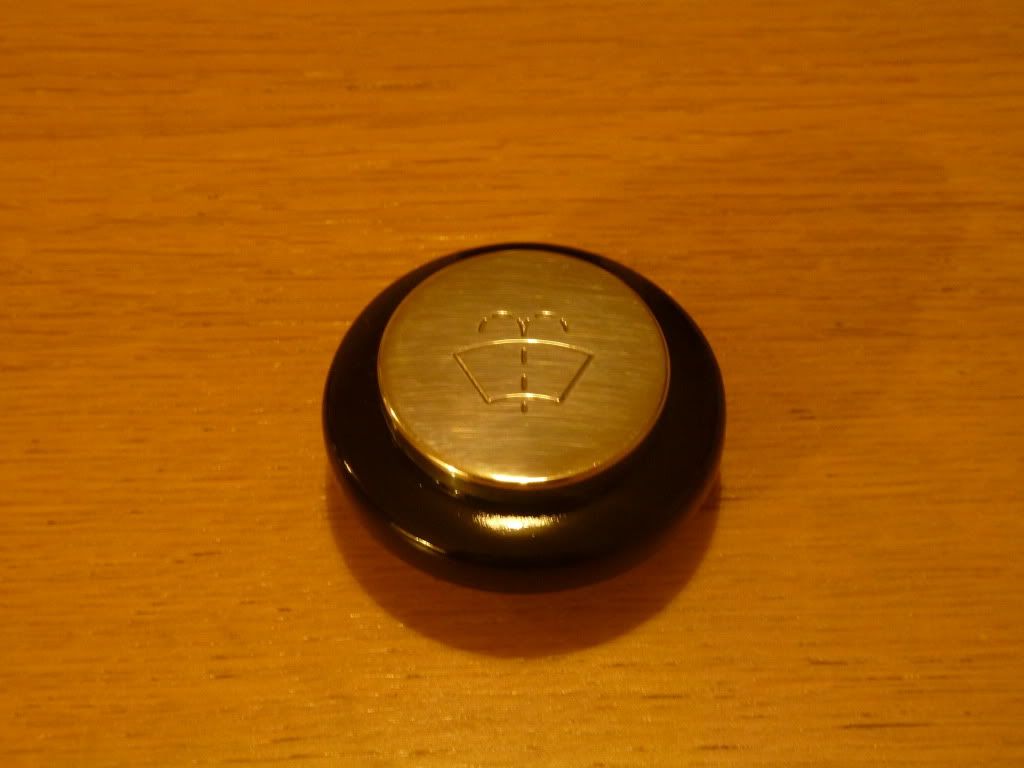
As you can see in the above pictures, I had painted the original cap, which is fine, but I really like the JCaps version. Looking on eBay, I came across a Focus RS billet aluminium washer cap, which I thought would be big enough to fit snuggly… nope… It only cost six quid plus p&p. It’s really well made.

P1020581.jpg


I used a spare cap and cut it down to make a circular cap, then used a hole cutter to allow the RS cap to fit snuggly inside it. I haven’t fitted it yet… we’ll see but I’m happy with it…

P1020592.jpg


P1020584.jpg


Things left to do…

I’ve been cleaning the bay as I’ve gone along. The nuts and bolts were replaced last year for shiny new ones and they are still nice and shiny.

The engine cover is being sanded down at the minute and will be refinished. The manifold cover needs to be re-polished, and I’m unsure as to whether to polish the throttle body; it’s presently painted black…hhhmmm… Last few bits and pieces now though...

Once the above is done, I’ll be saving my pennies to have the wheels refurbed to finish off the hub/brake work done over the summer, all the bushes will finally be replaced with the ones sitting in my shed, and the car will hopefully be getting a respray, as the car is eight years old and with it being Ovni, fade is becoming more obvious.

Finally, my front KW coilovers V1s will be going on, hopefully with the addition of a 50 mm height assist Static + air lift system made by Stance.Solutions. I would love to have full air ride fitted but coilovers are on, and with the assistance of front height adjustment from the Static + air lift modules, it makes financial sense, and ticks all the boxes for me.

Here’s a link to help you understand my gibberish…

http://www.stance-solutions.co.uk

Thanks for reading! All comments/ideas welcome.

James :)
 
Oct 21, 2006
1,226
1
Norfolk
Not much of an exciting update, but an update all the same.

Powerflex Dog Bone Bushes

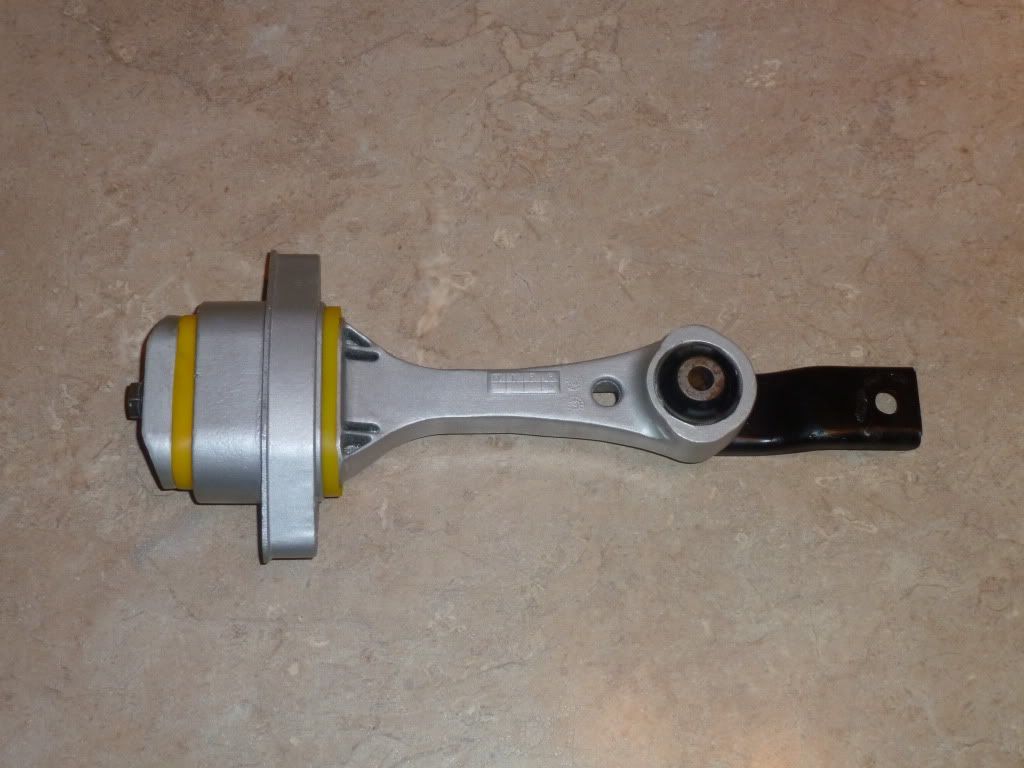
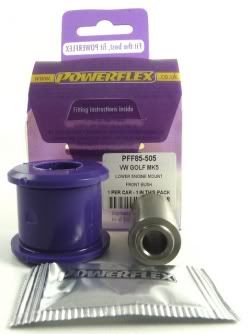
I’ve had a Powerflex Dog Bone bush for quite a while that I got as a freebee when buying my Wish Bone bushes, etc. Getting things ready for next year, I purchased an engine/gear box Dog Bone Mount for £10 plus postage from eBay, striped it down, cleaned/sanded/repainted it using Hammerite Smooth Silver/U-Pol Gloss Black, before fitting the new bush. It took a little effort to get the nut and bolt to catch, but once on it buttoned up fine.

Here’s a pic…

P1020646.jpg


Here’s a link and product code for anyone who might need it…

http://www.powerflex.co.uk/product-details/Front+Engine+Mount+Dog+Bone/882.html

PFF85-420 VW GOLF MK4 Engine Mounting (Dog Bone)

The smaller black bush seems absolutely solid and without wear, so I don’t think there’s a need to replace this. I’d be interested to hear if anyone has used this/ would recommend it?

resize_image.jpg


http://www.powerflex.co.uk/product-details/Front+Engine+Mount+Dog+Bone+Small+Bush/1820.html

Throttle Body Cover

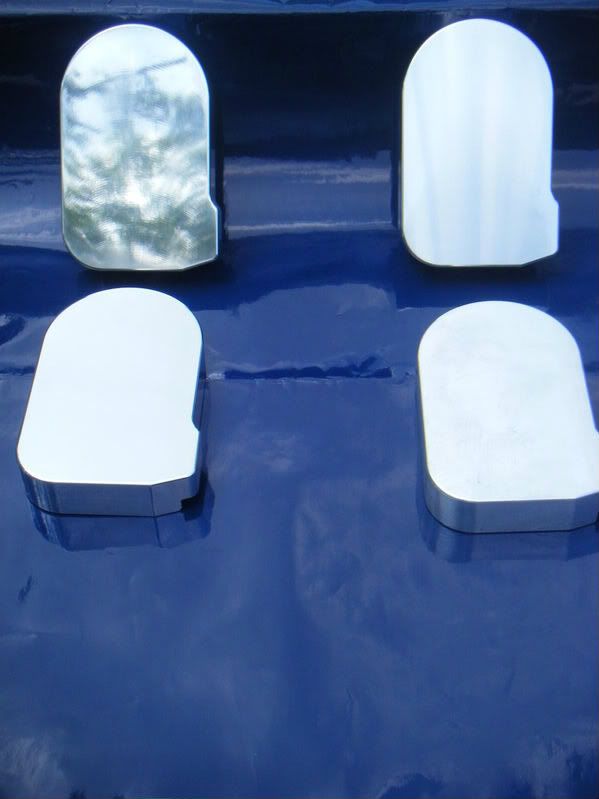
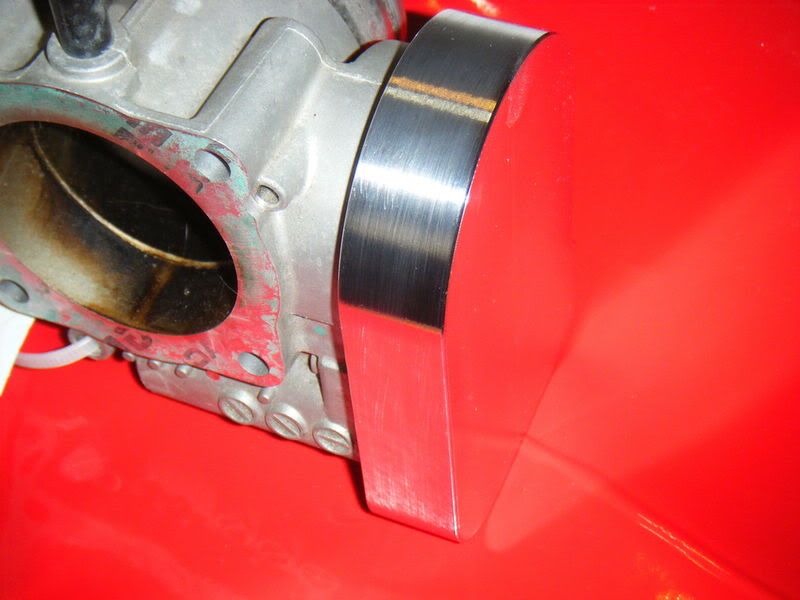
Having seen one of Richard’s (RDS) latest purchases on his thread, I bought one of these, having bought from WhanAB previously and knowing how good his products are.

Pics taken from web site…

KGrHqFicE4uDIbgoBOO4I1oFg0_3.jpg


KGrHqRjYE4n7gC-VBOO4bMDhSg0_3.jpg


http://www.ebay.co.uk/sch/whanab_audi_vw_designer_parts/m.html?_nkw=&_armrs=1&_from=&_ipg=&_trksid=p3686

My Throttle Body is presently painted black, but I intend to polish it to blend into the Inlet Manifold; this will hopefully be done in Jan. Hopefully it’ll blend in nicely…

Thanks for reading. Hope everyone has a great Christmas and New Year.

James :)
 
Last edited:
SEATCUPRA.NET Forum merchandise