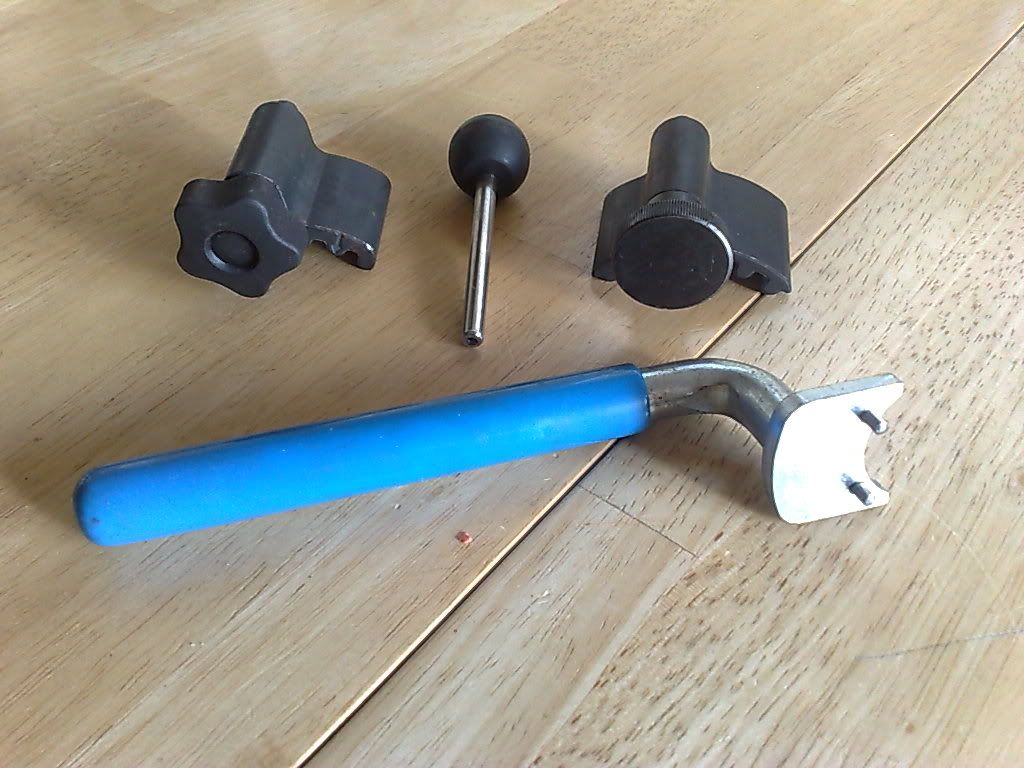
I'm afraid the frequency of photos taken started to decrease as my selfishness to get to the job done took hold. But I'll describe as best as possible.
Once the 4 crank pulley bolts are off you can start removing a few bits from the top. Engine cover of course, coolant header tank, fuel filter and what looks to be some sort of vacuum controller near the strut. Move them all out of the way and be prepared to lose a little coolant. Once moved out of the way you should have unrestricted access to the auxiliary ribbed belt and be able to put a socket/spanner on the auto tensioner while you pull the belt off. You can also unclip the top timing (toothed) (cam) belt cover and take it off. Take the crank pulley off too.
I didn't take the glow plugs out, if you want to then it will be easier to turn the engine over by hand but it's not essential if you're feeling strong.
The next bit is taking the N/S engine mount off. This is where the engine needs to be supported either from underneath using a jack or above using an engine support. The engine support route will definitely be easier, I had a nightmare trying to get the amount of travel I needed out of my jack. I had to use 2 pieces of wood, 1 above and 1 below and then the engine keep on leaning back into the bulkhead too much. I think this was because I took the dogbone mount off, it I would have left this on it would have supported the engine a little more and perhaps allowed me more access to the engine mount bolts which were bugger to get to.
Anyway, take the dogbone mount off, or don't. I'd try it without taking it off next time I did this job and see how it goes. Then support the engine in your chosen way and take the N/S engine mount off, then the bracket on the body, then the bracket on the engine.
Final part of the access disassembly is to take the lower belt covers off (2 sections). 6 10mm hex-head screws later and you can see the whole timing belt. Get your timing kit ready. This (3978 £13.25)
http://www.fast-tools.co.uk/acatalog/Volkswagen.html did me fine.
Turn the engine over using the 19mm(?) crank bolt. Turn clockwise to ensure you're not loosening the bolt at all. It will be hard to turn unless you took the glow plugs out. Turn it until you can insert the crank lock and the 2 prongs on the cam sprocket backplate are lined up with 4Z as in C6 below. The 4Z point has to go in between the prongs (those aren't teeth it's highlighting, it's the back of the cam sprocket. You can only line the crank timing mark up with the lock tool in.
Insert the cam locking tool (or 6mm drill bit if you're so inclined) and slacken the 3 bolts on the cam sprocket so the sprocket itself can move freely inside the limits of the bolts.
Slacken the tensioner by turning it anti-clockwise then remove it along with the old roller. Put the new roller on and the new tensioner, still with its locking pin in. Put the tensioner so its notch sits in the slot on the block. The whole assembly can't move from there. Use an allen key (6mm again I think) to turn it as far anti-clockwise as possible with the pin still in then tighten the bolt.
Loop the new belt around in the order of:
1. Cam sprocket
2. Tensioner
3. Roller
4. Crank
5. Water pump
Slacken the tensioner bolt slightly then turn the tensioner clockwise until the pointer is in the middle of the indicator then lock the bolt and tighten. The cam sprocket can turn slightly as the tensioner is tightened and loosed but the cam is locked in place by the cam locking tool.
Nice new teflon coated belt with new roller and tensioner:
Lock the cam sprocket 3 bolts, remove the 2 locks and then turn the engine over by hand using the crank bolt. Turn it over a few times until you can lock the crank again and the cam sprocket timing mark lines up with 4Z as before. The tensioner should still be pointing in the middle of the indicator and everything else should still be lined up. If not try starting again.
Once you're happy with everything start putting everything back together. Re-assembly as they say is the reverse of removal but in this case it's fairly easy. You can't put anything back together wrong.
I didn't use new mount bolts as Droitwich SEAT said they don't replace them. I tend to be able to feel torque pretty well so I didn't use my torque wrench for this job, although you obviously should if you're at all unsure.
Sorry for the lack of mid-action pics. The dogbone mount and the NS mount bracket bolt too me much longer than I thought so I had to get a move on. It took me about 4 hours while taking my time and taking a few pics + 2 30 min hold ups so it's not the biggest job in the world. Hope this helps someone.
 If his way of doing it causes a problem he has the ability to fix it.
 If his way of doing it causes a problem he has the ability to fix it.


