http://www.autometer.com/cat_gaugedetail.aspx?gid=2653 ?? dont know if any 1 likes this think im gonna get

Best gauge match for LCR dials/Phantom II UK distributor
- Thread starter dasmith83
- Start date
You are using an out of date browser. It may not display this or other websites correctly.
You should upgrade or use an alternative browser.
You should upgrade or use an alternative browser.
i was very close to getting those....but as they illuminate in such a similar way to the autogauge halfrauds ones, i thought i may aswell save £40.
i got both the boost and oil temp gauges together for £45, rather than about £100 for the autometer phantom equivalents
i got both the boost and oil temp gauges together for £45, rather than about £100 for the autometer phantom equivalents
ah ok....do these temp sensors all come a standard size then? I was worried as i went for a cheap n cheerful gauge it may not be as straightforward to get working.
im only have boost and oil temp, so i won't need the sandwich place.
what about the t-piece for the boost? where's that go? any pics for reference would be awesome...i've read ppl put it by the dv but i've no idea where that is either!
im only have boost and oil temp, so i won't need the sandwich place.
what about the t-piece for the boost? where's that go? any pics for reference would be awesome...i've read ppl put it by the dv but i've no idea where that is either!
just t piece into the dump valve line, the one that runs into the top of the valve for the boost value-if its mechanical. If its electrical boost t it the same but it has a pulse sender which electrically determines the pressure.
oil temp, im not sure what the size of the hole is, but not all senders that are supplied with gauges will fit, so you may need to source a sender if yours isnt the right size.
If you search for it, there are a few threads ive read with it on but cant recall the exact size anymore
oil temp, im not sure what the size of the hole is, but not all senders that are supplied with gauges will fit, so you may need to source a sender if yours isnt the right size.
If you search for it, there are a few threads ive read with it on but cant recall the exact size anymore
ok guys, i just tried doing the wiring for the gauges, and worked out how they work in the house with a 12v transformer.
I have the graduational autogauge series (7colour ones).
There is a yellow, purple and orange wire which need a 12v source and a black earth wire.
All works fine in the house....HOWEVER when i connect the 3 positive wires to the blue/grey wire from the dimmer and the black to the brown on the dimmer, the gauge illuminates, but i can't change the colour of the lighting.
Seems rather strange to me! any ideas? Im just hoping the switch was being annoying! i will try again 2mo morning though and post back
Rite guys, a little update.
When the purple wire is connected to the +, it illuminates the needle.
When the yellow and orange wires are connected to the +, it illuminates the dials (and i can change the colour using the switch).
When the yellow/orange wires are connected individually, nothing illuminates...both yellow and orange need a + feed to illuminate the dial.
Using the transformer, i have discovered that the colour change feature works with 12v, and 9v, but 6v and below it doesn't work and the dial remains illuminated in blue (the first colour out of the sequence).
Now, my confusion at the moment, is that the blue/grey wire on the dimmer, provides 11.3v (with the car off) so surely the illumination would all work fine...but alas, no it doesn't.
Any ideas why this might be? All i can think of, is it needs more current? Where else near the dimmer controls could i find a 12v ignition switched feed?
Cheers
Small guide to wiring the Autogauge Gradational Series (7 colour change)
Please Note: the information below is for the Autogauge "gradational" series, 7 colour change). They can be purchased from most Halfords stores, for approximately £20-£25. The gauges come with the necessary parts to fit them and make them work (i.e. t-piece and piping for boost guage, and temp. sender for oil temp).
http://www.halfords.com/webapp/wcs/...rentcategoryrn_70561_crumb__topcategory_70561
they're not fitted yet, but i will take some pics showing what they look like against the standard dials, day and night later on today.
Below are some pics of the exact same gauge from a post i found yesterday.
Obviosuly for our dials, we would leave the guages on "red"
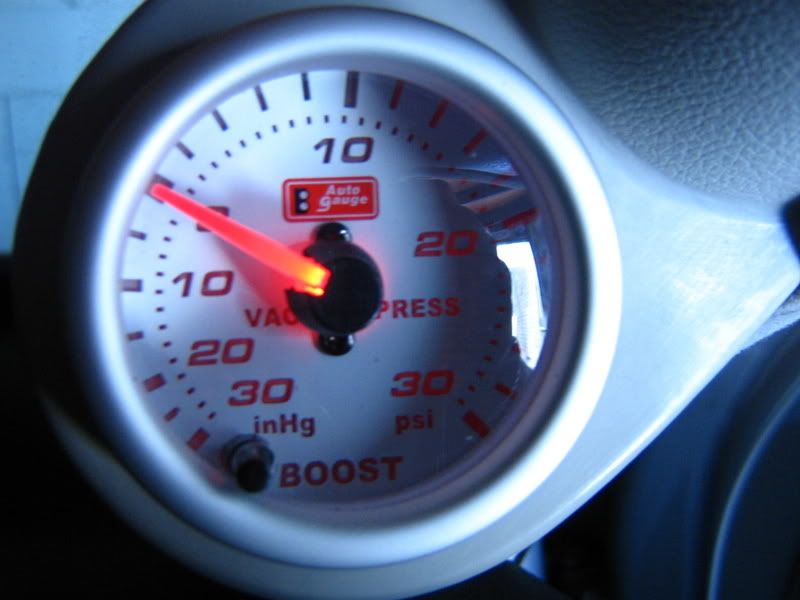
As for the wiring...see pics below-
The gauge has the wires below:
Black - earth
Purple - turns on illumination for the needle
Orange - turns on illumination for the dial numbers
Yellow - memory wire to remember what colour you chose
(note: the dial numbers will only illuminate if both the orange and yellow wires are connected...orange alone will not do anything).
So as per the pics below-
Yellow wire to red permanent feed in pic below

Black wire to brown earth wire
Purple and orange to blue/grey from dimmer plug (this allows the dials to dim along with the standard dash lights).

Please Note: the information below is for the Autogauge "gradational" series, 7 colour change). They can be purchased from most Halfords stores, for approximately £20-£25. The gauges come with the necessary parts to fit them and make them work (i.e. t-piece and piping for boost guage, and temp. sender for oil temp).
http://www.halfords.com/webapp/wcs/...rentcategoryrn_70561_crumb__topcategory_70561
they're not fitted yet, but i will take some pics showing what they look like against the standard dials, day and night later on today.
Below are some pics of the exact same gauge from a post i found yesterday.
Obviosuly for our dials, we would leave the guages on "red"
As for the wiring...see pics below-
The gauge has the wires below:
Black - earth
Purple - turns on illumination for the needle
Orange - turns on illumination for the dial numbers
Yellow - memory wire to remember what colour you chose
(note: the dial numbers will only illuminate if both the orange and yellow wires are connected...orange alone will not do anything).
So as per the pics below-
Yellow wire to red permanent feed in pic below
Black wire to brown earth wire
Purple and orange to blue/grey from dimmer plug (this allows the dials to dim along with the standard dash lights).

beezasport
Sold the car to buy a....
on the oil temp....there are 4 small connected into the gauge and there are 3 points to bolt onto one being the sender for oil temp and a ground and +ive do the ground and +ive need to be used on he bolt on side?
Now i'm not at home at the mo, but as far as i remember the bolt's need to be wired up as well. I can't see any reason why you couldn't use the + and - from the illumination wires.
I.e. take the purple and orange wires from the gauge and the blue/grey wire from the dimmer and fix them all onto the + bolt. Then take the black wire from the gauge and the brown from the dimmer and fix them onto the - bolt....they other bolt just needs to go to the temp sender (think its the white wire on the sender), and then take the black wire from the sender and earth it somewhere.
I'll double check this when i can see the wiring diagram when i get home. Also once i fit these gauges i'll do a proper guide and post it up as a seperate thread specific to these autogauge gradational gauges. (fingers crossed the nomad double pillar pod will arrive this week..it should've been here last friday)
beezasport
Sold the car to buy a....
fund out that if you use the dimmer +ive for the bolt +ive on the gauge it makes the gauge read wrong needs a 12v ignition source...the dimmer reduces the voltage causing the readings to drop
cheers for all the info really helped out!
i can take some pics for you if you need them
cheers for all the info really helped out!
i can take some pics for you if you need them
hey m8....thats interesting, thanks for the heads up ") Pics would be great m8!
Pics would be great m8!
So where did you tap into for a decent 12v ignition source?
Also, where did you put your temp sender? was it a direct fit? I'm assuming you also have these autogauge gauges??
Pics would be great m8!So where did you tap into for a decent 12v ignition source?
Also, where did you put your temp sender? was it a direct fit? I'm assuming you also have these autogauge gauges??
beezasport
Sold the car to buy a....
hey m8....thats interesting, thanks for the heads up
So where did you tap into for a decent 12v ignition source?
Also, where did you put your temp sender? was it a direct fit? I'm assuming you also have these autogauge gauges??
Went straight into the top of the filter housing with the filter.
I didnt tap into anywhere for the ignition live yet thats how i found out about the voltage drop using the dimmer! ill try get some pics after work tomorrow for ya.
ok m8...glad to hear the temp sender is a nice fit. is it a pain the backside to get to? or is it a 5min job for that bit?
If i remember rightly...on the pic below, the blue/grey wire and the red/brown wire should be a 12v ignition. I will get the multimeter out tomorrow and find out!
If i remember rightly...on the pic below, the blue/grey wire and the red/brown wire should be a 12v ignition. I will get the multimeter out tomorrow and find out!
beezasport
Sold the car to buy a....
mine was tight to get at but not too bad! i'll get the meter out when i get in tonight if its not too late.
the oil temp sender needs earthing with the black wire ill post up the wire combinations when i get chance to have a look.
the oil temp sender needs earthing with the black wire ill post up the wire combinations when i get chance to have a look.
Similar threads
- Replies
- 2
- Views
- 789
- Replies
- 0
- Views
- 2K
