Hello !
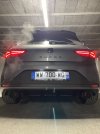
Decided to start this thread to share my experience through modifying my Leon cupra mk3 by my own since I bought it in November 2023. Here is My introduction
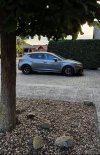
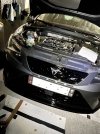
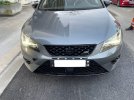
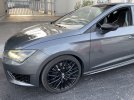
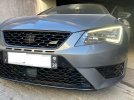
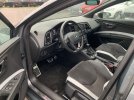
So I imported from Germany a Leon cupra mk3 DSG 290 sub 8 pack in pyrenean grey. It’s originally an orange energy pack but the previous owner blacked it out in a seat workshop :



After checking on some nice looking cupras on instagram (and also because I really like to) I decided to start the mods. Since the car is under seat warranty I only started with aesthetics mods.
1) Cupra monogram at the back
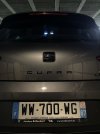
Bought OEM cupra letters in gloss black, easy mod even though I first struggled to find any guide on how to position it « OEM way ». I ended up position those letters using an ST measure guide so they were too high on the trunk for me and finally did it again with new letters :
1st try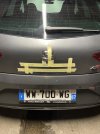
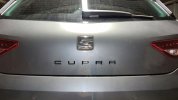
2nd try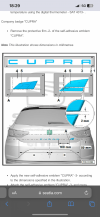
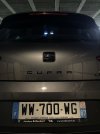
I used a cardboard hand made guide thanks to te correct measure guide I’ve finally found.
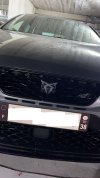
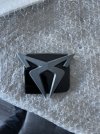
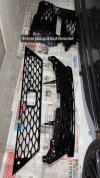
2) grey and black cupra flag on the front grill
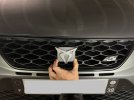
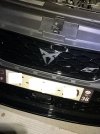
I bought an OEM cupra R flag for the front grill.
Used an hairdryer to warm a bit the original flag and it was pretty easy to take it off. Then just put the other one in place (back with double sided tape)
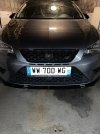
3) wanted to add a sportier look to the car which is quite discrete from factory even with sub8 skirts. I bought rieger front lip and rear diffusor and a maxton spoiler.
No difficulty for the front lip few holes to drill (bottom of the front bumper) and screws to put on.
Same for the spoiler double sided tape can take some time to adjust on the car depending on how perfectionist you are to perfectly center it.
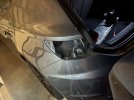
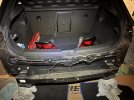
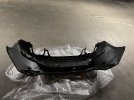
For the Rear diffusor : it was quite scary to take the original one off. Taking off the screws was really easy (3 or 5 screws I think) but then you have to pull on the diffusor and you get really scared to break some plastic clips. In the end just be careful with your paint. Do your best to look behind it and check the « real clips » to unclip before pulling (hard !) on the other ones, from a side to another, no need to rush the process.
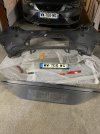
Installing the new one was really easy after.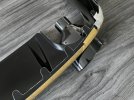 Here you can see that these are not « real clips » but they are so squeezed in the bumper that you really have to pull hard.

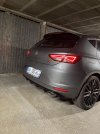
4) decided to black out the Seat emblems. Contacted some wrappers who weren’t convinced the wrap will last well. Ended up buying full dip paint and tried it. 6 coats of paint and 3 coats of varnish and the results was …. Well not what I expected :

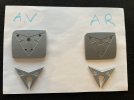
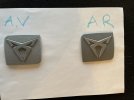
Finally found on Amazon some replacement S emblems. Just had to remove the chromed S parts which at first I didn’t know I could take off. I searched about it and found out you can easily do it :
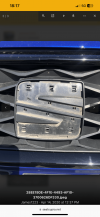
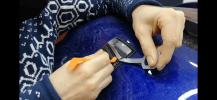
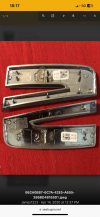
Good to know : I broke one part in two and some clips snapped during the removal process.
I then used a needle to clean the broken clips from the hole to make sure the new parts will perfectly fit in.
Its direct plug and play replacement already gloss black with original clips at the back + double sided tape and they hold on very well.
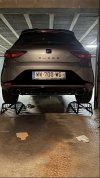
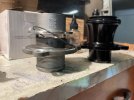
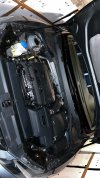
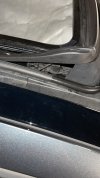
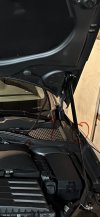
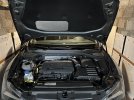
5) added hood jacks. Really easy mod
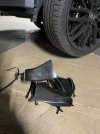
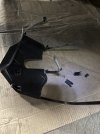
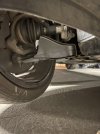
6) read some stuff about rs3 air brake ducts
I used a really helpful guide on how to retrofit them on our cupra lower arms :
Cupra.net fitting guide
Adjustment guide
Since I have 370mm brembo brakes I didn’t had to trim the top edges of the ducts (they won’t rub against the disc even in full lock) but I did trim as mentioned in the second guide the fixation to allow better hold on the arm.
Except this little trimming work really easy to put on.
7) resonator delete
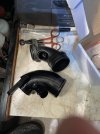
I bought a Vag sport resonator delete kit (send a picture of your resonator to make sure you get the right type) and installed it myself in a « self garage ». I don’t have any picture for this process but you have a YouTube video of this installation from vagsport on an Audi S3 so might help.
I had to cut the front exhaust collar since the screws were corroded and I did cut out a bit too much of my exhaust so ended up with small gaps between the vagsport pipe and the rest of the exhaust. (advice : do not use the shitty tool you can buy with the resonator, just take measurement and use grinding machine. Also it might be easier to take off the whole exhaust line which is not hard).
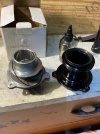
It costed me 5 different exhaust collars to finally find the right fitment to avoid any leaks noices and water condensation spilling from the collars. I bought an original VAG collar for the front and I add an additional plate (from another collar) in the double collar from vagsport at the back. I also did high temperature silicone joints on each collar sides. => no more whistling / blowing / loud noises in the canine or any spilling from the exhaust. Really happy to have finally solved this issue. And the new exhaust note is just what the car was missing. If you wonder : yes a little of droning around 130kmh if you push on the gas pedal around 50% but easy to avoid this situation and not really loud droning can easily live with it. The car is still discrete when you drive in town and the burbles comes in only in S gearbox mode.
8) new exhaust tips.
I really didn’t like the OEM tips so ended up buying some new ones :
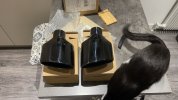
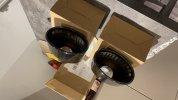
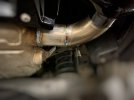
only issue with our cars is that you have to cut off the old ones and weld the new. A welder did a really good job on mine for around 150€ (inox welding is a bit more expensive)
Decided to start this thread to share my experience through modifying my Leon cupra mk3 by my own since I bought it in November 2023. Here is My introduction
So I imported from Germany a Leon cupra mk3 DSG 290 sub 8 pack in pyrenean grey. It’s originally an orange energy pack but the previous owner blacked it out in a seat workshop :


After checking on some nice looking cupras on instagram (and also because I really like to) I decided to start the mods. Since the car is under seat warranty I only started with aesthetics mods.
1) Cupra monogram at the back
Bought OEM cupra letters in gloss black, easy mod even though I first struggled to find any guide on how to position it « OEM way ». I ended up position those letters using an ST measure guide so they were too high on the trunk for me and finally did it again with new letters :
1st try


2nd try


I used a cardboard hand made guide thanks to te correct measure guide I’ve finally found.
2) grey and black cupra flag on the front grill
I bought an OEM cupra R flag for the front grill.
Used an hairdryer to warm a bit the original flag and it was pretty easy to take it off. Then just put the other one in place (back with double sided tape)

3) wanted to add a sportier look to the car which is quite discrete from factory even with sub8 skirts. I bought rieger front lip and rear diffusor and a maxton spoiler.
No difficulty for the front lip few holes to drill (bottom of the front bumper) and screws to put on.
Same for the spoiler double sided tape can take some time to adjust on the car depending on how perfectionist you are to perfectly center it.
For the Rear diffusor : it was quite scary to take the original one off. Taking off the screws was really easy (3 or 5 screws I think) but then you have to pull on the diffusor and you get really scared to break some plastic clips. In the end just be careful with your paint. Do your best to look behind it and check the « real clips » to unclip before pulling (hard !) on the other ones, from a side to another, no need to rush the process.
Installing the new one was really easy after.
 Here you can see that these are not « real clips » but they are so squeezed in the bumper that you really have to pull hard.

4) decided to black out the Seat emblems. Contacted some wrappers who weren’t convinced the wrap will last well. Ended up buying full dip paint and tried it. 6 coats of paint and 3 coats of varnish and the results was …. Well not what I expected :

Finally found on Amazon some replacement S emblems. Just had to remove the chromed S parts which at first I didn’t know I could take off. I searched about it and found out you can easily do it :


Good to know : I broke one part in two and some clips snapped during the removal process.
I then used a needle to clean the broken clips from the hole to make sure the new parts will perfectly fit in.
Its direct plug and play replacement already gloss black with original clips at the back + double sided tape and they hold on very well.

5) added hood jacks. Really easy mod

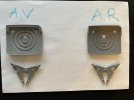
6) read some stuff about rs3 air brake ducts
I used a really helpful guide on how to retrofit them on our cupra lower arms :
Cupra.net fitting guide
Adjustment guide
Since I have 370mm brembo brakes I didn’t had to trim the top edges of the ducts (they won’t rub against the disc even in full lock) but I did trim as mentioned in the second guide the fixation to allow better hold on the arm.
Except this little trimming work really easy to put on.


7) resonator delete
I bought a Vag sport resonator delete kit (send a picture of your resonator to make sure you get the right type) and installed it myself in a « self garage ». I don’t have any picture for this process but you have a YouTube video of this installation from vagsport on an Audi S3 so might help.
I had to cut the front exhaust collar since the screws were corroded and I did cut out a bit too much of my exhaust so ended up with small gaps between the vagsport pipe and the rest of the exhaust. (advice : do not use the shitty tool you can buy with the resonator, just take measurement and use grinding machine. Also it might be easier to take off the whole exhaust line which is not hard).
It costed me 5 different exhaust collars to finally find the right fitment to avoid any leaks noices and water condensation spilling from the collars. I bought an original VAG collar for the front and I add an additional plate (from another collar) in the double collar from vagsport at the back. I also did high temperature silicone joints on each collar sides. => no more whistling / blowing / loud noises in the canine or any spilling from the exhaust. Really happy to have finally solved this issue. And the new exhaust note is just what the car was missing. If you wonder : yes a little of droning around 130kmh if you push on the gas pedal around 50% but easy to avoid this situation and not really loud droning can easily live with it. The car is still discrete when you drive in town and the burbles comes in only in S gearbox mode.
8) new exhaust tips.
I really didn’t like the OEM tips so ended up buying some new ones :


only issue with our cars is that you have to cut off the old ones and weld the new. A welder did a really good job on mine for around 150€ (inox welding is a bit more expensive)

Last edited:


