• Guest would you be interested in CUPRA or SEAT valve caps? let us know in the poll

  • Welcome to our new sponsor Lecatona, a brand dedicated to enhancing performance for VAG group sports cars, including SEAT, Audi, Volkswagen and Škoda. Specializing in High Pressure Fuel Pump (HPFP) upgrades.

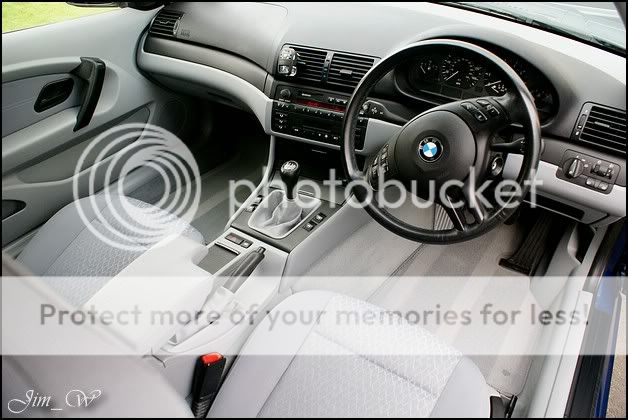
Light cloth interior detail - e46 318 BMW

Jim@WD

Active Member
Something a little different for you this time..

e46 BMW 318 – Interior Detail – Light grey upholstery

Car in question:

DSC00125wd.jpg


The owner had seen images of a previous e46 that I had worked on.. Leaving it looking something like this:
DSC06954wd.jpg


This one however was in a little worse condition. I received these images on email a few weeks back:

IMG_2196.jpg


IMG_2199.jpg


Product
• 303 aerospace protectant (UV protection for dash/plastics etc)
• AutoSmart G101 (all purpose cleaner)
• AutoSmart Bio Brisk (interior/upholstery cleaner)
• Warm water

• Lots of microfibre cloths
• Meguiars triple action detail brush
• Meguiars Slide-lock brush
• Various detail brushes
• VAX 6131 wet ‘n dry hoover
• Vikan upholstery brush
• Cocktail sticks

Inspection..

DSC00128wd.jpg


DSC00130wd.jpg


DSC00133wd.jpg


DSC00135wd.jpg


DSC00136wd.jpg

DSC00141wd.jpg
 

Jim@WD

Active Member
DSC00142wd.jpg


DSC00143wd.jpg


DSC00145wd.jpg


DSC00147wd.jpg


DSC00148wd.jpg


First job was to remove any litter and brush all surface dirt to the floor.

DSC00149wd.jpg


After this, a gentle scrub to the carpets to loosen the pile followed by a thorough hoover.

Loaded the VAX 6131 with clean warm water, armed myself with Bio-Brisk and a few microfibres then got to work..

Carpets first.

DSC00155wd.jpg

DSC00153wd.jpg


Dirty water collected after the passenger front & rear carpet.

DSC00154wd.jpg


Driver’s side looking pretty rough after the hoover:

DSC00159wd.jpg
 

Jim@WD

Active Member
IMG]http://i566.photobucket.com/albums/ss102/WhiteDetails/BMW%20e46%20318%20Interior/DSC00161wd.jpg[/IMG]


Side-wall completed first..

DSC00162wd.jpg


Then the rest of..

DSC00170wd.jpg


DSC00164wd.jpg


And the water:

DSC00172wd.jpg


Fresh water installed, dirty water poured away in readiness for seats.

Tackled the front seat first. Before:

DSC00136wd.jpg


Progress:

DSC00175wd.jpg


After:

DSC00177wd.jpg


DSC00178wd.jpg


Sun’s out; makes a change!

Ouch:

DSC00182wd.jpg
 

Jim@WD

Active Member
Audi Support Vehicle holding up nicely:

DSC00185wd.jpg


DSC00186wd.jpg


50/50 on the front passenger seat bolster:

DSC00192wd.jpg


Water after seats:

DSC00195wd.jpg


Doorcards wiped down and scrubbed where applicable, other interior plastics and surfaces cleaned. Seatbelt pulley, sun-visors, centre-console, pedals etc..


DSC00197wd.jpg


Another vac given to remove some surface debris and we’re nearly there..

DSC00198wd.jpg


As you can see in these shots, the heavily stained areas were not 100% removed..

Drivers seat still a little patchy:

DSC00199wd.jpg


And the lower-centre section of the rear bench had a stain that wasn’t fully removed.. Quite an improvement though!

Before:

DSC00142wd.jpg


After:

DSC00204wd.jpg


DSC00205wd.jpg
 
Nimbus hosting - Based solely in the UK.