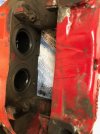
Well, I kinda promised myself that I would write up my experience of getting the calipers refurbed and fitted. It’s been a few months and life is busy, but I got there in the end. As a DIYer I probably over thought it all and got a bit too OCD. But I learned a lot of stuff and that is why we tinker with our Mk1’s right?
Here we go (plenty of pictures)...
A few years back I had done the typical sanding and peeling off the old clear lacquer, followed by a new coat of VHT clear on my original set of calipers. They lasted a year or two before they started looking a bit tatty again.
Here is a picture of them, now off the car. They’re actually not that bad…. But they’re not that good either!
Back in Jan/Feb, I got a donor set from our favourite LCR breaker.
I had stripped the calipers down to a point and decided that I need to get them painted professionally, especially seeing how my rattle can lacquering had turned out after a couple of years.
I sent them off for a refurb and this is what came back.
The paint finish looks really good. I can’t complain, but here are the things I picked up on…
- The paint is “Brembo red”. Its not quite the OEM (rosso??) red of the original calipers. It might just bug me a bit. I probably should have done more homework on paint colours. There really are 50 shades of red as well as grey!!
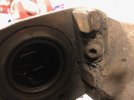
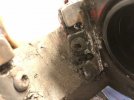
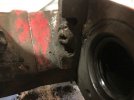
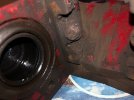
- The carriers got painted red too. I was told by the company that they normally paint them black. Annoying, but no one sees them so its not an issue. I noticed that mating faces where the carrier would bolt to the hub were not masked. Maybe not an issue??
- The fixing screws for the pad guide plates supplied were in my opinion of poor quality. They weren’t that tight, weren’t threadlocked and hex heads are a bit crap. I bought quality replacements from Addiction Motorsport with a torx head. Note the replacements were T30. Original OEM were T27. I also note that when I unscrewed the hex bolts, there was a whole load of blast material in each recess that I needed to pour/blow out. Not impressive stuff for a “pro” refurb.
Bolts supplied with refurb:
Refurb bolt supplied on left, Addiction Motorsport bolt supplied on the right:
- Some of the dust seals looked like they’re not seated perfectly. I’ve been assured that this is typical and they’ll settle with usage, but I do wonder whether genuine Brembo seals would fit better. The issue is only on the smaller pistons. Only time will tell if there is an issue. Before this refurb I had never contemplated that 4 pots have two different sized pistons. You learn something new every day!
- I had to remove the pad guide plates and square them up a little in a vice. They were probably a bit bent from years of wear and corrosion under them had probably pushed them out a bit. There were also some “blobs” of paint that needed sanding down a little to make the pads fit nicely. Worst one shown below. After a very light sand, I fitted all the guide plates and the new pads fitted perfectly.
Before plate bending and paint sanding:
- Original Brembo bleed screw covers don’t fit with the supplied new bleed nipples. The refurb supplied some dust caps that are basic at best. I suspect I’d need to buy some genuine Brembo bleed nipples for it to be perfect. I might just do that.
Braided lines
I had two sets to play with. One from Addiction Motorsport (HEL lines) and one from Badger 5.
The HEL lines have a more “OEM” looking connection to the hardpipe, but when I went to fit them I found they didn’t fit through the mount on the car chassis. Perfect timing for brake fluid to be oozing from the hardline!
Plan B – I swapped to the Badger 5 hoses. They fitted perfectly. Q - Why don’t Badger 5 supply their hoses with the funny rubber grommet thingy for mounting to the strut. I had to prise the rubber grommets off the HEL lines and put them onto the Badger 5 ones.
It was a bit of a squish getting those grommets into the strut mount.
Pads
I bought a set of Brembo HP2000 pads. After approx. 100 miles, I’m finally starting to feel the bite. I need more time to really assess them, but they have to be better than the cheapo Brembo pads from Euro car parts.
Fitting and bleeding
I used an EZ bleed pressure bleeder and only bled the front calipers. All seems good so far. I was a bit apprehensive about bleeding the whole system. My brake fluid is quite old now so I’ll probably pay the pros to do a full bleed of the system soon anyhow.
The pressure bleeder hoses didn’t keep a tight seal. So I got out the blu tack?!? Even that didn’t hold all the pressure completely, but it was enough to bleed the front calipers.
Summary
I have shiny new calipers, but the colour isn’t perfect (I’m being a bit fussy). The refurb was pricey and whilst the paint finish is excellent, I’d probably do the rebuild myself if I ever did it again, so I can lavish my time and care on it. I might consider getting my original set painted the OEM colour and do the another rebuild myself using genuine Brembo parts. But that’s a lot of cash that I could spend in other ways.
Here are a few pictures of the end product:
